
Pico Keypad

Made by mukesh-sankhla / 3D Printing / Automotive / Games & Gaming / Productivity / IoT
About the project
A Shortcut Keypad for your PC work
Project info
Difficulty: Moderate
Platforms: Adafruit, DFRobot, RakWireless, MicroPython, CircuitPython
Estimated time: 1 hour
Story
1 / 3


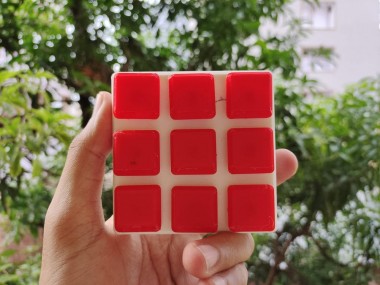
Pico KeyPad is a must-have shortcut keyboard for your PC work. This keypad consists of 9 keys (you can add more no. of keys), the size of this 3x3 keypad is small and can be easily carried out. All this 9 keys can be programmed for any shortcut. You can use it during programming / Coding or during editing and more, all the software shortcuts are compatible with this keypad. In this written tutorial we a going to see how can we make it.
Thank You NextPCB:This project is successfully completed because of the help and support from NextPCB. NextPCB is one of the most experienced PCB manufacturers in Global, has specialized in the PCB and assembly industry for over 15 years. Not only could NextPCB provide the most innovative printed circuit boards and assembly technologies in the highest quality standards, the fastest delivery turnaround as fast as 24 hours.
Guys if you have a PCB project, please visit their website and get exciting discounts and coupons.
Register and get $100 from NextPCB: https://www.nextpcb.com/register?code=Mukeshdd
Only 0$ for 5-10pcs PCB Prototypes:https://www.nextpcb.com/?code=Mukeshdd
See more info about PCB Assembly Capabilities: https://www.nextpcb.com/pcb-assembly-capabilities?code=Mukeshdd
1 / 6
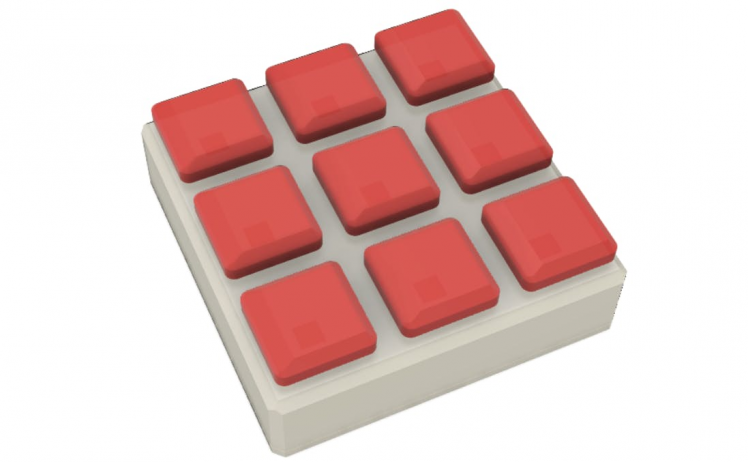

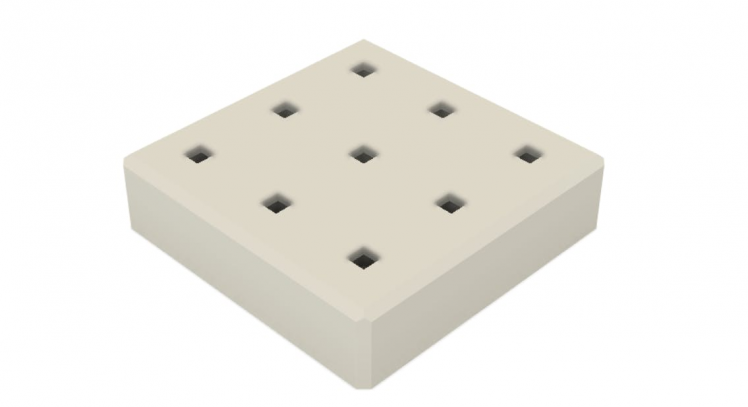
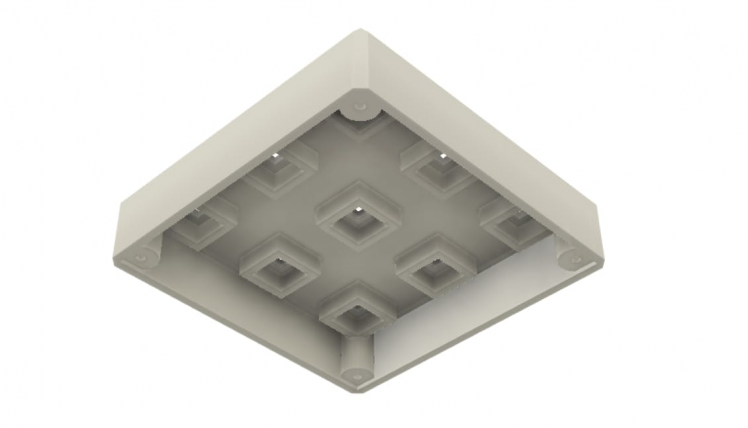

- 3D Print the given 3D Models.
- Note: If you don't find the same Push Buttons as mine please design your own Keypad.
- Once the print is complete insert the pushbuttons and fix them with some quick glue.
1 / 3
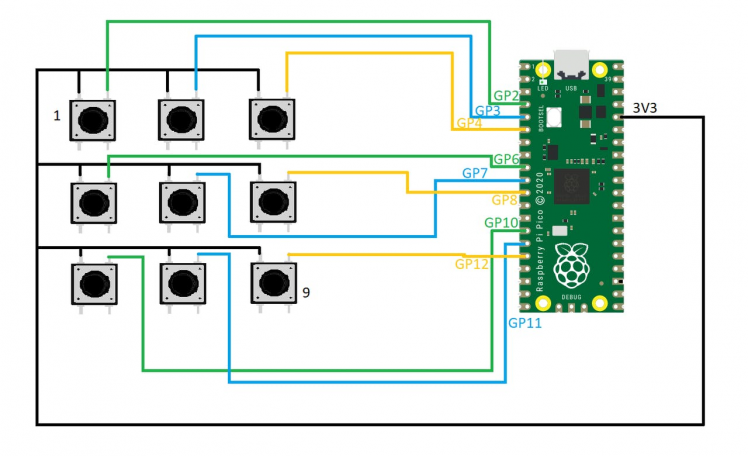
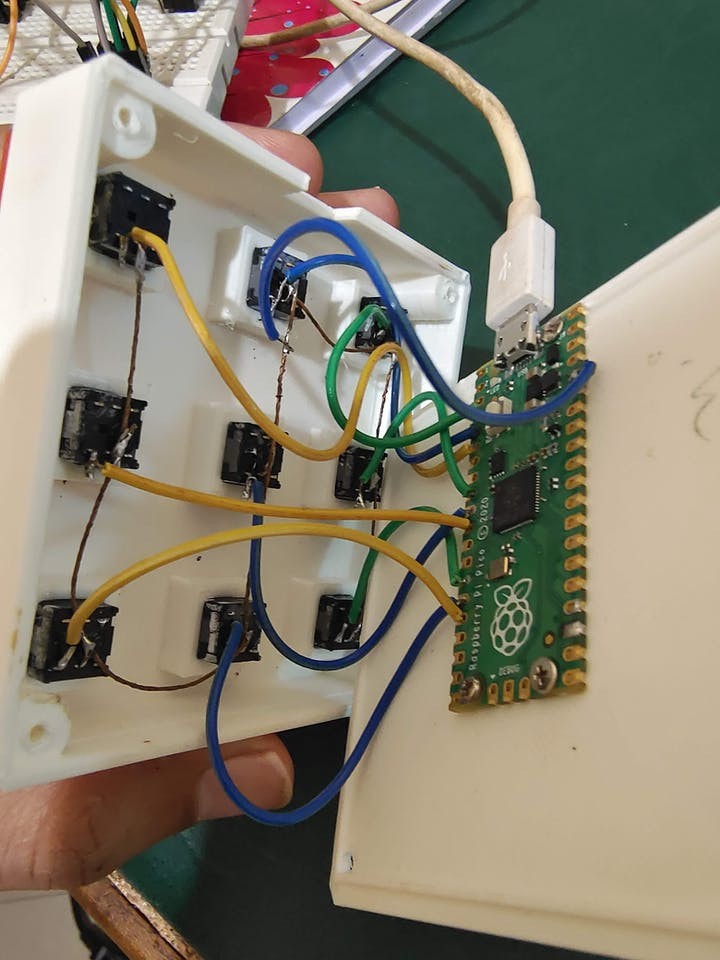
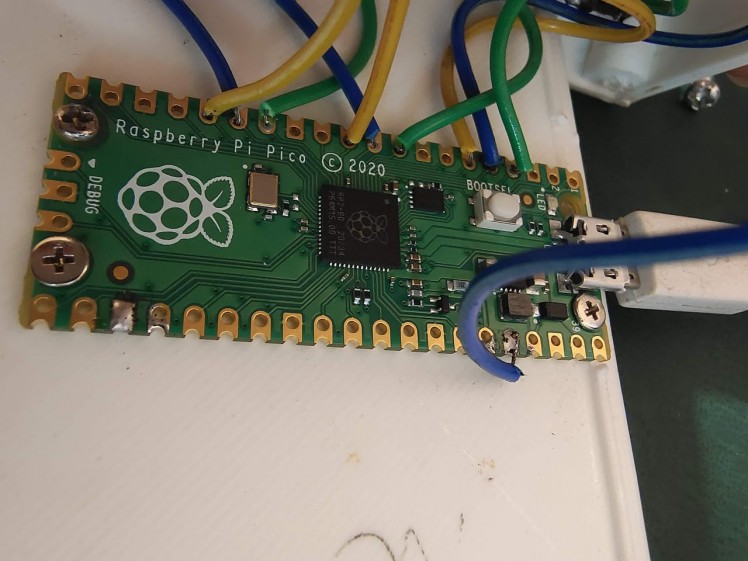
- Make all the connections as shown in the schematic diagram.
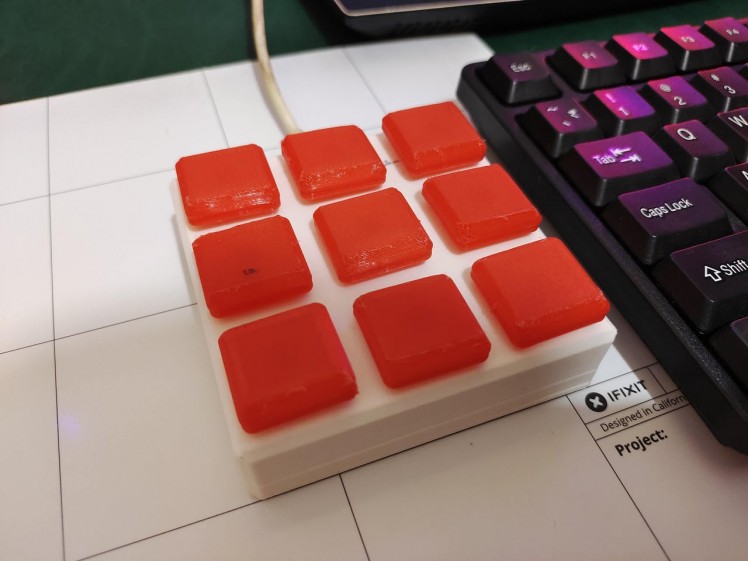
- Put the 3D-printed keys on top of the buttons using fast glue.
- fix the RPi Pico using some screws.
1 / 5

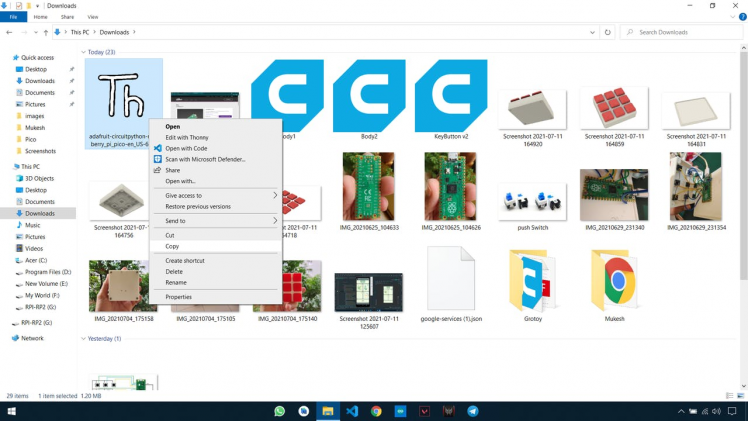
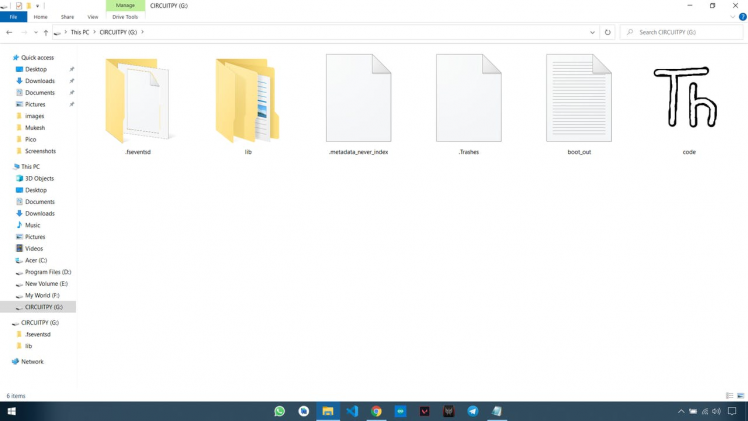
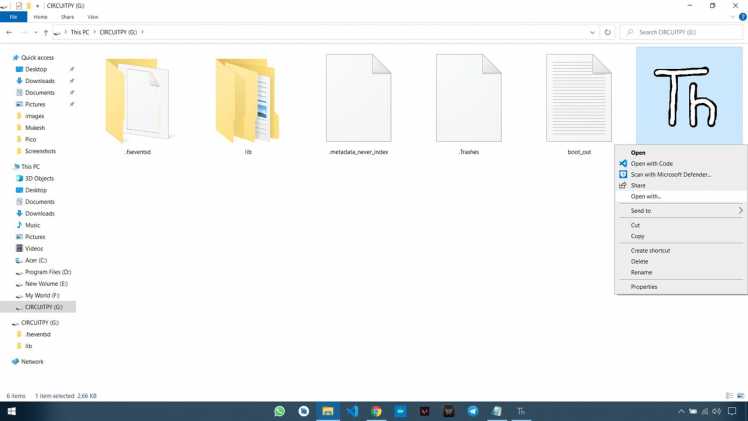
- Download Circuitpython File
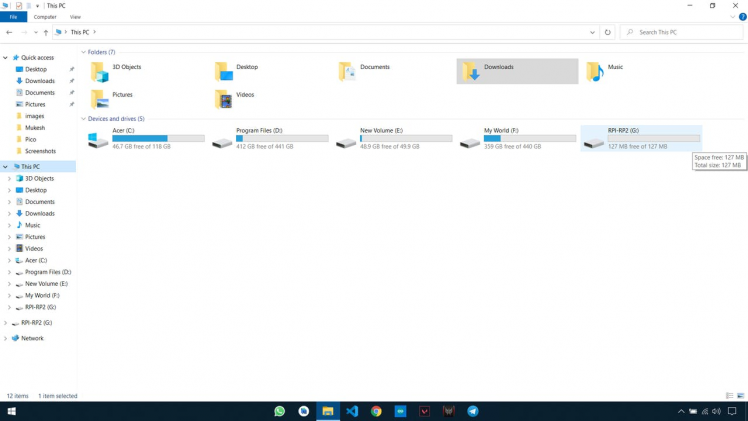
- Hold the Bootsel button of the pico and plug it to your PC.
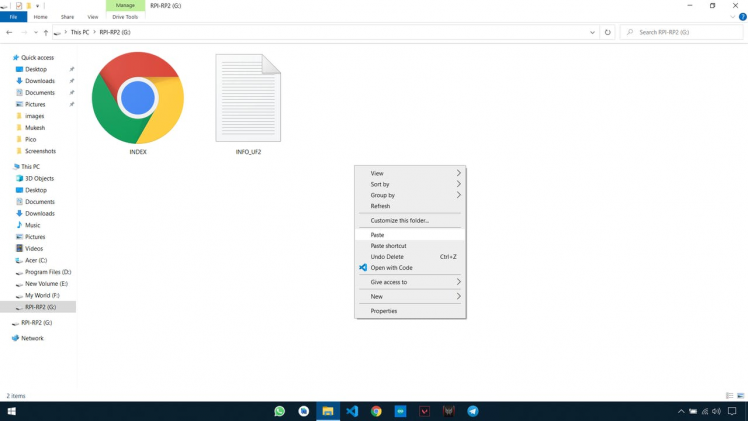
- Copy-paste the file into the Raspberry Pi Pico directory.
- The board will reconnect automatically.
1 / 5
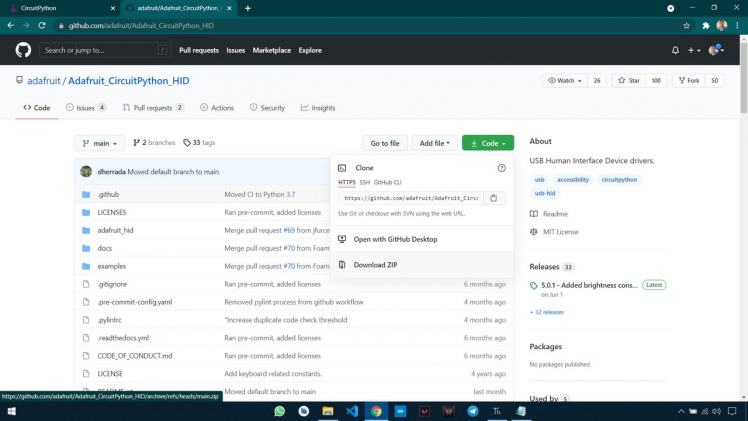

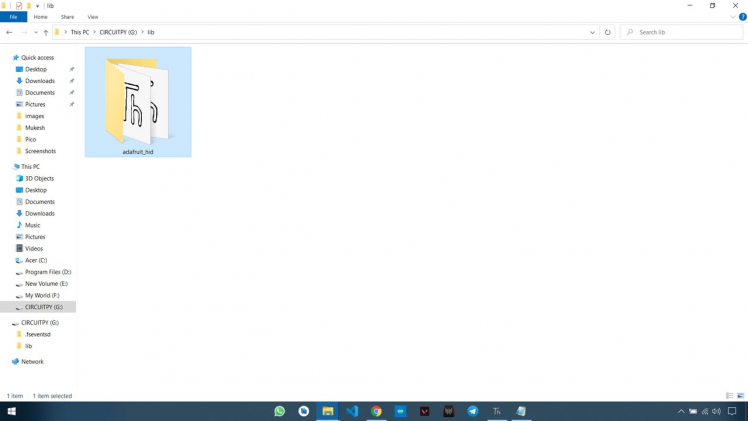
- Download the GitHub repository
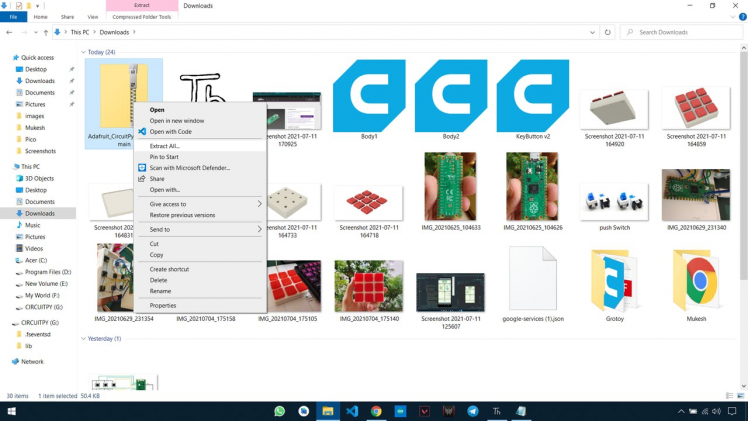
- Extract the file.
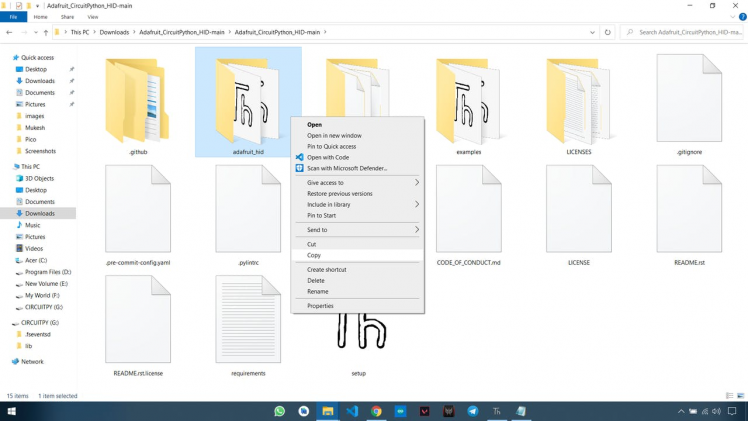
- Copy the adafruit_hid file and paste it in pico directory -> lib (in lib folder).
1 / 5
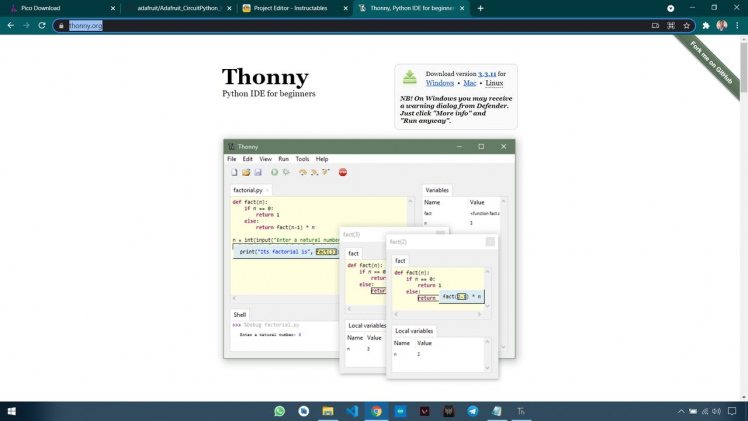
- Download the Thony and install it (Do watch some tutorials if you are a RPi Pico beginner).
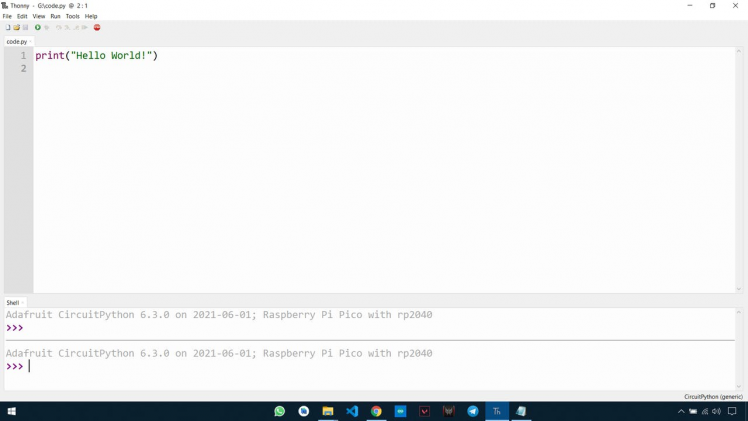
- Open the Pico directory and open the code.
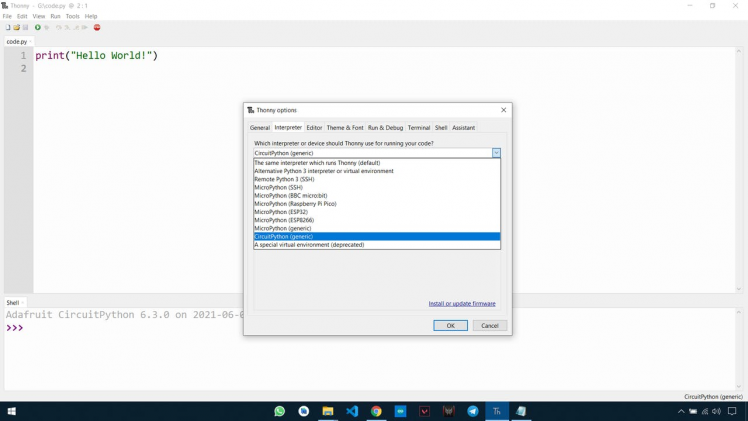
- Now go to Tools -> Options -> interpreter -> and select Circuitpython(generic).
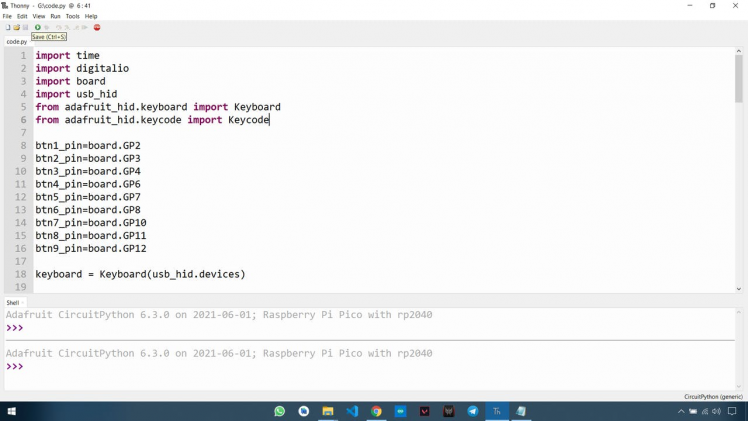
- Copy-paste the given code into the editor and save it.
import time
import digitalio
import board
import usb_hid
from adafruit_hid.keyboard import Keyboard
from adafruit_hid.keycode import Keycode
from adafruit_hid.mouse import Mouse
btn1_pin=board.GP2
btn2_pin=board.GP3
btn3_pin=board.GP4
btn4_pin=board.GP6
btn5_pin=board.GP7
btn6_pin=board.GP8
btn7_pin=board.GP10
btn8_pin=board.GP11
btn9_pin=board.GP12
keyboard = Keyboard(usb_hid.devices)
mouse = Mouse(usb_hid.devices)
btn1 = digitalio.DigitalInOut(btn1_pin)
btn2 = digitalio.DigitalInOut(btn2_pin)
btn3 = digitalio.DigitalInOut(btn3_pin)
btn4 = digitalio.DigitalInOut(btn4_pin)
btn5 = digitalio.DigitalInOut(btn5_pin)
btn6 = digitalio.DigitalInOut(btn6_pin)
btn7 = digitalio.DigitalInOut(btn7_pin)
btn8 = digitalio.DigitalInOut(btn8_pin)
btn9 = digitalio.DigitalInOut(btn9_pin)
btn1.direction = digitalio.Direction.INPUT
btn2.direction = digitalio.Direction.INPUT
btn3.direction = digitalio.Direction.INPUT
btn4.direction = digitalio.Direction.INPUT
btn5.direction = digitalio.Direction.INPUT
btn6.direction = digitalio.Direction.INPUT
btn7.direction = digitalio.Direction.INPUT
btn8.direction = digitalio.Direction.INPUT
btn9.direction = digitalio.Direction.INPUT
btn1.pull = digitalio.Pull.DOWN
btn2.pull = digitalio.Pull.DOWN
btn3.pull = digitalio.Pull.DOWN
btn4.pull = digitalio.Pull.DOWN
btn5.pull = digitalio.Pull.DOWN
btn6.pull = digitalio.Pull.DOWN
btn7.pull = digitalio.Pull.DOWN
btn8.pull = digitalio.Pull.DOWN
btn9.pull = digitalio.Pull.DOWN
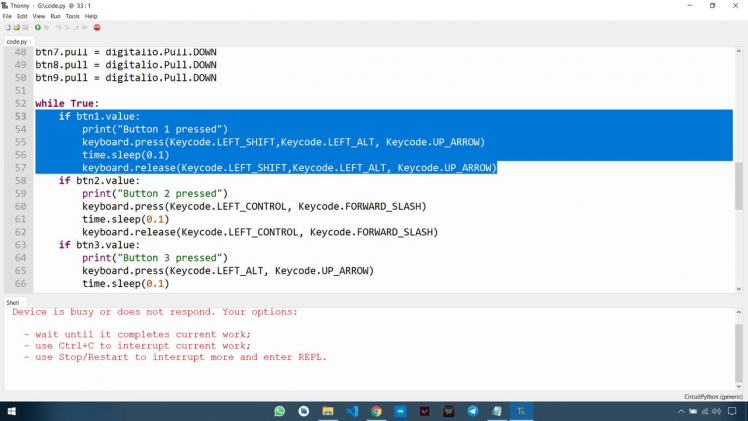
while True:
if btn1.value:
print("Button 1 pressed")
keyboard.press(Keycode.LEFT_SHIFT,Keycode.LEFT_ALT, Keycode.UP_ARROW)
time.sleep(0.1)
keyboard.release(Keycode.LEFT_SHIFT,Keycode.LEFT_ALT, Keycode.UP_ARROW)
if btn2.value:
print("Button 2 pressed")
keyboard.press(Keycode.LEFT_CONTROL, Keycode.FORWARD_SLASH)
time.sleep(0.1)
keyboard.release(Keycode.LEFT_CONTROL, Keycode.FORWARD_SLASH)
if btn3.value:
print("Button 3 pressed")
keyboard.press(Keycode.LEFT_ALT, Keycode.UP_ARROW)
time.sleep(0.1)
keyboard.release(Keycode.LEFT_ALT, Keycode.UP_ARROW)
if btn4.value:
print("Button 4 pressed")
keyboard.press(Keycode.LEFT_SHIFT,Keycode.LEFT_ALT, Keycode.DOWN_ARROW)
time.sleep(0.1)
keyboard.release(Keycode.LEFT_SHIFT,Keycode.LEFT_ALT, Keycode.DOWN_ARROW)
if btn5.value:
print("Button 5 pressed")
keyboard.press(Keycode.LEFT_CONTROL, Keycode.B)
time.sleep(0.1)
keyboard.release(Keycode.LEFT_CONTROL, Keycode.B)
if btn6.value:
print("Button 6 pressed")
keyboard.press(Keycode.LEFT_ALT, Keycode.DOWN_ARROW)
time.sleep(0.1)
keyboard.release(Keycode.LEFT_ALT, Keycode.DOWN_ARROW)
if btn7.value:
print("Button 7 pressed")
keyboard.press(Keycode.WINDOWS, Keycode.PRINT_SCREEN)
time.sleep(0.1)
keyboard.release(Keycode.WINDOWS, Keycode.PRINT_SCREEN)
if btn8.value:
print("Button 8 pressed")
keyboard.press(Keycode.LEFT_ALT, Keycode.F4)
time.sleep(0.1)
keyboard.release(Keycode.LEFT_ALT, Keycode.F4)
if btn9.value:
print("Button 9 pressed")
keyboard.press(Keycode.WINDOWS, Keycode.G)
time.sleep(0.1)
keyboard.release(Keycode.WINDOWS, Keycode.G)
time.sleep(0.3)"""
`adafruit_hid.keycode.Keycode`
====================================================
* Author(s): Scott Shawcroft, Dan Halbert
"""
"""USB HID Keycode constants.
This list is modeled after the names for USB keycodes defined in
<a href="https://usb.org/sites/default/files/hut1_21_0.pdf#page=83."> https://usb.org/sites/default/files/hut1_21_0.pdf...</a>
This list does not include every single code, but does include all the keys on
a regular PC or Mac keyboard.
Remember that keycodes are the names for key *positions* on a US keyboard, and may
not correspond to the character that you mean to send if you want to emulate non-US keyboard.
For instance, on a French keyboard (AZERTY instead of QWERTY),
the keycode for 'q' is used to indicate an 'a'. Likewise, 'y' represents 'z' on
a German keyboard. This is historical: the idea was that the keycaps could be changed
without changing the keycodes sent, so that different firmware was not needed for
different variations of a keyboard.
"""
A """``a`` and ``A``"""
B """``b`` and ``B``"""
C """``c`` and ``C``"""
D """``d`` and ``D``"""
E """``e`` and ``E``"""
F """``f`` and ``F``"""
G """``g`` and ``G``"""
H """``h`` and ``H``"""
I """``i`` and ``I``"""
J """``j`` and ``J``"""
K """``k`` and ``K``"""
L """``l`` and ``L``"""
M """``m`` and ``M``"""
N """``n`` and ``N``"""
O """``o`` and ``O``"""
P """``p`` and ``P``"""
Q """``q`` and ``Q``"""
R """``r`` and ``R``"""
S """``s`` and ``S``"""
T """``t`` and ``T``"""
U """``u`` and ``U``"""
V """``v`` and ``V``"""
W """``w`` and ``W``"""
X """``x`` and ``X``"""
Y """``y`` and ``Y``"""
Z """``z`` and ``Z``"""
ONE """``1`` and ``!``"""
TWO """``2`` and ``@``"""
THREE """``3`` and ``#``"""
FOUR """``4`` and ```"""
FIVE """``5`` and ``%``"""
SIX """``6`` and ``^``"""
SEVEN """``7`` and ``&``"""
EIGHT """``8`` and ``*``"""
NINE """``9`` and ``(``"""
ZERO """``0`` and ``)``"""
ENTER """Enter (Return)"""
RETURN """Alias for ``ENTER``"""
ESCAPE """Escape"""
BACKSPACE """Delete backward (Backspace)"""
TAB """Tab and Backtab"""
SPACEBAR """Spacebar"""
SPACE """Alias for SPACEBAR"""
MINUS """``-` and ``_``"""
EQUALS """``=` and ``+``"""
LEFT_BRACKET """``[`` and ``{``"""
RIGHT_BRACKET """``]`` and ``}``"""
BACKSLASH """```` and ``|``"""
POUND """``#`` and ``~`` (Non-US keyboard)"""
SEMICOLON """``;`` and ``:``"""
QUOTE """``'`` and ``"``"""
GRAVE_ACCENT """:literal:``` and ``~``"""
COMMA """``,`` and ``<``"""
PERIOD """``.`` and ``>``"""
FORWARD_SLASH """``/`` and ``?``"""
CAPS_LOCK """Caps Lock"""
F1 """Function key F1"""
F2 """Function key F2"""
F3 """Function key F3"""
F4 """Function key F4"""
F5 """Function key F5"""
F6 """Function key F6"""
F7 """Function key F7"""
F8 """Function key F8"""
F9 """Function key F9"""
F10 """Function key F10"""
F11 """Function key F11"""
F12 """Function key F12"""
PRINT_SCREEN """Print Screen (SysRq)"""
SCROLL_LOCK """Scroll Lock"""
PAUSE """Pause (Break)"""
INSERT """Insert"""
HOME """Home (often moves to beginning of line)"""
PAGE_UP """Go back one page"""
DELETE """Delete forward"""
END """End (often moves to end of line)"""
PAGE_DOWN """Go forward one page"""
RIGHT_ARROW """Move the cursor right"""
LEFT_ARROW """Move the cursor left"""
DOWN_ARROW """Move the cursor down"""
UP_ARROW """Move the cursor up"""
KEYPAD_NUMLOCK """Num Lock (Clear on Mac)"""
KEYPAD_FORWARD_SLASH """Keypad ``/``"""
KEYPAD_ASTERISK """Keypad ``*``"""
KEYPAD_MINUS """Keyapd ``-``"""
KEYPAD_PLUS """Keypad ``+``"""
KEYPAD_ENTER """Keypad Enter"""
KEYPAD_ONE """Keypad ``1`` and End"""
KEYPAD_TWO """Keypad ``2`` and Down Arrow"""
KEYPAD_THREE """Keypad ``3`` and PgDn"""
KEYPAD_FOUR """Keypad ``4`` and Left Arrow"""
KEYPAD_FIVE """Keypad ``5``"""
KEYPAD_SIX """Keypad ``6`` and Right Arrow"""
KEYPAD_SEVEN """Keypad ``7`` and Home"""
KEYPAD_EIGHT """Keypad ``8`` and Up Arrow"""
KEYPAD_NINE """Keypad ``9`` and PgUp"""
KEYPAD_ZERO """Keypad ``0`` and Ins"""
KEYPAD_PERIOD """Keypad ``.`` and Del"""
KEYPAD_BACKSLASH """Keypad ``\`` and ``|`` (Non-US)"""
APPLICATION """Application: also known as the Menu key (Windows)"""
POWER """Power (Mac)"""
KEYPAD_EQUALS """Keypad ``=`` (Mac)"""
F13 """Function key F13 (Mac)"""
F14 """Function key F14 (Mac)"""
F15 """Function key F15 (Mac)"""
F16 """Function key F16 (Mac)"""
F17 """Function key F17 (Mac)"""
F18 """Function key F18 (Mac)"""
F19 """Function key F19 (Mac)"""
LEFT_CONTROL """Control modifier left of the spacebar"""
CONTROL = LEFT_CONTROL """Alias for LEFT_CONTROL"""
LEFT_SHIFT """Shift modifier left of the spacebar"""
SHIFT = LEFT_SHIFT """Alias for LEFT_SHIFT"""
LEFT_ALT """Alt modifier left of the spacebar"""
ALT = LEFT_ALT """Alias for LEFT_ALT; Alt is also known as Option (Mac)"""
OPTION = ALT """Labeled as Option on some Mac keyboards"""
LEFT_GUI """GUI modifier left of the spacebar"""
GUI = LEFT_GUI """Alias for LEFT_GUI; GUI is also known as the Windows key, Command (Mac), or Meta"""
WINDOWS """Labeled with a Windows logo on Windows keyboards"""
COMMAND """Labeled as Command on Mac keyboards, with a clover glyph"""
RIGHT_CONTROL """Control modifier right of the spacebar"""
RIGHT_SHIFT """Shift modifier right of the spacebar"""
RIGHT_ALT """Alt modifier right of the spacebar"""
RIGHT_GUI """GUI modifier right of the spacebar"""{"mode":"full", "isActive":false}
Step 7: Keycode Use
if btn1.value:
print("Button 1 pressed")
keyboard.press(Keycode.LEFT_SHIFT,Keycode.LEFT_ALT, Keycode.UP_ARROW)
time.sleep(0.1)
keyboard.release(Keycode.LEFT_SHIFT,Keycode.LEFT_ALT, Keycode.UP_ARROW)- As you can see in the above code paragraph we have lines keyboard.press(Keycode.LEFT_SHIFT, Keycode.LEFT_ALT, Keycode.UP_ARROW) and keyboard.release(Keycode.LEFT_SHIFT, Keycode.LEFT_ALT, Keycode.UP_ARROW)
- The keyboard.press is to perform the key action and keyboard.release is for releasing the key action.
- If we don't release the key then the key action will perform again and again unless we shut down the system so always remember to release the key.
- you can add your own shortcuts by referring to the Keycodes.
- For example, if I want to make a key for copy the in the keyboard.press and keyboard.release I have to add
(Keycode.LEFT_CONTROL, Keycode.C)
- The code should look something like this
if btn5.value:
print("Button 5 pressed")
keyboard.press(Keycode.LEFT_CONTROL, Keycode.C)
time.sleep(0.1)
keyboard.release(Keycode.LEFT_CONTROL, Keycode.C)- Note: Ignore the shell error, just edit the code and save, the keypad will run without any issue.
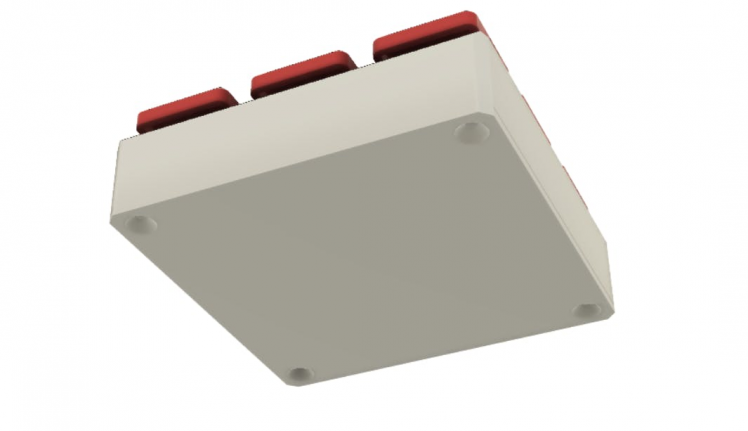
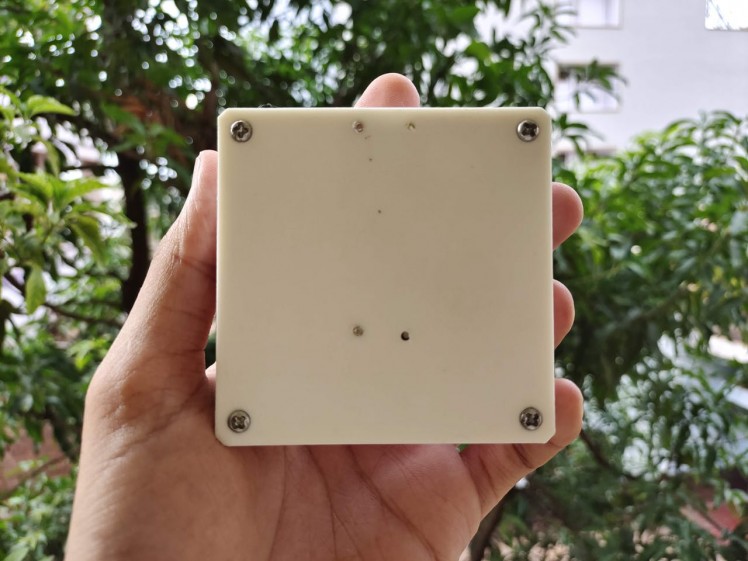
- Put the 3D printed base using screws or glue.
1 / 3


Code
Credits
mukesh-sankhla
Tech Educator | Content Creator | Developer | Maker - Simplifying technology through hands-on learning. Creating high-quality tutorials, projects, and insights on electronics, IoT, robotics, CAD, 3D printing, and software development at Empowering students, professionals, and makers with practical, accessible, and inspiring content.
Related products


Leave your feedback...