
Pet Pot

Made by mukesh-sankhla / 3D Printing / Environmental Sensing / Home Automation / Weather / IoT
About the project
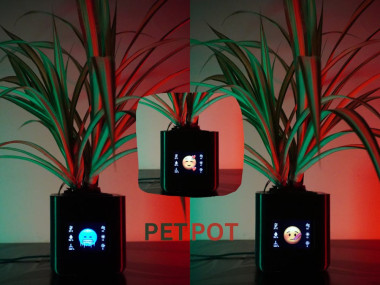
Pet Pot - A Smart Desk Planter
Items used in this project
Hardware components

Story
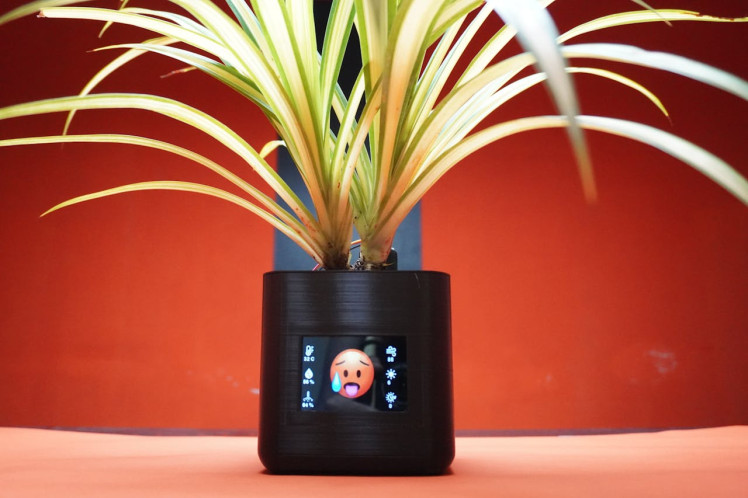
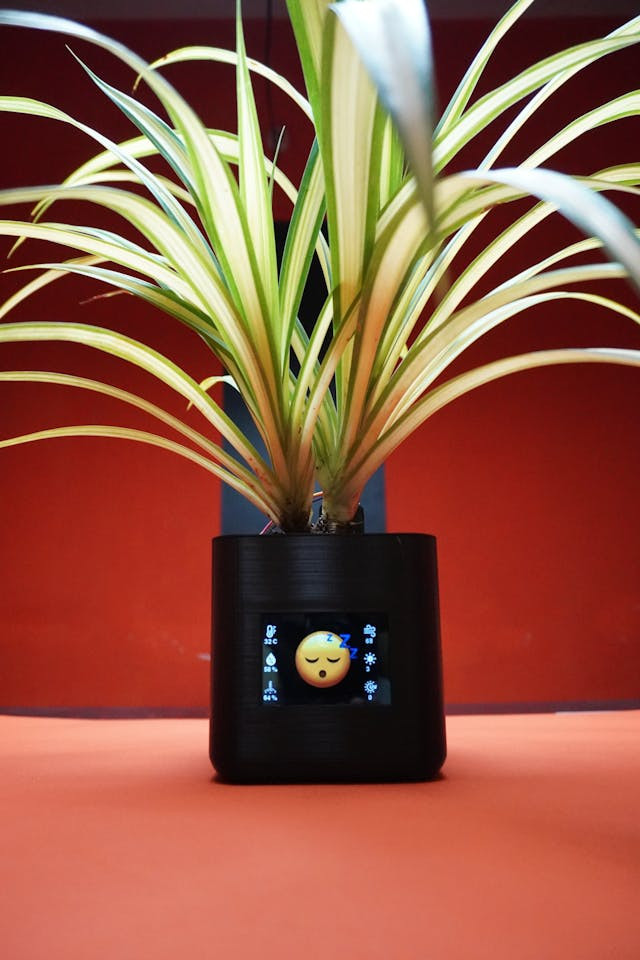
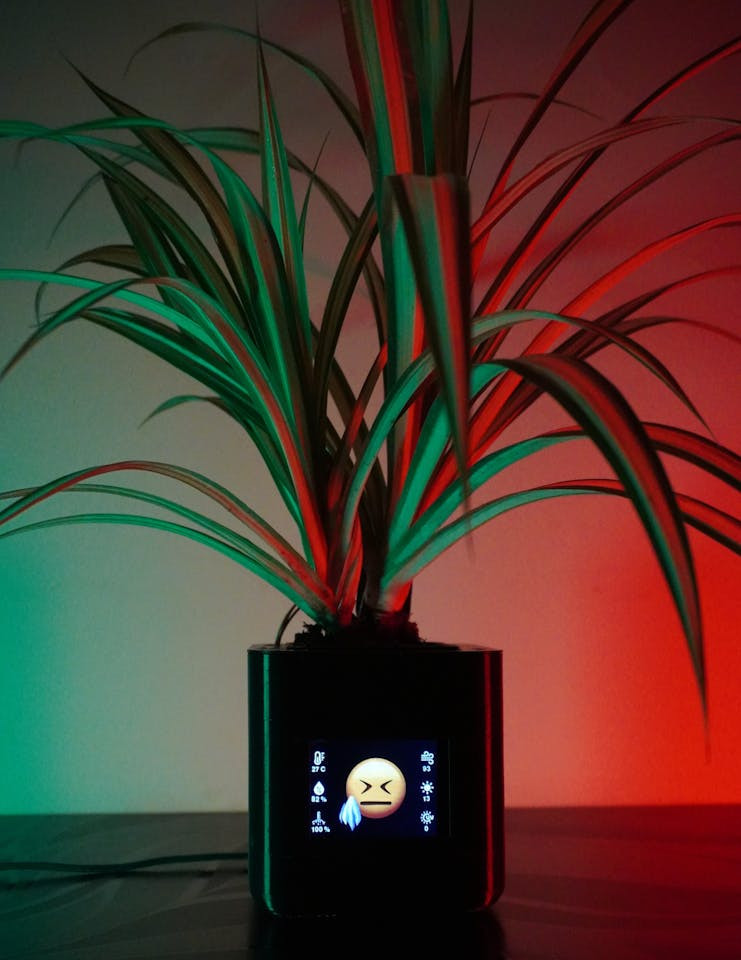
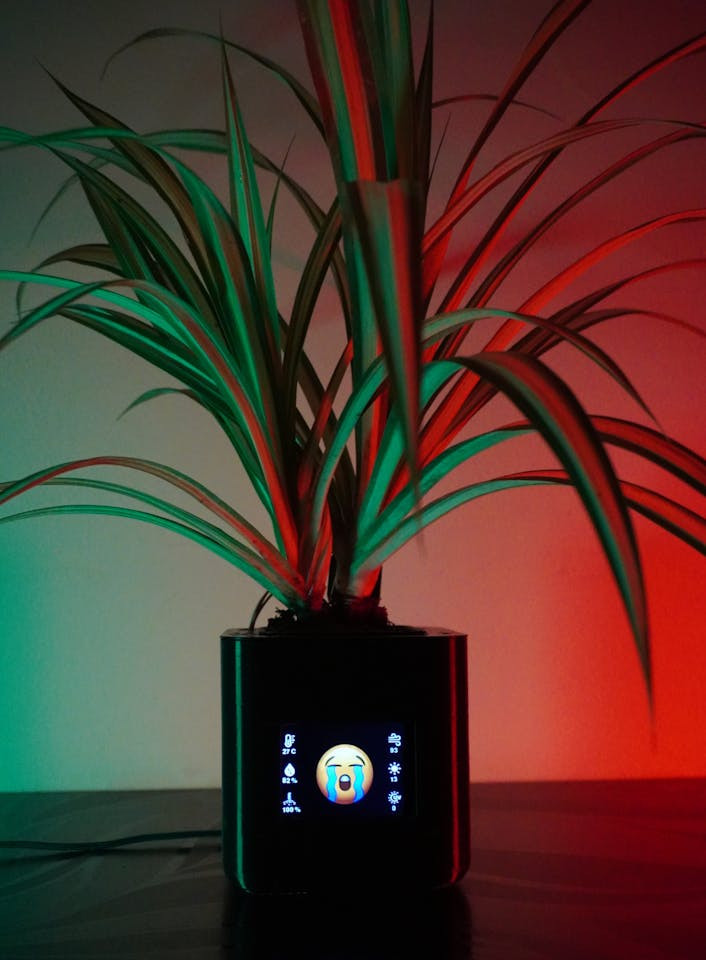
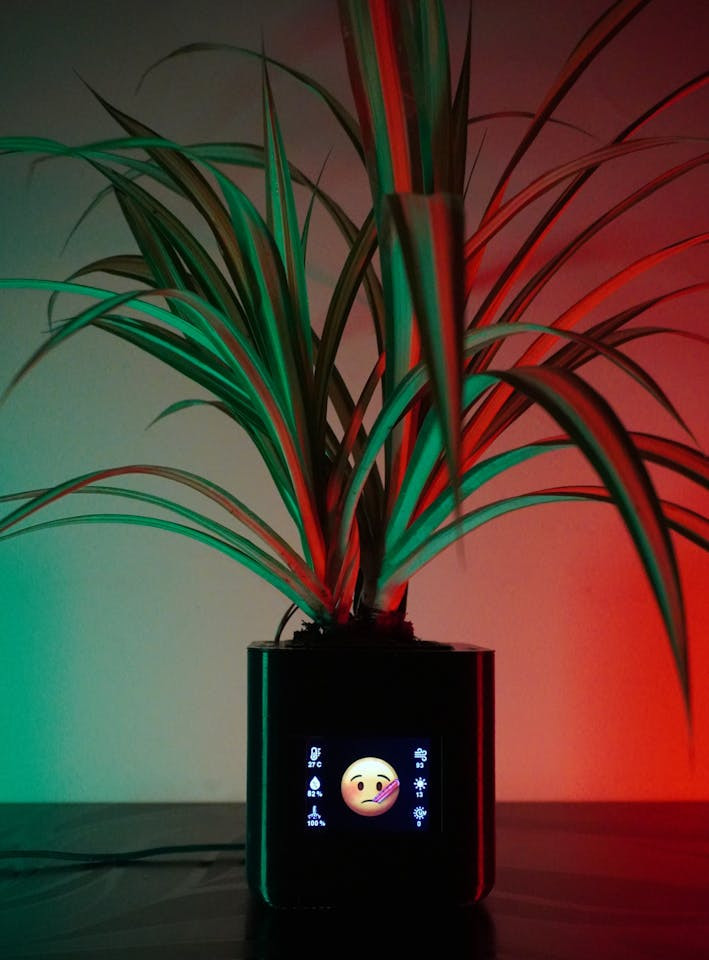
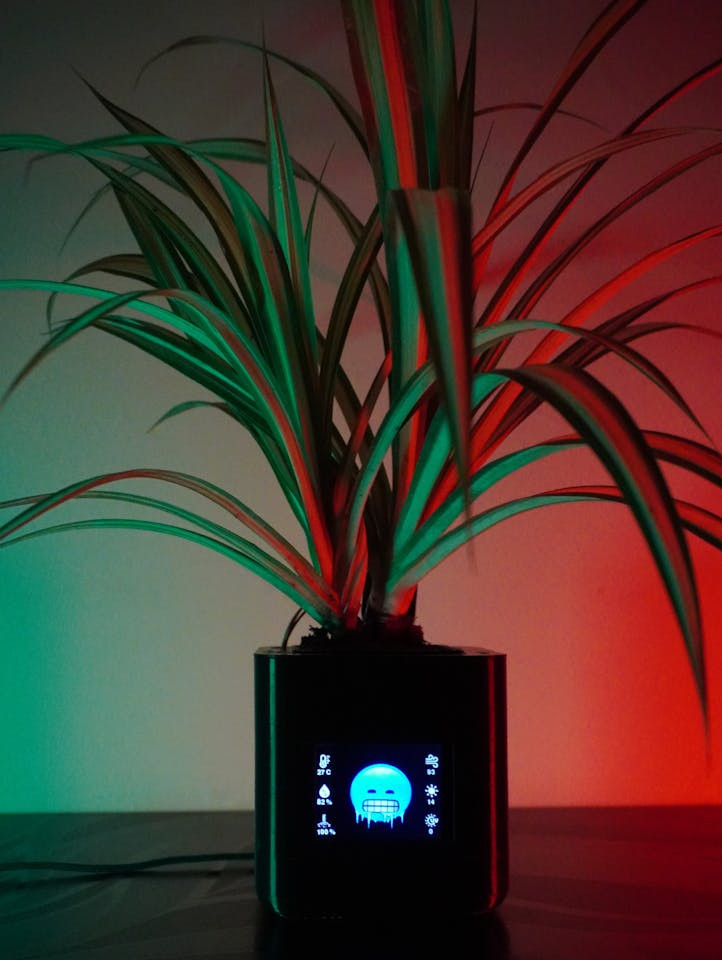
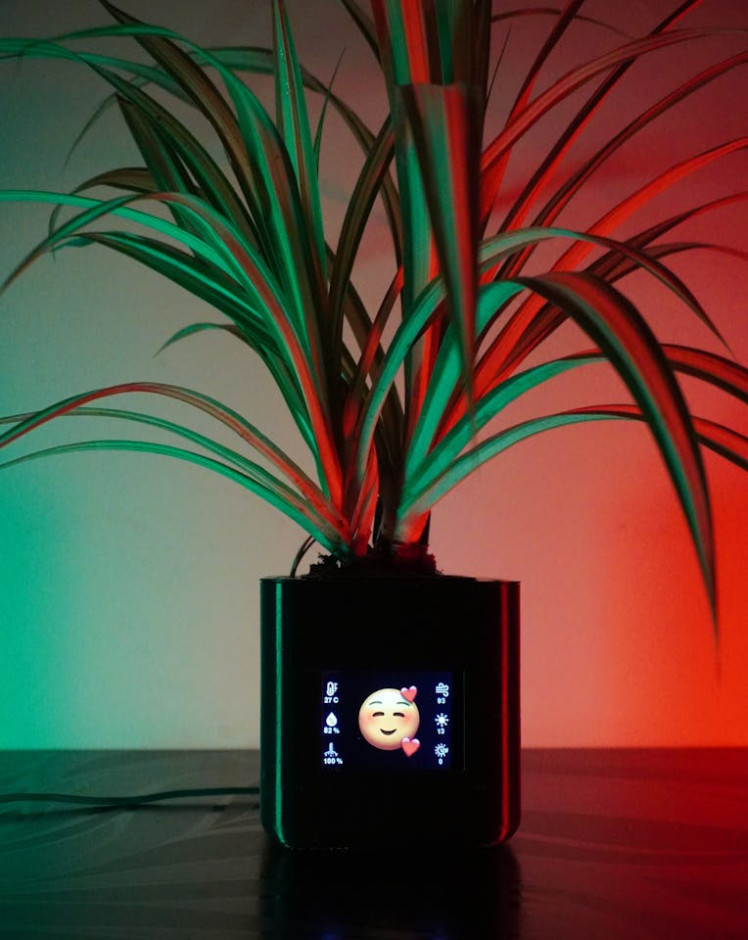
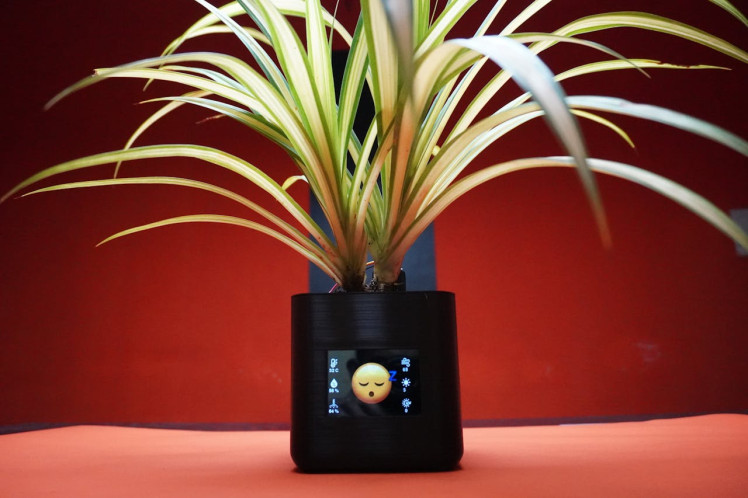
Introducing Pet Pot - Not Your Ordinary Planter! Have you ever wanted a plant that communicates with you? Well, that's exactly what Pet Pot is all about! Pet Pot is not just an ordinary planter; it's a smart planter with a unique personality. Pet Pot uses high-tech sensors to understand what's happening in its environment. It pays attention to things like temperature, humidity, soil moisture, air quality, UV index, and light intensity. And guess what? It expresses its feelings through emojis! Imagine this: If you forget to water the plant and the soil is dry, Pet Pot might display an angry or sad emoji animation. If the room gets too hot, it'll show a hot emoji. And when the lights go off, it'll put on a sleepy emoji. There are plenty of other emojis to discover, each telling you something different about your plant's well-being. But that's not all! Pet Pot doesn't just show emojis; it also gives you real-time information about the temperature, humidity, soil moisture, air quality, UV index, and light intensity in its surroundings. It's like having a personal weather station right in your plant pot. And here's the exciting part: We've gone a step further. We've created a system that stores all this real-time data in a MySQL database on the same device as Pet Pot. We've even set up a NodeRed server to create a user-friendly dashboard. This means you can access and analyze all the data using your everyday devices, like your phone or laptop. With Pet Pot, you'll not only have a healthy and happy plant but also a fun and interactive addition to your home. It's the future of plant care, and it's here to make your life greener and more exciting. Get ready to experience the magic of Pet Pot!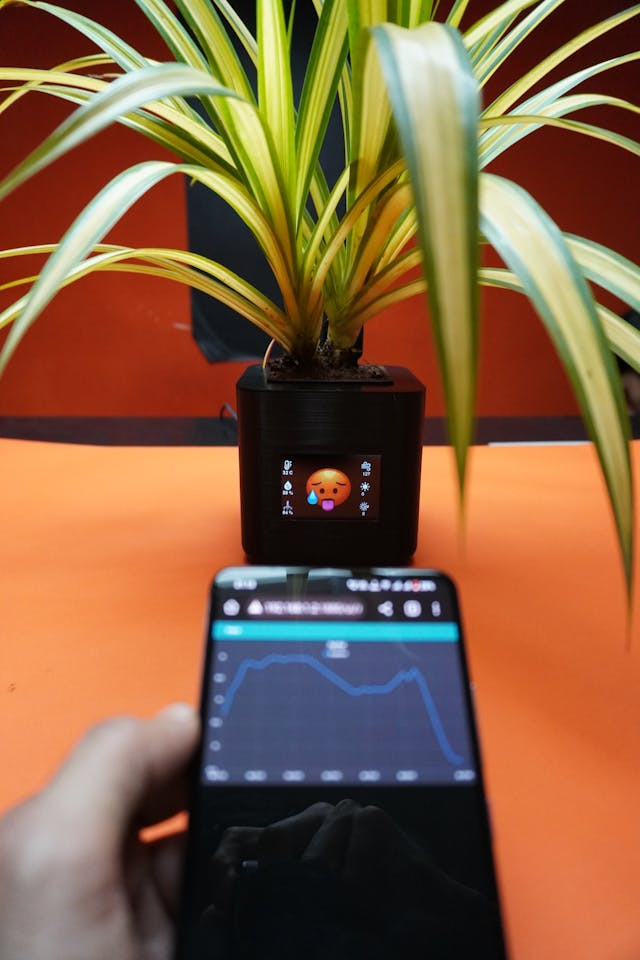
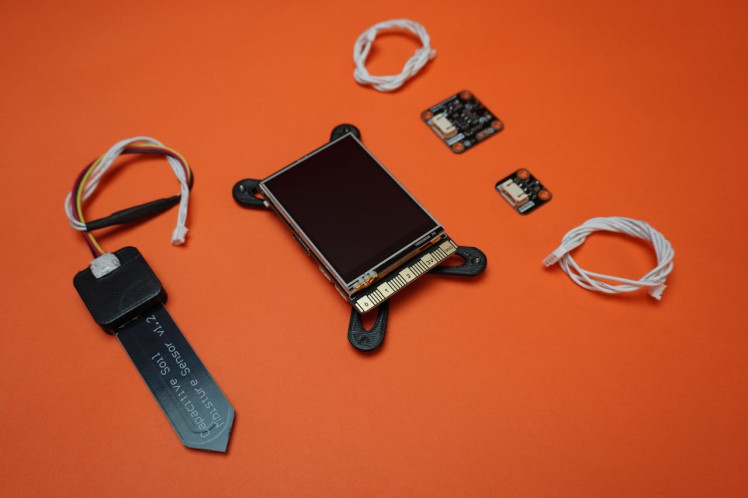
Supplies
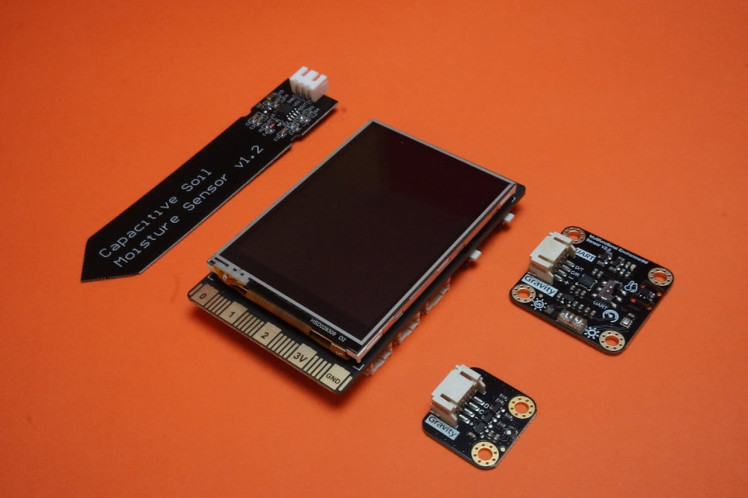

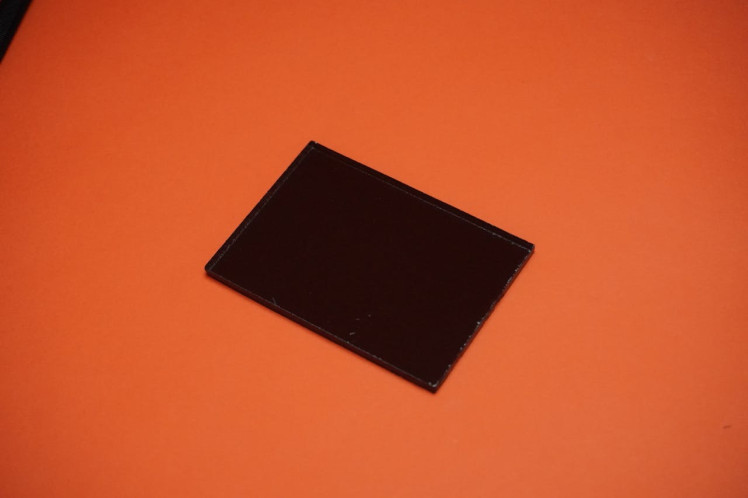
1x 80x60 mm See Through Glass Or Acrylic
Tools I Used:Sponsored By NextPCB
This project is successfully completed because of the help and support from NextPCB -Reliable Multilayer PCB Manufacturer. NextPCB is one of the most experienced PCB manufacturers in Global, has specialized in the PCB and assembly industry for over 15 years.
Order high-quality, reliable PCB starting at $1.9, multilayer starting at $6.9:
https://www.nextpcb.com/pcb-quote
Enjoy free PCB assembly for 5 boards:
https://www.nextpcb.com/pcb-assembly-quote
DFM free online PCB Gerber viewer:
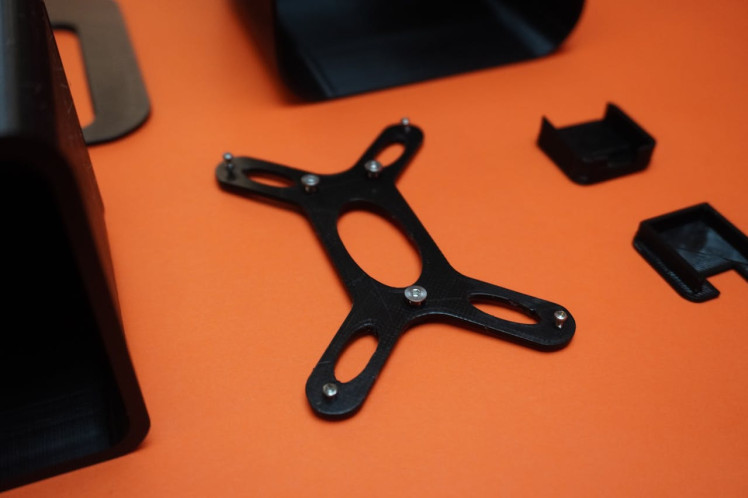
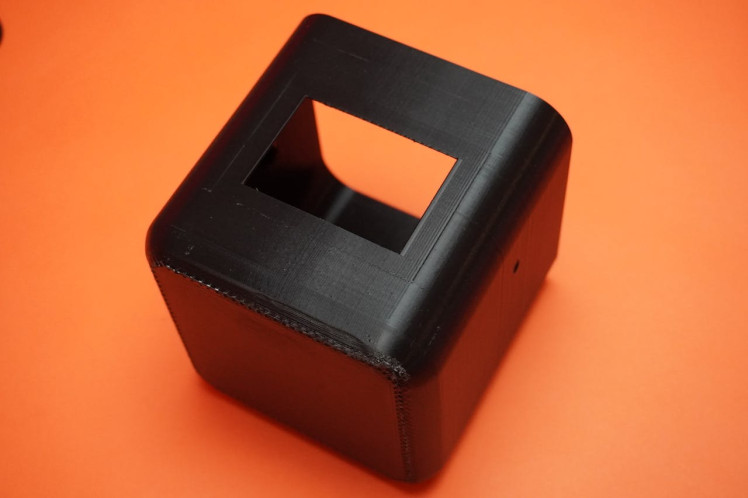
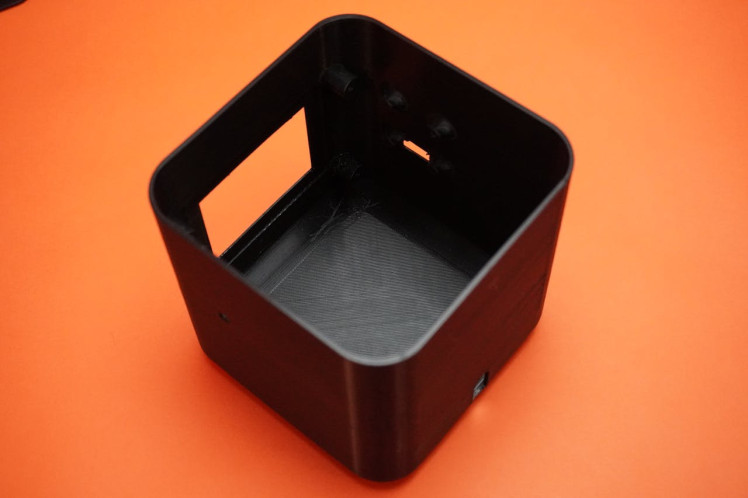
Step 1: CAD Designing & 3D Printing
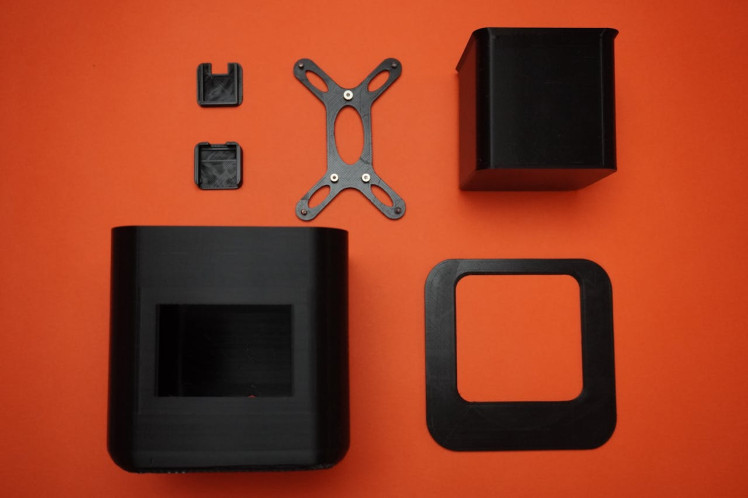
Step 2: Mounting Bracket
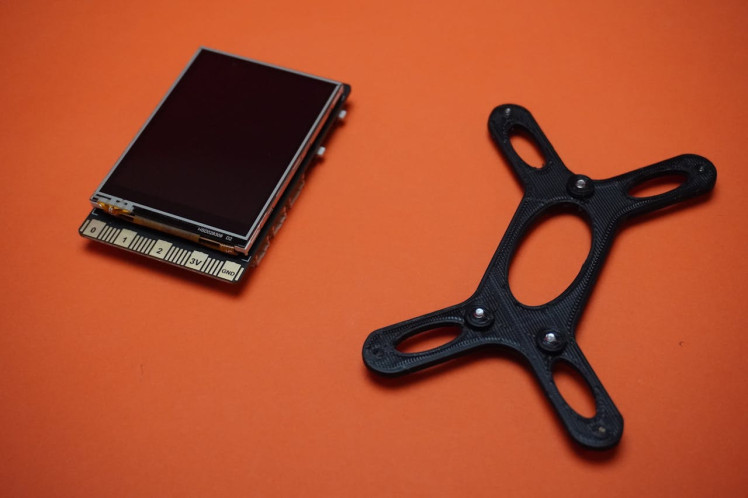


Now that we have our 3D printed parts ready, the next step is to join them together.
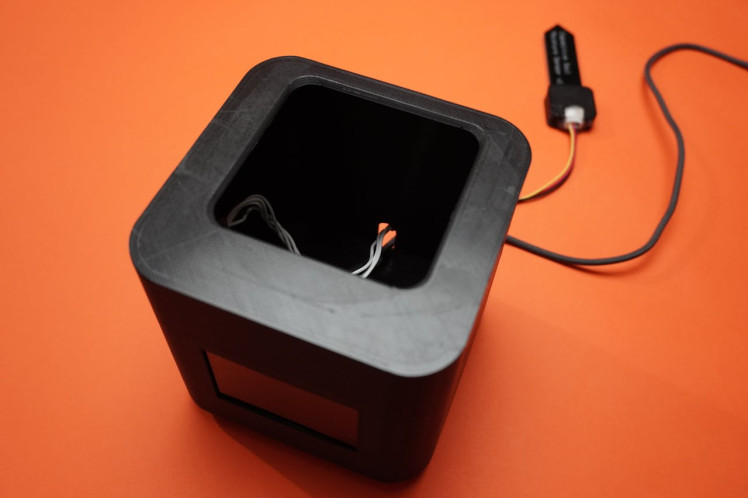
Step 3: Adding a Transparent Display Cover
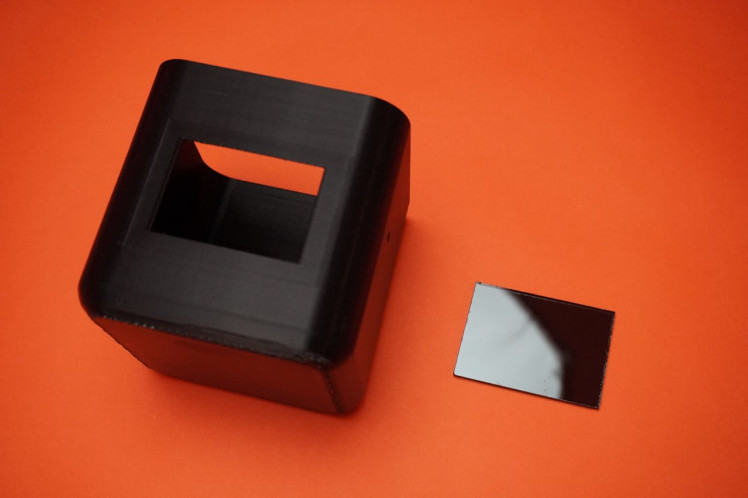
In this step, we'll give Pet Pot a sleek look by adding a black see-through glass as a protective visor for the display on the main body. We'll use glue to secure it in place.
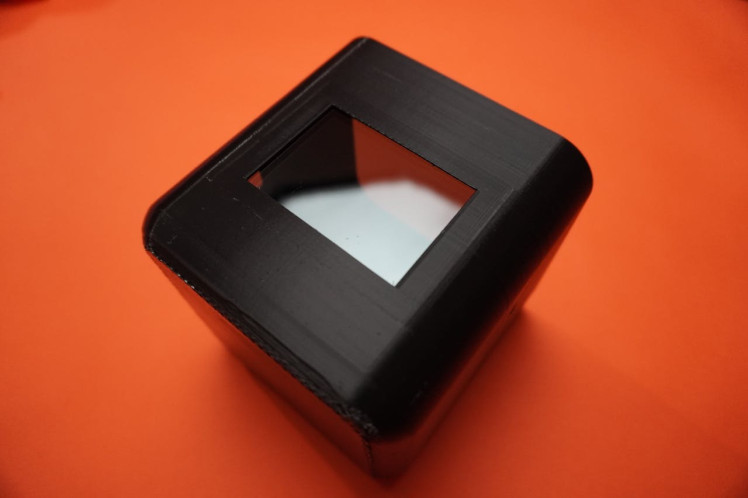
Once the glue has completely dried, you'll have a stylish and protective visor for the display on your Pet Pot. It not only adds a sleek appearance but also safeguards the display from dirt and damage.
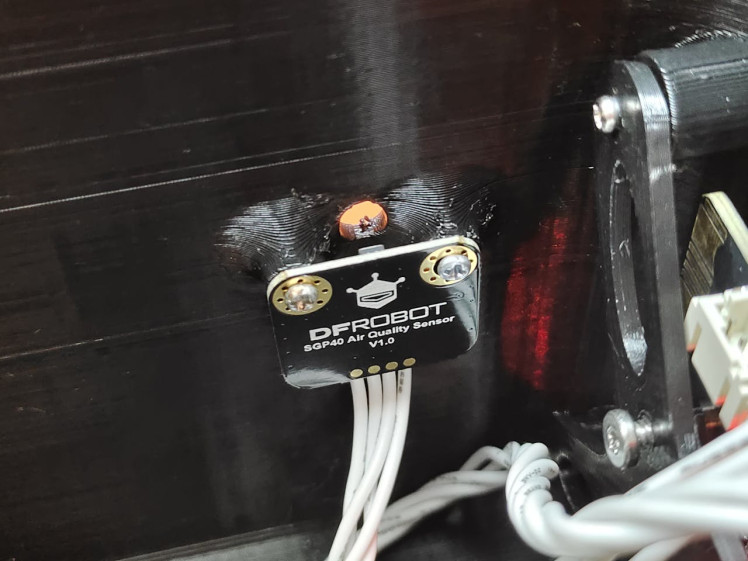
Step 4: Waterproofing the Soil Moisture Sensor
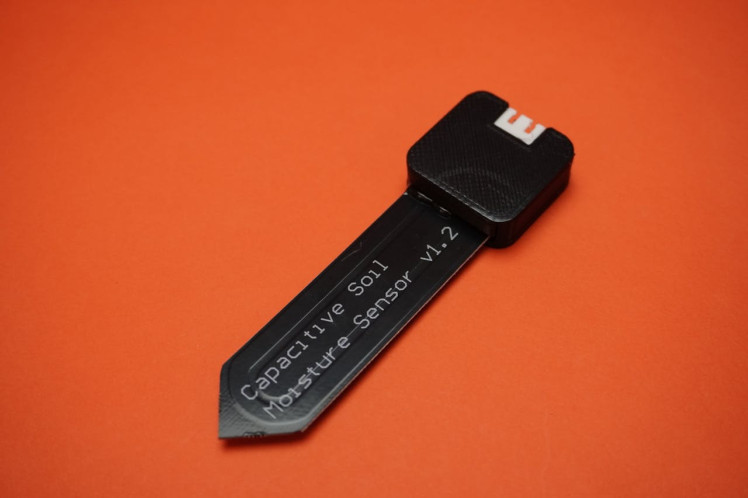

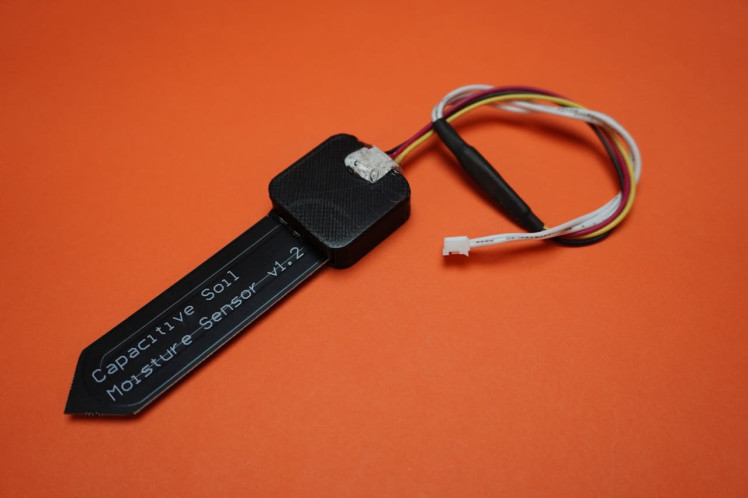
In this step, we'll make sure the soil moisture sensor is protected from water by attaching a 3D printed cover using hot glue.
Step 5: Connecting the Sensors to the Board
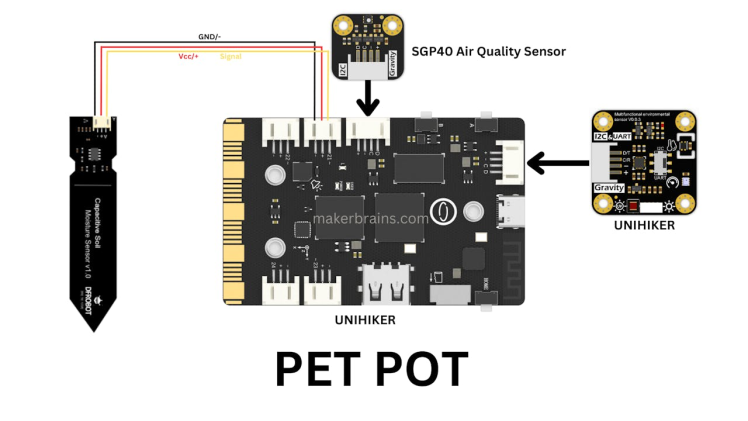
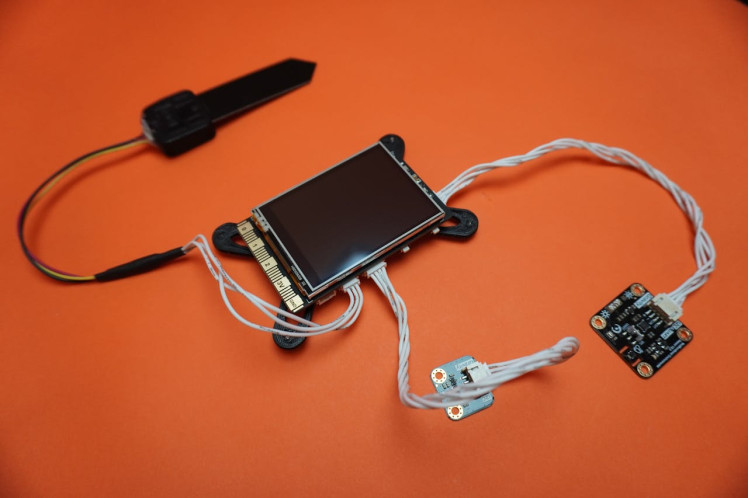
Now, let's connect the sensors to the unihiker board. The air quality and environment sensors can be easily connected using the provided connectors, thanks to the manufacturer's user-friendly design. Follow the diagram for proper connections.
Make sure to double-check the connections to ensure they are accurate and secure.
Step 6: Mounting Electronics to the Main Body
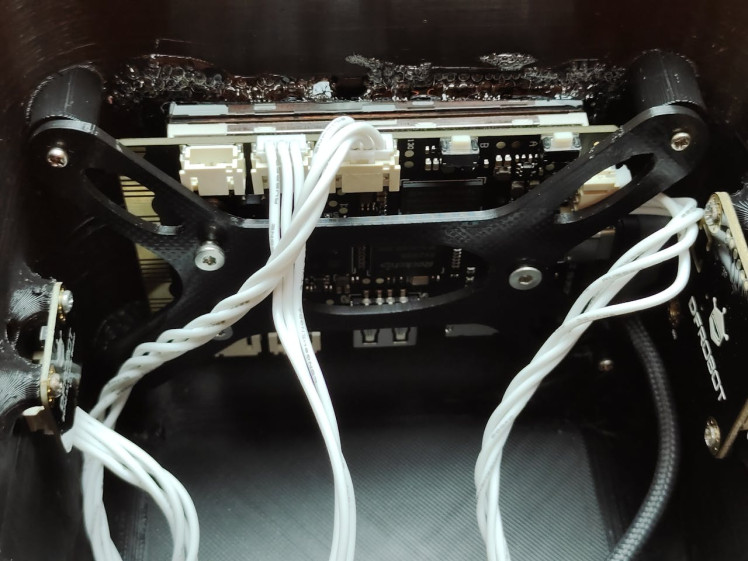

In this step, we'll secure all the electronic components to the main body of Pet Pot using screws.
By completing this step, you'll have successfully mounted all the electronics securely to the main body of Pet Pot. This ensures that the components are in the correct positions and will function properly as part of your smart planter project.
Step 7: Plant Your Green Friend
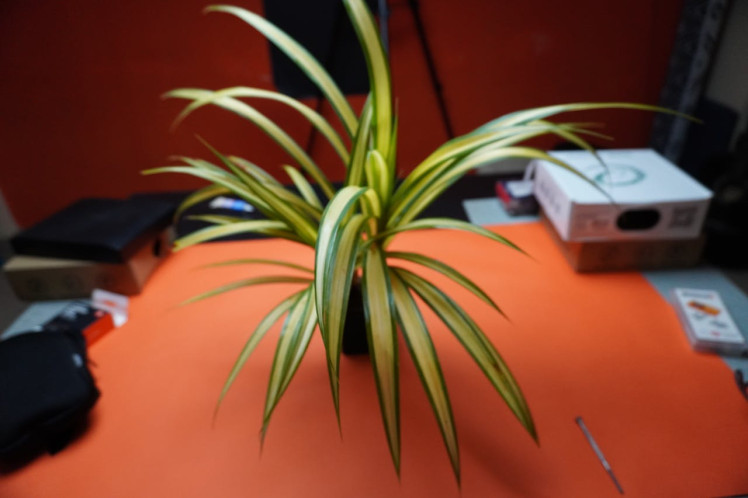
Now, let's bring your Pet Pot to life by planting a real plant and assembling everything together.
Now, with your plant nestled within Pet Pot's now lets make it smart using some codes and logics.
Step 8: Choose Your Pet Pot Program

You have the option to choose between two Python programs for your Pet Pot: "SimplePetPot" and "AdvancePetPot, " depending on your level of programming and data needs.
SimplePetPot (For Beginners):
AdvancePetPot (For Advanced Users):
Choose the program that best suits your needs and level of expertise. With either option, you'll be able to interact with and care for your Pet Pot in a way that fits your preferences.
Step 9: SimplePetPot
To begin coding SimplePetPot with the Mind+ software, please follow these detailed steps:
Following these steps will allow you to code and run SimplePetPot using the Mind+ software, creating a user-friendly interface for your Pet Pot project.
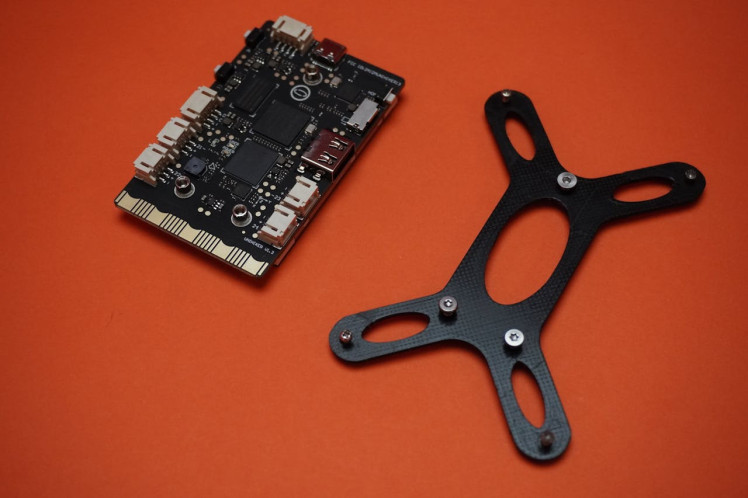
First, I used a program called Fusion 360 to create the design for Pet Pot. I made sure to carefully look at all the official data sheets and documents for the electronic components I was going to use. After that, I 3D printed all the parts needed for Pet Pot.
You can take a look at the design in your web browser or on your mobile app, and if you want to make any changes to it, you can do that using the Fusion 360 software. You can also find the STL files, which are the 3D printing files, right here for easy access : Pet Pot STL, Codes, and Other Files
Take the 3D printed mounting bracket and align it with the Unihiker board in the desired position.
Use the three screws to attach the bracket securely to the board. Insert each screw through the bracket's holes and into the corresponding holes on the board.
Tighten the screws carefully to ensure a firm connection, but be cautious not to overtighten and damage the components.
Take the black see-through glass and ensure it's clean and free from any smudges or debris.
Apply a thin, even layer of adhesive glue to the edges of the display area on the main body of Pet Pot. Be careful not to use too much glue to avoid excess spillage.
Gently place the black see-through glass over the glued area, ensuring it aligns perfectly with the display.
Press down lightly on the glass to secure it in place. Make sure it sticks evenly to the main body.
Allow the glue to dry as per the manufacturer's instructions. This may take some time, so be patient.
Take the 3D printed cover designed for the soil moisture sensor.
Heat up your hot glue gun and allow it to reach the appropriate temperature for gluing.
Apply a generous amount of hot glue into the sensor cover bottom body.
Carefully place the soil moisture sensor into cover body, apply some more glue on the exposed components of the sensor.
Press the top cover gently but firmly to ensure a secure bond with the bottom body.
Air Quality and Environment Sensors (I2C Connection):
Use the provided connectors for these sensors.
Follow the diagram to connect them as indicated.
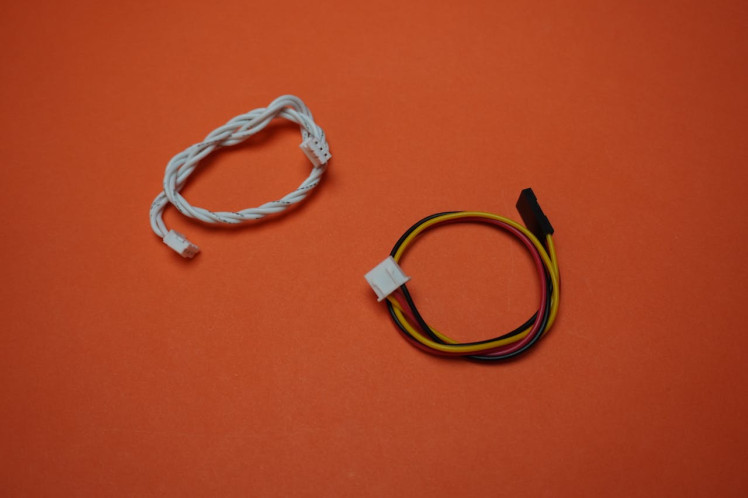
Soil Moisture Sensor (Custom Connection):
If you're using the soil moisture sensor provided in the supply, it's straightforward with the provided connectors.
I made adjustments because I didn't have the particular sensors model, follow the circuit diagram for the modified connections.
Ensure the connections are secure and properly aligned.
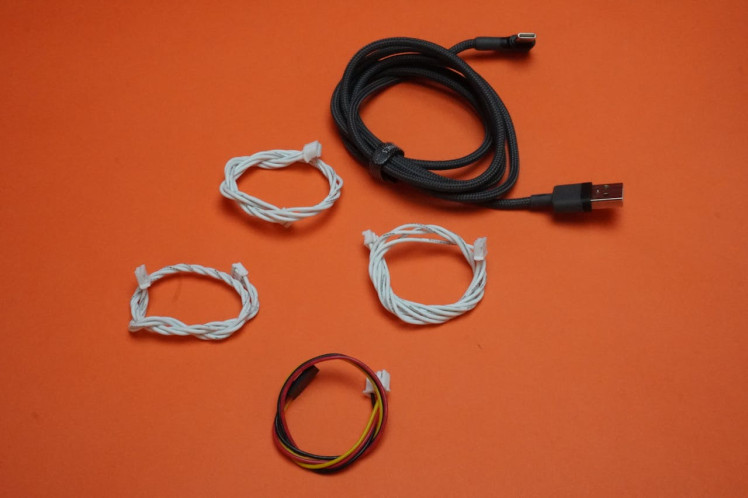
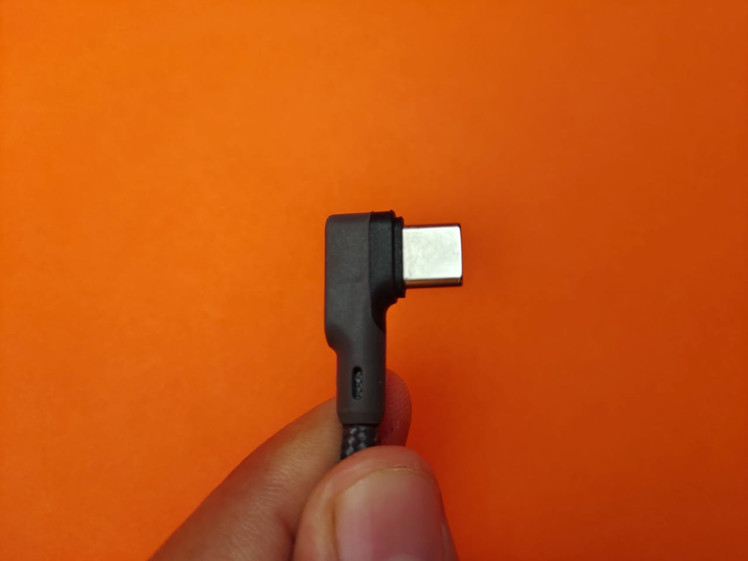
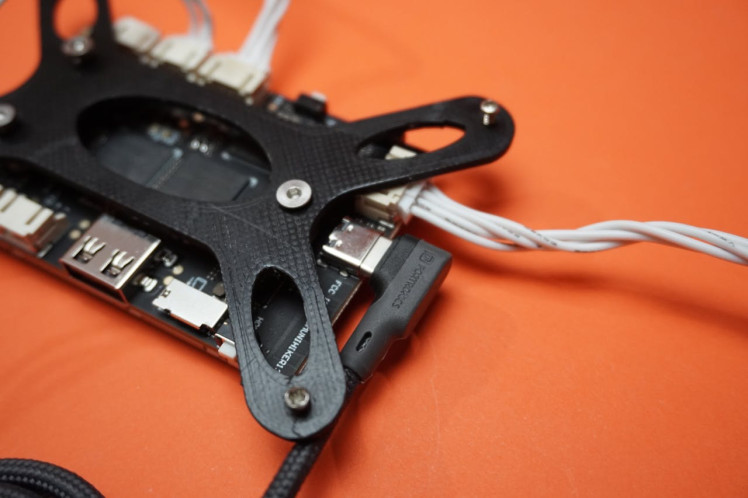
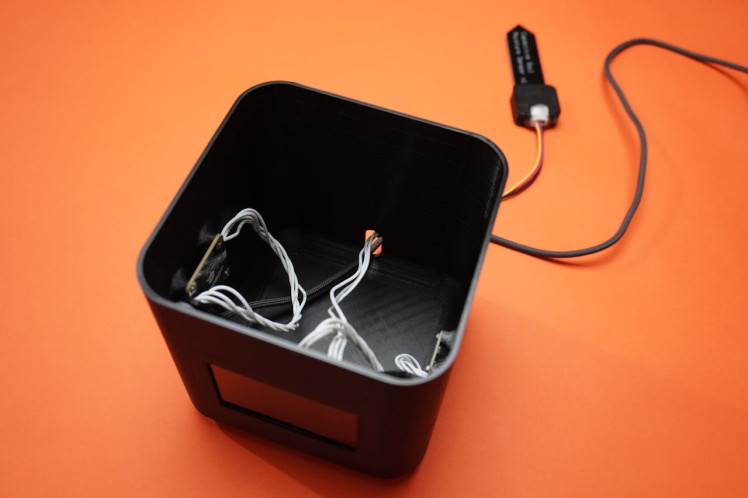
Additionally, keep in mind that due to design constraints, a 90-degree Type-C cable is being used instead of the standard Type-C cable for power and data transfer.
Place all the electronic components (Unihiker board with the 3D printed mounting bracket, and other sensors or modules) onto the main body in their designated locations.
Using the appropriate screws, attach each electronic component to the main body. Ensure that you align the mounting holes on the components with those on the main body.
Tighten the screws carefully, making sure not to over-tighten and damage the components. Use small screwdrivers to reach the inner locations.
After securing all the components, check to ensure that they are firmly attached and stable. Gently shake the assembly to confirm that nothing is loose.
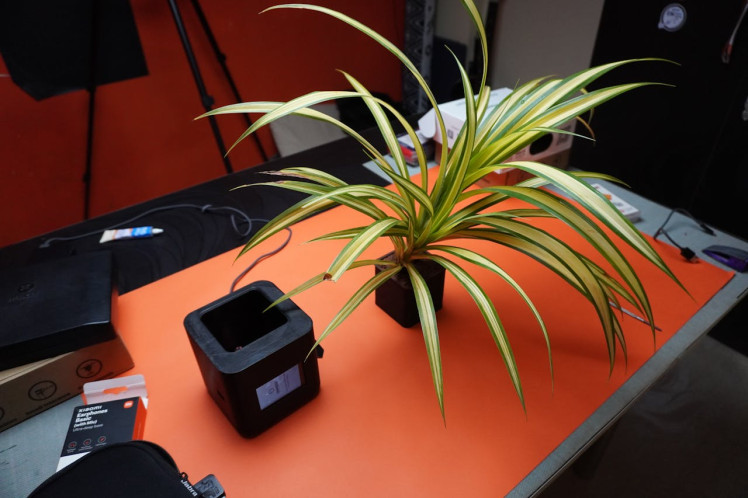
Select a suitable plant for your Pet Pot and carefully transplant it into the 3D printed pot body. Ensure the plant is potted with soil.
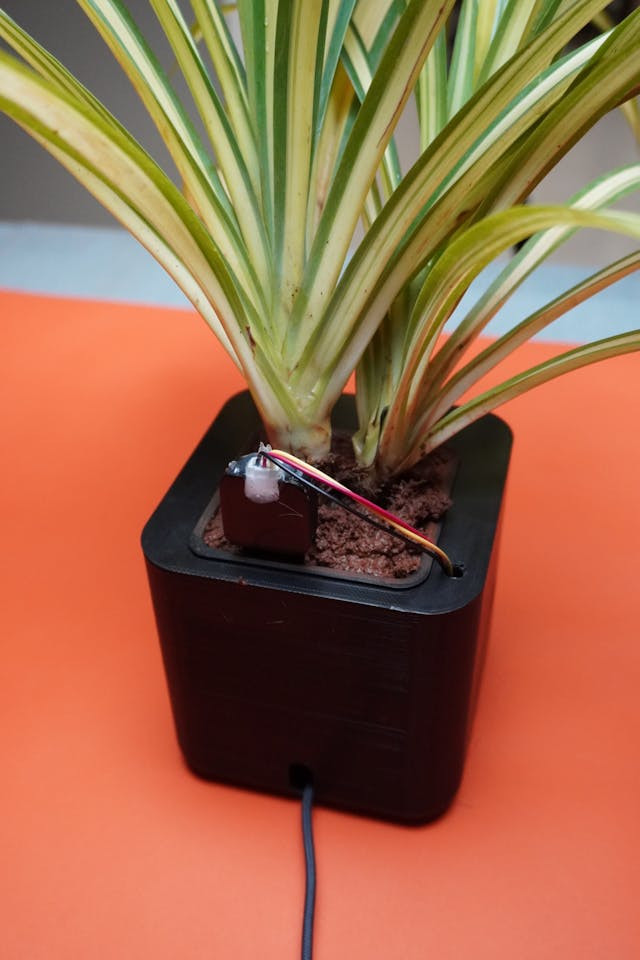
Gently insert the soil moisture sensor into the soil near the plant's root system. This sensor will help monitor the moisture level to ensure your plant gets just the right amount of water.
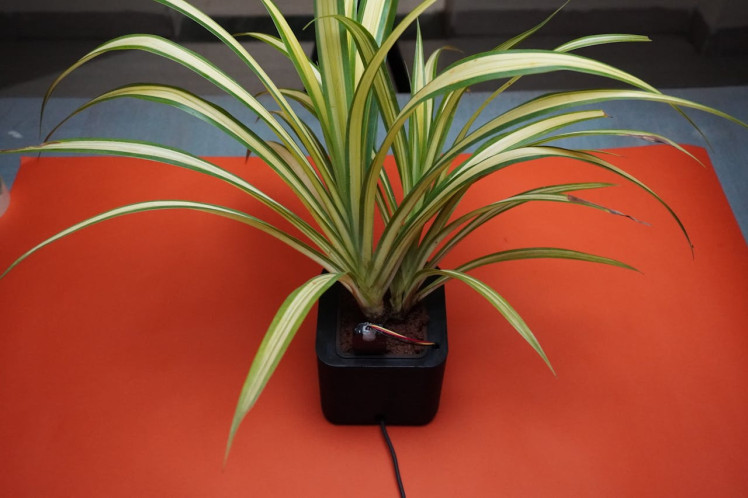
Place the 3D printed pot body, now containing the plant and soil moisture sensor, into the main body of Pet Pot. Make sure it fits snugly and aligns correctly.
This program is designed for users who are not deeply into programming.
It displays emojis on the Pet Pot's display based on sensor readings, making it easy to understand your plant's needs.
Additionally, it shows real-time sensor data directly on the display.
This program includes all the features of SimplePetPot.
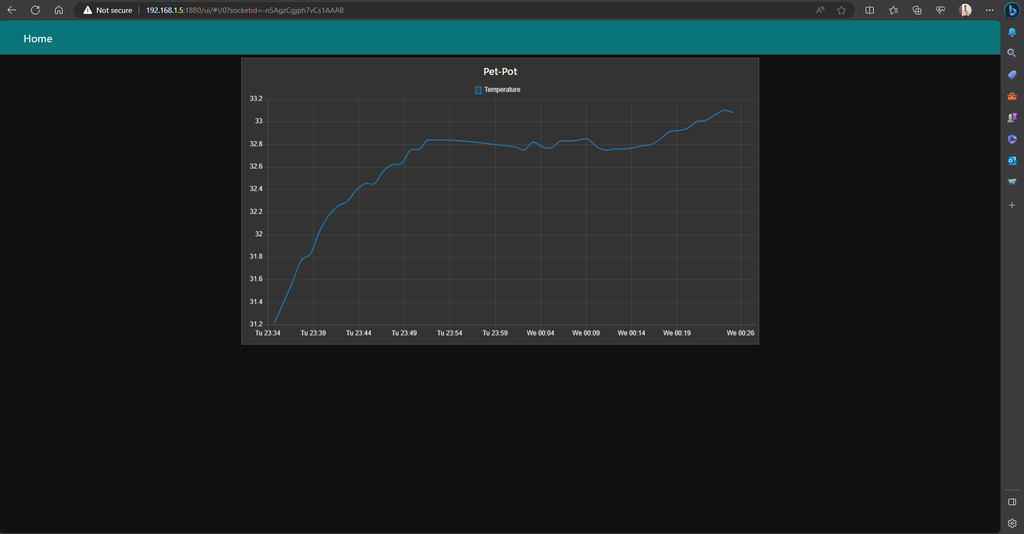
In addition, it provides MySQL data storage capability, allowing you to record and analyze sensor data over time.
You can also set up a NodeRed dashboard for a user-friendly interface to visualize and manage your data using your phone or laptop.
Visit the Mind+ download page at https://mindplus.cc/download-en.html.
Download the Mind+ software for your computer's operating system (Windows, macOS, Linux) and follow the installation instructions.
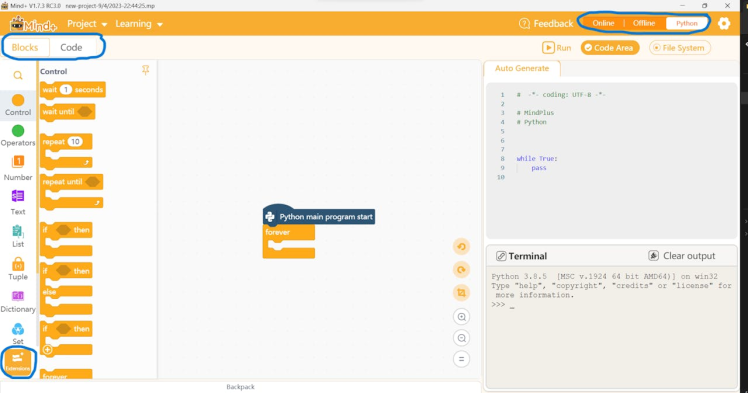
After installation, launch the Mind+ software on your computer.
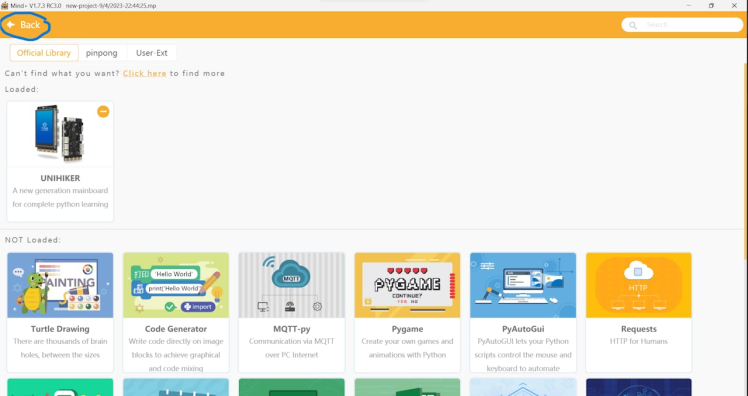
Go to the "Extensions" menu in Mind+.
Select "Unihiker" from the available extensions.
Ensure your Unihiker board is connected to your computer using the 90-degree Type-C cable.
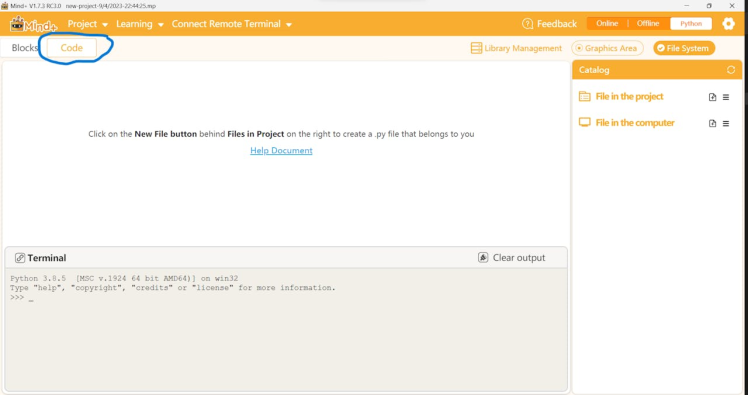
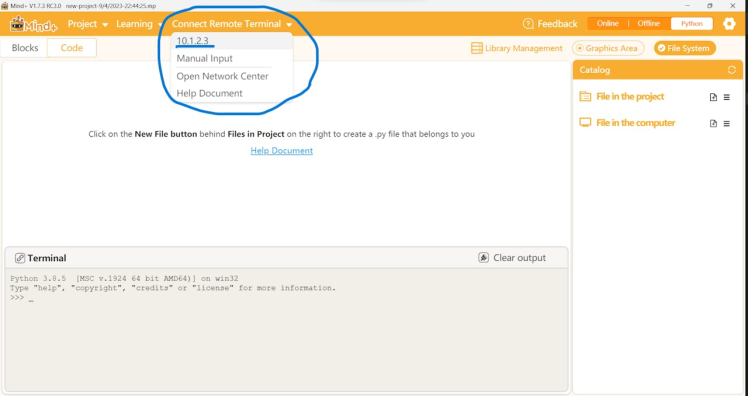
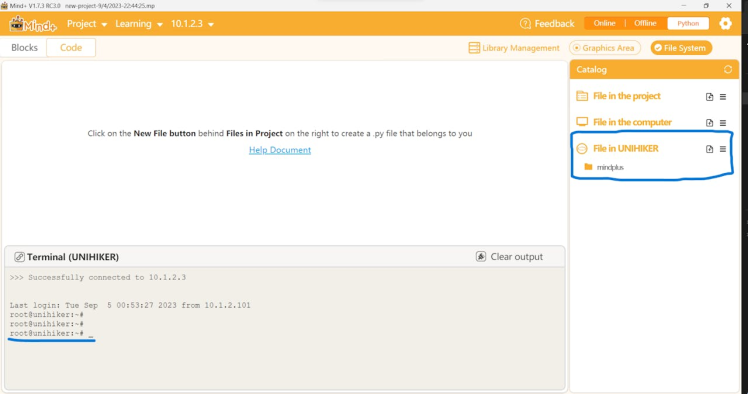
In Mind+, click on the "Code" menu.
Look for an option to connect to the Unihiker, typically displayed as "@10.1.2.3."
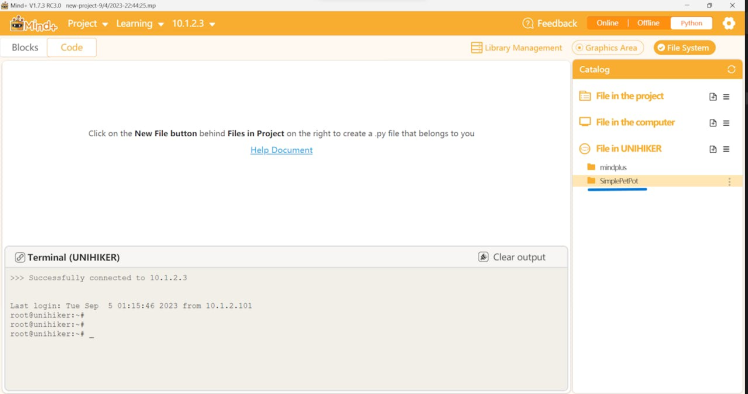
Once connected to the Unihiker, open the directory where your SimplePetPot code is stored. It should be in a folder you've downloaded, likely named "SimplePetPot."
Drag and drop the entire "SimplePetPot" folder from the downloaded zip file into the appropriate location within the Mind+ software.
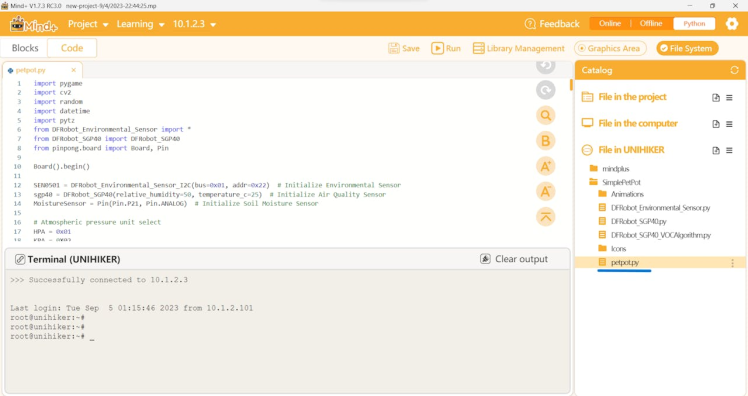
In Mind+, locate and open the "PetPot.py" code file from the "SimplePetPot" folder.
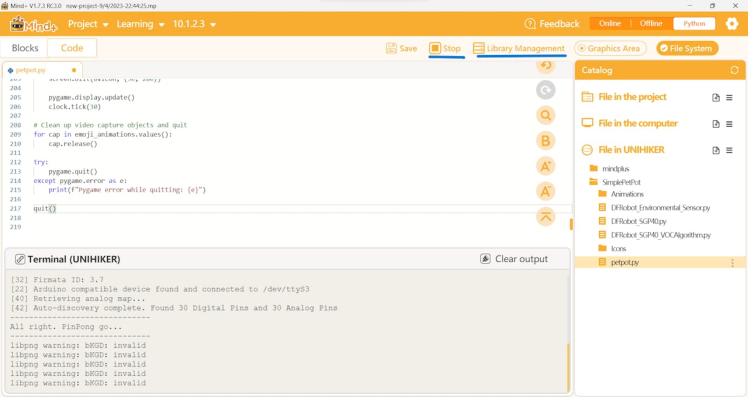
Run the code within the Mind+ environment.
If you encounter any errors or missing libraries while running the code, you can download and install the required libraries from the Mind+ Library Management.
- Step 10: AdvancePetPot
-
- Follow the same above instructions for setting the Mind+ software.
- Drag and drop the AdvancePetPot folder into unihikers directory.
- Follow this tutorial for Setting Up The SSH For Unihiker.
- After you setup the SSH follow the below steps.
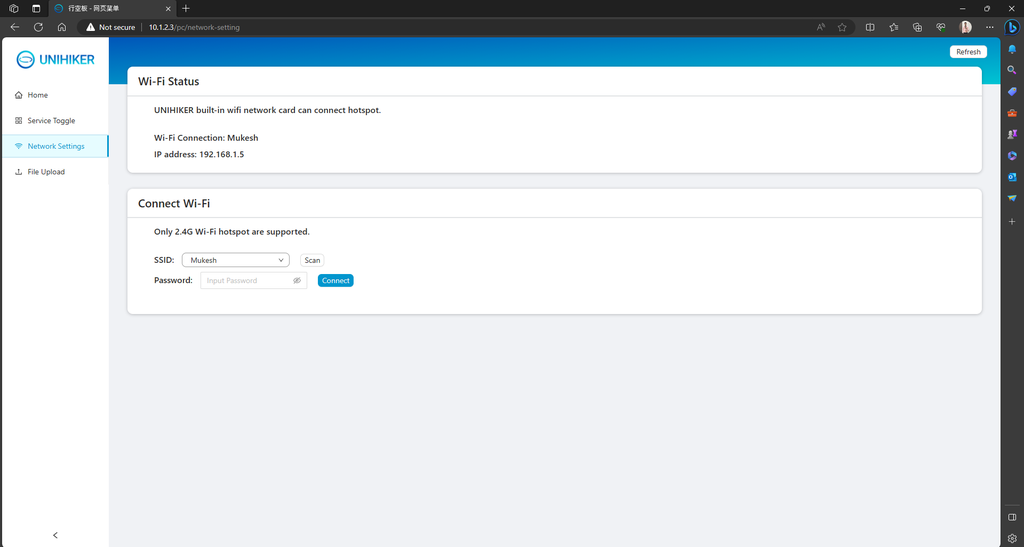
Connect Unihiker To Home WiFi:
- Follow Unihikler tutorial and connect the Unihiker to your home WiFi.
Installing Node-Red:
- Use the below command to install Node-Red
bash <(curl -sL https://raw.githubusercontent.com/node-red/linux-installers/master/deb/update-nodejs-and-nodered)- Use the below command to start Node-Red
node-red-start- Once Node-Red is installed, you can start it by opening a web browser and entering the following URL:
http://{your_pi_ip-address}:1880Installing My SQL:
- Run the following commands
apt-get update- Install MySQL server on unihiker
sudo apt install mariadb-server- Check and start MySQL terminal
sudo systemctl status mariadb- Create MySQL user and password
username-u password-p- Grant user remote access permissions
GRANT ALL PRIVILEGES ON *.* TO 'root'@'%' IDENTIFIED BY 'your_password' WITH GRANT OPTION;- Grant user local access permissions
GRANT ALL PRIVILEGES ON unihiker.* TO 'root'@'localhost' IDENTIFIED BY 'root';
FLUSH PRIVILEGES;
EXIT;- Install MySQL python module
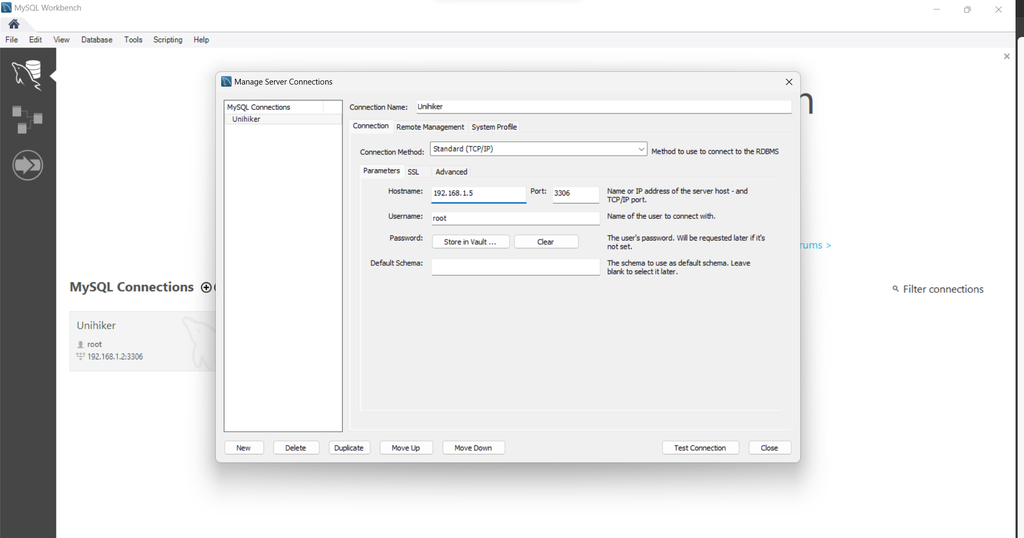
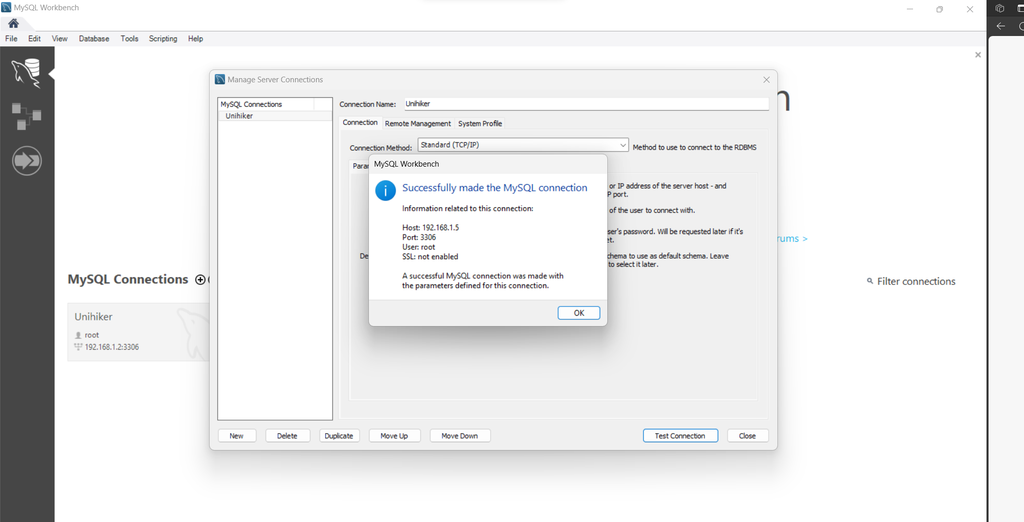
pip install mysql-connector-python- Download and install MySQL Workbench software and connect to the unihikers MySQL server using username and password.
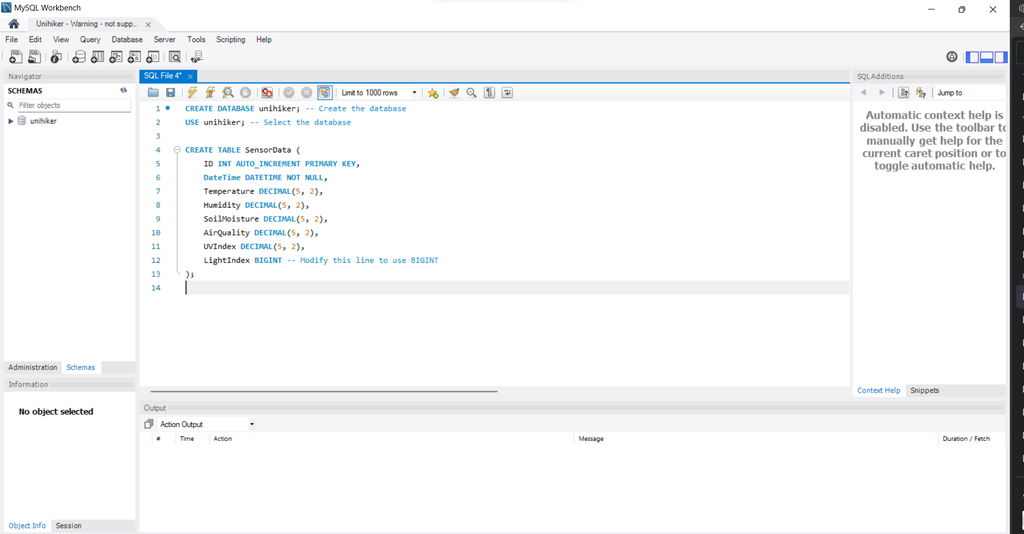
- Run the following query to create schema, table, columns of the database.
CREATE DATABASE unihiker; -- Create the database
USE unihiker; -- Select the database


CREATE TABLE SensorData (
    ID INT AUTO_INCREMENT PRIMARY KEY,
    DateTime DATETIME NOT NULL,
    Temperature DECIMAL(5, 2),
    Humidity DECIMAL(5, 2),
    SoilMoisture DECIMAL(5, 2),
    AirQuality DECIMAL(5, 2),
    UVIndex DECIMAL(5, 2),
    LightIndex BIGINT -- Modify this line to use BIGINT
);
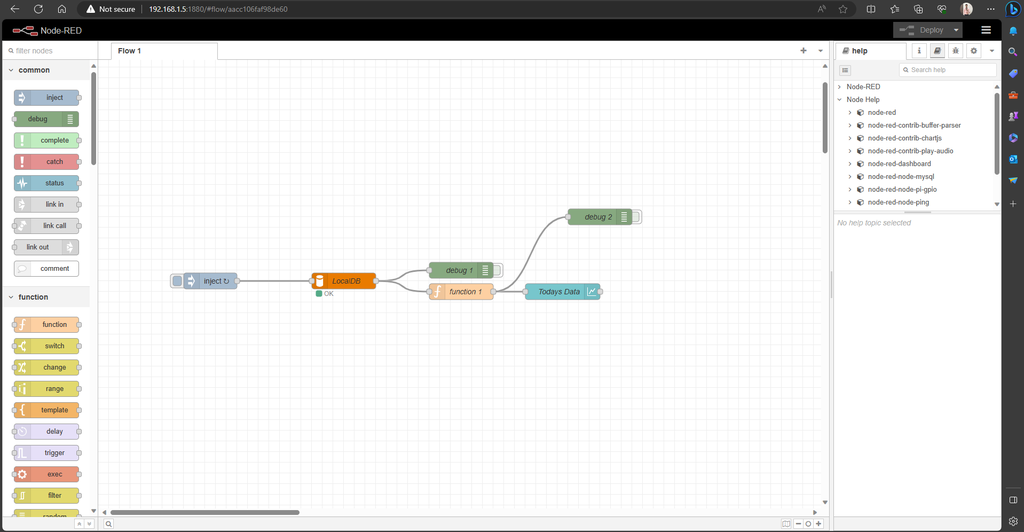
- Now setup the NodeRed flow:
- Use my example as reference
[
    {
        "id": "aacc106faf98de60",
        "type": "tab",
        "label": "Flow 1",
        "disabled": false,
        "info": "",
        "env": []
    },
    {
        "id": "d453abaa9eb10f4c",
        "type": "mysql",
        "z": "aacc106faf98de60",
        "mydb": "3abdbb72c33a6b69",
        "name": "LocalDB",
        "x": 460,
        "y": 540,
        "wires": [
            [
                "960879a0ca162189",
                "fb2a7cea7a74674c"
            ]
        ]
    },
    {
        "id": "960879a0ca162189",
        "type": "debug",
        "z": "aacc106faf98de60",
        "name": "debug 1",
        "active": false,
        "tosidebar": true,
        "console": false,
        "tostatus": false,
        "complete": "false",
        "statusVal": "",
        "statusType": "auto",
        "x": 680,
        "y": 520,
        "wires": []
    },
    {
        "id": "c48a950e9a14216f",
        "type": "inject",
        "z": "aacc106faf98de60",
        "name": "",
        "props": [
            {
                "p": "topic",
                "vt": "str"
            }
        ],
        "repeat": "300",
        "crontab": "",
        "once": true,
        "onceDelay": 0.1,
        "topic": "SELECT * FROM SensorData WHERE DATE(DateTime) = CURDATE();",
        "x": 210,
        "y": 540,
        "wires": [
            [
                "d453abaa9eb10f4c"
            ]
        ],
        "info": "{rn    "id": "d8ed62266b22607d",rn    "type": "inject",rn    "z": "aacc106faf98de60",rn    "name": "",rn    "props": [rn        {rn            "p": "payload"rn        },rn        {rn            "p": "topic",rn            "vt": "str"rn        }rn    ],rn    "repeat": "",rn    "crontab": "",rn    "once": "false",rn    "onceDelay": "0.1",rn    "topic": "SELECT * FROM SensorData WHERE DATE(DateTime) = CURDATE();",rn    "payload": "",rn    "payloadType": "date",rn    "x": 180,rn    "y": 360,rn    "wires": [rn        [rn            "21b9594edb0307ce"rn        ]rn    ]rn}rn"
    },
    {
        "id": "fb2a7cea7a74674c",
        "type": "function",
        "z": "aacc106faf98de60",
        "name": "function 1",
        "func": "var result = msg.payload;nn// Prepare data arrays for each parameternvar temperatureData = [];nvar humidityData = [];nvar soilMoistureData = [];nvar airQualityData = [];nvar uvIndexData = [];nvar lightIndexData = [];nnfor (var i = 0; i < result.length; i++) {n    var row = result[i];n    var dataPoint = {n        x: row.DateTime, // Assuming DateTime is the x-axis valuen        y: row.Temperature // Change this to the desired y-axis valuen    };n    temperatureData.push(dataPoint);nn    dataPoint = {n        x: row.DateTime,n        y: row.Humidityn    };n    humidityData.push(dataPoint);nn    dataPoint = {n        x: row.DateTime,n        y: row.SoilMoisturen    };n    soilMoistureData.push(dataPoint);nn    dataPoint = {n        x: row.DateTime,n        y: row.AirQualityn    };n    airQualityData.push(dataPoint);nn    dataPoint = {n        x: row.DateTime,n        y: row.UVIndexn    };n    uvIndexData.push(dataPoint);nn    dataPoint = {n        x: row.DateTime,n        y: row.LightIndexn    };n    lightIndexData.push(dataPoint);n}nn// Prepare the chart data for each parameternmsg.payload = [n    {n        series: ["Temperature"],n        data: [temperatureData]n    },n    {n        series: ["Humidity"],n        data: [humidityData]n    },n    {n        series: ["Soil Moisture"],n        data: [soilMoistureData]n    },n    {n        series: ["Air Quality"],n        data: [airQualityData]n    },n    {n        series: ["UV Index"],n        data: [uvIndexData]n    },n    {n        series: ["Light Index"],n        data: [lightIndexData]n    }n];nnreturn msg;n",
        "outputs": 1,
        "noerr": 0,
        "initialize": "",
        "finalize": "",
        "libs": [],
        "x": 680,
        "y": 560,
        "wires": [
            [
                "5aad53cea1da48b0",
                "5e7142074dbb81f7"
            ]
        ]
    },
    {
        "id": "5aad53cea1da48b0",
        "type": "ui_chart",
        "z": "aacc106faf98de60",
        "name": "Todays Data",
        "group": "f1f3f08af11de6bf",
        "order": 0,
        "width": 0,
        "height": 0,
        "label": "Pet-Pot",
        "chartType": "line",
        "legend": "true",
        "xformat": "dd HH:mm",
        "interpolate": "cubic",
        "nodata": "No Data",
        "dot": false,
        "ymin": "",
        "ymax": "",
        "removeOlder": 1,
        "removeOlderPoints": "",
        "removeOlderUnit": "86400",
        "cutout": 0,
        "useOneColor": false,
        "useUTC": false,
        "colors": [
            "#1f77b4",
            "#aec7e8",
            "#ff7f0e",
            "#2ca02c",
            "#98df8a",
            "#d62728",
            "#ff9896",
            "#9467bd",
            "#c5b0d5"
        ],
        "outputs": 1,
        "useDifferentColor": false,
        "className": "",
        "x": 870,
        "y": 560,
        "wires": [
            []
        ]
    },
    {
        "id": "5e7142074dbb81f7",
        "type": "debug",
        "z": "aacc106faf98de60",
        "name": "debug 2",
        "active": false,
        "tosidebar": true,
        "console": false,
        "tostatus": false,
        "complete": "false",
        "statusVal": "",
        "statusType": "auto",
        "x": 940,
        "y": 420,
        "wires": []
    },
    {
        "id": "3abdbb72c33a6b69",
        "type": "MySQLdatabase",
        "name": "LocalDB",
        "host": "localhost",
        "port": "3306",
        "db": "unihiker",
        "tz": "IST",
        "charset": "UTF8"
    },
    {
        "id": "f1f3f08af11de6bf",
        "type": "ui_group",
        "name": "Default",
        "tab": "16fae9a9b6ae5482",
        "order": 1,
        "disp": false,
        "width": "18",
        "collapse": false,
        "className": ""
    },
    {
        "id": "16fae9a9b6ae5482",
        "type": "ui_tab",
        "name": "Home",
        "icon": "dashboard",
        "disabled": false,
        "hidden": false
    }
]- You may face few challenges in this step, you have to debug the issue, use internet, ask AI as did. Once everything is connected you are good to record and visualize the data on your fingertips.
- Step 11: Conclusion
-


Pet Pot is not just a planter; it's a living, breathing ecosystem. It's a testament to human ingenuity and the desire to nurture the natural world in our digital age.
If you found this project enjoyable and inspiring, please consider giving it a like and sharing your thoughts in the comments. Your feedback is a great source of motivation for me. If you've undertaken this project yourself, don't hesitate to share your own version in the "I made it" section below. Thank you, and I look forward to sharing more exciting projects with you in the future! ??
Schematics, diagrams and documents
CAD, enclosures and custom parts
Code
Credits
mukesh-sankhla
Tech Educator | Content Creator | Developer | Maker - Simplifying technology through hands-on learning. Creating high-quality tutorials, projects, and insights on electronics, IoT, robotics, CAD, 3D printing, and software development at Empowering students, professionals, and makers with practical, accessible, and inspiring content.
Leave your feedback...