

Object And Human Following Robot

Made by berasukanta / Artificial intelligence / Home Automation / Robotics / Security / Sensors
About the project
Object following robot which can find an object with range ... follow or avoid an object and human in specific distance.
Project info
Difficulty: Moderate
Estimated time: 1 hour
License: GNU General Public License, version 3 or later (GPL3+)
Items used in this project
Hardware components


View all

Story
hellooo guys...
we have made a new nice project...object following robot thats based on arduino...
this robot is made by using a ultrasonic sensor....
ultrasonic sensor:-
An Ultrasonic sensor is a device that can measure the distance to an object by using sound waves. It measures distance by sending out a sound wave at a specific frequency and listening for that sound wave to bounce back.
so..this sensor can find object with range and follow or avoid a object and human in specific distance..
so lets start..
Step 1: Components
1:-arduino uno with usb cable(Generic Uno R3 ATmega328P with USB Cable length 1 feet, Compatible with ATMEGA16U2 Arduino (Color may vary))
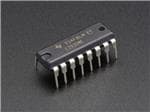
2:-l293d motor driver(Embeddinator's L293D Motor Driving Module)
3:-breadboard(KTC CONS Labs Nickel Plated 840 Points Bread Board or Solderless Piecesb Circuit Test Board, White)
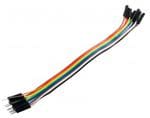
4:-jumper wires(REES52 Jumper Wire - 10 Male to Male + 10 Female to Female + 10 Male to Female)
5:-ultrasonic sensor hc-04(Ultrasonic Module HC-SR04 Distance Measuring Transducer Sensor for arduino)
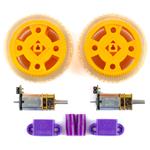
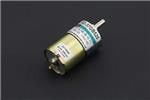
6:-two dc gear motor(Generic E_14009429 Imported DC Geared Motor Gearmotor for Arduino Robot Smart Car DIY 14009429Mg)
7:-a chasis with wheels and caster wheel(Generic AX195 Advance Metal Chassis)
8:-power bank or 9v battery(Intex IT-PBB 2000 MAH Power Bank (White))
Step 2: Circuit connection
ultrasonic sensor connection:-
trig pin is connected to arduino 2pin
echo pin is connected to arduino 3pin
l293d motor driver connection:-
motordriver l293d have 16pin...
1,8,9,16pin of l293d is connected to +5v
4,5,10 and 11 pin of l293d is connected to gnd
so.
connection between arduino and l293d:-
2pin of l293d is connect to 4pin of arduino
7pin of arduino is connect to 5pin of arduino
9pin of arduino is connect to 6pin of arduino
15pin of arduino is connect to 7pin of arduino
motor connection:-
motor1 is connected to 3 and 6pin of l293d
motor2 is connected to 10 and 14 pin of l293d
that it....then connect to power supply....
Step 3: How This Robot Works??
This robot is works depend on ultrasonic sensor,which is help to find any object in range...
ultrasonic sensor works in 180degree angle..
if distance is 40cm or >40..then robots will be stop..
delay(500);}
digitalWrite(m11,LOW);
digitalWrite(m11,LOW);
digitalWrite(m11,LOW);
digitalWrite(m11,LOW);
if(distance>=40){
}
delay(400);
digitalWrite(m11,HIGH);
digitalWrite(m11,LOW);
digitalWrite(m11,HIGH);
digitalWrite(m11,LOW);
{
else
}
delay(400);
digitalWrite(m11,LOW);
digitalWrite(m11,HIGH);
digitalWrite(m11,LOW);
digitalWrite(m11,HIGH);
if(distance>=25){
so if distance of ultrasonic sensor 25cm or <25
this time robot moves forward using two dc gear motor...
else ..if distance <25..this time robots can moves backward..
plz subscribe our channel..and dont forget to share...
Schematics, diagrams and documents
Code
Credits
berasukanta
we are s_r tronics on you tube... we are maker... we love electronics and robotics.. plz support us and subscribe our channel https://m.youtube.com/channel/UCcSpCN3nV34zZsdaiVhPTKA
Related products


Leave your feedback...