
Nxp Scarab Robot

Made by ashokr / Automotive / Environmental Sensing / Games & Gaming / Home Automation / Robotics
About the project
A Robot designed for Automate our routine tasks with smartness.
Project info
Difficulty: Difficult
Platforms: Android, NXP, Texas Instruments
Estimated time: 1 hour
License: GNU General Public License, version 3 or later (GPL3+)
Items used in this project
Hardware components


Story
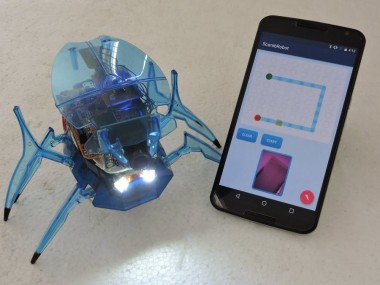
NXP Scarab Robot
Its just a robot can be configured to do specific or routine tasks. The tasks are configure through smart mobile via NTAG interface. And the task results will be stored in the same NTAG.
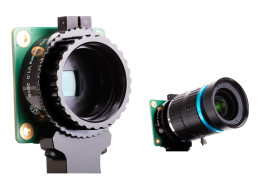
The Task can be anything , reading temperature /pressure/capturing pictures or motion detection. In this project the task is capturing the picture.I used OV7670 VGA camera at 160x120 resolution with Flexio Ports.
FRDM-K82F Board got it from hackster.io And interfaced with NTAG I2c Plus board , OV7670 and L293D H bridge driver. Purchased Scarab XL Hexbug from online store and established the connections between L293D and DC motors. Also connected LEDs in Scarab.
Android application is for configuring the scarab and it is developed using Android studio. Using of this App the user can define a path for maneuvering the scrab. Its similar like my sketch drive car. In addition the user can set the task location in the maneuver path. The app also can be connect to Bluetooth module (HC-05) for reading Image data from Serial Flash (K82F Board has external Flash of 64MB).
The RGB led's are used for indication scarab status.
Blue - Idle state
Green - Active state
Cyan - Moving State
Blue/Green - Blinking (Reading Data)
Red - Not used
Tapping a mobile with NTAG, will download the configuration into Scarab (K82F). And after that trigger (Tap again with trigger button) starts the Scarab to move on the configured path direction. And it stops at Task location , after completing the task it resumes from there and stops at destination. At this stage the user can read data from NTAG or via Bluetooth.The features can be extended by connecting scarab to internet (ESP8266 - I have tested this but not used here due to large data size Image). The results can be read from anywhere.
some use-cases are like,
Home security - Scarab robots replacement for dogs or watchman
Monitoring & Automation - It can do a lot in agriculture & Industries (with cloud)
Military- It also can be used in Military.
Scarab Robot Demo Video
(Note :- The picture was taken at night time, was not visible clearly)
Schematics, diagrams and documents
Code
Credits
Related products


Leave your feedback...