
Make Simple Raspberry Pi Pico Weather Station With Hexabitz

Made by Aula_Jazmati / Environmental Sensing / Home Automation / Kids & Family / Sensors / Weather
About the project
Join me as I unveil the secrets of designing a simple yet powerful weather station using Raspberry Pi Pico and Hexabitz.
Project info
Difficulty: Moderate
Platforms: Seeed Studio, STMicroelectronics
Estimated time: 1 hour
License: MIT license (MIT)
Items used in this project
Hardware components

Story
Embark on a journey to create a weather station like no other! Join me as I unveil the secrets of designing a simple yet powerful weather station using Raspberry Pi Pico and Hexabitz Sensor Hub module (H0AR9).
Get ready to dive into the world of temperature and humidity monitoring, as we bring this project to life on Hackster.io.
Temperature, Humidity, Light, Color and Motion Sensor Hub:H0AR9x is sensor hub module with STM32G0 MCU and a variety of sensors:
- Weather: TI HDC1080DMBT digital temperature and relative humidity sensor.
- Light: Broadcom (Avago) APDS-9950 proximity, ambient light and RGB color sensor.
- Motion: Panasonic EKMC1601111 proximity infrared motion detector (PIR).
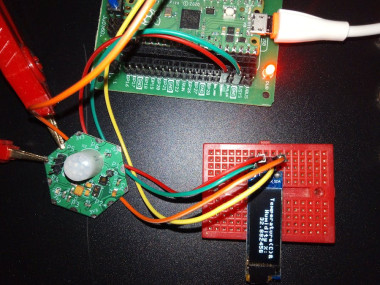
Use this module as an indoors weather station, room monitoring node or put on board aerial or ground robotics platform to gather surrounding data. Connect with other Hexabitz modules to log sensor measurements, stream data wirelessly or control external devices based on sensor readings.
Temperature, Humidity, Light, Color and Motion Sensor HubHexabitz Module Setup:Check out this article for writing code with STM32CubeIDE.
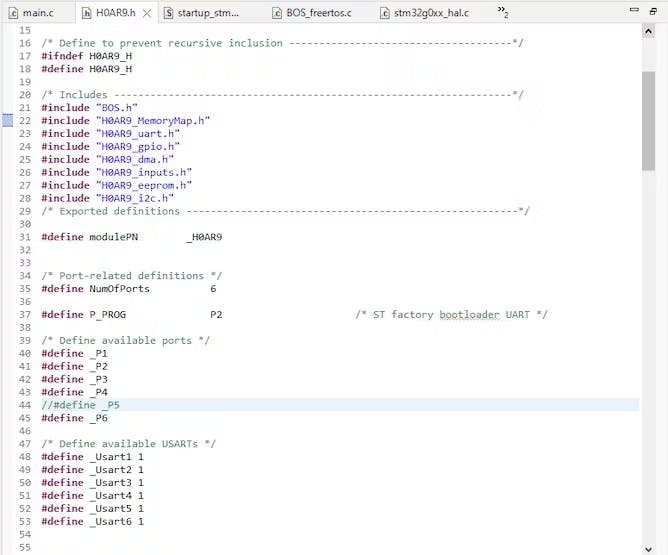
H0AR9x Firmware H0AR9.h code:
Let's disable P5 port by commenting its directive in H0AR9.h.
H0AR9x Firmware main.c code:
First, we define the temperature and humidity variables:
float temper;
float humidity;
and then defined the other variables used in the code.
uint8_t MESG_T[5];
uint8_t MESG_H[5];
And in the repeated closed loop, we made sure that MCU periodically checks the temperature value of the sensor using the API from module factsheet and sends it via uart.
SampleTemperature(&temper);
sprintf(MESG_T, "%f",temper);
For transmitting data in interrupt mode, we use a HAL function called HAL_UART_Transmit_IT()
HAL_UART_Transmit_IT(&huart5, MESG_T,5);And we repeated the same steps to send the value of the humidity variable to the same port after an appropriate time delay.
SampleHumidity(&humidity);
sprintf(MESG_H, "%f",humidity);
HAL_UART_Transmit_IT(&huart5, MESG_H,5);
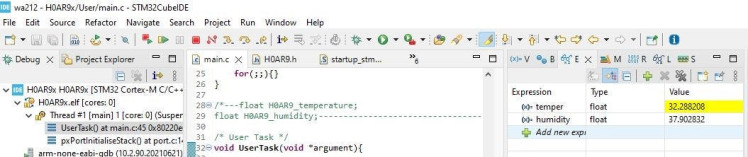
Delay_ms(10);These values were first monitored using the STM32CubeIDE debugging function to monitor our weather live expressions, as shown in the figure.
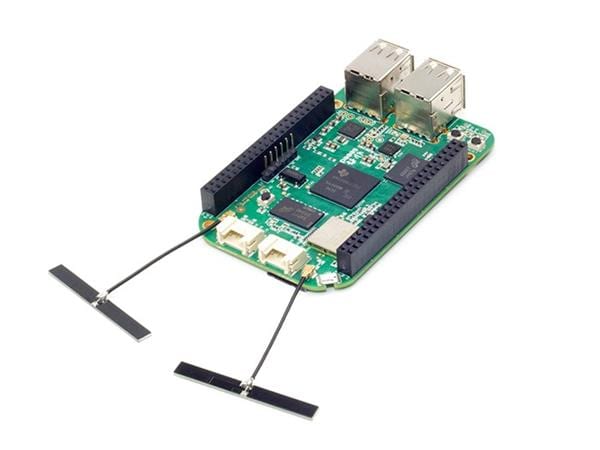
Raspberry Pi Pico is a low-cost, high-performance microcontroller board with flexible digital interfaces. Key features include:
- RP2040 microcontroller chip designed by Raspberry Pi in the United Kingdom
- Dual-core Arm Cortex M0+ processor, flexible clock running up to 133 MHz
- 264kB of SRAM, and 2MB of on-board flash memory
- USB 1.1 with device and host support
- Low-power sleep and dormant modes
- Drag-and-drop programming using mass storage over USB
- 26 × multi-function GPIO pins
- 2 × SPI, 2 × I2C, 2 × UART, 3 × 12-bit ADC, 16 × controllable PWM channels
- Accurate clock and timer on-chip
- Temperature sensor
- Accelerated floating-point libraries on-chip
- 8 × Programmable I/O (PIO) state machines for custom peripheral support
The Raspberry Pi Pico comes as a castellated module allows soldering direct to carrier boards, while the Pico H comes with pre-soldered headers.
https://www.raspberrypi.com/documentation/microcontrollers/
Below is a quick reference for Raspberry Pi RP2xxx boards. If it is your first time working with this board it may be useful to get an overview of the microcontroller:
Raspberry Pi Pico Setup:The Raspberry Pi Pico Python SDK book contains step-by-step instructions for connecting to your Pico and programming it in MicroPython using both the command line and the Thonny IDE.
UART (serial bus): There are two UARTs, UART0 and UART1. UART0 can be mapped to GPIO 0/1, 12/13 and 16/17, and UART1 to GPIO 4/5 and 8/9.
Class UART – duplex serial communication bus:
UART implements the standard UART/USART duplex serial communications protocol. At the physical level it consists of 2 lines: RX and TX. The unit of communication is a character (not to be confused with a string character) which can be 8 or 9 bits wide.
UART objects can be created and initialised using:
from machine import UART

uart = UART(1, 9600)                         # init with given baudrate
uart.init(9600, bits=8, parity=None, stop=1) # init with given parameters
Supported parameters differ on a board:
Pyboard: Bits can be 7, 8 or 9. Stop can be 1 or 2. With parity=None, only 8 and 9 bits are supported. With parity enabled, only 7 and 8 bits are supported.
WiPy/CC3200: Bits can be 5, 6, 7, 8. Stop can be 1 or 2.
A UART object acts like a stream object and reading and writing is done using the standard stream methods:
uart.read(10)       # read 10 characters, returns a bytes object
uart.read()         # read all available characters
uart.readline()     # read a line
uart.readinto(buf)  # read and store into the given buffer
uart.write('abc')   # write the 3 characters
See machine.UART.
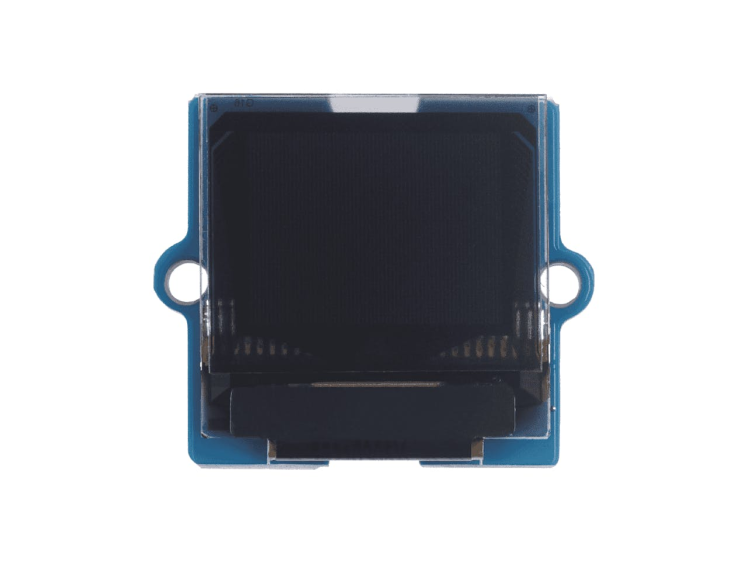
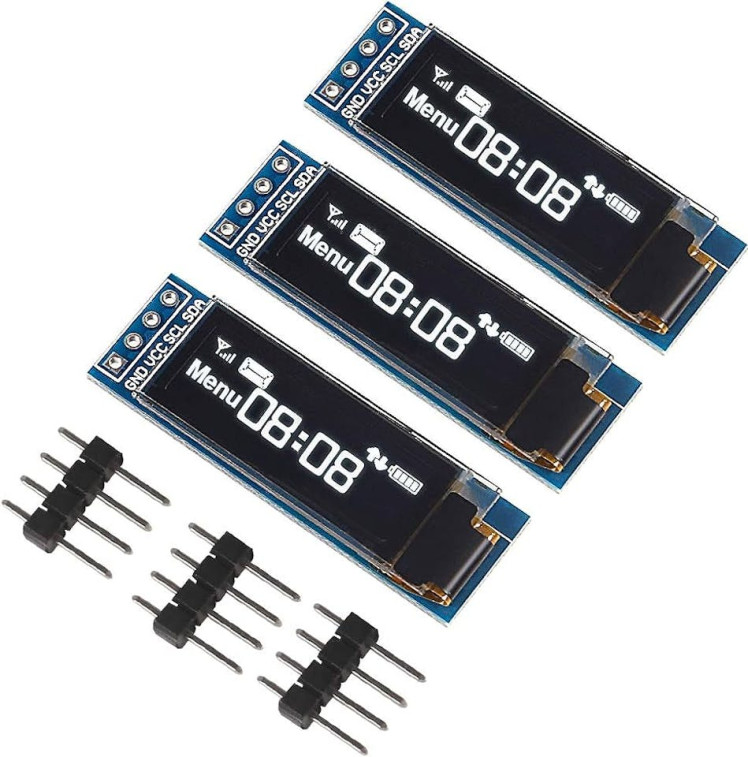
The organic light-emitting diode (OLED) display that we’ll use in this tutorial is the SSD1306 model: a mono color, 0.96-inch display with 128×64 pixels or 128×32 pixels as shown in the following figures.
The OLED display doesn’t require backlight, which results in a very nice contrast in dark environments. Additionally, its pixels consume energy only when they are on, so the OLED display consumes less power when compared with other displays.
The model we’re using here has only four pins and communicates with the Pico using I2C communication protocol. There are models that come with an extra RESET pin. There are also other OLED displays that communicate using SPI communication.
SSD1306 (MicroPython)Library ?️
Raspberry Pi Pico SSD1306 OLED Display (MicroPython) Simulation:
https://wokwi.com/projects/359558101922696193
Code Explanation ?All you need to do is perform the following steps :
- Import the machine module.
- Import the time module.
- Import the SSD1306 module.
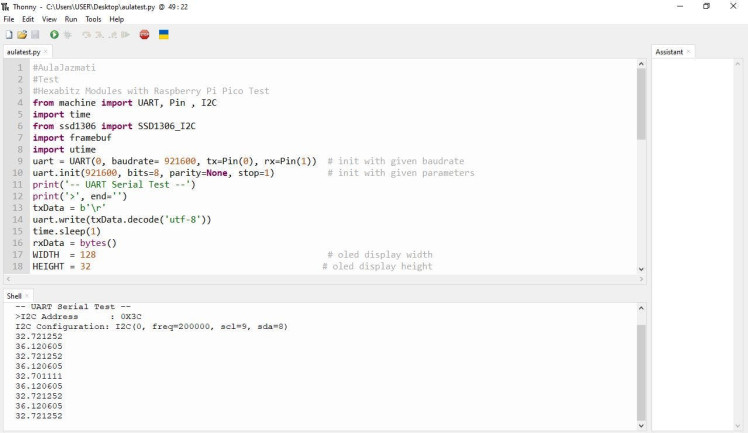
from machine import UART, Pin , I2C
import time
from ssd1306 import SSD1306_I2C
UART objects can be created and initialized using:
uart = UART(0, baudrate= 921600, tx=Pin(0), rx=Pin(1))     # init with given baudrate
uart.init(921600, bits=8, parity=None, stop=1) # init with given parameters
A UART object acts like a stream object and reading and writing to Hexabitz module is done using the standard stream methods:
rxData = bytes()
while uart.any() > 0:
rxData = uart.read(12)
w =rxData.decode('utf-8')
print(w)
Define the parameters of the SSD1306 OLED display.
WIDTH = 128 # oled display width
HEIGHT = 32 # oled display height
i2c = I2C(0, scl=Pin(9), sda=Pin(8), freq=200000) # Init I2C using pins GP8 & GP9 (default I2C0 pins)
print("I2C Address : "+hex(i2c.scan()[0]).upper()) # Display device address
print("I2C Configuration: "+str(i2c)) # Display I2C config
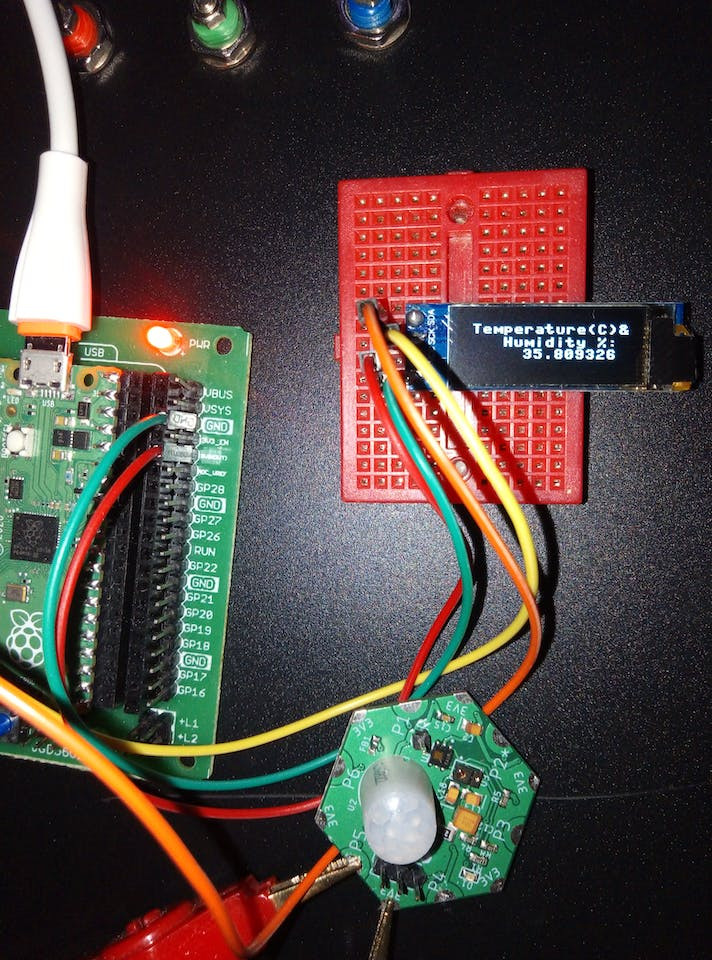
oled = SSD1306_I2C(WIDTH, HEIGHT, i2c) # Init oled displayThen we create a loop to read from the serial port of the module and show on the OLED display. Note that the temperature is displayed, then the percentage of humidity, and so on.
while uart.any() > 0:
rxData = uart.read(12)
w =rxData.decode('utf-8')
print(w)
oled.fill(0)
oled.text("Temperature(C)&",5,4)
oled.text("   Humidity %:",5,14)
oled.text(w,44,23)
oled.show()
time.sleep(2)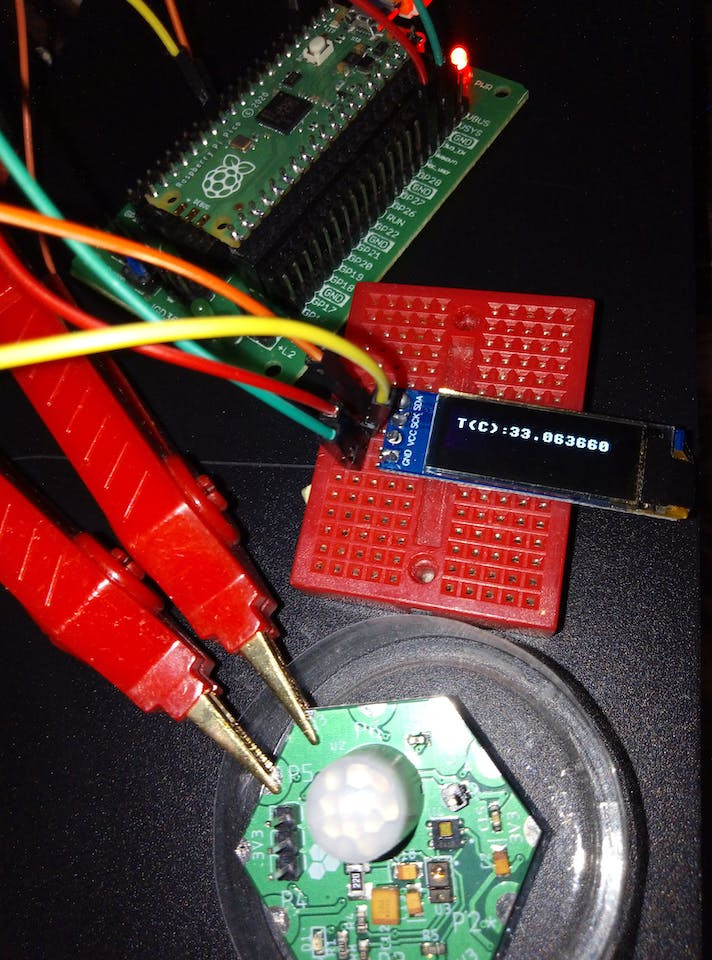
1 / 2
Temperature(c) Reading
 Reading")
Temperature(c) Reading
Humidity(%) Reading
 Reading")
Humidity(%) Reading
? Future Work:We will create a weather station that not only displays real-time temperature and humidity readings but also provides historical data analysis through data logging capabilities. This feature enables users to track weather patterns over time and make informed decisions based on the collected data.
Additionally, we plan to enhance the functionality of our weather station by integrating it with online platforms. This will enable users to access their weather station remotely through their smartphones or computers, ensuring they are always up-to-date with the latest weather conditions.
Thanks to the distinctive Hexabitz specifications such as scalability, we can add other weather sensors and connect them via Bluetooth or Wi-Fi modules to measure the temperature and humidity outside the house.
The system can also be expanded by adding sensors measuring wind speed, atmospheric pressure, light sensor and a rain sensor.
In conclusion, our project aims to provide individuals with a simple yet effective solution for monitoring temperature and humidity levels in their surroundings. By utilizing Raspberry Pi's computing power and Hexabitz Sensor Hub module's versatility, we can create a weather station that not only meets the basic requirements but also offers advanced features for data analysis and remote accessibility. Stay tuned as we embark on this exciting journey of designing and building our very own weather station!
Schematics, diagrams and documents
CAD, enclosures and custom parts
Code
Credits
Related products


Leave your feedback...