
Lightsaber Game Controller With Motion Sensing

Made by leo-moreno / Art / Games & Gaming / Sensors / Star Wars / Sustainability
About the project
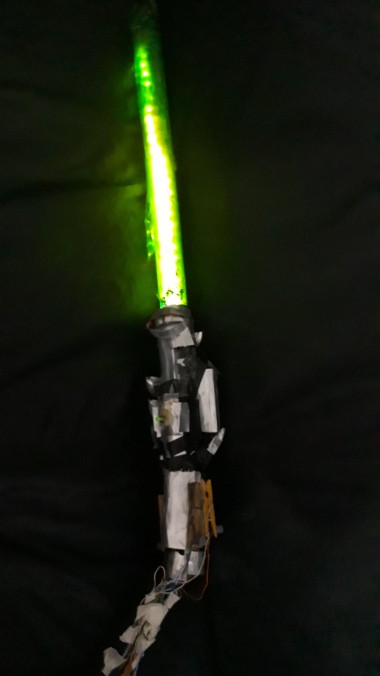
A motion sensing game controller for those "force sensitive" gamers, clash through your favorite challenging games with wooden clamps triggers and a built in analog stick with this affordable lightsaber that is also a game controller.
Project info
Difficulty: Moderate
Platforms: Arduino
Estimated time: 1 day
License: GNU General Public License, version 3 or later (GPL3+)
Items used in this project
Hardware components


View all
Hand tools and fabrication machines
Story
2.Lightsaber Structure:Hilt
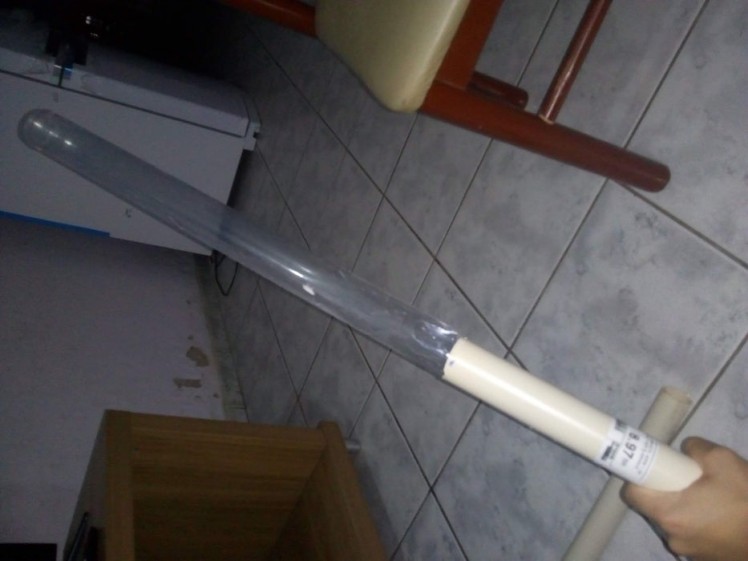
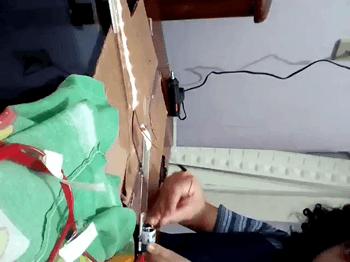
For the hilt, we gonna to cut 30 cm of the PVC pipe, it's a very comfortable height to be handled, and after that the pipe must be sanded.
Mark with a pen where your fingers and thumbs rest naturally, it will be for the buttons and analog wires to pass, also make one for the led switch. Now let's drill a hole with the used soldering iron, watch out for the hot plastic.
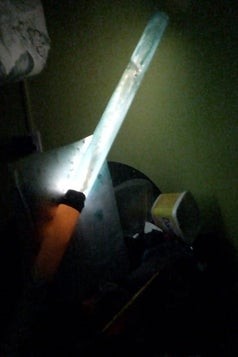
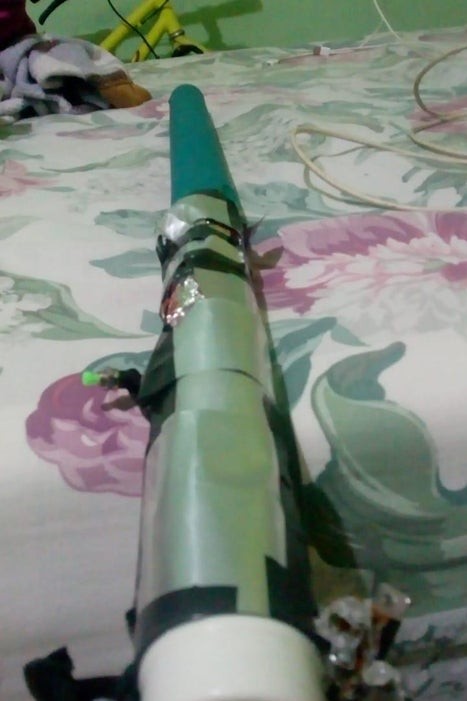
3. Lightsaber Structure: Blade
We gonna carefully sand the plastic tube, I used a plastic tube generally used for Christmas balls.
It is not tough enough for some lightsaber fights, but it is safe enough not to break your TV or monitor screen if you accidentally hit it with the saber blade.
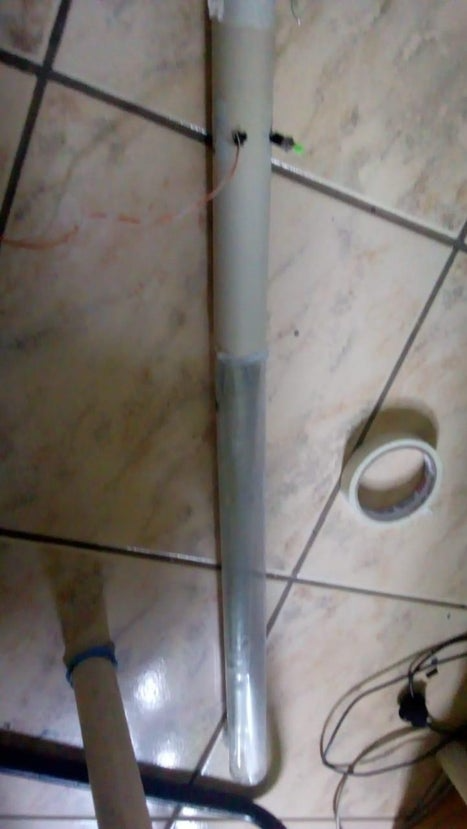
To fit in on the PVC pipe, you can gently crumple the far end of the plastic tube, or carefully pass something hot(like the soldering iron) near the end of it, lately we gonna use tape to firm the blade.
4. Lightsaber Intern Eletronics: Accel/Gyro and Battery.
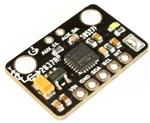
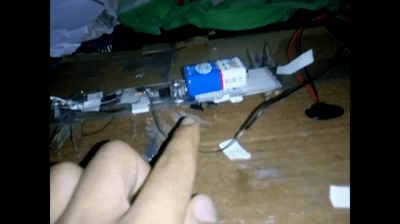
Our “saber crystal” the source of the power and of this gaming lightsaber are the Accelerometer /Gyroscope MPU6050, responsible for literally “sense the force” for responding our moves in game, and of course the battery that are responsible for powering the LEDs inside the blade.
We gonna mount the sensor in the middle of a ruler with approx same wideness dimensions of the PVC pipe for fitting inside it, positioning the sensor on the middle guarantees stability and precision on the sensor reading, because the only force acting on it is the one that you apply on it. Screwing or just fixing the sensor with tape shall make it not fall off the ruler while you move.
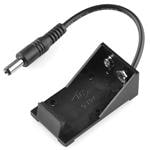
The 9V Battery are heavy enough to unbalance the motion of our lightsaber, so I glued and taped it down of the same point the sensor is fixed, these cames with the cost of a hard time replacing the battery, but I am working on a future design for making a “door” in the middle of the pipe to switch it.also these batteries have a good lifetime of like some months.
Solder the sensor following this diagram, a good advise is to hot glue the terminals after soldering, this guarantee that clashes and tensioning the wires are not going to make the solder joints “broke”.
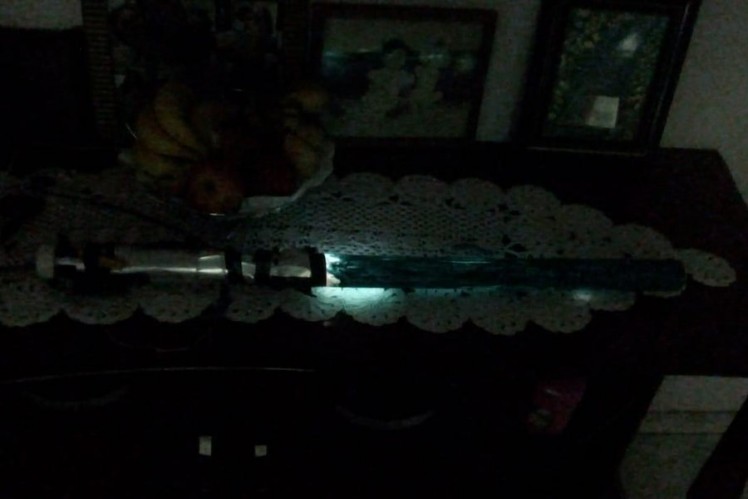
5. Lightsaber Intern Eletronics: Saber LEDs
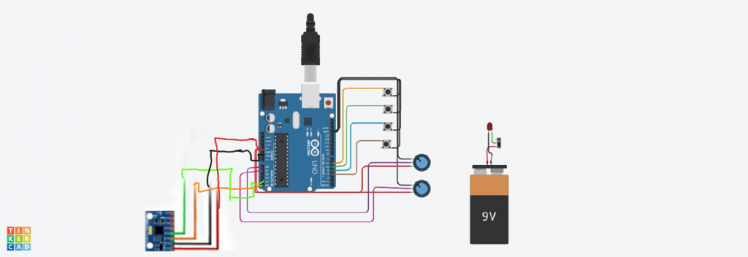
Follow the circuit diagram for the LED switch circuit, just remember having longer wires for the switch, so you won't struggle with the wire stretching while working on solder them in the rest of LED circuit.
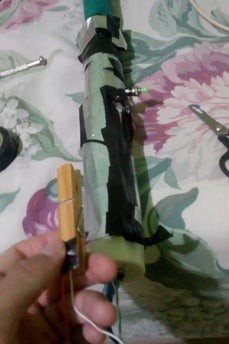
At this point you might have the ruler with the sensor and the battery mounted on it, solder longer wires for the LED part of the circuit, and now you have everything that must be fitted inside the pipe.
If you chose to have the wires for the buttons and analog stick to pass inside the pipe, the time for passing them inside is now, tape the other ends of the wires, they gonna be waiting till the time to solder the analog stick and buttons on them.
Also, tape every loose wire of the ruler with some tape to avoid bad tensioning of them and now fit our"saber crystal circuit" inside it.
Make a hole on the PVC cap with a little help from something hot, and pass every wire inside it, and thread it on the pipe.
You soldered longer wires for the LED strip, so now you won't have much problem soldering them, after that, wrap the strip with some of this CD plastic bags, this is going to help reflect more the light, pass some glue on the strip and fit it inside the blade.

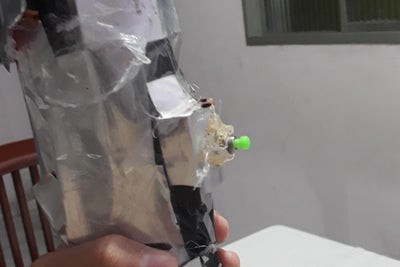
6.Controller Buttons
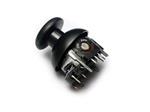
A simple way for finding an analog stick, is salvaging it from older controllers, using the good soldering iron, a desoldering pump and patience, you can easily scrap out one from the controller board, i only used one analog stick for optional reasons.

You re going to solder it following the general circuit diagram(each axis on the analog are represented by a potentiometer), after that glue it with a lot of hot glue and tape, might look bad but its just be careful with the analog that you will have a great play.
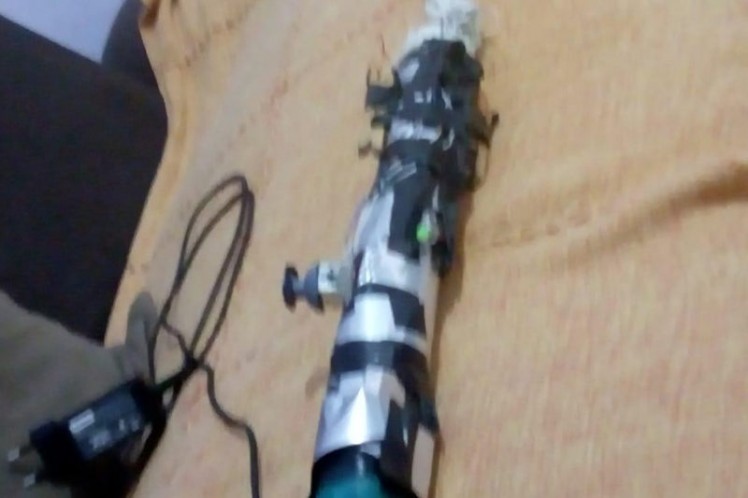
7.Wooden Clamp Triggers
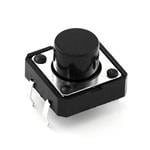
I managed to find just one switch for the buttons, so I had to improvise the other with these wooden clamps triggers.
Split apart the wooden clamp, saving the metal clip for reassembling, and mark two spots with a pen for hammering the nails.
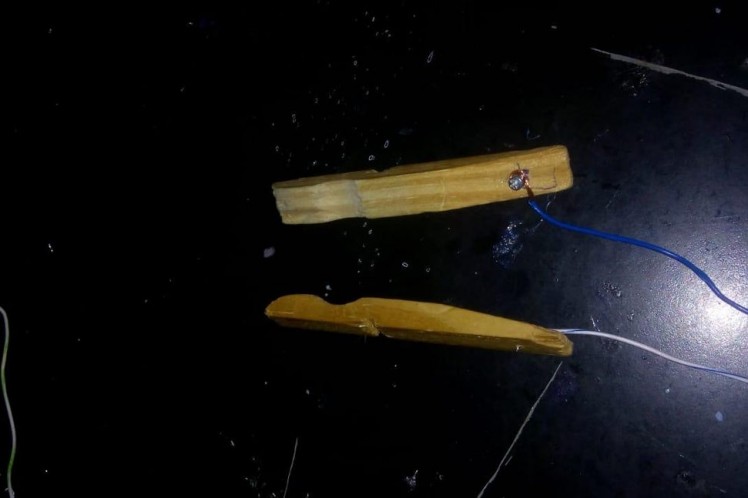
Hammer a nail on each marked spot for opening a hole(you can use a drill instead a hammer and nail)and screw some bolts into it, saving space for wrapping a copper wire on each bolt before totally screw them.
For protecting your finger from a possible short and improve the ergonomics of the button, you can hot glue a plastic cap(I used the caps of the old controller buttons)right on the tip of the screw above the wooden clamp. I hot glued these wooden clamp triggers on the bottom of the lightsaber, so it looks like the black parts from Luke's lightsaber.

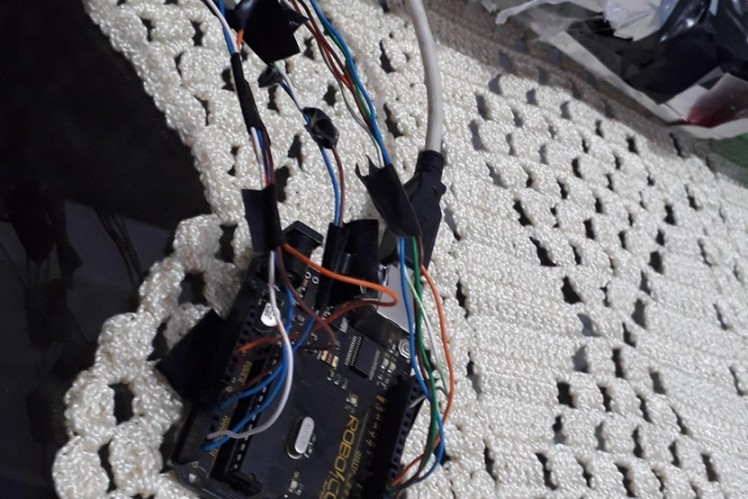
8. Virtual Joystick Configuration and Arduino Code
Download and install the following programs, vJoy is used for creating a virtual joystick on your computer, and vJoySerialFeeder is for feeding the virtual joystick with data gathered from your Arduino.
For the Arduino to gather angle information from the Accel/Gyro, you must add the MPU6050_tockn library, it is easily installed from the library manager, just go to tools, then library manager, a menu will open, and you will search MPU6050_tockn, just install and now Arduino is ready to gather angle data from the sensor.
Down below, I uploaded my Arduino code for a controller with,4 physic buttons,1 motion controlled button and a single analog stick. Compile it to your Arduino, and take note of the COM port showed in the footnotes of the compilation.
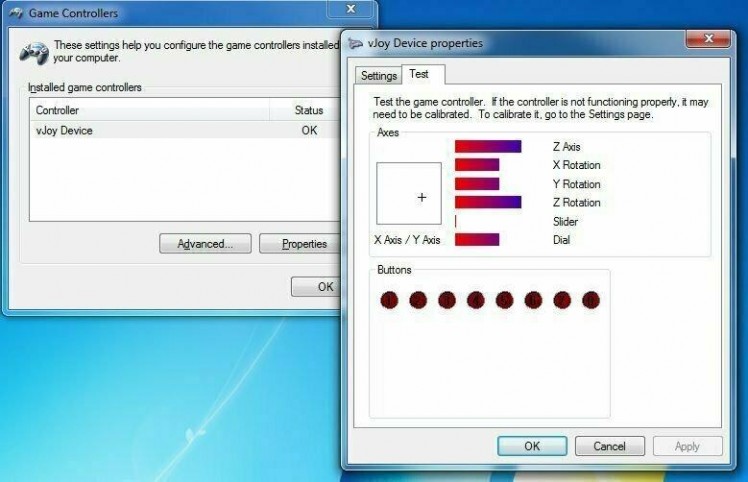
After download vJoy, install it and check if your computer recognize a vJoy device on the device menu.
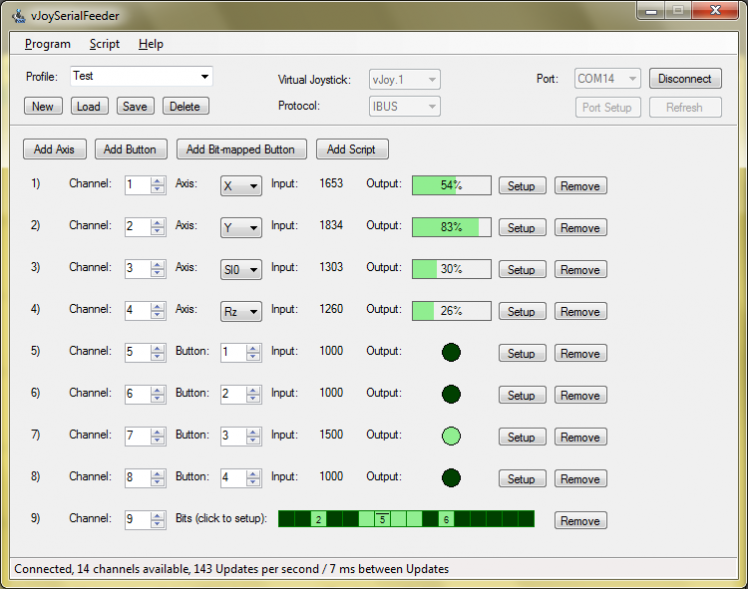
9. vJoySerialFeeder Controller Setup
Hang on my Padawan, we come closer to the functional Lightsaber Game Controller, now that you have previously downloaded vJoySerialFeeder, we must configure our controller on it.
After following the wiring diagram of our circuit to Arduino, you re going to plug the Arduino into the computer and open vJoySerialFeeder.
On the application, click refresh then port, choose the COM port that you took note previously and then click Connect(troubleshooting advise:usually if you face something like failsafe, after connecting, this means that something on your circuit is bad connected, generally something like pulling the saber too strong that the solder in the wires broke).
In the Channel Monitor option check if all channels respond, analogs should have a variation, while all the other buttons including the motion sensed, must vary from only 2 states.
Go to add buttons and start adding every button, checking the channel monitor for matching the buttons with the right channels. In the Setup option of every Button, set the threshold max to 1023 and the minimum to 0,check on your controller if its inverted, if is, just select the invert box to fix that.
Do the same process for the analog stick by going to add axis, and carefully matching the t axis X and Y for the two axis the analog have, go to calibrate and the program is going to help you calibrate each axis.
At this point you noticed that every button press blink a green circle on the program, pay attention to this to see if the motion sensing “button” is working well, if you have any issue maybe you have to change the angle manually on the code, and start experimenting values that best suite your play style by checking the angles with the "get angle" example included in the MPU6050_tockn library.
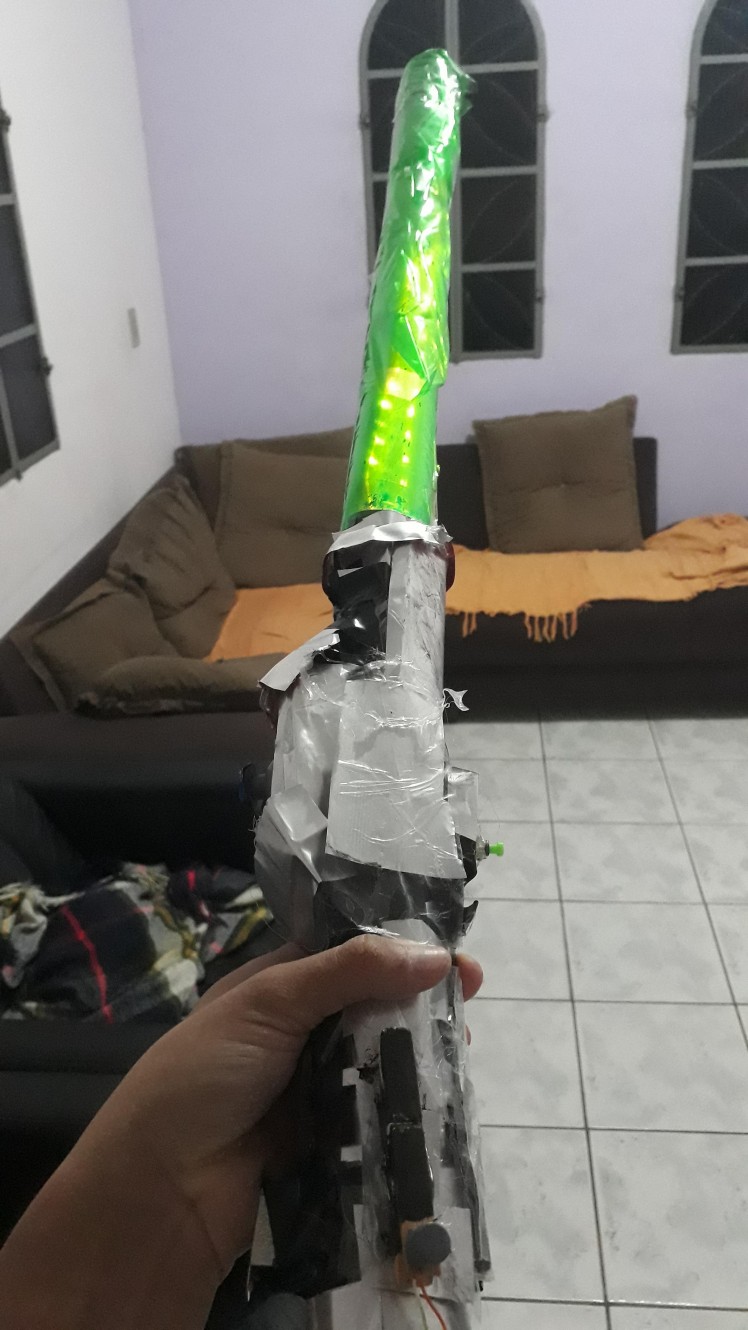
10.Decorating the Lightsaber: Hilt
At this point my Padawan, you already own a game controller, but its not a lightsaber yet, so feel free to decorate your hilt in a way that express your alignment with “the force”, my alignment is with the beer, so I cut beer cans with a big scissors, being carefully in this process, I left some books above the cut cylindrical pieces to plaining it a little, then I started covering the hilt with it, always in big pieces of aluminum, (some parts may be uncovered after all, so its up to you wrap the hilt with aluminum foil before, just to hide the uncovered parts a little).

If you have any wire passing out of the hilt, or any terminal from a button except for the triggers(they too far from the aluminum, and are isolated by the hot glue)please tape them with isolating tape, to avoid any shocking stuff.
For holding these aluminum parts, isolating tape and transparent tape are a good design choice, i optionally made a case for the analog stick with the cut beer cans.

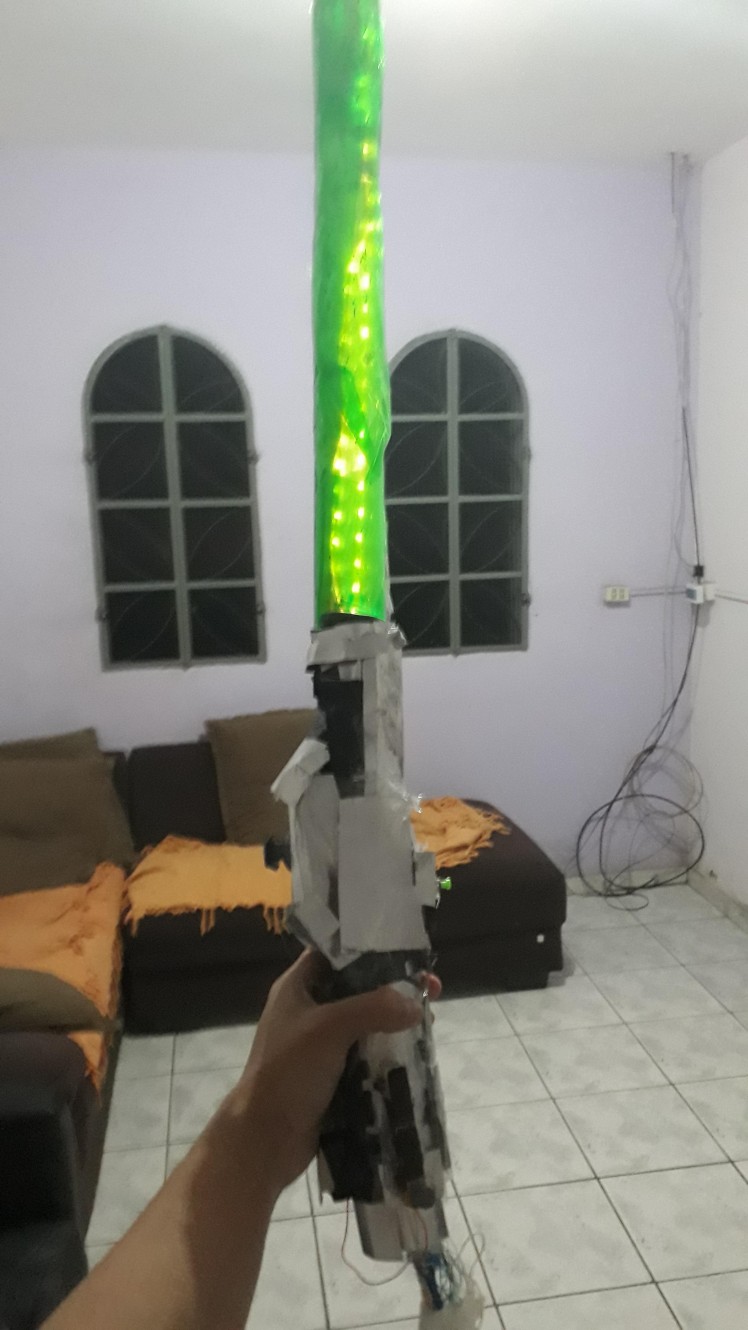
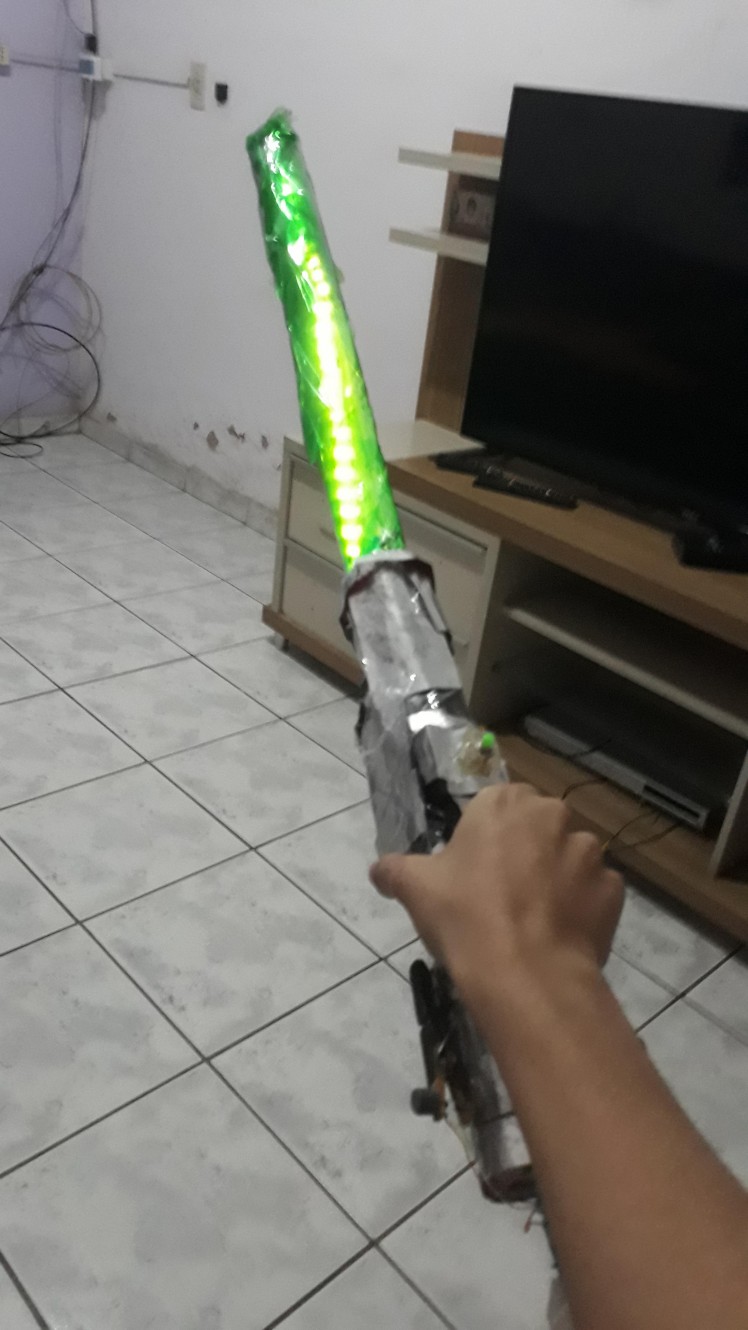
11.Decorating the Lightsaber: Blade
I only have White colored LED strip, so I wrapped the blade with green colored cellophane paper, with is also a cheap and alternative to buying colored LED strips,


Never paint the blade, just don't paint her, it's not going to glow so well.

One of the counters of this controller are the wires, that's why I point out their importance, you gonna move a lot, and i often had issues with wires being pulled out, so don't be afraid to use longer wires, or even soldering more wires in the wires you already have, caring for they have almost the same size, and if possible mark the wires with something like a tape if you don't have many colors of wires, that's going to save you a lot of time.
My usual position for playing are holding the analog stick and the back button with my right hand(I m right-handed)and the other hand in the triggers' area.

13.Lightsaber Gaming
And after all that, my Padawan, your training is now complete. You built your own lightsaber game controller, now show these games your control over “the force”.
With time and patience you get the way of swinging the lightsaber to the timing of some games.
And that's it! I hope you like to feel “the force” within wooden clamps buttons and beer cans lightsaber
May the force be with you all guys!
Schematics, diagrams and documents
Code
Credits
Related products


Leave your feedback...