
Using Ibm's Watson For Ph And Ec Measurements
About the project
This will show how to monitor EC, pH, and temperature of a hydroponics setup and upload the data to IBM's Watson service. Watson is free to get started with. There are paid plans, but the free plan is more than enough for this project.
Project info
Difficulty: Easy
Platforms: Arduino, Everything ESP, Particle, Pycom, Raspberry Pi
Estimated time: 1 hour
Items used in this project
Hardware components

Story
Step 1: Getting the Parts
- Any ESP32 development board. This one seems reasonable, but any will work.
- An EC_Salinity Probe Interface board and a K1 conductivity probe. You can get them both at ufire.co.
- An ISE Probe Interface board and a pH probe also from ufire.co. You can save 10% by joining the GroupGets campaign.
- Some odds and ends like wires and USB cables.
Step 2: The Software
- I will assume you are familiar with Arduino, the Arduino IDE, and have it installed already. If not, follow the links.
- Next thing is getting the ESP32 platform installed. For some reason, this hasn't been simplified by the available platform management features the IDE has to offer, so you'll need to go to the github page and follow the appropriate installation instructions.
- Now for the libraries: From in the Arduino IDE, goto Sketch / Include Library / Manage Libraries...
- Search for and install 'EC_Salinity'.
- Search for and install 'PubSubClient'.
- Search for and install 'ISE Probe Interface'.
- Search for and install 'ArduinoJson' version 5.13.2.
Step 3: Making Connections
The ESP32 we are using has WiFi and BLE interfaces, so that just needs a power supply. You'll probably want a USB cable supplying power, but a battery is another option. Many ESP32s can be bought with battery charging circuitry already on the board.
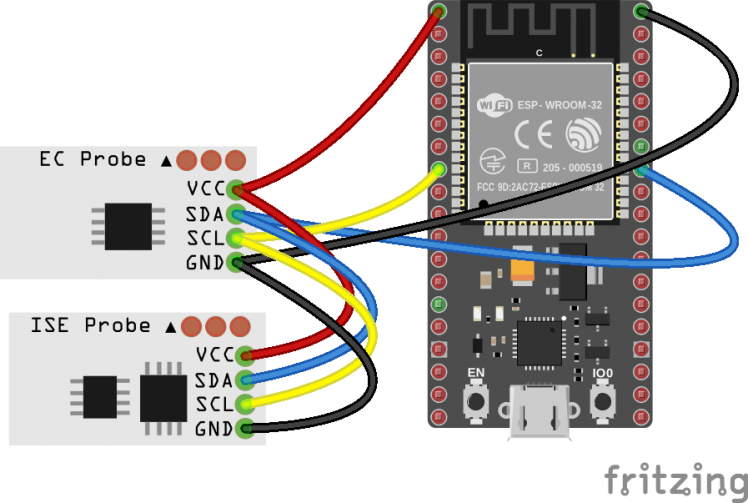
The uFire devices that we will be measuring EC, pH and temperature connect to the ESP32 by the I2C bus. With the ESP32, you can choose any two pins for I2C. Both devices will be on the same bus, so the SCL and SDA pins will be the same. If you look at the code (next step), you will see these two lines.
ISE_pH pH(19, 23);EC_Salinity mS(19, 23);
I decided to use pin 19 for SDA and pin 23 for SCL. So Connect the ESP32's 3.3v (or whatever the pin may be called on your particular board) to the EC uFire device's 3.3/5v pin, GND to GND, 19 to SDA, and 23 to SCL. Now connect the uFire pH board to the EC board, pin for pin. The pinout on your ESP32 may be different from the picture.
Step 4: Make an IBM Watson Account
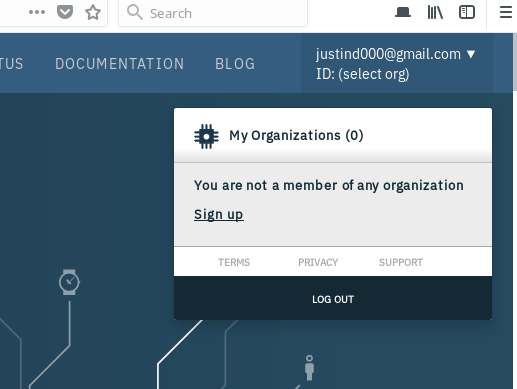
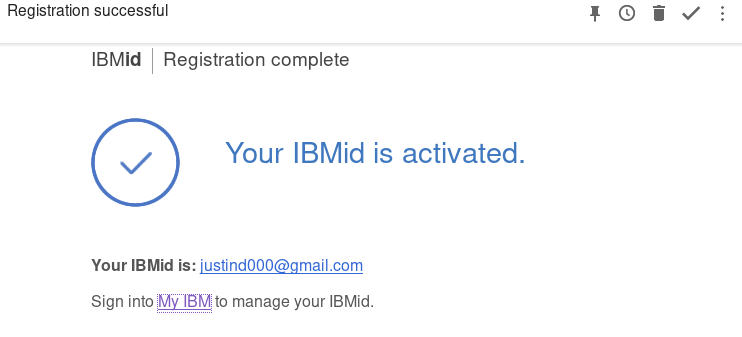
Go to the IBM Watson IoT Platform website and click 'SIGN IN' in the upper right corner. Click the link near the bottom to 'Create and IBMid'. Complete the registration process and you'll eventually find yourself on a mostly empty looking webpage. In the upper right corner, you'll see your email address, click it and you will see that it says you aren't a member of an organization. Click 'Sign up'.
You will find yourself at the IBM Cloud Login page. Click 'Login', and then on the next page, click 'SIGN UP'. Complete the form and then check your email. Head back to this page and install the 'Internet of Things Platform'.
Now head to the very first page, here, click your email address, and you should see an organization in the menu called 'Bluemix Free xxxxxx'. Take note of the six digit number/letter combination. You'll need it for later, it is your organization ID.
Now you can go to this link, click 'Internet of Things Platform-vr. On the next page, you'll see a 'Launch' button. I would copy that link for quicker access next time, it will be where everything is done from here on.
Step 5: Provision a Device
- You'll see a menu on the left side of the screen. Click the one that looks like a microprocessor labeled 'Devices'.
- In the upper middle of the screen, you'll see 'Browse', 'Action', and 'Device Types'. Select 'Device Types', and then '+ Add Device Type'.
- On the 'Add Device Type' screen, make a new device name it ESP32, click Next. Complete the additional information on the form if you want and then click 'Done'. On the next screen, click 'Register Devices'
- On the 'Register Devices' screen, you should see your device type, ESP32, already filled in and a black to enter a 'Device ID'. I'll call mine '0001'. Click 'Next'. Leave the authentication token blank and click 'Next' and then 'Done'.
- On the following screen, you will be given your one and only chance to copy the 'Authentication Token'. Copy it and also take note of the 'Organization ID', 'Device ID' and 'Device Type'. You'll need it for the next step.
- Keep that page open and go to the next step.
Step 6: Sketch

You can take a look at the source here.
- Copy the files into an Arduino project.
- Edit Watson.h.
- Change ssid and password to your WiFi network information.
- Change Organization_ID, Device_Type, Device_ID, and Authentication_Token to the information you got from the previous step.
- Upload it to your ESP32 and take a look at your new device on the IBM Watson site. Click the device and then 'State'. It should be showing you updating values. If it isn't working, you may find some useful information under 'Logs'.
Step 7: View the Data
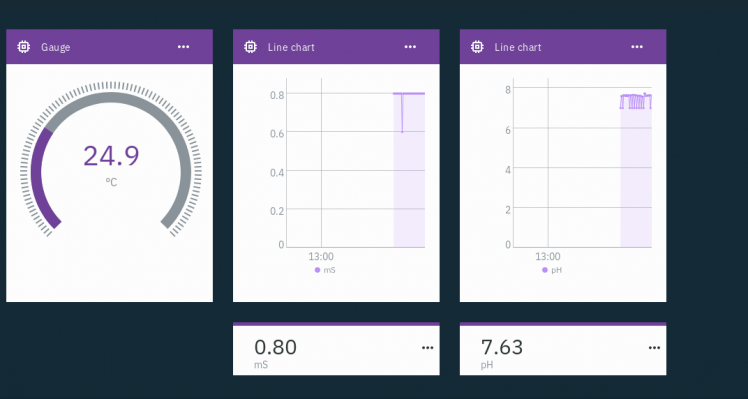
- On the IBM Watson IoT Platform page, click the very top left icon, the one with nine small dots labeled 'Boards'.
- Click '+ Create New Board', call it whatever you want, click 'Next' and then 'Done'.
- Open the newly created Board, then click '+ Add New Card'.
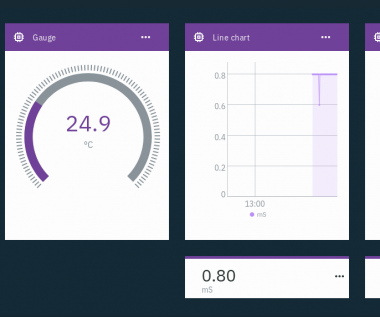
- I'll make a temperature visualization using the Gauge chart type.
- On the next page, select our device and click 'Next'
- Click 'Connect new data set' on the next page. In the 'Event' box, select 'status', then in the 'Property', you should see a listing of our data items, choose 'C'. Change the 'Type' to number and the 'Unit' to 'C', then 'Min' and 'Max' to 0 and 85. Click 'Next'.
- Change the size to 'S' or 'M' to actually see the gauge chart. 'Next' and then 'Submit'.
- Repeat the above steps for the other data items.
Credits

Related products


Leave your feedback...