
Getting Started With The Smartcar Platform

Made by platisd / Art / Automotive / Robotics / Sensors
About the project
A versatile & easy to use vehicle platform for hobby-grade projects: You focus on application logic and the library takes care of the rest.
Project info
Difficulty: Easy
Platforms: Arduino, Atmel, Everything ESP
Estimated time: 1 hour
License: Creative Commons Attribution CC BY version 4.0 or later (CC BY 4+)
Items used in this project
Hardware components


Software apps and online services
Story
Introduction to the platform
In this article I will illustrate how you can kickstart your vehicle-based project using the Smartcar library. The library will take care of controlling your motor and fetching >Turning software engineers into Makers".
The whole idea with the platform is you should be able to get things up and running fast and everything should "just-work" out of the box. This means once you set up your hardware and you know what pin controls what, you should be able to use everything with just a handful of high level and object oriented commands.
Let's see what that means in practice...
Getting started with the hardware
The library should be able to support any motor combination and way of steering (i.e. "like a tank" or "with a steering wheel) as well as plenty of common hobby-grade sensors to measure distance, heading and speed. In other words, if you can hook up the motors to a microcontroller, then you are good to go.
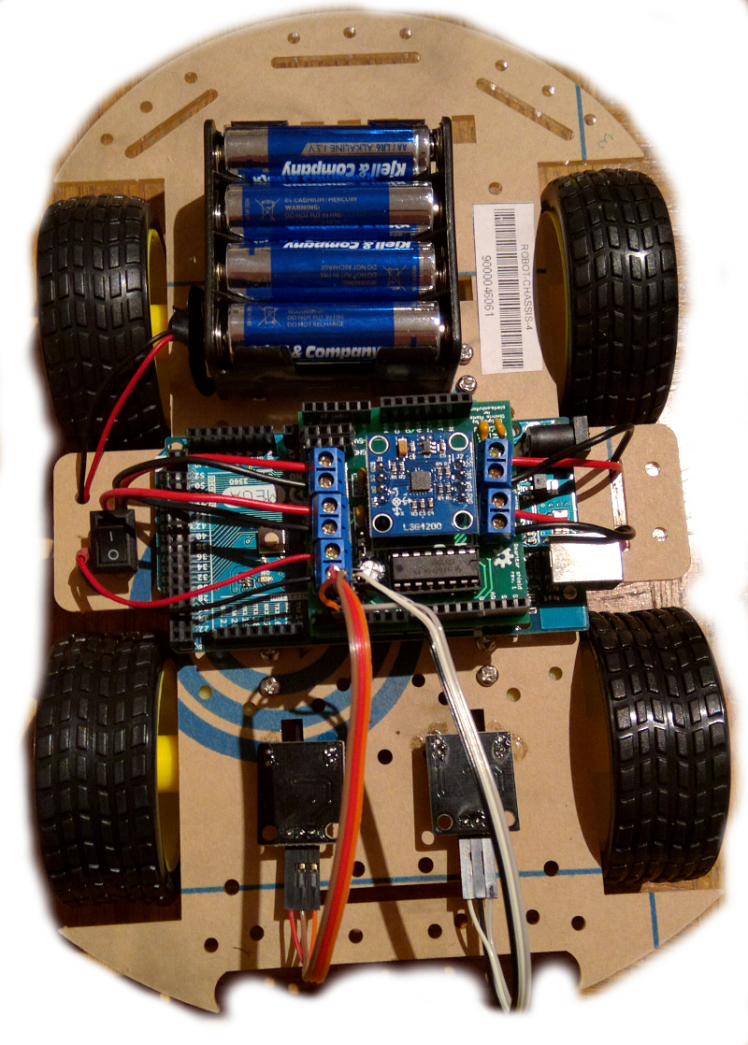
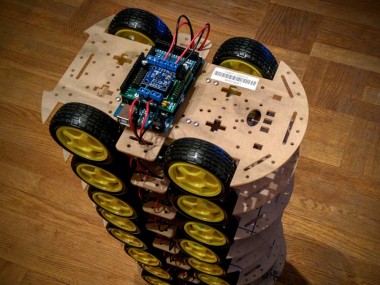
If you want to make your life easier, there is a reference hardware platform in the form of an Arduino shield. It offers sockets for 4 brushed DC motors, a GY-50 gyroscope and two odometers (speed encoders). I would personally suggest using the shield if you are planning to have two or four (connected in pairs) small-sized motors running the vehicle, but it is absolutely not a requirement.The software will in fact support any kind of motor. For example, the same library has been running on an Android Autonomous Vehicle which uses an Electronic Speed Controller (ESC) for throttling and a servo motor for steering or a Augmented-Reality enabled autonomous wheelchair that met the prime minister of China.
To sum up, get a miniature vehicle with any kind of motors and hook them up to an Arduino.
Getting started with the software
Getting started with the software is equally easy. First, you need to download the library. There are different ways to achieve that, but I would personally suggest you doing that via the Arduino IDE so you can be automatically notified whenever there is a new release.
- Open your Arduino IDE and get to the library manager: Sketch → Include library → Manage libraries
- In the search field, type in "Smartcar shield" and click on install. That was it!
Now let's get to the code.
To start working with the library you will need to include it in your sketch, so the first line should be:
#include <Smartcar.h>
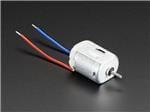
Then we need to instantiate the motors. Here things depend on your setup. I will use the programmatically most "complicated" motor (and perhaps the most common in hobby projects) which is a brushed DC motor. This kind of motor has two poles and their polarity controls the direction of movement while the duty cycle controls the speed. You should definitely use some kind of motor controller (e.g. the L293D H-bridge) and avoid providing power to the motor directly from the microcontroller pins.Next, you should note down which pin when set to HIGH makes each motor move to the direction that is "forward" for your setup, which one when set to HIGH spins the motor "backward" and which controls the speed.
int leftMotorForwardPin = 8;
int leftMotorBackwardPin = 10;
int leftMotorSpeedPin = 9;
int rightMotorForwardPin = 12;
int rightMotorBackwardPin = 13;
int rightMotorSpeedPin = 11;
BrushedMotor leftMotor(leftMotorForwardPin, leftMotorBackwardPin, leftMotorSpeedPin);
BrushedMotor rightMotor(rightMotorForwardPin, rightMotorBackwardPin, rightMotorSpeedPin);
Now that we are representing our motors in software, it is time to define how they steer the car. Specifically, there are two ways of doing so:
- Differential control - One motor on each side of the vehicle, driving it like a tank
- Ackerman control - One motor to control throttle and another for steering like a passenger vehicle
The most common for cheap setups with brushed DC motors, is differential control, however I have seen some ingenious Ackerman-like control with two brushed DC motors in inexpensive RC cars. Either way, determining how you control the vehicle with the motors in code, is trivial.
If you are using differential control:
DifferentialControl control(leftMotor, rightMotor);
And if you would be using Ackerman control, in which case you would have a throttle and a steering motor instead of "left and right":
AckermanControl control(steeringMotor, throttlingMotor);
We are almost ready! Now it is time to instantiate our vehicle. We want to keep things simple this time, so we will use the SimpleCar class. This class represents a very basic kind of vehicle, which is just able to move around.
SimpleCar car(control);
To set the speed, you need to call the setSpeed function. The argument in this case should be the percentage of speed that you want, where the sign of the argument determines the direction. To put it simply, if you enter -100 the car will start moving backwards at full speed, 80 will make the car move forward at 80% of the full speed and 0 will make the car stop. So if you want to move forward for 1 second at full speed, move backward for 2 seconds at half speed and then stop, your code overall should look like this:
#include <Smartcar.h>
int leftMotorForwardPin = 8;
int leftMotorBackwardPin = 10;
int leftMotorSpeedPin = 9;
int rightMotorForwardPin = 12;
int rightMotorBackwardPin = 13;
int rightMotorSpeedPin = 11;
BrushedMotor leftMotor(leftMotorForwardPin,leftMotorBackwardPin, leftMotorSpeedPin);
BrushedMotor rightMotor(rightMotorForwardPin, rightMotorBackwardPin, rightMotorSpeedPin);
DifferentialControl control(leftMotor, rightMotor);
SimpleCar car(control);
void setup() {
car.setSpeed(100);
delay(1000);
car.setSpeed(-50);
delay(2000);
car.setSpeed(0);
}
void loop() {
// put your main code here, to run repeatedly:
}
To steer the vehicle, simple call the setAngle function and supply an argument from -90 to 90 which represent degrees. The cool part is that this will work regardless of what kind of motor you have. For example, using car.setAngle(20) on a vehicle with a servo motor acting as a steering wheel, will turn the servo knob 20 degrees to the right. On the other hand, if you've got differential control, it will make the left side motors spin a faster than their right-side counterparts, resulting the car to turn right softly.
There are other types of Car classes which are able to utilize a heading sensor, odometers or both, but I will let you discover these yourselves. For example, you can use the cruise control feature and let the car maintain its speed regardless of disturbances (very useful when you want to move the car at low speeds) or rotate the car at certain degrees.
Last but not least, a plethora of sensors are supported out-of-the-box, such as the popular HC-SR04 and the SHARP infrared sensors. Let's see how easily you can control an HC-SR04 ultrasound sensor.
#include <Smartcar.h>
const int TRIGGER_PIN = 6; //D6
const int ECHO_PIN = 7; //D7
const unsigned int MAX_DISTANCE = 100;
SR04 front(TRIGGER_PIN, ECHO_PIN, MAX_DISTANCE);
void setup() {
Serial.begin(9600);
}
void loop() {
Serial.println(front.getDistance());
delay(100);
}
The example above will take measurements from an ultrasound sensor, attached to D6 and D7 pins, every 100 milliseconds and print it out over Serial. Simple, isn't it?
Conclusion
The Smartcar platform has been adopted by literally dozens of projects since 2015 with different hardware setups. I hope you will also find it useful and it will allow you to spend less time setting things up and more time in actual hacking.
The version 5 release, few days ago, introduced a highly object-oriented design which finally made the library truly hardware-agnostic and limited the room for errors by the users. It is also fully covered by unit tests, its examples are being built for various boards on CI/Travis and the documentation is automatically generated upon every commit.
Finally, check out the video accompanying the latest release which illustrates some of the new features and do not hesitate to contact me if you have any questions!
Schematics, diagrams and documents
Code
Credits
Related products


Leave your feedback...