
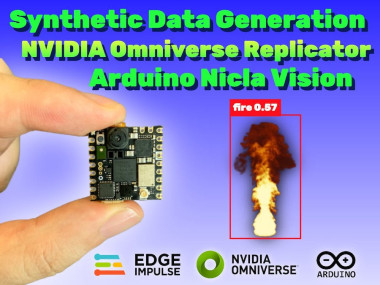
Fire Detector Using Omniverse Replicator And Arduino Nicla

Made by shakhizat / Artificial intelligence / Environmental Sensing / Robotics / Sensors / IoT
About the project
This is a proof-of-concept project that demonstrates the use of TinyML and synthetic dataset for fire detection.
Project info
Difficulty: Difficult
Platforms: Arduino, Edge Impulse, NVIDIA
Estimated time: 5 hours
License: GNU General Public License, version 3 or later (GPL3+)
Items used in this project

Story
Fire is a critical threat to humanity, and detecting it is vital. Current flame sensors have limitations in distance detection. To overcome this, I aim to create a lightweight and highly accurate fire detection system using the machine learning approach. This problem becomes very challenging when real-time data processing is necessary or when there are few datasets available for machine learning model. So, here synthetic datasets comes into play. This project provide a proof-of-concept for the advantages of using synthetic dataset in fire detection systems. Synthetic dataset is a data type that enables us to simulate situations that we may have limited chances of encountering in real life but need to address. It offers a highly cost-effective alternative to using real data. Synthetic datasets for training deep neural networks is increasingly used in computer vision. Different strategies, such as domain randomization exist to bridge the gap between synthetic training data and the real application.
This guide will walk you through the process of training an object detection model for fire detection system. Below diagram can better explain the overall architecture of the project.
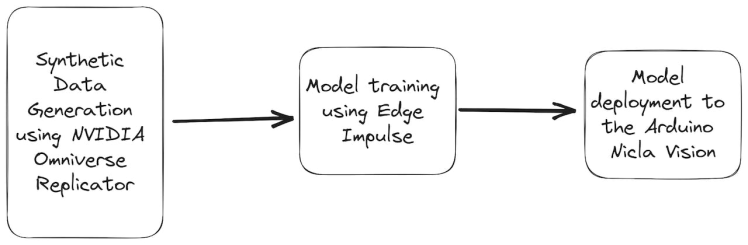
As shown in the figure above, Nvidia Omniverse tool can be utilized to create a synthetic dataset. This platform offers photorealistic rendering and dynamic scene creation, enabling the generation of highly realistic scenarios with varying environmental factors such as light, color, background, and more.
Then using Edge Impulse web platform, we can quickly train an ML model on the data in the cloud.
After completing the training process, the optimized fire detection model is deployed onto the Arduino Nicla Vision. The Nicla Vision's compact size and low power consumption make it ideal for edge computing applications. The model's deployment on this platform enables real-time fire detection, as it can process data locally without relying on cloud connectivity.
Potentially, the output of the machine learning model can be used to trigger an action, such as turning on a light or sending a notification to a smartphone.
Synthetic Data Generation using NVIDIA Omniverse Replicator
As with any machine learning task, the first most important task is to prepare the dataset. Omniverse Replicator is part of Nvidia Omniverse ecosystem, a virtual world simulation that is available within Omniverse Code application.
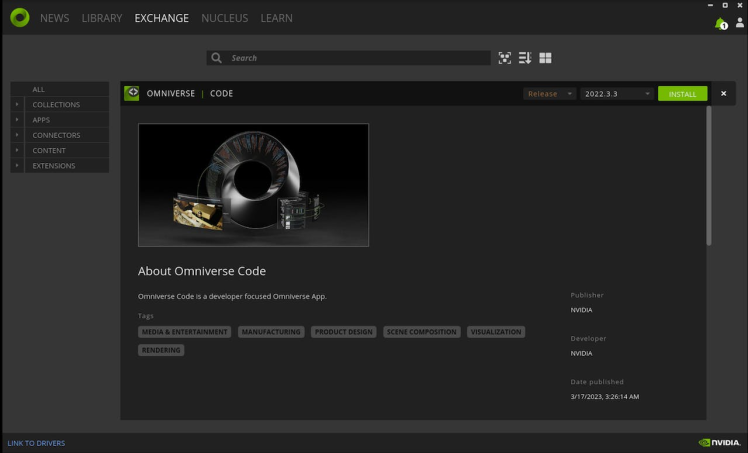
Download Omniverse from the official NVIDIA website by visiting this link. You have the option to download the application for either Windows or Linux operating systems from this link. After downloading Omniverse, navigate to the Exchange tab and proceed with the installation of Omniverse Code.
Then, create a local Nucleus Service, go to the Nucleus tab and follow the instructions provided there.
After setting up the Nucleus Service, navigate to the Library tab. From there, open Omniverse Code to begin using it.
You may encounter the following message:
2023-05-13 10:20:29 [Warning] [rtx.flow.plugin] rtx.flow.plugin failed to load Flow dynamic libraries (error: libnvflow.so: cannot open shared object file: No such file or directory)! Flow rendering will not be available. Try enabling the omni.flowusd extension.To resolve this issue, you should enable the omni.flowusd extension to autoload. This can be done in the Omniverse application settings. Find the omni.flowusd extension and ensure that the Autoload option is enabled or checked.
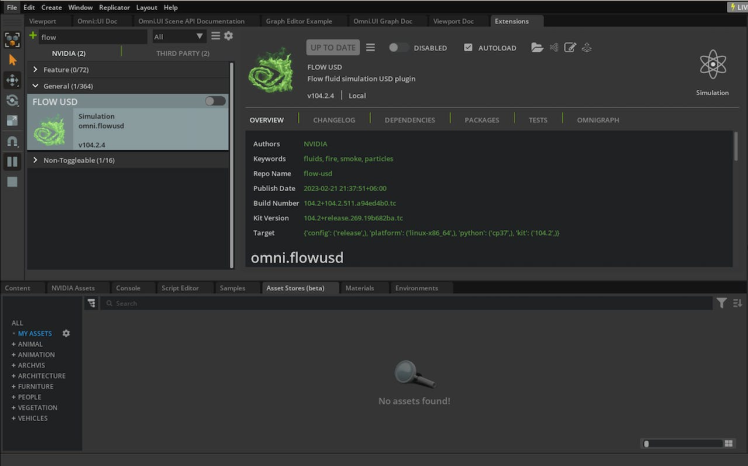
Save the settings and restart the Omniverse application.
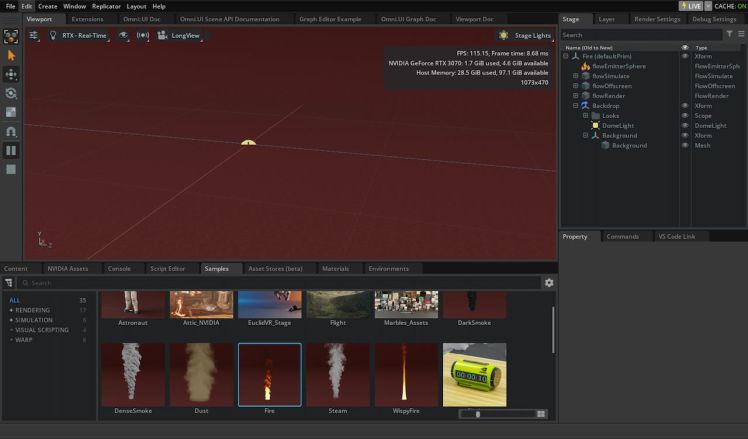
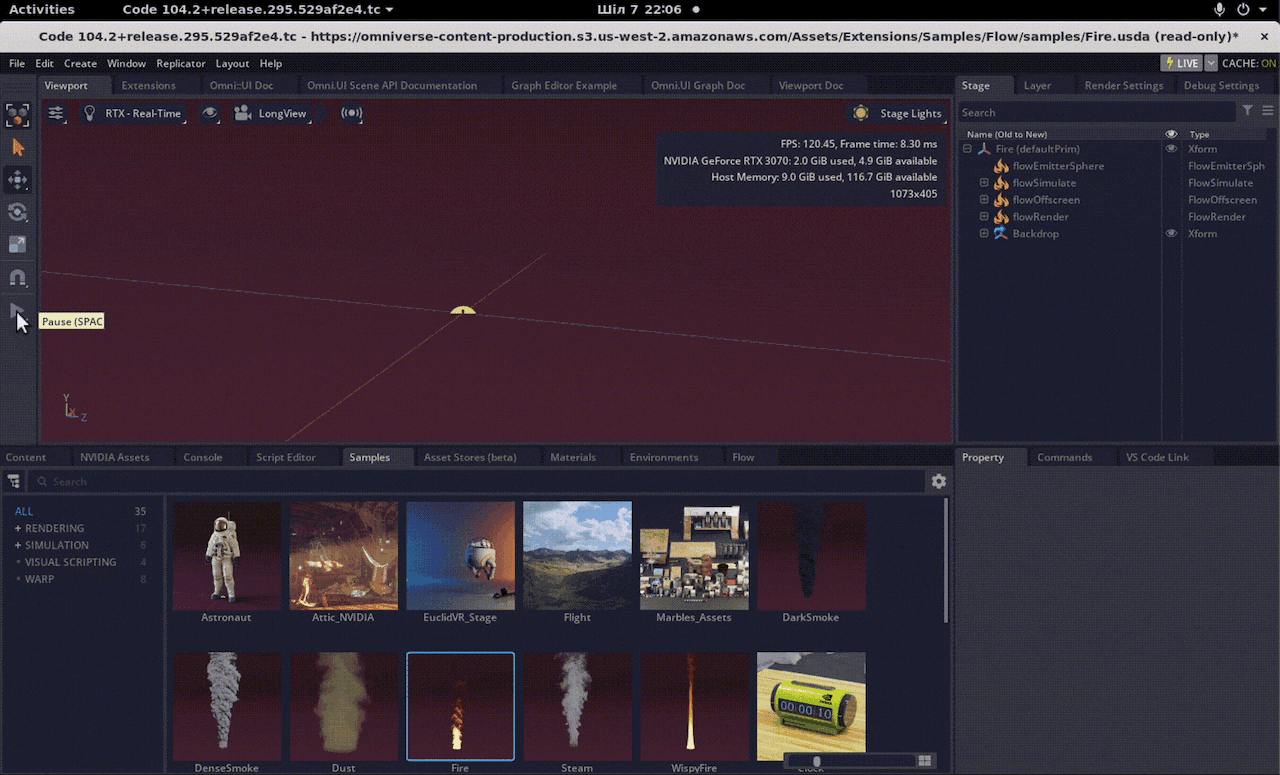
For testing purposes, you can find a fire sample from the Samples tab below and perform a drag-and-drop to add it to the scene. Then, click the "Play" button to initiate the fire animation.
Now, we are going to generate a synthetic dataset using Python code. We will have the opportunity to produce diverse data with two cameras that look at each frame from different angles.
Please navigate to the Script Editor and paste the following code snippet.
import omni.replicator.core as rep
import datetime
now = datetime.datetime.now()
# Camera1
focal_length1 = 25
focus_distance1 = 1200
f_stop1 = 0.4
pixel_resolution1 = (512, 512)
horizontal_aperture1 = 8.5
camera1_pos = [(0, 270, 500), (500, 270, 500), (-500, 270, 500)]
# Camera2 (Top view)
focal_length2 = 50
focus_distance2 = 5000
f_stop2 = 2.8
pixel_resolution2 = (512, 512)
horizontal_aperture2 = 8.5
camera2_pos = [(0, 1800, 0)]
with rep.new_layer():
# Camera1
camera1 = rep.create.camera(
position=(0, 0, 1200),
rotation=(0, -90, 0),
focal_length=focal_length1,
focus_distance=focus_distance1,
f_stop=f_stop1,
horizontal_aperture=horizontal_aperture1,
name='Camera1'
)
# Camera2
camera2 = rep.create.camera(
position=(0, 1500, 0),
rotation=(-90, 0, 0),
focal_length=focal_length2,
focus_distance=focus_distance2,
f_stop=f_stop2,
horizontal_aperture=horizontal_aperture2,
name='Camera2'
)
# Create a new render_product (1 for each camera)
render_product1 = rep.create.render_product(camera1, pixel_resolution1)
render_product2 = rep.create.render_product(camera2, pixel_resolution2)
# Create the floor plane
floor = rep.create.plane(
position=(0, 0, 0),
rotation=(0, 0, 0),
scale=(50, 50, 50),
semantics=[('class', 'floor')],
name='floor',
)
# Randomize the floor material
def random_Floor_Material():
floor_material = rep.randomizer.materials(
materials=rep.get.material(path_pattern="/Fire/Looks/*"),
input_prims=floor
)
return floor_material.node
rep.randomizer.register(random_Floor_Material)
with rep.trigger.on_frame(num_frames=300):
rep.randomizer.random_Floor_Material()
with camera1:
rep.modify.pose(look_at=(0, 0, 0), position=rep.distribution.sequence(camera1_pos))
with camera2:
rep.modify.pose(look_at=(0, 0, 0), position=rep.distribution.sequence(camera2_pos))
writer = rep.WriterRegistry.get("BasicWriter")
now = now.strftime("%Y-%m-%d")
output_dir = "fire_data_" + now
writer.initialize(output_dir=output_dir, rgb=True)
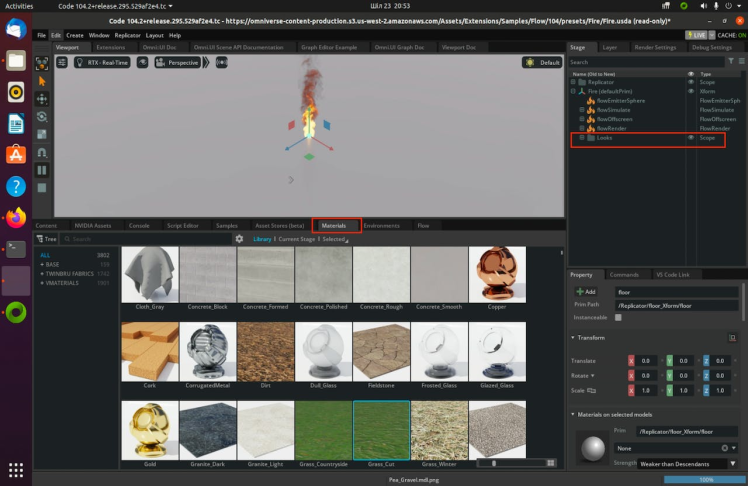
writer.attach([render_product1, render_product2])Drag and drop a fire element from the flow tab to the scene.
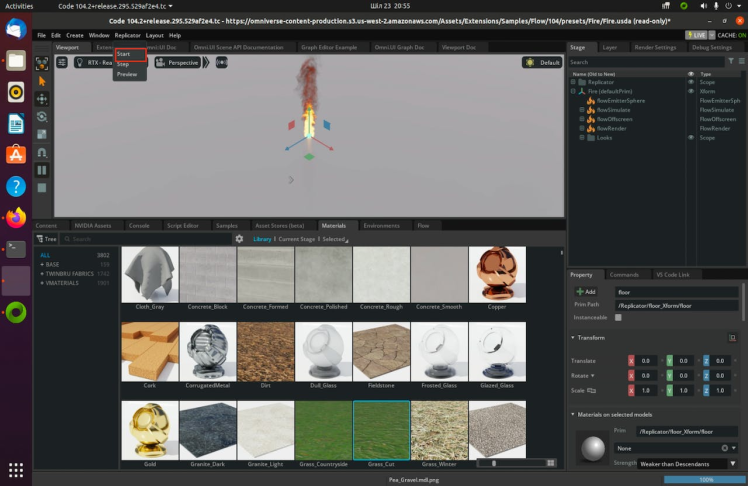
Click on the Run button in the Script Editor tab. Then, Drag and drop different materials from the materials tab to the scene.
In the above code, the writer is initialized and attached to the renderer to produce image outputs without annotations.
Now, let's start the synthetic data generation by clicking the start button.
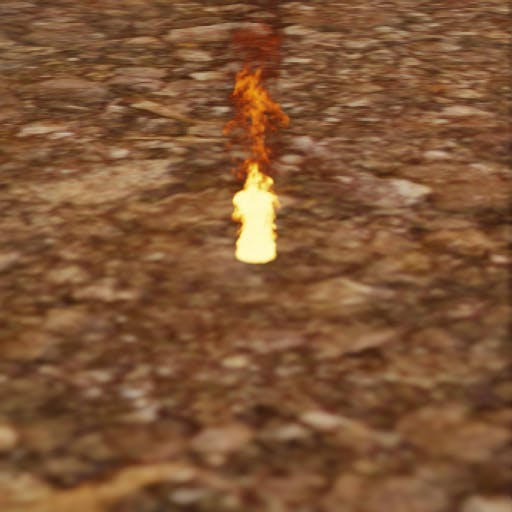
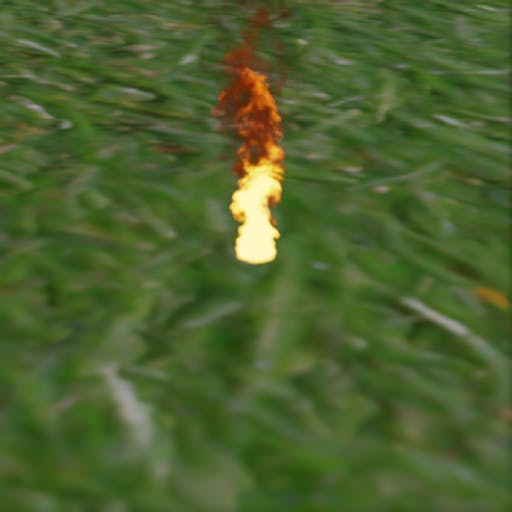
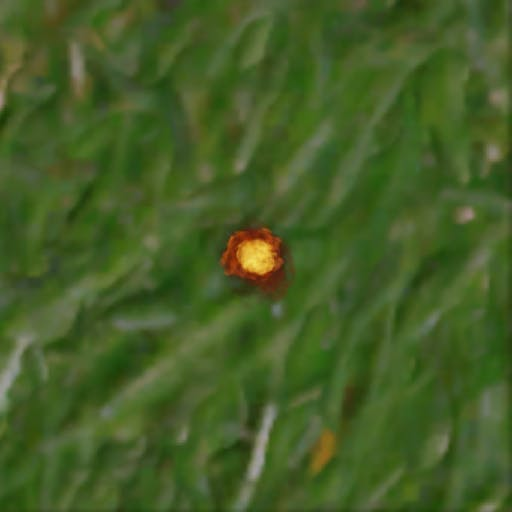
We are constantly changing the material of the floor, which will increase the variety of data. This leads to an increased diversity of the dataset. It will create two folders with the following names: RenderProduct_Replicator, RenderProduct_Replicator_01. The images will be populated in the img folder inside these respective folders.
Once your generation finished, you can view the synthetic images inside of these folders as shown below.
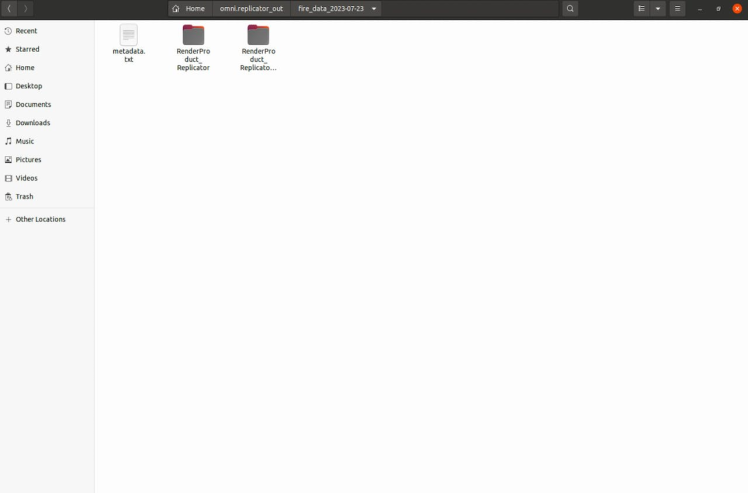
The folder "RenderProduct_Replicator" contains front-view images of the fire.
The folder "RenderProduct_Replicator_01" contains top-view images of the fire.

That concludes the process of synthetic dataset generation.
Since we don't have annotations with bounding boxes for the fire, we need to find a way to automate this process. This step will be covered in the next section.
Automatic Image Labeling Using Grounding DINO
It is well-known fact that, data labeling has become an extremely costly and time-consuming task. As per the NVIDIA forum, conducting output annotation for flow objects using internal tools in NVIDIA Omniverse Code is not feasible. Therefore, I have discovered a solution, utilizing groundbreaking zero-shot object detectors such as Grounding DINO, which has revolutionized the image labeling process.
Firstly, use the Python code below to copy the images from these folders into one.
import os
import shutil

def copy_images(source_folders, destination_folder):
    # Create the destination folder if it doesn't exist
    if not os.path.exists(destination_folder):
        os.makedirs(destination_folder)

    for folder in source_folders:
        # List all files in the source folder
        files = os.listdir(folder)

        for file in files:
            # Check if the file is an image (you can add more image extensions if needed)
            if file.endswith('.png'):
                source_file_path = os.path.join(folder, file)
                destination_file_path = os.path.join(destination_folder, file)

                # If the destination file already exists, rename the file
                counter = 0
                while os.path.exists(destination_file_path):
                    counter += 1
                    new_filename = f"{os.path.splitext(file)[0]}_{counter}.png"
                    destination_file_path = os.path.join(destination_folder, new_filename)

                # Copy the file to the destination folder
                shutil.copy(source_file_path, destination_file_path)

if __name__ == "__main__":
    source_folders  = ["./RenderProduct_Replicator/rgb/", "./RenderProduct_Replicator_01/rgb/"]
    destination_folder  = "./output_folder"
    copy_images(source_folders, destination_folder)
After completing the previous task, follow the steps described by Parthiban Marimuthu in "How I Did Automatic Image Labeling Using Grounding DINO."
Open the "generate_annotation" Jupyter notebook and execute the following code snippet. Make sure you have all the necessary dependencies and libraries installed in your Jupyter environment to successfully execute the code.

It will generate annotations in Pascal VOC format inside the export folder, as you can see below. The Pascal VOC (Visual Object Classes) format serves as a widely adopted standard for datasets in object detection. It stores images along with their corresponding annotations, including bounding box labels.
You can use the Python code below to check the correctness of the bounding box.
import cv2
import xml.etree.ElementTree as ET

def draw_bounding_box(image_path, annotation_path, output_path):
    # Load the image
    img = cv2.imread(image_path)

    # Parse the annotation file
    tree = ET.parse(annotation_path)
    root = tree.getroot()

    for obj in root.findall('object'):
        # Retrieve bounding box coordinates
        xmin = int(obj.find('bndbox/xmin').text)
        ymin = int(obj.find('bndbox/ymin').text)
        xmax = int(obj.find('bndbox/xmax').text)
        ymax = int(obj.find('bndbox/ymax').text)

        # Draw the bounding box on the image
        cv2.rectangle(img, (xmin, ymin), (xmax, ymax), (0, 255, 0), 2)

    # Save the image with bounding box
    cv2.imwrite(output_path, img)

if __name__ == "__main__":
    image_path = "path/to/your/image.jpg"
    annotation_path = "path/to/your/annotation.xml"
    output_path = "path/to/save/output_image.jpg"

    draw_bounding_box(image_path, annotation_path, output_path)
Below, you can see the images.
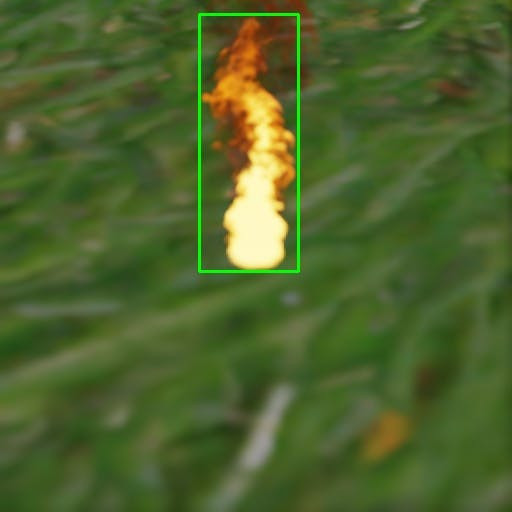
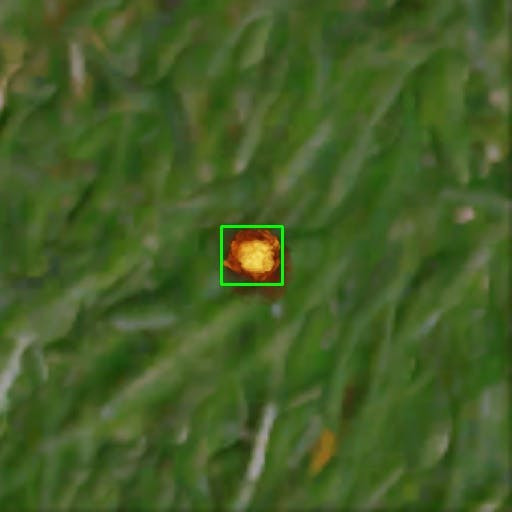
Image labeling is now complete. As you can see, the initial image labeling process can be completed within a few minutes by utilizing Grounding DINO zero-shot approach.
The next step will be to train the model for the fire detection system using Edge Impulse and finally deploy it to the Arduino Nicla Vision.
Training using Edge Impulse platform
Edge Impulse offers an end-to-end solution for deploying models on TinyML devices. The process begins with data collection using IoT devices, followed by feature extraction, model training, and finally, deployment and optimization for TinyML devices.
Create a directory structure as shown below.
.
├── annotations
│ ├── rgb_0000.xml
│ ├── rgb_0001.xml
│ ├── rgb_0002.xml
│ ├── rgb_0003.xml
│ ...
└── images
├── rgb_0000.png
├── rgb_0001.xml
├── rgb_0002.png
├── rgb_0003.png
├── rgb_0004.png
├── rgb_0005.png
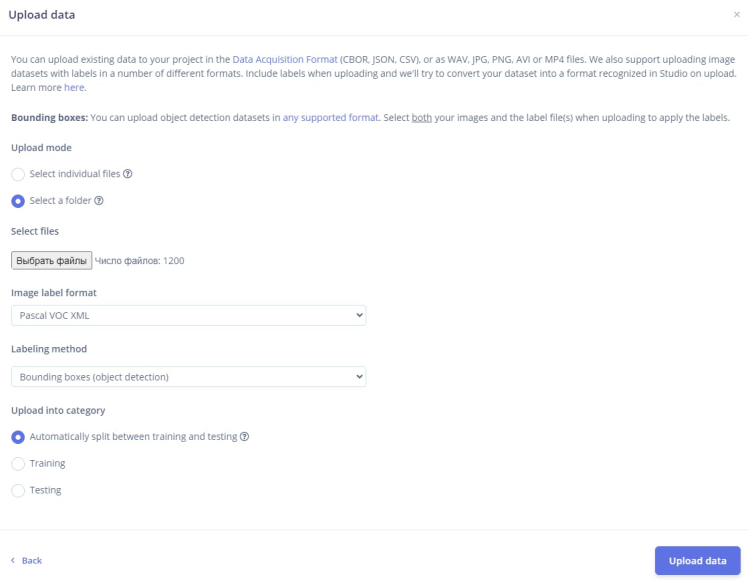
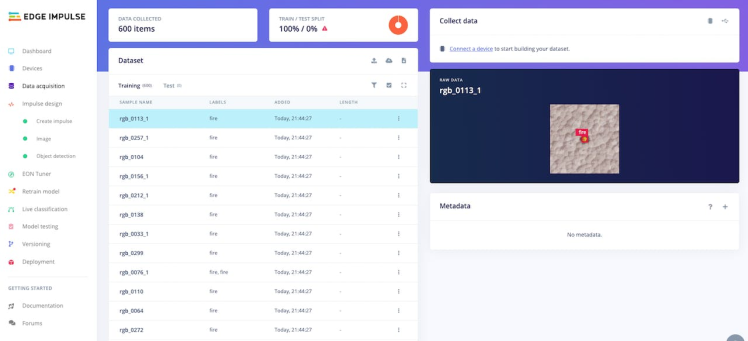
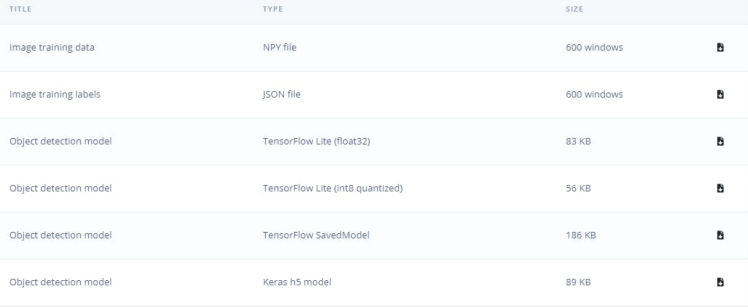
...Edge Impulse has recently released the functionality to upload datasets in the Pascal VOC fomat. In my case, I uploaded approximattely 600 images and annotation files.
You should ensure that each image is properly labeled and grouped into its respective fire class to avoid any confusion during training.

Once you have set up all of your classes and are happy with your datasets, it is time to train the model. Navigate to Create Impulse on the left navigation menu.

Finally, click Save Impulse.
Then navigate to Image. In this step you will generate the features from the input data. Features are unique properties that will be used by the classification algorithm to classify image.
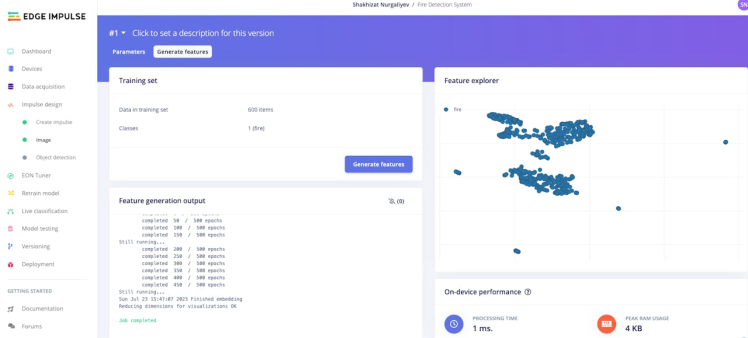
Once you're done playing with the feature explorer, click on the Object detection item in the left navigation menu.
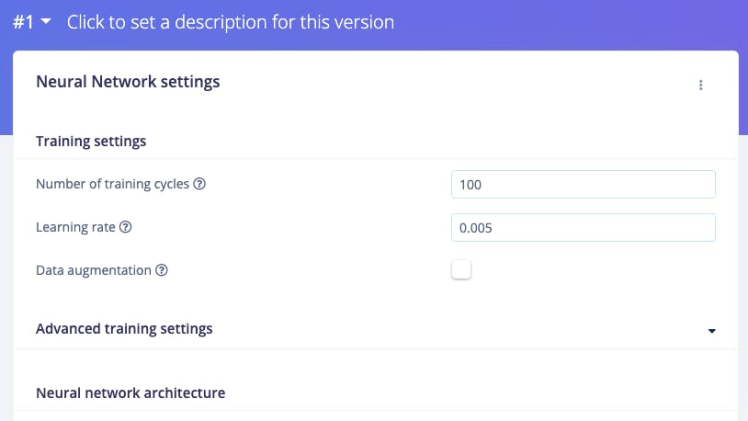
For this project, the number of training cycles was set to 100 and the learning rate was set to 0.005.
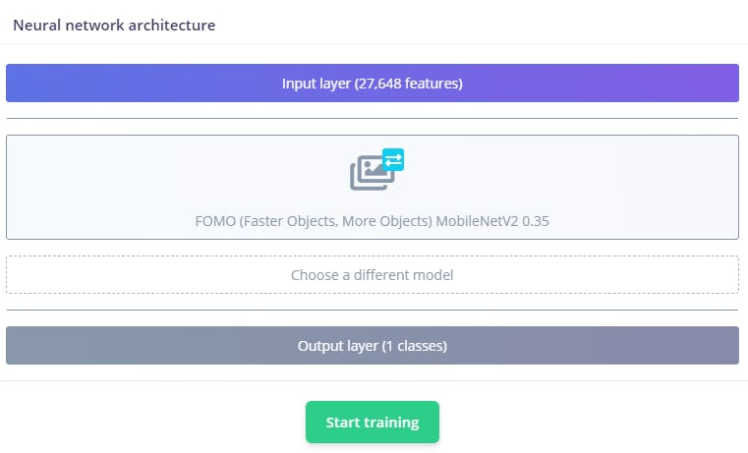
Edge Impulse developed FOMO, a TinyML deep learning architecture for the edge for real-time object detection on edge devices, makes it possible to run real-time object detection on devices with very small computation and memory capacity. Instead of detecting bounding boxes, FOMO predicts the object’s center. These models are designed to be <100KB in size and can be deployed to the Arduino Nicla Vision.
The neural network architecture has the following structure. It will be training our model using transfer learning based on the FOMO.
Train the model by pressing the Start training button. This process might take around 5-10 minutes, depends on your data set sizes. If everything goes correctly, you should see the following in the Edge Impulse.
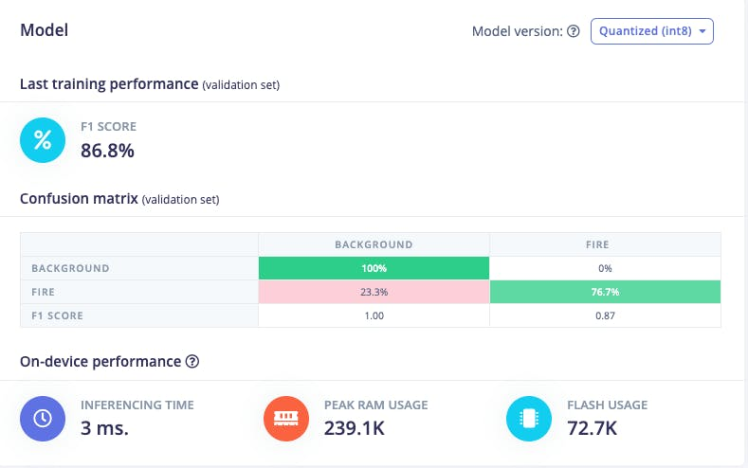
The F1 score is 86.8%, it means that the model has a good balance between precision and recall, and it is performing well on the this object detection task. Once you're happy with the performance of your model, it's time to deploy it to your Arduino Nicla Vision.
The size of our quantizedmodel is 56KB. The Arduino Nicla Vision has a usable memory limit of 400 kilobytes (KB) due to the processor utilizing 1 megabyte (MB) of random-access memory (RAM) for the operating system and the image buffer already. It has also 2MB of flash memory, and the 16MB of QSPI flash memory to give you extra storage.
Deploying the Trained Model to Arduino Nicla Vision
Arduino Nicla Vision can be programmed in MicroPython environment using OpenMV IDE. Download it.

Arduino Nicla Vision
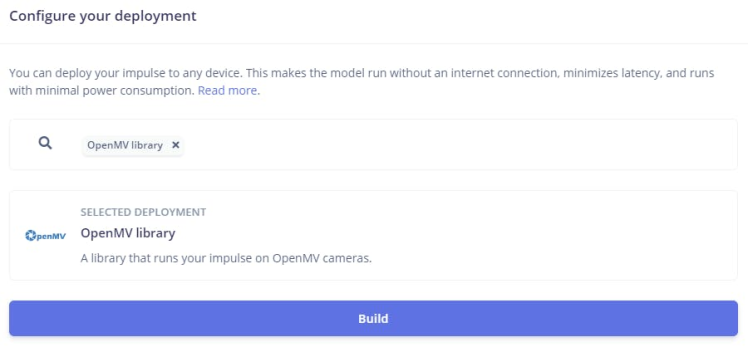
Then, go to the Deployment tab of the Edge Impulse. Click on the deployment options. In my case it is OpenMV library.
And at the bottom of the section, press the button Build. A zip file will be automatically downloaded to your computer. Unzip it.
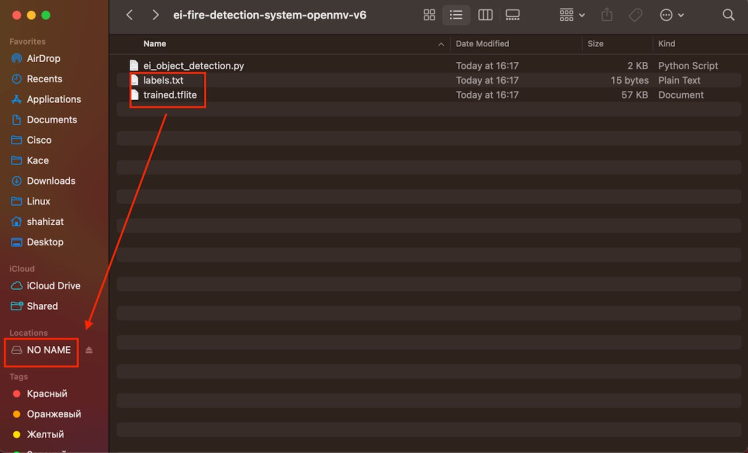
Connect the Arduino Nicla Vision device to your computer using a USB cable.
Copy the "labels.txt" and "trained.tflite" files to the root directory of the Arduino Nicla Vision device. Ensure that you paste the files directly into the main folder.
In the OpenMV IDE, locate the ei_object_detection.py python script, which handles the object detection process. And finally, run it.
Here is the demonstation video:
Be careful with lighters and matches, as the lighter was used solely for demonstration purposes.
I’ve taken synthetic training data and trained a model in the cloud using Edge Impulse platform, and we’re now running that model locally on our Arduino Nicla Vision board. Although it is just a proof of concept, the Fire Detection System presented here is a comprehensive solution that leverages the power of Nvidia Omniverse Replicator to create a synthetic dataset, utilizes the advanced machine learning capabilities of the Edge Impulse platform to develop a highly accurate fire detection model, and deploys it onto the Arduino Nicla Vision for real-time edge-based fire detection. This tutorial is a valuable resource for anyone interested in machine learning with Arduino Nicla boards.
You can further expand this project by adding triggers, such as turning on a light, activating a buzzer, or sending a notification to a smartphone!
Thank you for reading! If you're interested in learning more about synthetic data generation using Nvidia Omniverse, I highly recommend checking out the references mentioned in this post below.
References- Synthetic Data Generation with Isaac Sim Replicator
- The Unreasonable Effectiveness of Synthetic Data
- Synthetic Data Generation Using Omniverse
- Randomizer Examples
- Running Replicator Headlessly
- Synthetic Data Examples
- How I Did Automatic Image Labeling Using Grounding DINO
- Bootstrapping Object Detection Model Training with 3D Synthetic Data
Code
Credits
Related products


Leave your feedback...