
Edubot Explorer 2 : Real-world Control ??

Made by Aula_Jazmati / Automotive / Environmental Sensing / Robotics / Sensors / Vehicles
About the project
EduBot Explorer is an advanced robotics control system that bridges the gap between simulation and real-world robotics.
Project info
Difficulty: Difficult
Platforms: Raspberry Pi, SparkFun
Estimated time: 1 day
License: MIT license (MIT)
Items used in this project
Hardware components

View all
Story
EduBot Explorer is an advanced robotics control system that bridges the gap between simulation and real-world robotics. This project extends the basic simulation into a fully-functional system that can control physical EduBot robots through a sophisticated Python GUI interface with autonomous navigation capabilities.
https://www.hackster.io/aula-jazmati/edubot-explorer-1-interactive-robotics-simulation-835413
Key Features🤖 Real Robot Control
- Wi-Fi Socket-based Communication: TCP/IP connection between GUI and Raspberry Pi
- Bidirectional Data Exchange: Real-time command sending and sensor data reception
- Motor Control: Precise movement commands (forward, backward, left, right, stop)
- Live Sensor Monitoring: Distance, temperature, and battery level tracking
🧭 Autonomous Navigation System
- Interactive Target Selection: Click on map to set destination
- Path Planning: Automated route calculation to target
- Obstacle Avoidance: Built-in obstacle detection and navigation
- Real-time Position Tracking: Live robot position updates
🎮 Advanced User Interface
- Compact Design: Optimized layout for better usability
- Connection Management: Easy robot connection setup
- Sensor Dashboard: Real-time environmental data display
- Command Logging: Complete history of robot operations
System Architecture Overview
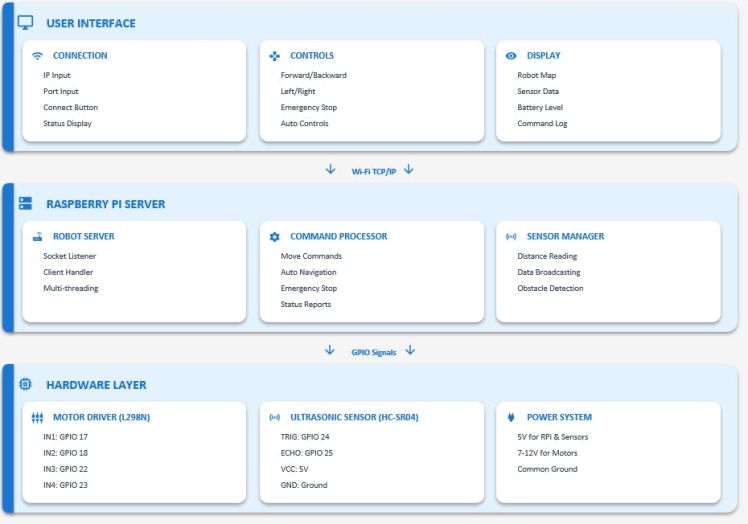
System Architecture Overview
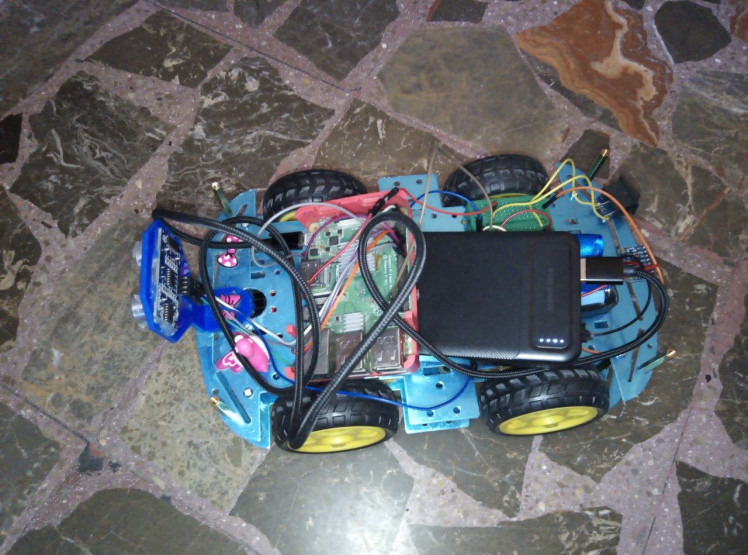
Raspberry Pi Setup
- Raspberry Pi (3/4/Zero)
- Motor Driver (L298N or similar)
- 2x DC Motors with wheels
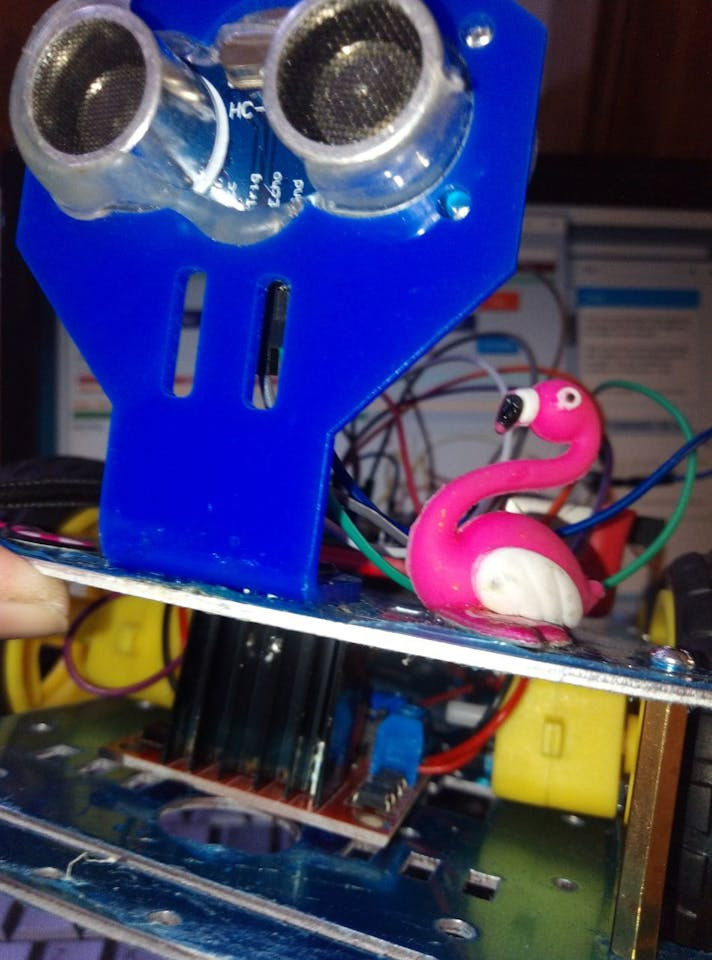
- HC-SR04 Ultrasonic Distance Sensor
- 5V Power Supply
- Jumper Wires and Breadboard
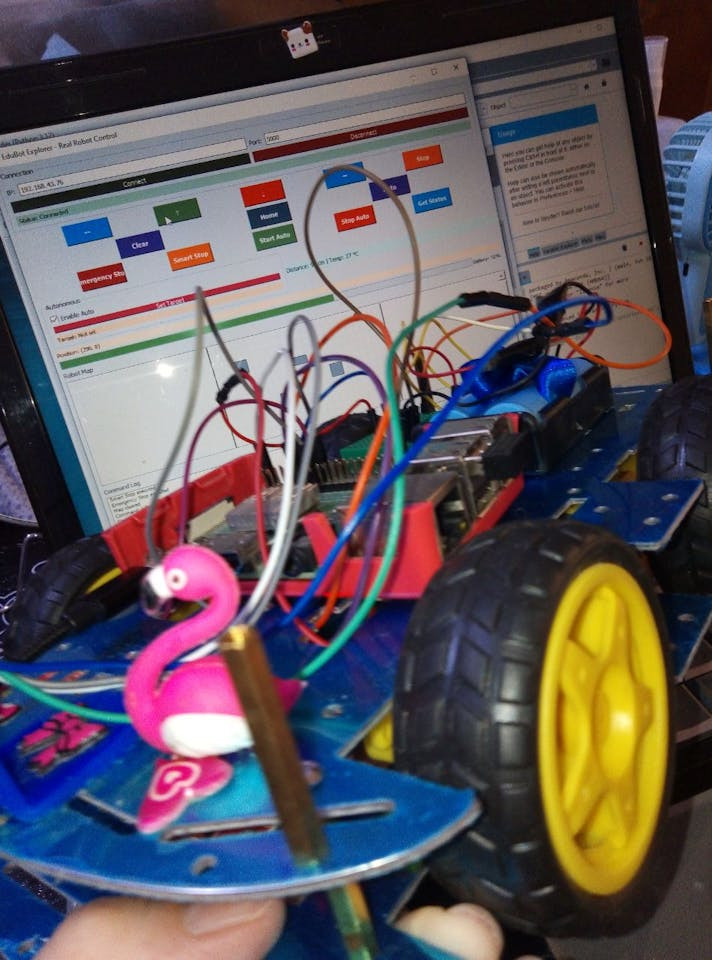
1 / 2 • EduBot
EduBot
EduBot & GUI
Wiring Configuration
# Motor Connections
MOTOR_LEFT_FORWARD = 17
MOTOR_LEFT_BACKWARD = 18
MOTOR_RIGHT_FORWARD = 22
MOTOR_RIGHT_BACKWARD = 23
# Sensor Connections
TRIGGER_PIN = 24
ECHO_PIN = 25
┌─────────────────┐    ┌─────────────────┐    ┌─────────────────┐
│   RASPBERRY PI  │    │   L298N DRIVER  │    │     MOTORS      │
│                 │    │                 │    │                 │
│ GPIO17 ────────►│ IN1│                 │OUT1│┌─────────────┐  │
│ GPIO18 ────────►│ IN2│                 │OUT2││  LEFT MOTOR │  │
│ GPIO22 ────────►│ IN3│                 │OUT3│└─────────────┘  │
│ GPIO23 ────────►│ IN4│                 │OUT4│┌─────────────┐  │
│ 5V     ────────►│ VCC│                 │    ││ RIGHT MOTOR │  │
│ GND    ────────►│ GND│                 │    │└─────────────┘  │
└─────────────────┘    └─────────────────┘    └─────────────────┘
1 / 3 • The first step in designing FlamingoTown 🦩😄
The first step in designing FlamingoTown 🦩😄
Data Flow Analysis
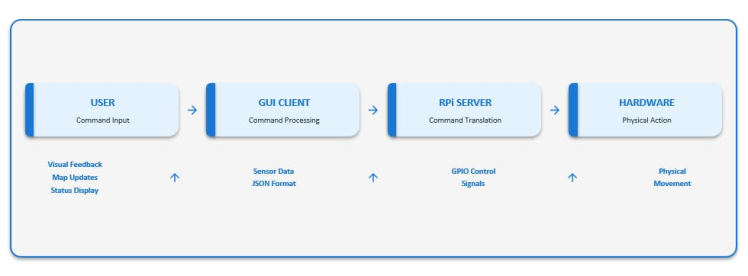
Data Flow Analysis
System Components
1. Robot Server (Raspberry Pi)
class RealEduBot:
"""Hardware abstraction layer for physical robot"""
- Motor control functions
- Sensor data collection
- GPIO management
class RobotServer:
"""TCP server for handling multiple clients"""
- Socket communication
- Command processing
- Automatic sensor broadcasting
Robot Server Test
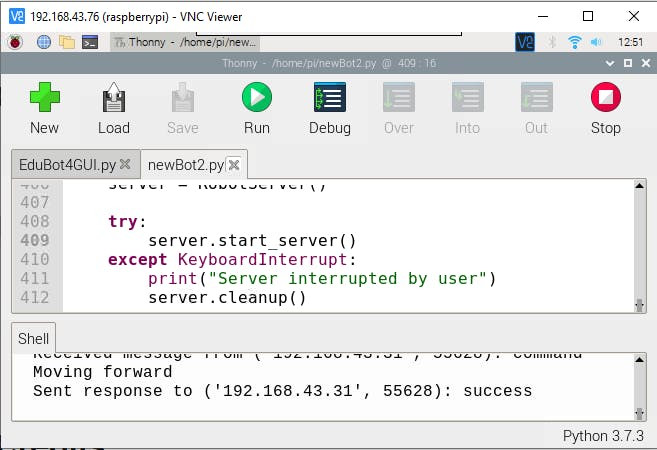
Robot Server Test
2. GUI Client (Desktop)
class RobotConnection:
"""Network communication handler"""
- Connection management
- Command sending
- Data reception
class EduBotExplorer:
"""Main application interface"""
- Interactive map
- Autonomous navigation
- Real-time monitoring
GUI Test
GUI Test
Installation & Setup
Step 1: Raspberry Pi Setup
# Install required packages
sudo apt update
sudo apt install python3-pip
pip3 install RPi.GPIO
# Clone the project
https://github.com/aula9/EduBot-Explorer2
# Run the robot server
python3 robot_server.py
Step 2: Desktop Application
# Install dependencies
pip install PyQt5
# Run the GUI application
python edubot_gui.py
Step 3: Network Configuration
1. Find Raspberry Pi IP address:
hostname -I2. Update GUI connection settings with correct IP
3. Ensure both devices are on same network
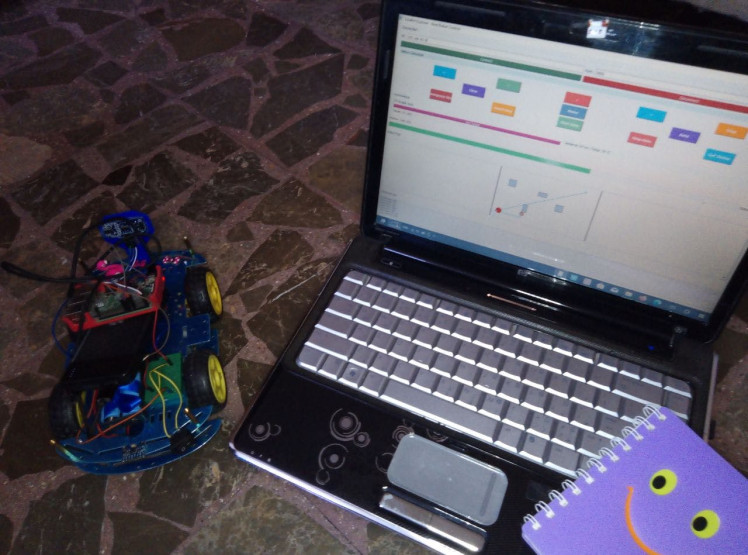
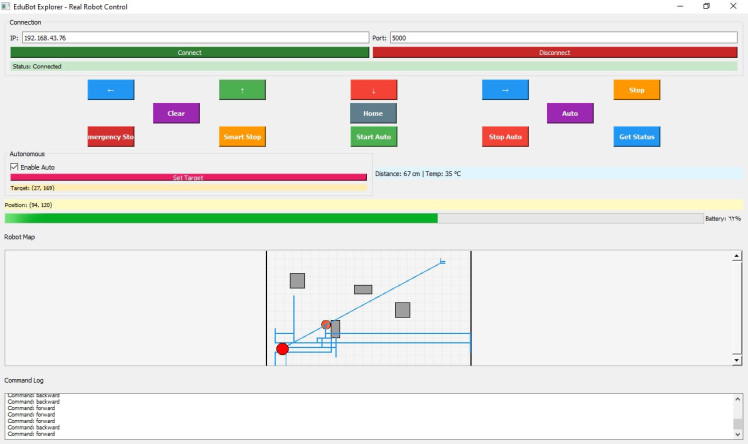
Usage Instructions
Basic Operation
1. Connect to Robot: Enter Raspberry Pi IP and click "Connect"
2. Manual Control: Use arrow buttons for direct control
3. Set Target: Click "Set Target" and click on map for destination
4. Autonomous Mode: Enable auto mode for automated navigation
Direct Control Test
Advanced Features
- Emergency Stop: Immediate halt of all operations
- Path Clearing: Remove previous trails and targets
- Home Return: Return robot to starting position
- Sensor Monitoring: Live distance and temperature readings
Technical Implementation
Communication Protocol
{
"type": "command",
"command": "move",
"data": {
"direction": "forward",
"distance": 8.0
}
}
Autonomous Navigation Algorithm
def autonomous_move(self):
dx = self.target_x - (self.robot_x + 7)
dy = self.target_y - (self.robot_y + 7)
distance = math.sqrt(dx*dx + dy*dy)
if distance < 10:  # Target reached
return
# Normalize and apply movement
dx = dx / distance * 4
dy = dy / distance * 4
self.move_robot(dx, dy, "autonomous")
Applications & Learning Outcomes
Educational Applications
- Robotics Programming: Hands-on experience with real hardware
- Network Communication: TCP/IP socket programming
- Sensor Integration: Working with ultrasonic and environmental sensors
- Autonomous Systems: Path planning and navigation algorithms
Technical Skills Developed
- Python programming with PyQt5
- Raspberry Pi GPIO control
- Client-server architecture
- Real-time data processing
- GUI application development
Troubleshooting
Common Issues
1. Connection Failed: Check IP address and network connectivity
2. GPIO Errors: Verify wiring and pin assignments
3. Motor Issues: Check power supply and motor connections
4. Sensor Inaccuracies: Ensure proper sensor placement and calibration
Debugging Tips
- Enable verbose logging in both server and client
- Check Raspberry Pi system resources
- Verify all dependencies are installed
- Test individual components separately
- Precise Localization: Researching Rotary Encoders + IMU integration for better movement tracking
- Advanced Navigation: Developing smarter obstacle avoidance algorithms
- Enhanced Simulation: Improving position accuracy and environmental awareness
Current Status: Prototyping and testing phase - following a practical, step-by-step implementation approach.
Progress updates shared regularly as features are validated and stabilized.
Built with ❤️ for the robotics education community
Code
Credits
Related products


Leave your feedback...