
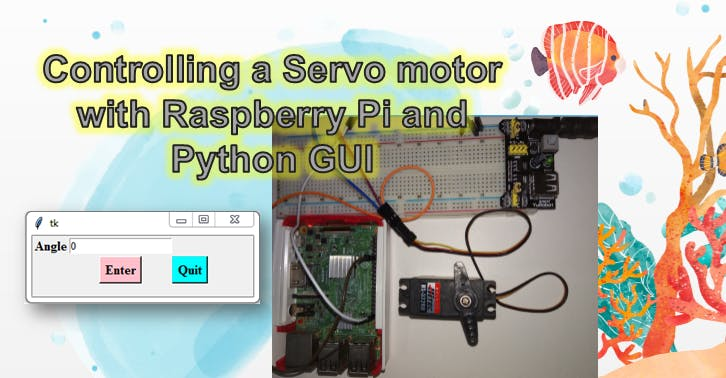
Controlling A Servo Motor With Raspberry Pi And Python Gui

Made by Aula_Jazmati / Automotive / Home Automation / Robotics / IoT
About the project
In this tutorial we are going present how to precisely control a servo using the Raspberry Pi and Python TK GUI.
Project info
Difficulty: Moderate
Platforms: Adafruit, Raspberry Pi
Estimated time: 1 hour
License: GNU General Public License, version 3 or later (GPL3+)
Items used in this project
Hardware components

Story
Introduction:
In this tutorial we are going present how to precisely control a Servo using the Raspberry Pi, and Python TK GUI.
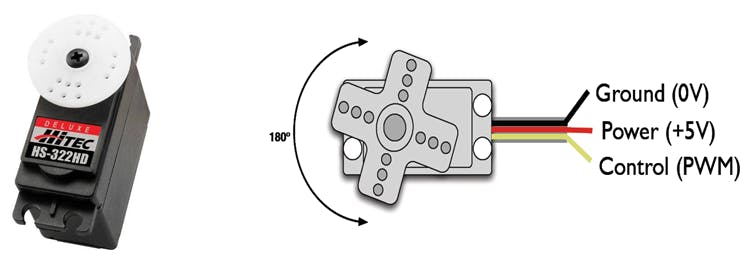
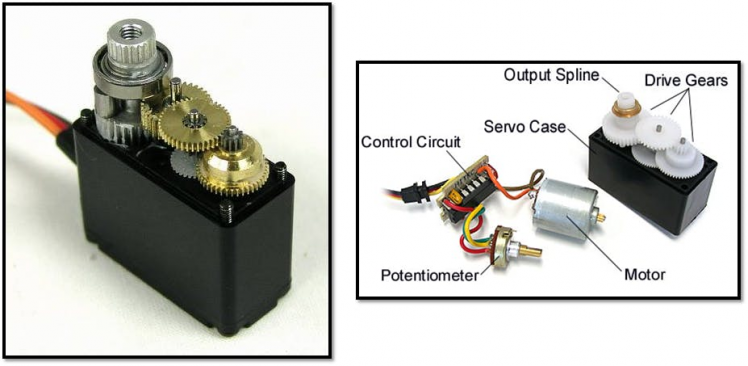
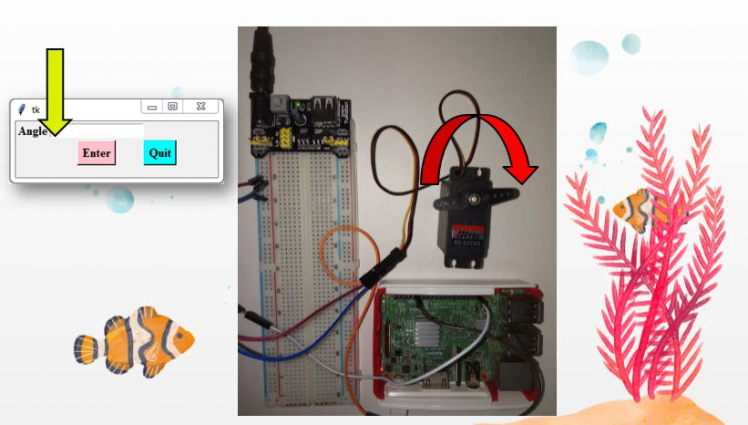
A Servomotor, or servo, is a small device that has an output shaft. This shaft can be positioned to specific angular positions by sending the servo a coded signal. As long as the coded signal exists on the input line, the servo will maintain the angular position of the shaft. As the coded signal changes, the angular position of the shaft changes.
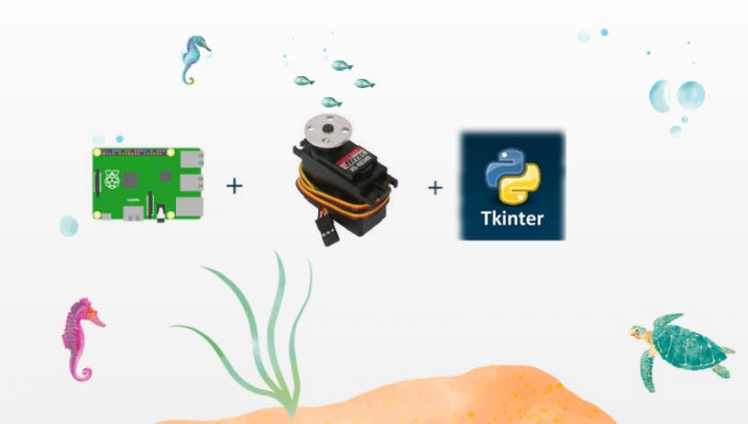
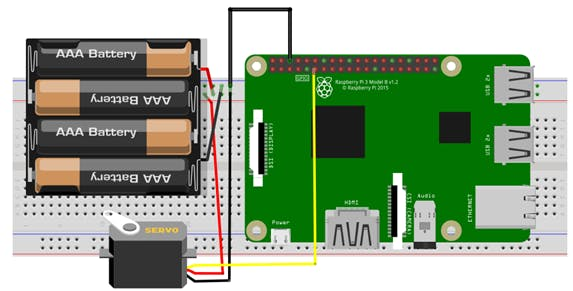
For this project you will need the following equipment:
- Raspberry PI
- Servo motor.
- Breadboard.
- Jumper Wires.
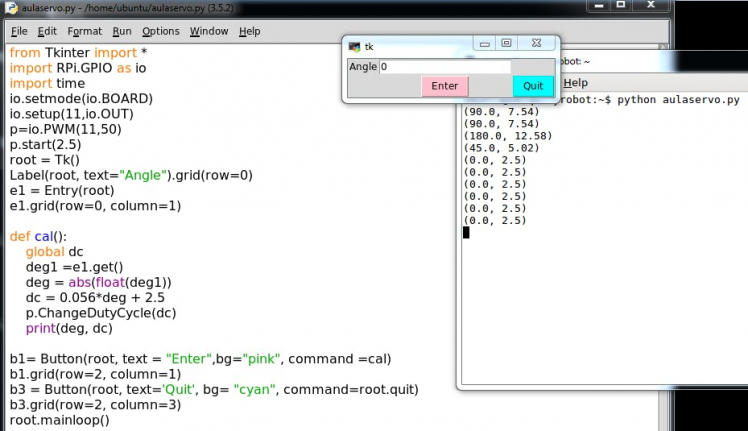
To control the servo motor from the Raspberry Pi we are going to use the PWM module in RPi.GPIO.

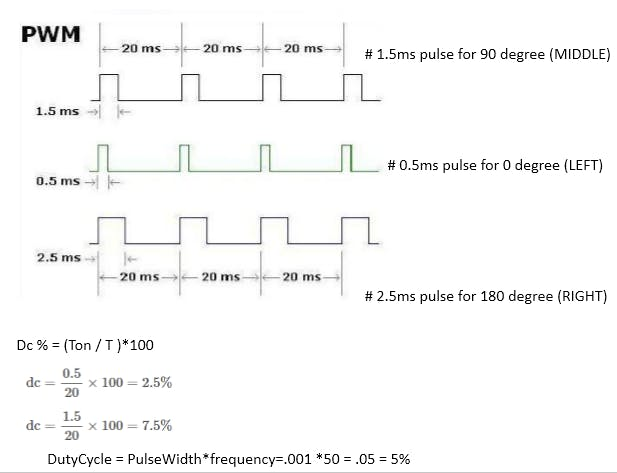
To do the linear equation I need two points. Well, I know that for a desired angle of 0, I should apply a DutyCycle of 2.5. This would be the point (0, 2.5). Now I also know that for a desired angle of 180, I should apply a DutyCycle of 12.5. This would be the point (180, 12.5). We now have two points and can calculate the equation of the line. (Remember, play with your servo... your numbers might be slightly different than mine, but the methodology below will work if you use your two points)
Remember slope of a line will be:
m=(y2-y1)/(x2-x1)=(12.5-2.5)/180-0)=10/180 = 1/18
We can now get the equation of the line using the point slope formula.
y-y1=m(x-x1)
y-2=1/18*(x-0)
y = 1/18*x + 2.5
Putting in our actual variables, we get
DutyCycle = 1/18* (DesiredAngle) + 2.5
Now to change to that position, we simply use the command:
pwm.ChangeDutyCycle(DutyCycle)
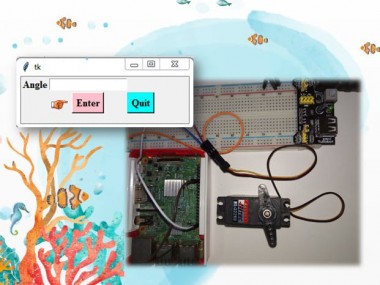
Python TkinterYou can start Python3 from the command line
(with python3) then importtkinter.
If you get an error message then exit out of Python3 and call
sudoapt-get install python3-tk to install it.
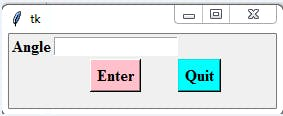
- Entry widgets are the basic widgets of Tkinter used to get input, i.e. text strings, from the user of an application. This widget allows the user to enter a single line of text. If the user enters a string, which is longer than the available display space of the widget, the content will be scrolled. This means that the string cannot be seen in its entirety. The arrow keys can be used to move to the invisible parts of the string. If you want to enter multiple lines of text, you have to use the text widget.
- An entry widget is also limited to single font.The syntaxof an entry widget looks like this: w =Entry(master, option,... )
- "master" represents the parent window, where the entry widget should be placed. Like other widgets, it's possible to further influence the rendering of the widget by using options. The comma separated list of options can be empty.
- The Button widget is a standard Tkinter widget, which is used for various kinds of buttons. A button is a widget which is designed for the user to interact with, i.e. if the button is pressed by mouse click some action might be started. They can also contain text and images like labels.
References:
https://www.youtube.com/watch?v=SGwhx1MYXUs
https://learn.adafruit.com/adafruits-raspberry-pi-lesson-8-using-a-servo-motor/servo-motors
https://www.youtube.com/watch?v=ddlDgUymbxc
https://www.oipapio.com/question-6863196
https://rpi.science.uoit.ca/lab/servo/

Schematics, diagrams and documents
Code
Credits
Related products


Leave your feedback...