
Cellular Iot Network Creator Kit With Blues

Made by ShebinJoseJacob / Environmental Sensing / Home Automation / Productivity / Sensors / IoT
About the project
Crafting Connectivity: Empowering Your World with Cellular IoT.
Project info
Difficulty: Expert
Platforms: Arduino, Google, Seeed Studio, Blues Wireless, Pimoroni
Estimated time: 3 weeks
License: GNU General Public License, version 3 or later (GPL3+)
Items used in this project
Hardware components

View all
Hand tools and fabrication machines
Story
Introduction
Introducing the Cellular IoT Network Creator Kit: a revolutionary leap into a world where connectivity isn't just seamless but effortlessly customizable. Picture a realm where every device becomes a node, orchestrating a symphony of real-time data collection and exchange.
But here's the game-changer – this isn't just for tech wizards; it's for anyone eager to explore the Internet of Things. And what sets it apart? It's all about simplicity. No coding wizardry or tech mastery is required. It's about unboxing, connecting, and stepping into the universe of IoT.
Imagine plugging in the gateway like any USB device. The sensors? They're ready to capture the world around you, powered by batteries. Setting up? It's like connecting dots or painting a picture with numbers. And coding? Not your forte? No worries.
Think of effortlessly linking the gateway to the cloud, by just powering it up. The sensors? They practically set up on their own, seamlessly connecting to the gateway. It's tech at your fingertips, transforming your environment effortlessly.
Each node is independent, with its own identity. Picture lights adjusting as you enter a room or machines optimizing productivity, all at your command. It's like conducting your symphony of smart devices.
And here's the real kicker: the dashboard. A central hub where you not only monitor sensor data but control devices with a simple touch. It's your canvas to craft a tailor-made experience.
In this world, expertise isn't a requirement. The Cellular IoT Network Creator Kit opens doors to smart living and innovation without complexity. It's your passport to an unlimited future where connectivity is fluid, and innovation is boundless. Welcome to tomorrow's world – simplified, connected, and waiting for you to explore. Welcome to the Cellular IoT Network Creator Kit.
Demo Video
Getting Started - How To Setup Your Own IoT Network
Before diving into the intricate details of constructing your Cellular IoT Network Creator Kit, let's begin by exploring its core components and how to set them up so that you can read and visualize data from the sensor nodes and control your actuator nodes from the dashboard. Understanding these basics will pave the way for a smoother and more comprehensive setup process.
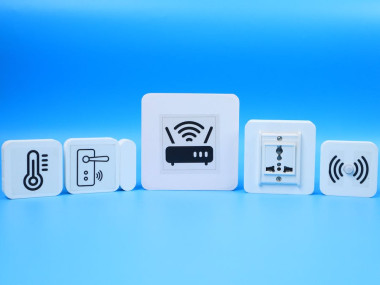
Kit Contents
The current version of the kit comes with five things,
- The Gateway
- An Environmental Sensor Node
- A Motion Sensor Node
- A Door Sensor Node
- A Smart Plug Node
We'll understand how each of them works later in this article. Now let's focus only on setting up the IoT network.
Setup Your IoT Network
The kit comes in such a way that all the codes are preinstalled on the boards, you just need to turn on the gateway as well as the nodes and they create an IoT network instantly. All you have to do is set up the dashboard to connect the gateway and sensors to the dashboard.
To do that follow these steps,
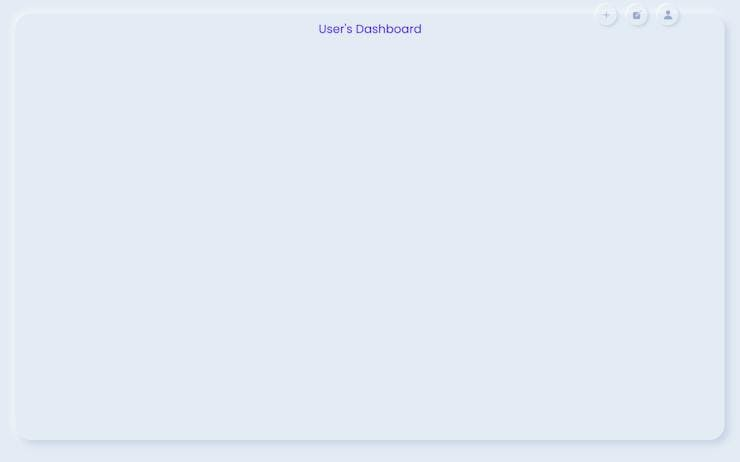
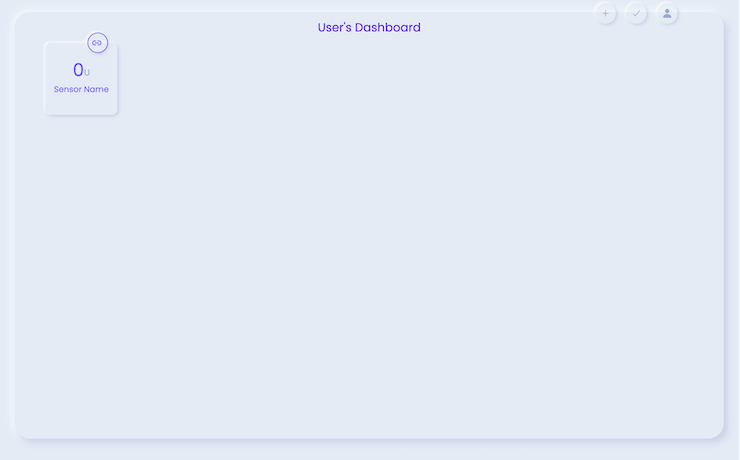
- Accessing the Modular IoT Dashboard: Open a web browser and navigate to the Modular IoT Dashboard. Upon arrival, you will see a blank dashboard interface.
- Adding Widgets to the Dashboard: Utilize the '+' icon on the landing page to add widgets to your dashboard. Widgets are graphical elements that display data from the connected nodes.
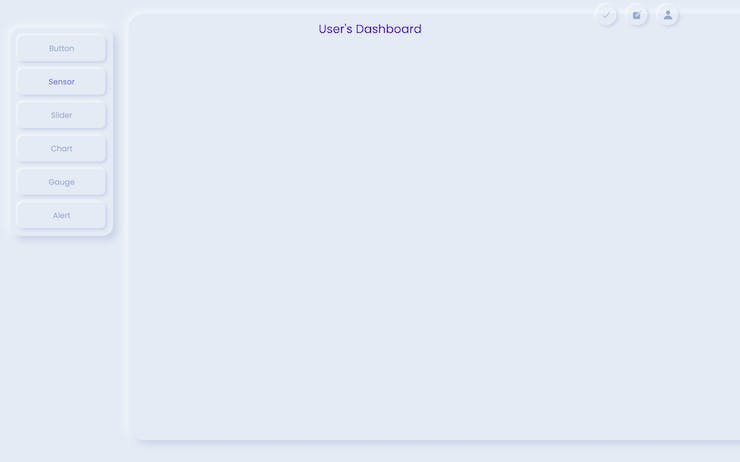
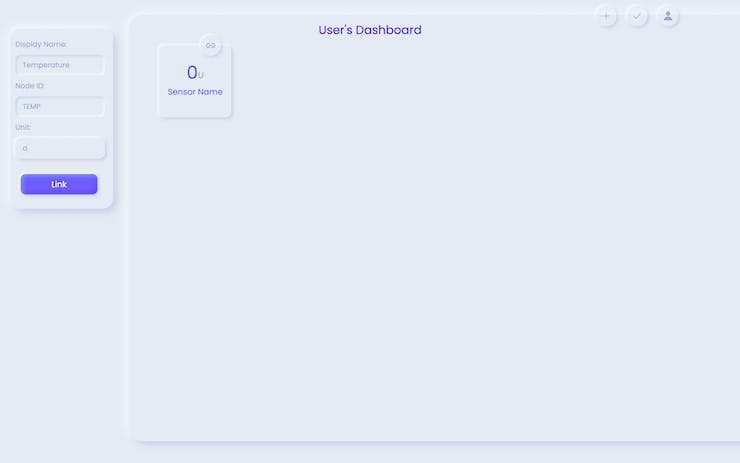
- Customizing Widgets: The dashboard widgets are resizable and draggable, offering versatility in design. Click the edit icon to link widgets to specific nodes and configure their appearance.
- Linking Widgets to Nodes: You'll find a link icon in the edit mode. Click on this icon to open a form. Enter the display name and the unique Node ID for the respective node. Repeat this process for each widget, linking them to the appropriate nodes.
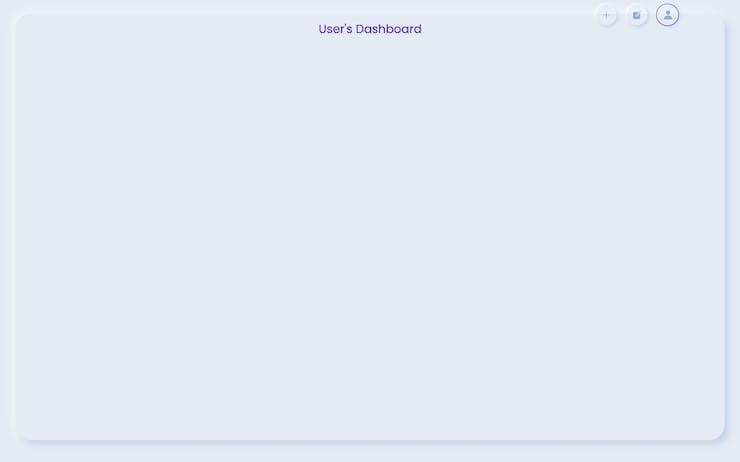
- Associating the Dashboard with the Kit: Click on the user icon on the dashboard to access a form. Enter your name and the unique 'Kit ID' associated with your kit. This step links your dashboard to your Modular IoT Kit.


By following these steps, users can seamlessly set up their Modular IoT Kit, connect the nodes to the dashboard, and begin monitoring data from nodes and control them in a user-friendly and intuitive manner.
How To Build Cellular IoT Network Creator Kit: Developer's Guide
This guide is your go-to resource for understanding the Cellular IoT Network Creator Kit. This guide provides a clear and comprehensive explanation of the system's components, their functionalities, and their interaction. Here we'll explain the system architecture, the data flow, and all other hardware and software requirements to build an IoT network creator on your own.
So let's with the general overview of the system.
General Overview Of The System
The modular IoT system comprises two integral components:
- The Gateway
- The Nodes
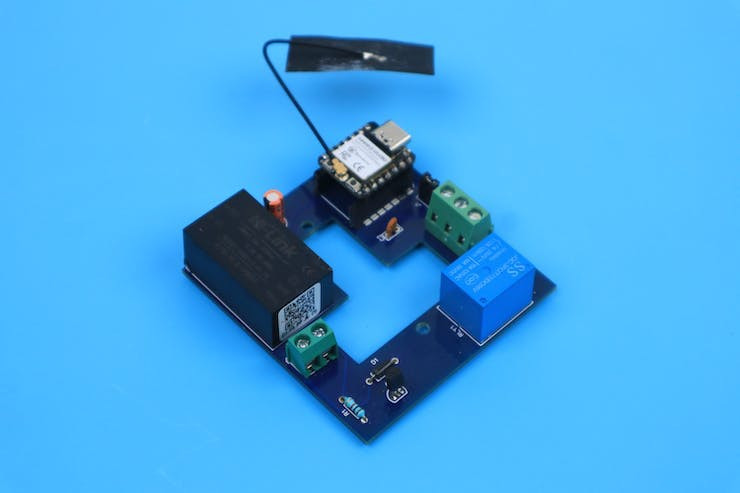
Gateway Component
The gateway serves as the central hub in the IoT Network Creator Kit, facilitating communication between multiple nodes and external services. In this kit, the gateway comprises three components.
1. NotecardCellular + WiFi
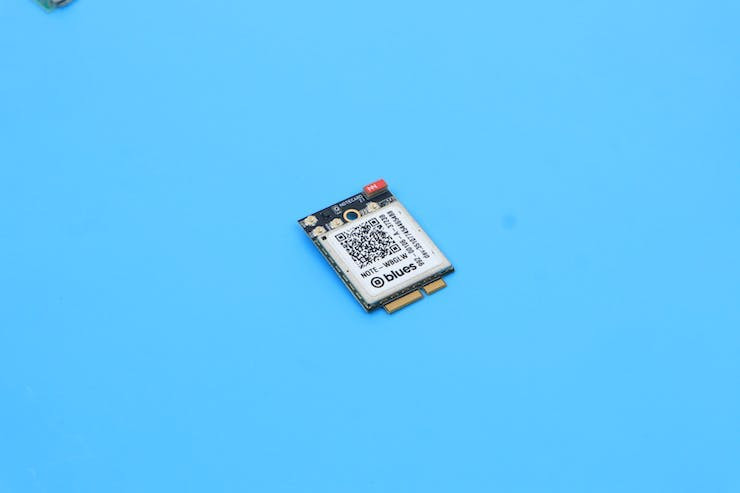
The Notecard, a vital part of the project, connects the Notehub and Gateway, enabling two-way communication. It operates using both cellular (LTE Cat-1) and Wi-Fi (2.4GHz b/g/n), offering flexibility and redundancy. In our setup, we use the LTE CAT-1 Global version. The Notecard can able to seamlessly switch to cellular if Wi-Fi is unavailable, ensuring uninterrupted data flow. It prioritizes security with AES-128 encryption and simplifies data transfer with a user-friendly JSON-based API. Its efficient design optimizes data transfer for low power consumption, making it a reliable and adaptable communication solution.
2. Notecarrier
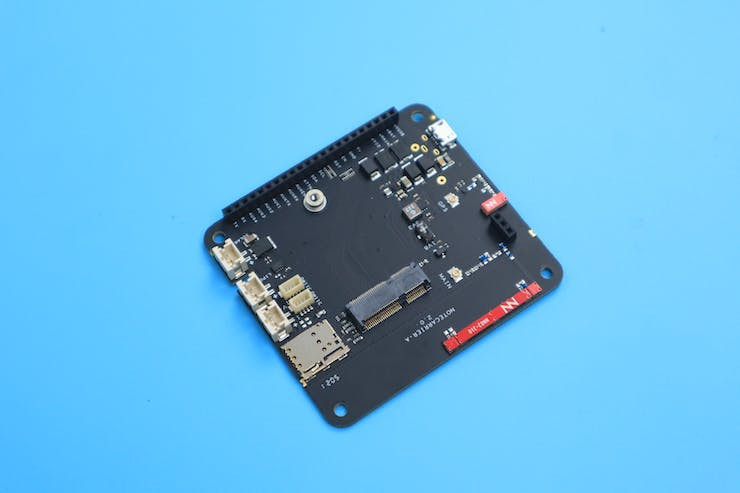
While the Notecard's modular design offers excellent flexibility for production, its direct integration with a customer's microcontroller and other components can pose obstacles during prototyping. Notecarriers address this challenge by providing a readily available platform that seamlessly interfaces with Notecard.
By bringing out its connections through dedicated breakout points and handling crucial functionalities like power management and signal amplification, Notecarriers simplify the prototyping process, enabling efficient development before transitioning to a custom design.
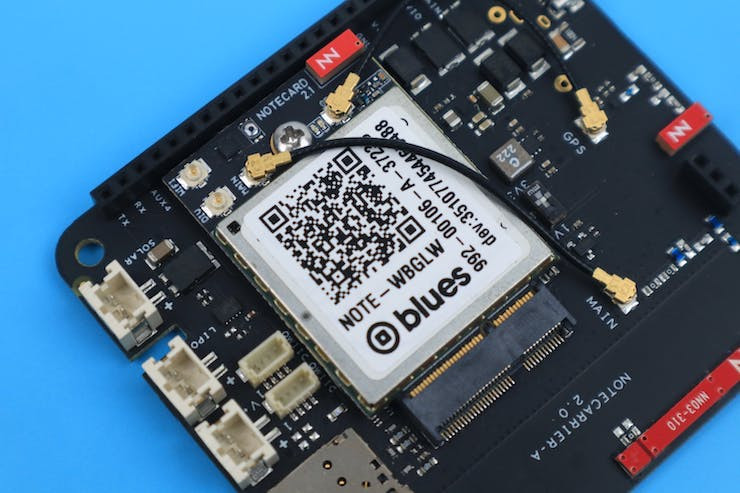
The Notecard has an embedded MFF2 SIM that enables its included cellular service coverage, with an integrated external SIM switch for applications that require such a capability. The Notecard can interface with the host MCU at either 1.8v or 3.3v levels.
In this case, we are going to power the Notecarrier through the V+ Pin,
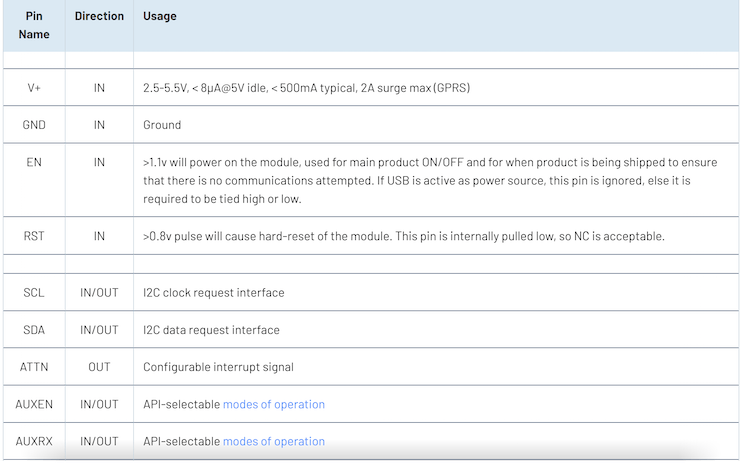
The 22pin header description shows that the V+ can take voltage from 2.5V to 5.5V. The I2C interface will be used for communicating with the MCU.
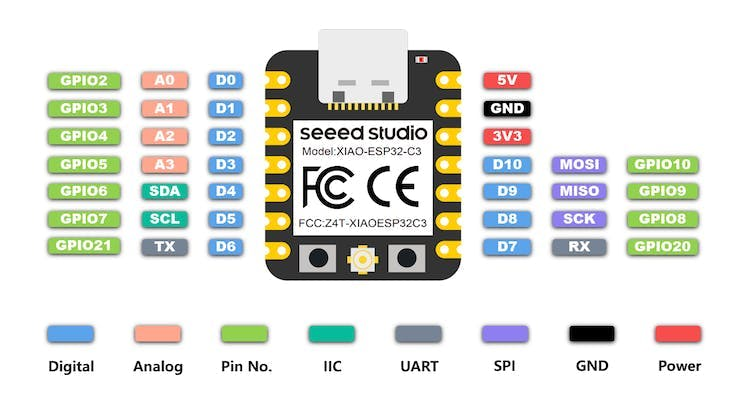
3. XIAO ESP32C3
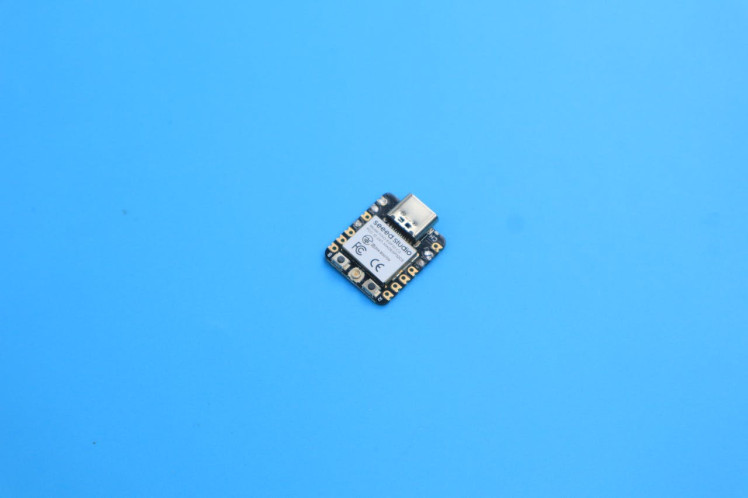
The Seeed Studio XIAO ESP32C3 stands out as a compact IoT development board, leveraging the Espressif ESP32-C3WiFi/Bluetooth dual-mode chip. The ESP32-C3 excels in radio frequency performance, supporting IEEE 802.11 b/g/n WiFi and Bluetooth 5 (LE) protocols. Included with the board is an external antenna, enhancing signal strength for wireless applications. This development board offers a powerful combination of computational efficiency and versatile connectivity options, making it a valuable tool for IoT projects.
It is equipped with rich interfaces and has 11 digital I/O that can be used as PWM pins and 4 analog I/O that can be used as ADC pins. It supports four serial interfaces such as UART, I2C, and SPI.
Assembly
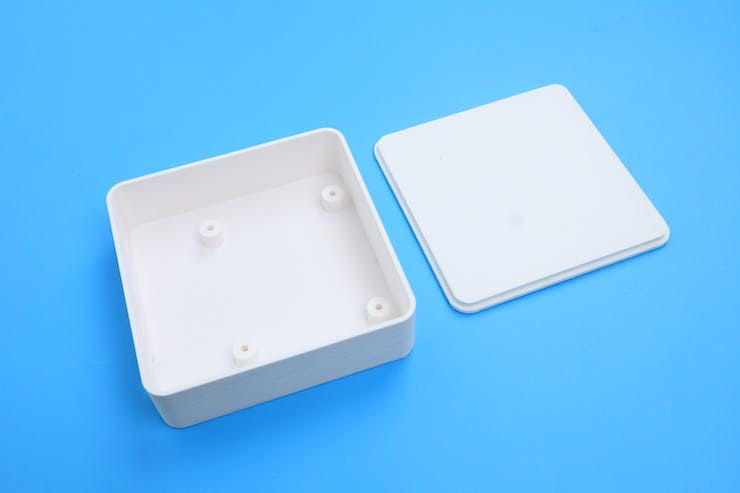
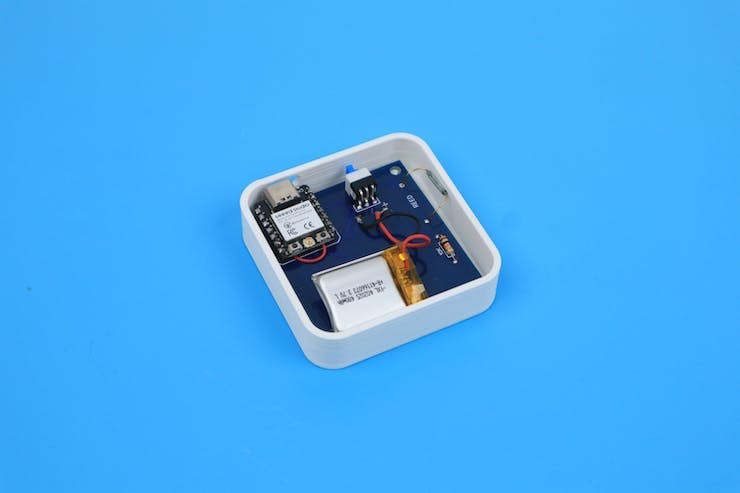
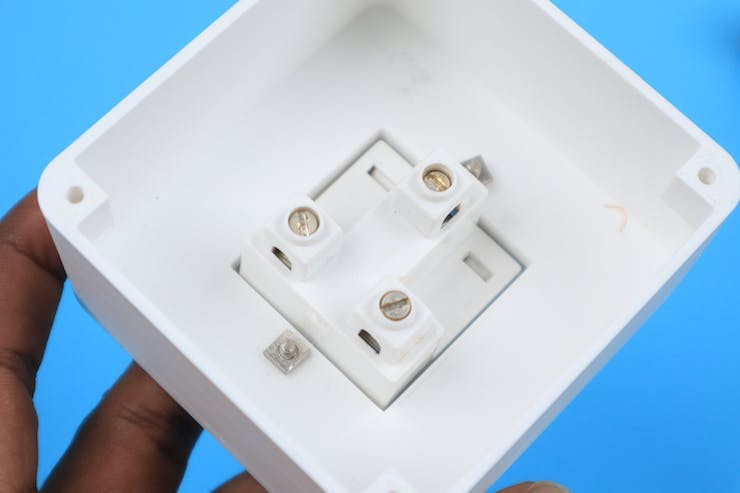
This is the 3D-printed enclosure made by PLA for securing all the components.
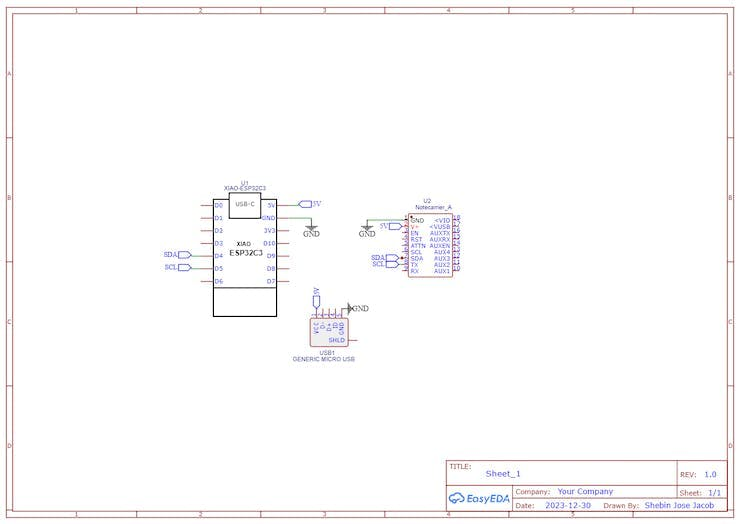
This is the schematics followed for wiring up the components.
First I secured the tiny micro USB breakout which is used for powering up the entire system.
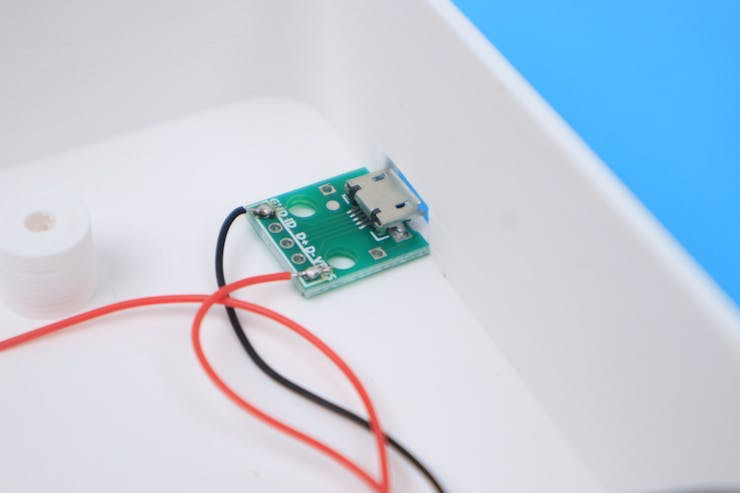
Then I secured the ESP32 C3 aside to the breakout board by pulling the soldered wires.
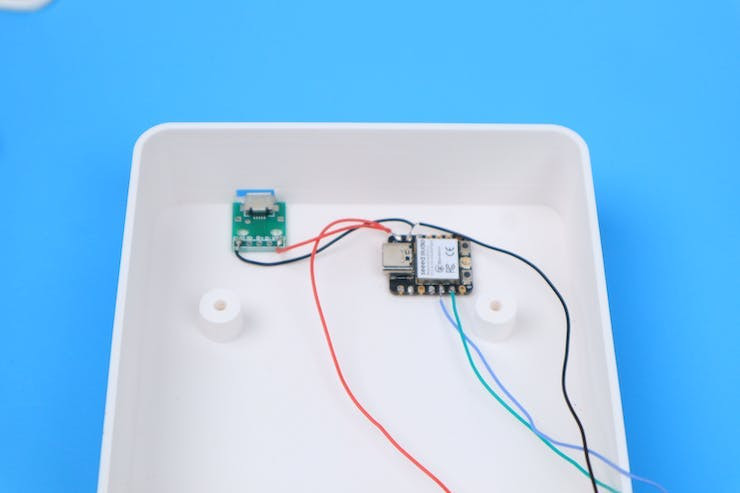
Then by completed the entire assembly by screwing the Notecarrrier with the M3 screws.
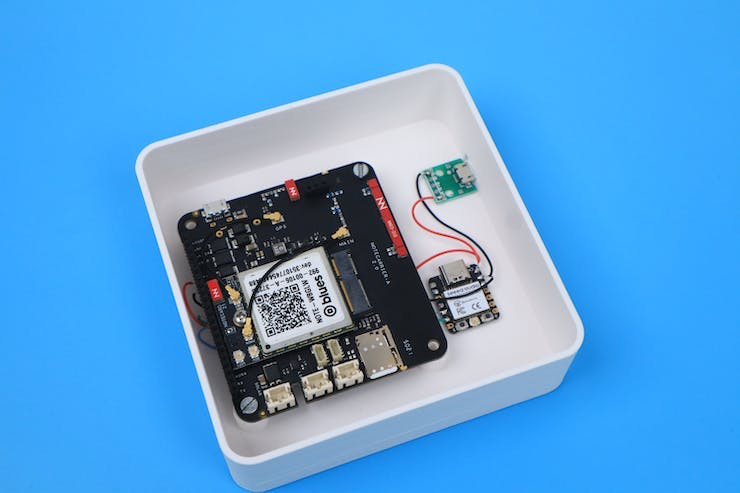
This will be the final outlook of the Gateway.
The gateway will be powered with a 5V 2A power supply.
Gateway Functions:
- Data Aggregation: The gateway collects data from multiple nodes within the network. It serves as a centralized point for receiving and processing information from various sensors or devices.
- Communication Hub: Using Bluetooth Low Energy (BLE), the gateway establishes connections with nodes (Xiao ESP32C3-based devices) to gather data efficiently.
- NotehubandFirebase Integration: The gateway forwards collected data to the Notehub and it then routes the data to the Firebase, a cloud-based platform, enabling seamless transmission to a web dashboard for real-time visualization and analysis.
Node Component
Nodes are essential elements in the IoT Network Creator Kit, acting as distributed devices equipped with sensors or actuators and communication capabilities. Each node within the kit comprises:
- Xiao ESP32C3: This microcontroller board forms the core of the node, providing processing power and connectivity functionalities. It utilizes the ESP32C3 chip, known for its efficiency and reliability in IoT applications.
- Sensors: The node incorporates various sensors tailored to specific functionalities, such as temperature, humidity, motion, or other environmental parameters. These sensors capture data relevant to the intended application.
- Actuators: These components serve as the output devices in the IoT network, enabling the execution of actions based on data received from sensors or commands from the central gateway.
Node Functions:
- Data Collection: Sensors embedded in the node gather real-time data from the environment or designated sources, such as temperature, humidity, motion, etc.
- Remote Control: Actuators provide the capability to remotely activate or deactivate connected devices or systems based on predefined conditions or commands received from the central gateway.
- BLE Communication: The node communicates with the gateway using Bluetooth Low Energy (BLE), transmitting collected data efficiently and securely.
Now we can understand the details and construction of each node.
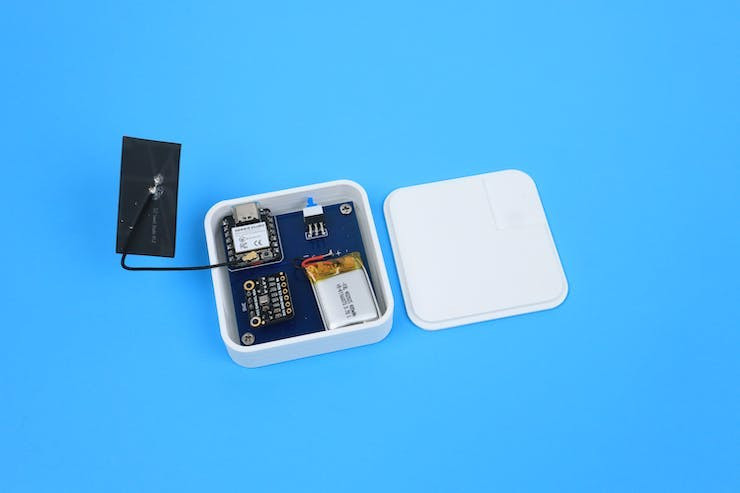
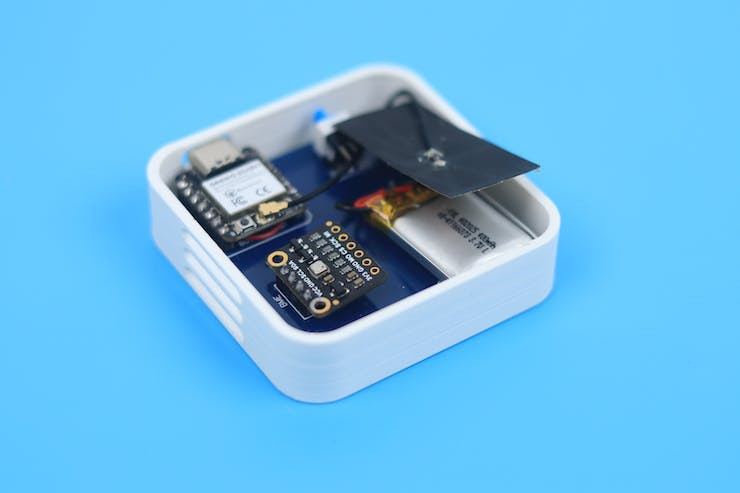
1. Environmental Sensor Node
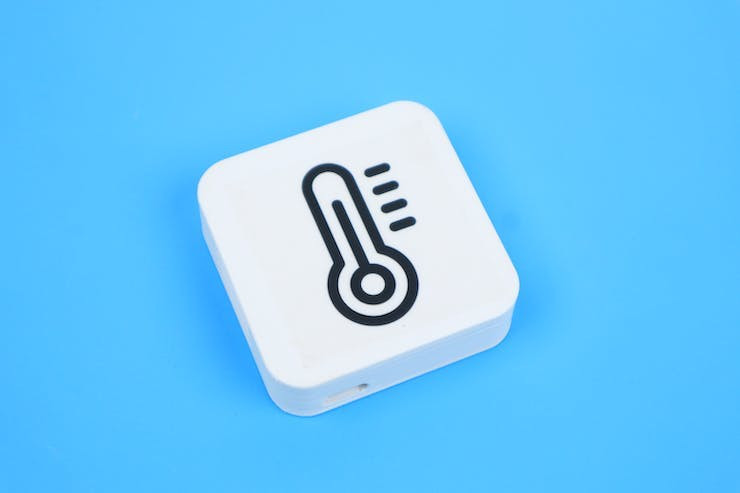
This node will fetch the air quality details such as Temperature, humidity, and Pressure through the BME680 sensor. We used the I2C protocol for communicating between esp32 C3 and BME680. ESP32 C3 will update the value to the gateway only once every 10 minutes while utilizing deep sleep mode.
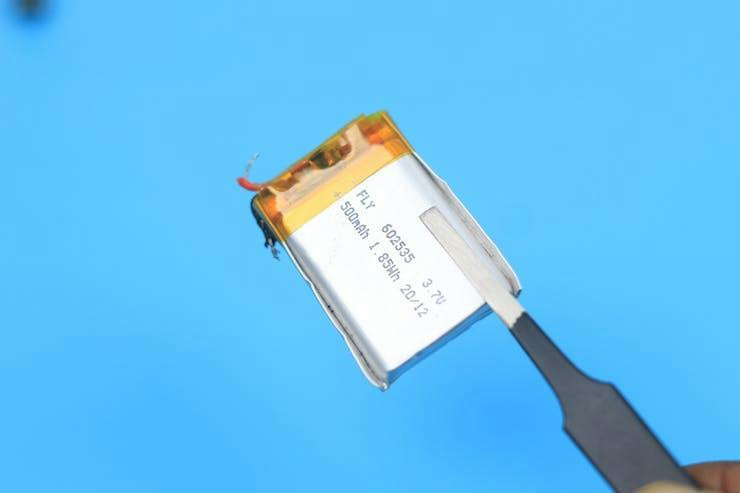
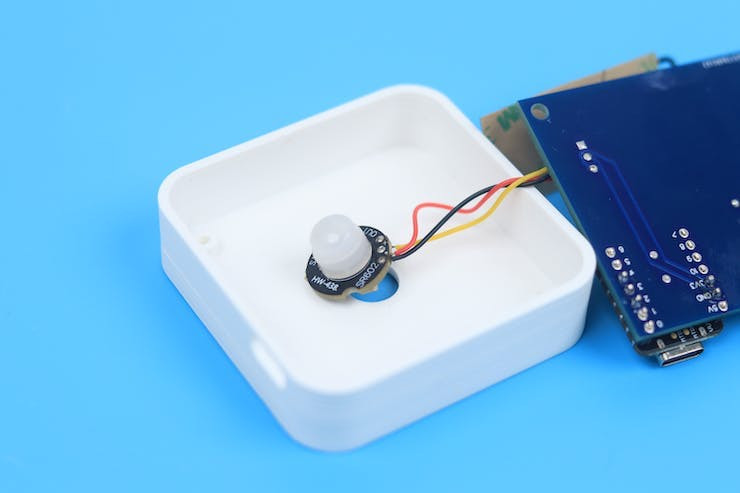
All the nodes have this kind of SPDT push switch for turning ON/OFF the device and also this 400 mah lipo battery for powering up, except the smart plug.

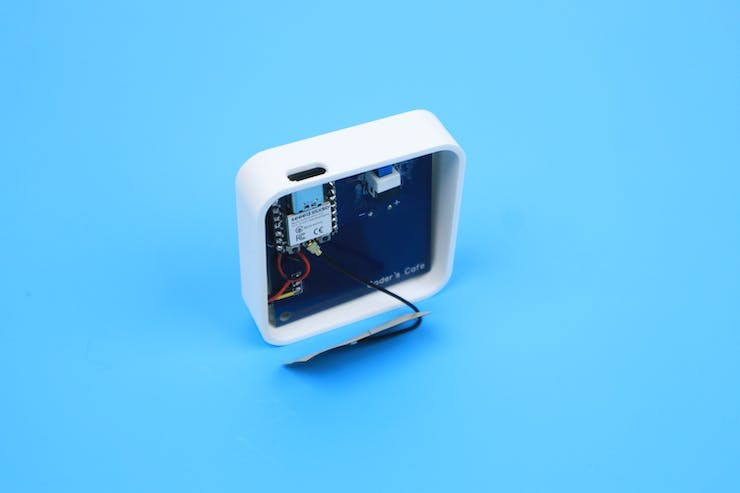
This is the inside view of this Node.
2. Motion Sensor Node
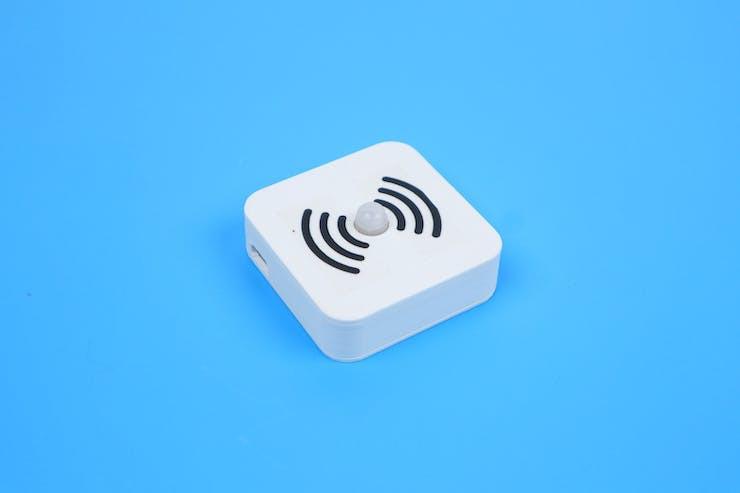
This node uses MH-SR602 MINI Motion Sensor Detector to detect human motions.
In this node also, we use the deep sleep capability of the controller. This ESP will be in deep sleep every time unless a trigger is given to the ESP32 by the PIR motion sensor whenever the motion is detected. When it wakes up it will give the message to the gateway and again goes back to the deep sleep.
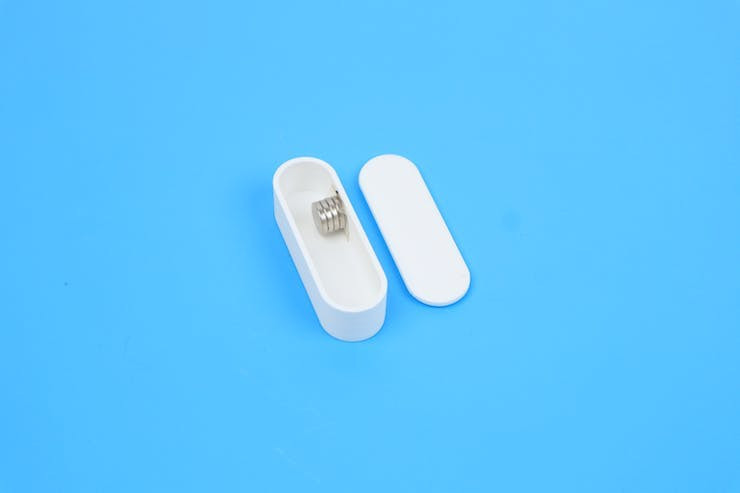
3. Door Sensor Node
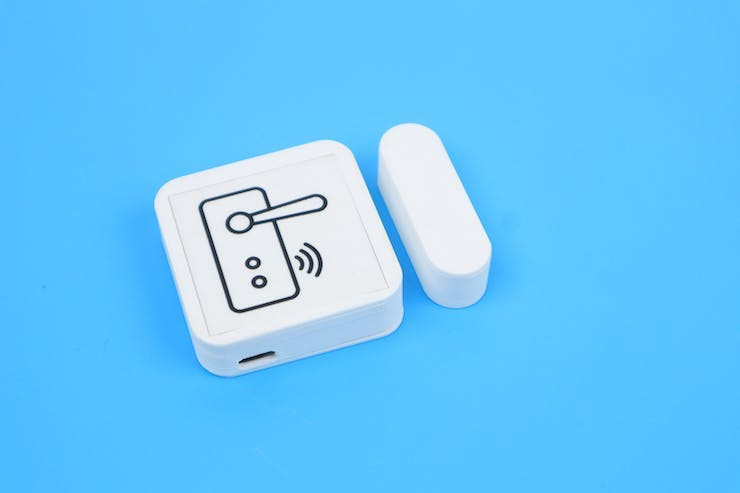
This node is powered by magnetic reed switches and magnets. Employing normally open magnetic reed switches, the node closes its circuit only when a magnet attaches to it, remaining open when no magnet is present. The reed switch is configured in a pull-down setup.
Functionally, this node operates similarly to the motion detection node. The key distinction lies in the triggering mechanism for the interrupt. Instead of relying on a motion sensor, the interrupt is initiated by the magnetic reed switch when someone opens the door. Subsequently, the node transmits a corresponding message to the gateway.
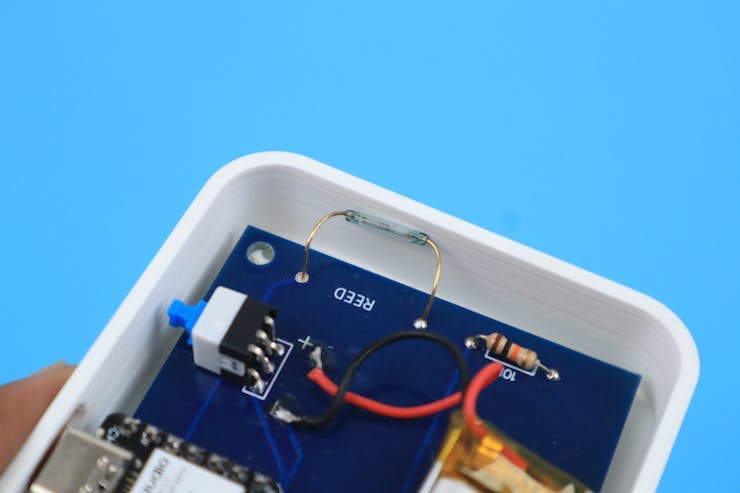
Powerful Neodymium magnets are used here to activate the reed switches.
4.Smart Plug
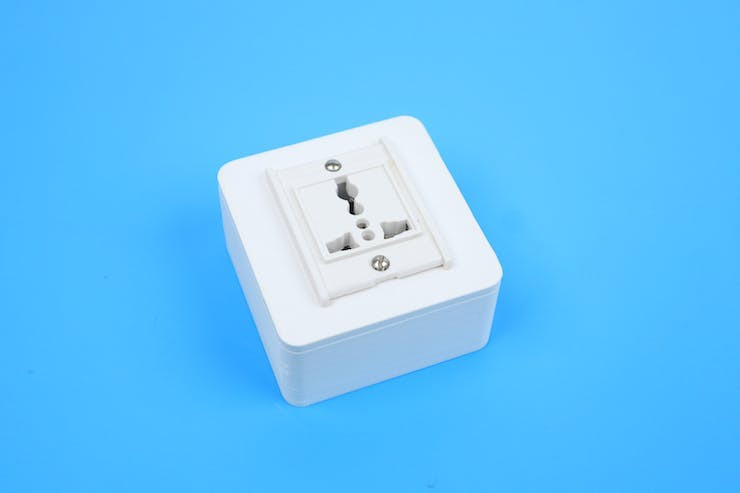
It's the only node that can be controlled through the dashboard. So we can connect appliances to it and we can control it from anywhere in the world.
Here the ESP is powered through the Hi link power supply which can provide 0.6A. The solid-state relay unit is used to control the AC appliances by combining three-pin plugs of both male and female.
Data Transmission, Management, and Dashboard Integration
Data Flow In Cellular IoT Network

Data Flow In Cellular IoT Network
Data Transfer Between Gateway And Nodes
In the Cellular IoT Network Creator Kit, the communication architecture between the gateway and the nodes follows a BLE (Bluetooth Low Energy) protocol, where the gateway operates as a multi-connect BLE server, capable of managing multiple simultaneous BLE connections. On the other hand, the nodes, equipped with sensors and actuators, function as BLE clients in this network.
The gateway, serving as a BLE server, establishes and maintains connections with multiple nodes within its range. Each node's role varies: sensor nodes periodically wake up from deep sleep mode, conserving battery power, to establish short-duration BLE connections at specified intervals, for instance, every 10 minutes. During this active phase, sensor nodes transmit the gathered data to the gateway.
Contrarily, actuator nodes maintain a persistent BLE connection with the gateway, staying in a connected state indefinitely. These actuator nodes continuously listen for commands or instructions sent from the dashboard via the gateway. This persistent connection ensures immediate responsiveness to commands, enabling real-time control over the connected actuators.
This communication strategy optimizes power consumption in sensor nodes, allowing them to conserve energy by entering deep sleep mode between data transmission intervals. Meanwhile, actuator nodes remain readily available, ensuring instant responsiveness to commands, and thereby creating a well-balanced ecosystem within the IoT network. The gateway serves as a central hub, managing and coordinating these dynamic connections between the nodes and the dashboard, enabling seamless data transmission and control.
Gateway - Firebase Interaction
In the Cellular IoT Network Creator Kit, the gateway serves as the bridge between the local network of nodes and the cloud-based Firebase service. This gateway interacts with Firebase using Blues Notehub, utilizing predefined routes configured within Notehub. These routes facilitate the seamless transmission of data collected from the nodes to the Firebase Realtime Database or Firestore.
Firebase REST APIs provide a straightforward way to interact with Firebase services via HTTP requests. These APIs allow developers to perform various operations, such as reading and writing data, managing authentication, and utilizing Firebase services like Realtime Database and Firestore.
Firebase Realtime Database REST API enables reading and writing data in real-time JSON format.
For example, if you want to get data from Realtime Database you can use this GET HTTP request using CURL
curl 'https://your-project-id.firebaseio.com/users.json'In a similar manner if you want to update the data in the Firebase Realtime Database you can do a PUT HTTP request using CURL
curl -X PUT -d '{
   "name": "John",
   "age": 30
}' 'https://your-project-id.firebaseio.com/users/1.json'
In Blues Notehub, RESTful APIs can be integrated as Proxy for Notecard Web Requests routes to facilitate the transfer of data between the Cellular IoT Network Creator Kit and Firebase services.
Communication Protocols
In the IoT Network Creator Kit, various communication protocols facilitate seamless connectivity and data exchange between components. Here are the key communication protocols used:
1. Bluetooth Low Energy (BLE):
- Purpose: Used for short-range communication between nodes and the gateway.
- Functionality: Enables efficient data transmission while minimizing energy consumption, ideal for connecting devices within proximity.
- Application: Facilitates communication between nodes (e.g., Xiao ESP32C3) and the gateway (e.g., Xiao ESP32S3) for data transfer.
2. Cellular Connectivity:
- Purpose: Enables the gateway to connect to the internet and external services.
- Functionality: Utilizes cellular networks (e.g., 4G LTE) to establish an internet connection for transmitting data to external platforms.
- Application: Allows the gateway equipped with Blues Notecard to send data collected from nodes to a cloud-based service like Firebase.
3. HTTP/HTTPS:
- Purpose: Facilitates communication between the device and Firebase's cloud services.
- Functionality: Enables data transmission using RESTful API endpoints provided by Firebase.
- Application: Devices interact with Firebase servers by making HTTP requests (POST, PUT, PATCH, DELETE) to send data, update records, retrieve information, or perform other operations within the Realtime Database or Firestore.
Firebase Integration For Data Storage And Management
The Firebase Realtime Database functions as the cornerstone of the IoT Network Creator Kit's cloud infrastructure, providing a scalable NoSQL database solution geared towards real-time data storage and synchronization. Designed to handle JSON-formatted data, this database facilitates instantaneous updates and synchronization across multiple platforms and devices, crucial for IoT applications utilizing Blues Notecards.
The real-time capabilities of Firebase enable immediate data propagation to connected devices and applications, supporting scenarios where live data updates are paramount. With offline persistence ensuring data availability even without an internet connection, this serverless architecture eliminates the need for managing servers and offers seamless integration possibilities for IoT devices, allowing them to efficiently store and retrieve data via Firebase's RESTful API.
Setting Up Firebase Realtime Database
1. Create a Firebase Project:
- Access the Firebase Console and create a new project dedicated to the Cellular IoT Network Creator Kit.

2. Enable Firebase Realtime Database:
- Navigate to the Firebase project's console and select the Realtime Database option.

- Follow the prompts to enable the Realtime Database, choose the preferred location, and start in test mode.


3. Set Database Rules:
- Define security and access rules for the database to ensure data security and compliance with access requirements.
- Customize rules based on your specific use case, setting permissions for read and write operations.
- Note the Reference URL which will be used in subsequent steps.

4. Register Your Web App:
- From the Firebase Console, select your project.
- Click on the Web icon (</>) to add a web app to your Firebase project. Enter an app nickname and register the app.


5. Obtain Firebase Configuration Details:
- Firebase provides configuration details specific to your web app. These details include a snippet of code containing Firebase SDK configurations.
- Copy the Firebase SDK snippet provided for your web app, including the configuration object containing API keys, authentication details, and other settings.
Firebase Config

Notehub Integration For Data Routing
Blues Notehub stands as the pivotal intermediary within the Blues ecosystem, streamlining communication between IoT devices powered by Blues Notecards and diverse cloud services. This centralized platform enables efficient management of device connectivity, data processing, and routing configurations. Through Notehub, users can provision and manage Notecards, define routes to direct collected data to specific cloud endpoints, and ensure secure transmissions through robust authentication measures.
Notable functionalities include data processing and transformation, allowing for tailored data formatting before transmission, and stringent security measures for encrypted, reliable communication. This versatile platform facilitates seamless integration with various cloud services, fostering simplified IoT deployments, remote monitoring, and control scenarios, such as routing data from Notecards to Firebase endpoints for storage, analysis, or visualization in Firebase's Realtime Database or Firestore.
For a quick start with the Notecard and Notehub follow this tutorial.
After successfully setting up your device you can see your connected notecard as shown here.

Once you have your device connected to the Notehub and you are able to see the transmitted data from your nodes in the Notehub, these are the steps that should be followed to set up a route to send data from the device to Firebase and vice versa.
Setting Up a Route to Send Data to Firebase:
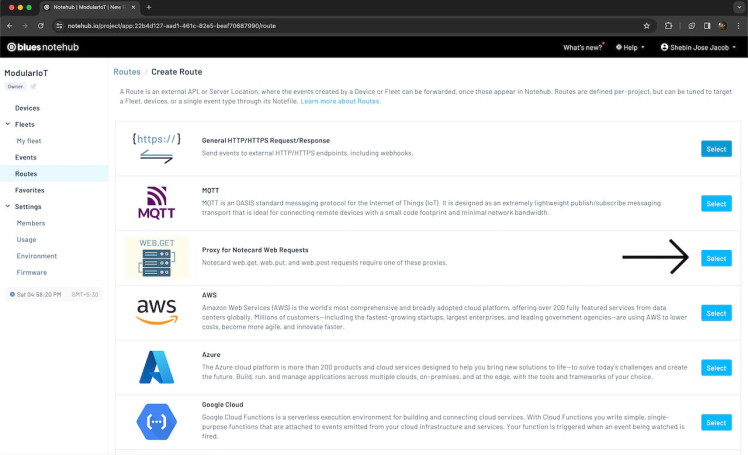
1. Select Routes Section:
- Within the Notehub interface, locate and select the Routes section.
2. Add a New Route:
- Look for an option to Create a new route within the Routes section and select it to initiate the route creation process.

- Select Proxy for Notecard Web Requests and proceed.
3. Define Route Details:
Fill in the necessary details to configure the route:
- URL: The Firebase Reference URL copied from the earlier step.
- Alias: Route name alias that will be used within the gateway code.
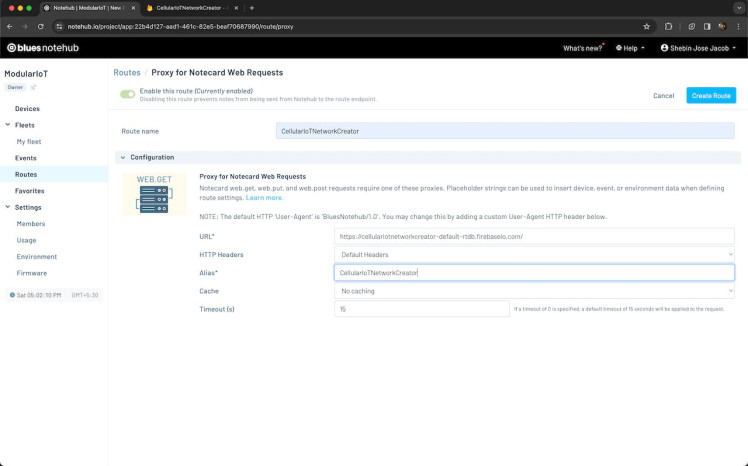
Save and Activate the Route:
- After configuring the route details, save the settings and activate the route to make it operational.
Test the Route:
- Test the newly created web route by triggering data transmission from the IoT device associated with the Notecard. Monitor the Notehub interface for successful data transmission and any potential errors.
Validate Endpoint Reception:
- Check the designated web endpoint (URL) to verify that data sent from the Notecard is being received and processed correctly.
Web Dashboard Development
The customizable dashboard is a versatile web application crafted using HTML, CSS, and JavaScript. It serves as a user-friendly interface for monitoring and managing data stored in the Firebase Realtime Database or Firestore. The dashboard's key features include a drag-and-drop interface and a plethora of widgets, allowing users to customize their views based on their preferences.
Dashboard Structure:
- HTML/CSS Layout: The dashboard's layout is structured using HTML and styled with CSS, ensuring a visually appealing and intuitive interface.
- JavaScript Functionality: JavaScript provides interactive functionalities, handling widget manipulation, drag-and-drop functionality, and dynamic data rendering.
Firebase Integration:
- Firebase JavaScript SDK: The dashboard integrates Firebase JavaScript SDK to establish a seamless connection with Firebase's Realtime Database or Firestore.
- Real-time Data Synchronization: Utilizes Firebase's real-time capabilities to fetch and display data in real-time, ensuring instant updates on the dashboard.
Drag-and-Drop Widgets:
The dashboard offers an array of customizable widgets, enhancing the user experience:
- Text Widget: Enables users to display and edit text dynamically, catering to various information display needs.
- Gauge Widget: Provides visual representations of numeric data, offering quick insights at a glance.
- Slider Widget: Empowers users to control variables or settings through an interactive sliding mechanism.
- Chart Widget: Renders data in various graphical formats like line, bar, and pie charts, aiding in data visualization.
- Switch Widget: Offers an intuitive on/off switch for controlling functionalities or devices seamlessly.
- Alert Widget: Displays notifications or alerts based on preset conditions or events, enhancing user awareness.
Functionality:
- Drag-and-Drop Interface: Allows effortless customization by enabling users to arrange widgets using simple drag-and-drop actions.
- Widget Customization: Provides options to configure and customize each widget's appearance, behavior, and data source.
- Real-time Data Display: Utilizes Firebase's real-time synchronization to update widgets instantly with changing data.
- Real-time Device Interaction: Utilizes Firebase's real-time synchronization to relay user commands (using control widgets like switches and sliders) instantly to the connected devices, enabling swift and responsive control actions.
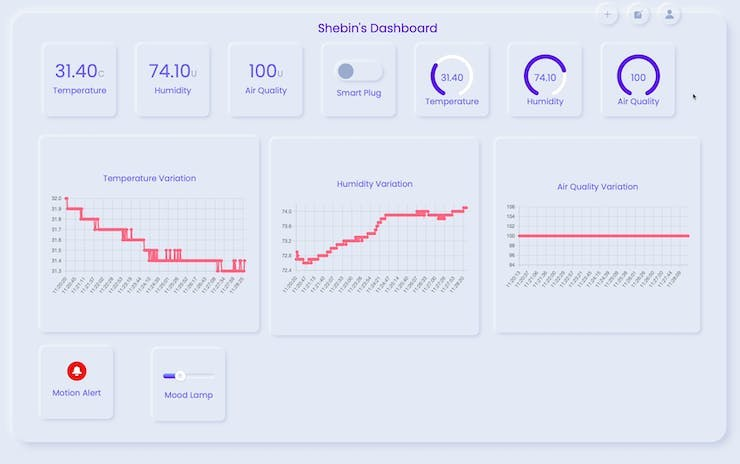
1. Smart Home Monitoring and Control:
- Scenario: A homeowner utilizes the dashboard to monitor and control various smart home devices connected to Firebase.
- Use Case: The dashboard features gauge widgets displaying real-time temperature and humidity levels in different rooms. Through switch widgets, the user remotely controls lights and switches them on/off. Additionally, sliders adjust thermostat settings, maintaining optimal room temperatures. Firebase's real-time synchronization ensures immediate responses to user commands, creating a seamless smart home experience.
2. Industrial IoT Monitoring and Maintenance:
- Scenario: An industrial facility leverages the dashboard for real-time monitoring and maintenance of critical machinery and processes.
- Use Case: The dashboard hosts charts displaying machinery performance metrics, while text widgets provide live status updates. With sliders, engineers adjust machine parameters for optimal operation, and alert widgets notify of any anomalies in real-time. This comprehensive monitoring system powered by Firebase aids in preemptive maintenance and swift responses to ensure uninterrupted industrial processes.
3. Smart Farm Monitoring and Crop Management:
- Scenario: Agricultural experts employ the dashboard to monitor and manage farming operations in a smart farm environment.
- Use Case: The dashboard hosts a variety of widgets tailored for agricultural data visualization. Gauge widgets display soil moisture levels and temperature, while charts visualize crop growth patterns and environmental conditions. Text widgets provide real-time updates on weather forecasts and crop information. With slider widgets, farmers remotely adjust irrigation systems based on soil moisture readings. Firebase's real-time synchronization ensures instant updates, aiding in informed decision-making for efficient water management and optimal crop growth.
4. Energy Monitoring and Optimization in Commercial Buildings:
- Scenario: Facility managers utilize the dashboard to monitor and optimize energy consumption in commercial buildings.
- Use Case: The dashboard includes gauge widgets displaying real-time energy consumption for different building zones. Charts visualize historical energy usage patterns, helping identify peak hours and trends. Alert widgets notify managers of anomalies or energy spikes. Using sliders, managers remotely adjust HVAC settings or lighting intensity to optimize energy usage. Firebase's real-time synchronization ensures immediate responses to control actions, aiding in energy efficiency and cost savings.
Conclusion
The Cellular IoT Network Creator Kit stands as a testament to the fusion of cutting-edge technology, empowering users to build, monitor, and manage IoT networks seamlessly. With its robust architecture comprising Blues components, Firebase integration, and a customizable dashboard, the kit exemplifies innovation in data visualization, real-time synchronization, and remote device control.
Looking ahead, the kit's evolution holds promising future updates, particularly in the realm of deploying machine learning models directly onto the network nodes. Integrating machine learning algorithms at the edge represents the next frontier, enabling localized data processing and decision-making within the nodes themselves. This advancement will elevate the kit's capabilities, fostering autonomous, data-driven decision-making without solely relying on centralized cloud resources.
In this new world, expertise is a mindset, not a requirement. With the Cellular IoT Network Creator Kit, setting up a smart home, revolutionizing an industry, or bringing an idea to life no longer hinges on specialized knowledge. Simplicity and power converge, and the once-imposing IoT landscape becomes your playground. Welcome to a future where innovation is unbounded, and connectivity is second nature. Welcome to the Cellular IoT Network Creator Kit - your gateway to a simpler, smarter tomorrow.
Schematics, diagrams and documents
Code
Credits
Related products


Leave your feedback...