





Building A Remote Coin-flipping Machine With Computer Vision

Made by terence-grover / 3D Printing / Artificial intelligence / Games & Gaming / Robotics / IoT
About the project
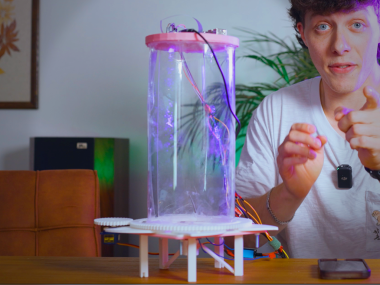
I built a machine that physically flips a coin, photographs the result, classifies it as heads or tails using a TensorFlow Lite model, and streams the whole thing live, all triggered remotely. It went through three hardware revisions, two complete detection rewrites, and ended up running 24/7 in a casino in Dubai.
Project info
Difficulty: Moderate
Platforms: Raspberry Pi, TensorFlow
Estimated time: 2 weeks
License: GNU General Public License, version 3 or later (GPL3+)
Items used in this project
Hardware components


View all
Software apps and online services

Hand tools and fabrication machines
Story
The Premise
I built a machine that physically flips a coin, photographs the result, classifies it as heads or tails using a TensorFlow Lite model, and streams the whole thing live and all triggered remotely over the internet. It went through three hardware revisions, two complete detection rewrites, and went from my bedroom on a YouTube stream to running 24/7 in a casino in Dubai as part of a live online gambling product.
This writeup covers the full arc: from cardboard-and-9V-battery prototype to a production system with mechanical coin recovery, exposure-based detection, remote calibration tooling, and thermal management for a 40°C environment.
Version 0: Cardboard and a Battery 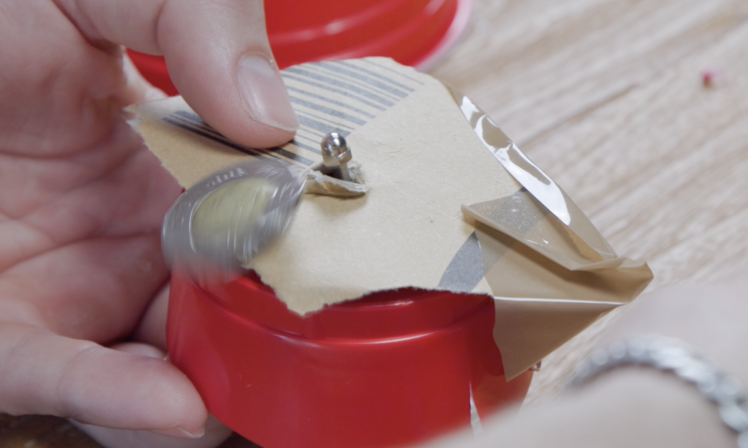
The first prototype existed to answer one question: can a solenoid flip a coin hard enough to matter?
A 5V solenoid was shoved through a hole cut in cardboard. The coin sat on top. Wiring it directly to a 9V battery (yes, wildly overpowered. as I always say: safety first) produced a flip so weak it barely cleared the solenoid shaft. But it proved the concept: electromagnetic actuation was viable.
The next step was to wire the solenoid properly through a relay, controlled by a Raspberry Pi's GPIO. A relay here acts as a low-voltage-controlled switch for the high-voltage solenoid circuit, keeping the 12V (and later 24V) supply away from the Pi's 3.3V GPIO pins. The Pi sent a signal, the relay closed, the solenoid fired, and the coin went airborne.
First real problem: the coin lands randomly and there's nothing to catch it or bring it back to center. It just rolls off the edge. Useless for repeated automated flips.
Version 1: 3D-Printed Bed & Iris Mechanism 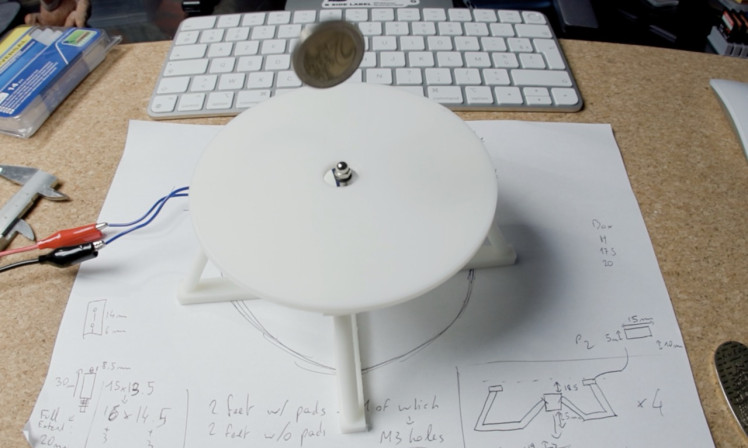
The fix was mechanical. I designed a landing pad and a way to hold the solenoid in place!
But the goal was still to get coin to flip over and over again without the need for human interaction. I finally landed (pun intended) on an iris mechanism the same principle as the aperture blades in a camera lens. Multiple overlapping blades rotate inward to close around the coin after it lands, pushing it back to the and center over the solenoid.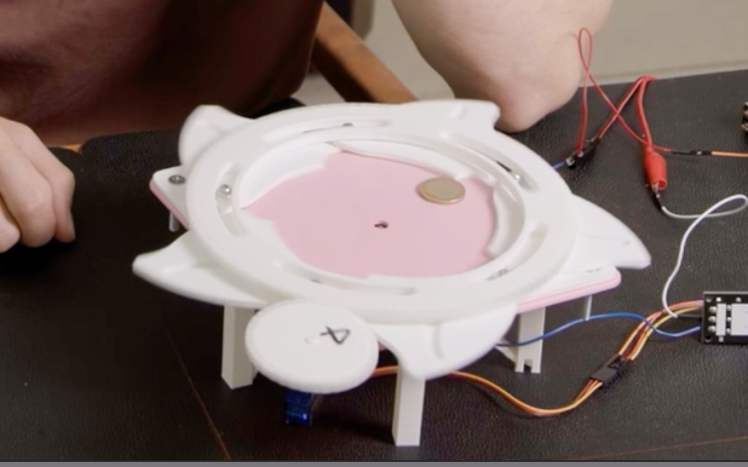
The iris is driven by a single servo. Rotating the servo sweeps all blades simultaneously through a gear ring. After every flip, the servo closes the iris, the blades push the coin to center, and then the iris reopens for the next flip. After adding a bit of code (outdated for this post but attached in the code section), I streamed it on YouTube and made the chat control it, allowing them to "bet" on which side will come out. Simple classification model, trained on the coin, streamed from a $15 Chinese IP camera. All connected to OBS.
Version 1.5: The Upgrade
A year after the YouTube video was released I received a phone call. An online casino owner located in Dubai wanted me to build a much larger, much more reliable version to run in his warehouse. This was the first time YouTube brought me a business opportunity. So I couldn't refuse.
Version 1 was printed in PLA on an Ender 3. The servo was a standard 9g micro servo. It worked well enough on a desk but had serious problems for this potential application:
- PLA warps above ~55°C, which ruled out any hot environment
- The 9g servo lacked torque. After a few hundred cycles the gears started skipping
- The overall scale was too small - the coin sat too close to the edge and frequently fell out
I upgraded my 3d printer from an Ender 3 to a BambuLab H2S and started working on a second PLA print at the desired larger scale to validate the new dimensions before committing to a material change. Once the geometry checked out, I moved to PETG for the production version.
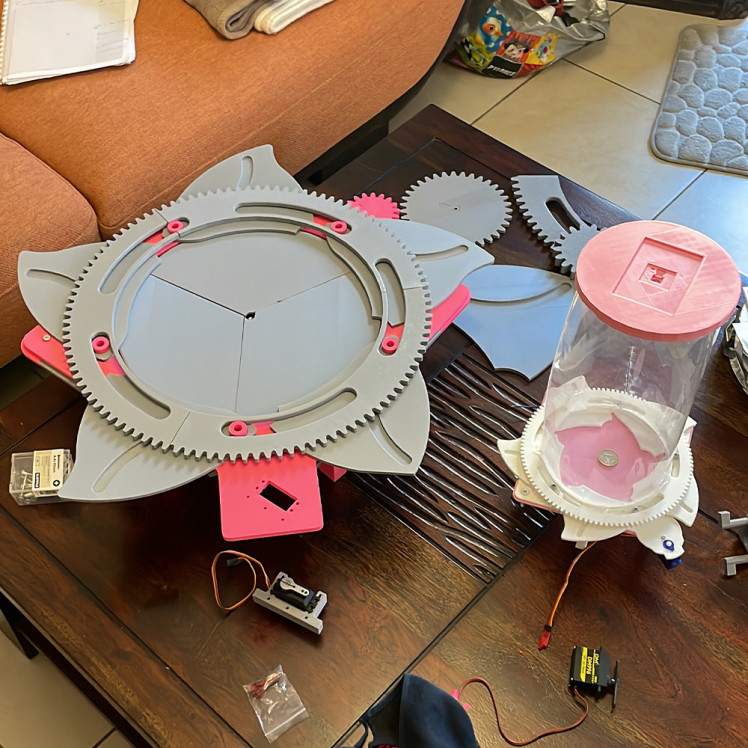
Around 150% scale increase.
Version 2 (Production): PETG, Bigger Servo, 24V Solenoid
The final hardware was designed around one constraint: this thing had to survive running unattended in Dubai, inside a venue where I couldn't physically touch it. Every component choice flows from that.
Frame and Enclosure
Printed in PETG on a Bambu H2S. I originally tried PA6-GF (glass-filled nylon) for maximum heat resistance, but the prints kept failing: warping, layer adhesion issues, nozzle clogs from the glass fiber. PETG ended up being the right balance of heat tolerance (~75°C glass transition) and printability.
The enclosure is made from multiple printed sections joined with plastic soldering: literally melting the seams together with a soldering iron and filler rod. Stronger than glue, and it doesn't creep under sustained heat like adhesive joints do (the plane ride to Dubai for the installation still managed to break a couple of those)
Solenoid
Upgraded from the original 12V unit to a Heschen HS-1564B, a 24V push-pull solenoid with a significantly longer stroke and much more force. Driven by a DRV8871 H-bridge motor driver rather than a simple relay. This gives cleaner control over the pulse, moves the entire system to a solid state architecture and handles the inductive kickback properly. 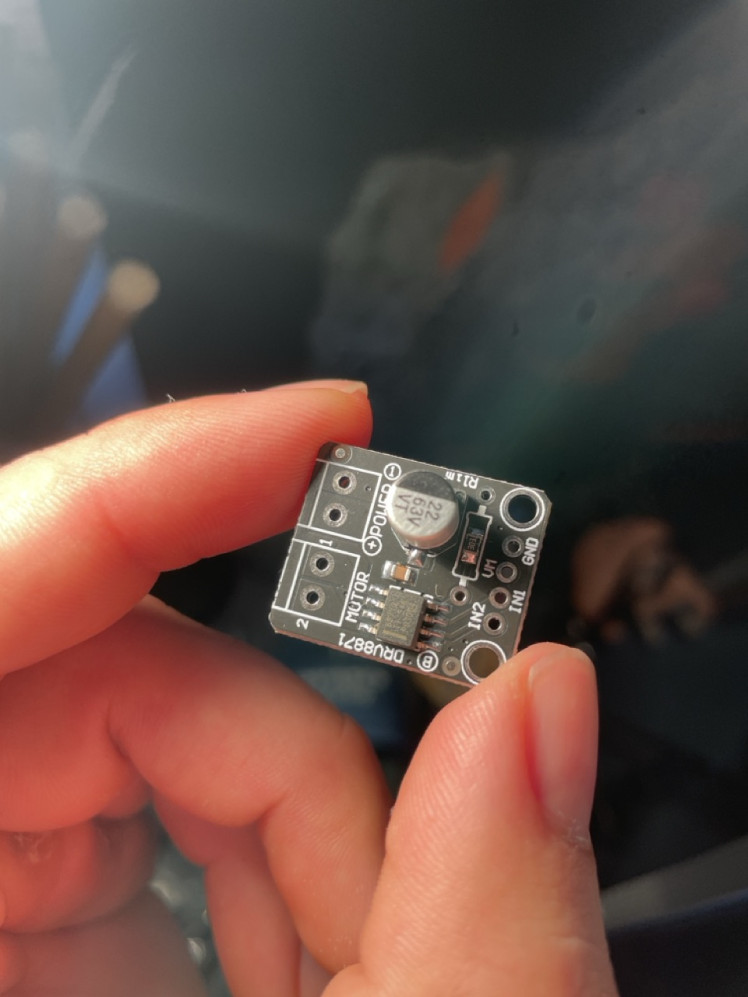
A bank of capacitors sits across the solenoid supply. When the DRV8871 fires, the caps dump their stored charge into the solenoid coil simultaneously with the PSU, giving a harder initial kick. The result is a faster, more consistent flip. The firing pulse is 40ms:
def flip_coin():
    solenoid.on()
    time.sleep(0.04)
    solenoid.off()
    time.sleep(0.1)
40ms was found experimentally. Shorter and the coin doesn't clear the solenoid shaft. Longer and you risk the coin going too high and landing outside the iris catch radius.
Servo
The 9g servo was replaced with a 40kg·cm unit. Massive overkill for pushing a coin around, but the reasoning was longevity. A servo running well within its torque capacity will last far longer than one running near its limit, especially at high cycle counts. That was a lesson I learned the hard way. We had to replace servos every 7 days during the first month or so...
The servo runs on 6V from a dedicated UBEC (universal battery eliminator circuit) plugged in to the 24V PSU, not from the Pi's 5V rail. Servos cause nasty voltage sags when they move under load, and a brownout on the Pi's supply means a crash and a reboot which would be unacceptable for an unattended machine + this has the benefit of supplying 6V to the servo (well within its. operating range 5-7.4V) for more power.
Thermal management on the servo includes a finned aluminum heatsink and a small fan. Dubai ambient temps plus continuous cycling generated enough heat to trigger the servo's thermal protection without it.
Power
Two separate PSUs: a 24V supply for the solenoid circuit and a 5V supply for the Pi 5. All high-current connections use XT60 connectors (ated for 60A continuous, impossible to plug in backwards). Lower-current distribution uses Wago lever nuts for tool-free reconfiguration and maintenance.
Pi and Camera
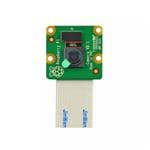
Raspberry Pi 5 with a Picamera 3, connected via the Pi's CSI ribbon cable. The Pi wears a screw terminal HAT to make GPIO wiring robust so that no jumper wires that can vibrate loose and no soldering is needed. Again, for ease of maintenance
The camera captures at 720×720 resolution. Higher resolution wasn't needed because the coin occupies a small, known region of the frame and the classifier only needs a 224×224 crop anyway. Lower resolution means faster capture and less data to push through the detection pipeline.
Detection: From Circle Detection to Exposure Masking
This went through two completely different approaches.
- Attempt 1: Hough Circle Detection + Radial Edge Scanning
The first detection pipeline used classical computer vision. The idea was to find the coin by looking for a circle of the expected radius in the image.
The code applied bilateral filtering and histogram equalization to the grayscale frame, computed Sobel gradients, then did a radial scan, casting rays outward from the assumed center at 180 angles and checking for edge hits at each candidate radius:
for r in range(COIN_MIN, COIN_MAX + 1):
  coords = []
  for a in angles:
    x = int(cx + np.cos(a) * r)
    y = int(cy + np.sin(a) * r)
    if 0 <= x < w and 0 <= y < h:
      if grad[y, x] > EDGE_THRESHOLD:
        coords.append((x, y))
If enough edge pixels were found at a given radius (above MIN_EDGE_HITS), the coin was considered present, and the mean of the detected edge coordinates gave an estimated center position.
This worked well in controlled lighting. It broke pretty rapidly once the coin damaged the landing bed enough and the lighting kept changing... Shadows from the overhead camera rig also shifted the apparent edge positions. Tuning the thresholds for one lighting condition made it fail under another.
- Attempt 2: Exposure-Based Detection
The replacement is embarrassingly simple. The coin is a shiny metal disc under a fixed light source. When it's present, a large percentage of pixels in the crop region are very bright. When it's absent (you're looking at the dark solenoid cavity), they aren't.
HIGHLIGHT_THRESH = 198
RATIO_THRESH = 0.31

bright = gray > HIGHLIGHT_THRESH
bright_ratio = bright.sum() / bright.size
coin_present = bright_ratio > RATIO_THRESH
That's it. Count the bright pixels, divide by total pixels, threshold the ratio. No edge detection, no circle fitting, no gradient computation.
A three-frame rolling window smooths out transient false positives (the recent_detections deque). The coin is only considered "stably present" if at least 2 of the last 3 frames detected it.
This survived every lighting condition the venue threw at it. The tuning took about 10 minutes.
The Fixed Crop - Why?
Both detection methods operate on a fixed crop, not the full frame. The crop is defined by the known mechanical center of the solenoid (with offsets OFFSET_X and OFFSET_Y to account for camera-to-mechanism misalignment) and the maximum expected coin radius:
def fixed_coin_crop(frame, pad=15):
    h, w = frame.shape[:2]
    cx = (w // 2) + OFFSET_X
    cy = (h // 2) + OFFSET_Y
    r = COIN_MAX
    x1 = max(cx - r - pad, 0)
    x2 = min(cx + r + pad, w)
    y1 = max(cy - r - pad, 0)
    y2 = min(cy + r + pad, h)
    return frame[y1:y2, x1:x2]
This crop serves double duty: it defines the detection region AND produces the image that gets fed to the classifier. Keeping it tight means less noise, faster processing, and a consistent input to the ML model regardless of what's happening in the rest of the frame.
Remote Calibration
The machine lived in Dubai. I was in the Netherlands. When venue staff bumped the table or moved something nearby, the camera-to-solenoid alignment could shift by enough pixels to throw off the fixed crop.
A calibration script let me check alignment remotely. It captures a single frame, draws the expected hole zone and detection radius as colored circles overlaid on the image, marks the assumed center point, and saves the result:
cx = (w // 2) + OFFSET_X
cy = (h // 2) + OFFSET_Y
cv2.circle(frame, (cx, cy), HOLE_RADIUS, (0, 0, 255), 2)    # red = hole
cv2.circle(frame, (cx, cy), DETECT_RADIUS, (0, 255, 0), 2)   # green = detection
cv2.circle(frame, (cx, cy), 4, (255, 0, 0), -1)              # blue = center
If the coin wasn't sitting inside the green circle in the output image, I knew the offsets needed adjusting. Quick SSH session, tweak OFFSET_X and OFFSET_Y, rerun, done.
Classification: TensorFlow Lite on the Pi
Training Data Collection
The training data was collected by the machine itself. A dedicated capture script runs the exact same flip-recenter-capture sequence as production.
Same solenoid timing, same servo angles, same crop, and saves 200 coin images to disk:
for i in range(200):
    flip_coin()
    time.sleep(1.5)
    recenter_iris()
    frame = capture_frame()
    crop = fixed_coin_crop(frame)
    cv2.imwrite(os.path.join(SAVE_DIR, f"coin_{ts}.jpg"), crop)
Each image was then hand-labeled as heads or tails. Over 500 labeled images total across multiple sessions. This was tedious but important: the model needed to see the coin under the exact optical conditions it would face in production (same camera, same lens, same lighting angle, same crop).
Model
A standard image classification architecture, trained offline and converted to TensorFlow Lite for on-device inference. The input is a 224×224 RGB image, the output is a two-class softmax (heads, tails).
interpreter = tflite.Interpreter(model_path="coin_modellast.tflite")
interpreter.allocate_tensors()

def classify_coin(img):
    resized = cv2.resize(img, (224, 224))
    normalized = resized.astype("float32") / 255.0
    expanded = np.expand_dims(normalized, axis=0)
    interpreter.set_tensor(input_details[0]['index'], expanded)
    interpreter.invoke()
    preds = interpreter.get_tensor(output_details[0]['index'])[0]
    labels = ["heads", "tails"]
    return labels[int(np.argmax(preds))], float(np.max(preds))
The model runs on the Pi's CPU via the TFLite runtime with no accelerator needed. Inference takes at most 2 seconds, which is invisible to the user given the mechanical cycle time.
Confidence scores consistently came back at 0.99–1.00 in production. The fixed crop plus controlled lighting plus a distinctive coin made this a straightforward classification task.
The Main Loop: State Machine
The production loop ties everything together. It runs as a state machine that coordinates with a remote backend API:
- Capture a frame and check for coin presence. If the coin isn't detected for 3 consecutive frames (MISSING_THRESHOLD), the machine enters maintenance mode and sends an OSC message to a monitoring system.
- Poll the backend for a pending round. The API returns either a round_id or "paused" (no action needed). If paused, the machine idles.
- Mark the round as ready and wait 2 seconds for the UI to catch up
- Fire the solenoid. 40ms pulse.
- Recenter the iris and verify the coin is visible. If recentering fails (coin jammed, landed weird), retry up to 4 times. If all attempts fail, cancel the round via the API and put the stream in maintenance through OSC.
- Crop and classify. Send the result (heads/tails + confidence score) to the backend.
- Every 100 flips, release the servo signal for 30 seconds to let it cool down. Continuous PWM generates heat even when the servo isn't moving.
The OSC messages go to a monitoring dashboard. different messages trigger different visual states so I could see at a glance whether the machine was healthy, idle, flipping, or in trouble and could cut the stream automatically.
What Went Wrong Along the Way
Servo jitter. The default gpiozero servo implementation uses software PWM, which jitters badly on the Pi because Linux isn't a real-time OS. The fix was pigpiod: a daemon that drives hardware-timed PWM via DMA. Completely eliminated the jitter. If you're doing anything with servos on a Pi, use PiGPIOFactory or don't bother.
Camera focus. The Picamera's default focus was set for far-field. The coin is 15cm away. The images were unusable until I physically disassembled the lens module (remove the glue blob, unscrew the lens element) to adjust the focal distance. This is documented in the Picamera hardware docs but easy to miss.
Coin detection v1 fragility. The Hough/radial detection worked perfectly at my desk and failed immediately in the venue. Computer vision programs need to be engineering for changing environments. Always. Think of an approach that doesn't care about anything else that what you're trying to detect. Simpler is generally the answer. The exposure mask approach doesn't care about any of that.
The full build of the first version:
More details on the second version:
My portfolio page
CAD, enclosures and custom parts
Code
Credits
Related products





Leave your feedback...