
A Bluetooth Controlled Sims Plumbob

Made by 8BitsAndAByte / 3D Printing / Communication / Games & Gaming / Lights / Wearables
About the project
We'll have to brush up our Simlish this Halloween, as we're turning ourselves into Sims!
Items used in this project
Hardware components

Story
We'll be recreating the diamond that floats above the Sim's head, also known as a plumbob, and making it Bluetooth controlled so you can set the colour to reflect your mood!
Supplies:- Adafruit Feather (nRF52 Bluefruit LE - nRF52832)
- 2 Adafruit NeoPixel Rings
- Lipo battery 3.7V
- Smartphone with Bluetooth and the Adafruit Bluefruit LE Connect app
- 3D printer
- Transparent 3D printing filament
- Needle and thread
- A hat (or other headgear to attach the hardware to)
- A bit of glue
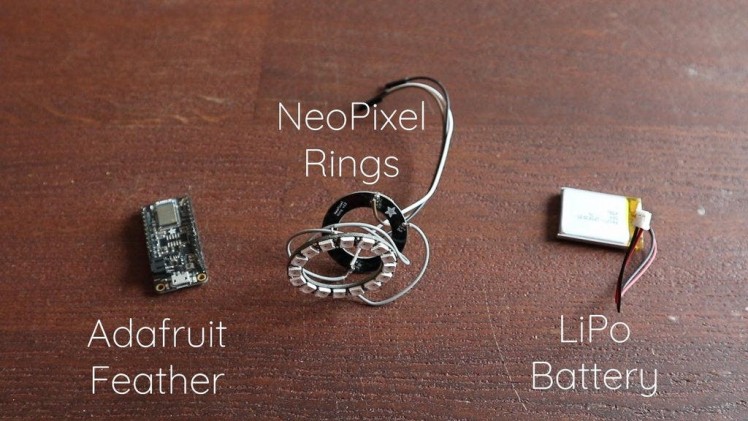
First things first, we'll need some hardware to make our creation work. For this project we'll be using the Adafruit Feather (nRF52 Bluefruit LE - nRF52832) because it’s small, lightweight and able to control lights via Bluetooth, what more could you want?
For the lights, we chose two Adafruit NeoPixel Rings, one for each half of the plumbob. A 500mAh 3.7V LiPo battery provides the power.
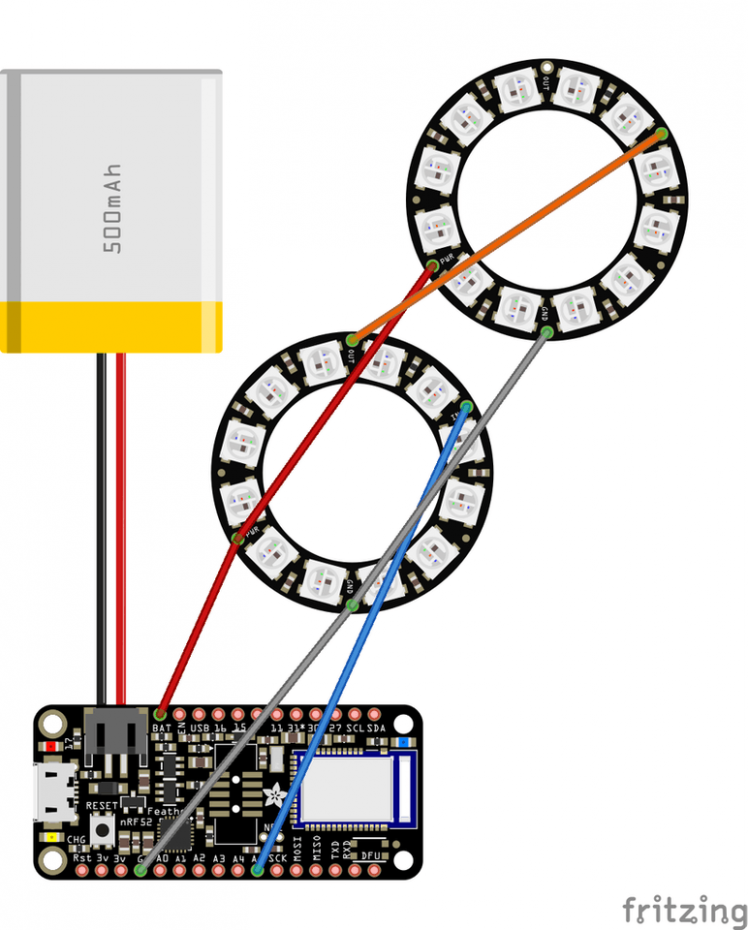
We connected all the components as shown in the Fritzing diagram above. We soldered the wires to the NeoPixel Rings but used female jumper wires for the connection to the Feather, so we could easily disconnect them and run the wires through the plumbob later on. Also be sure to make the wires from the Feather to the first NeoPixel Ring long enough, as they need to go through the first half of the plumbob.
Feather Setup and Bluetooth AppOn to the next part, getting the hardware to do stuff! The idea is to connect the Adafruit Feather to the Adafruit Bluefruit LE Connect app on a smartphone and so we can pick the colour of the NeoPixels via the app, so the colour of the plumbob can reflect our current mood.
But first we need to set up the Adafruit Feather to work with the Arduino IDE by following this guide provided by Adafruit.
Next up is uploading the controller sketch to the Feather. This example sketch can be found in the Arduino IDE by going to File > Examples > Adafruit Bluefruit nRF52 Libraries > Peripheral > controller
With this sketch uploaded to the Feather, you can now connect it to the smartphone Bluefruit app by following the steps outlined in this guide.
Controlling the NeoPixelsOnce the Feather and app are connected, the Feather can already receive a number of Bluetooth messages from the app, including a colour! To send a colour to the Feather, open the Bluefruit app and connect to your feather. In the menu, go to Controller > Color Picker. The moment you pick a colour via the colour wheel and press the select button, the message containing the colour is sent to your feather, pretty neat right?
All we have to do is add some code to control the NeoPixels and change their colour when the Bluetooth message arrives. The full code is added in attachment!
Plumbob and Feather Case
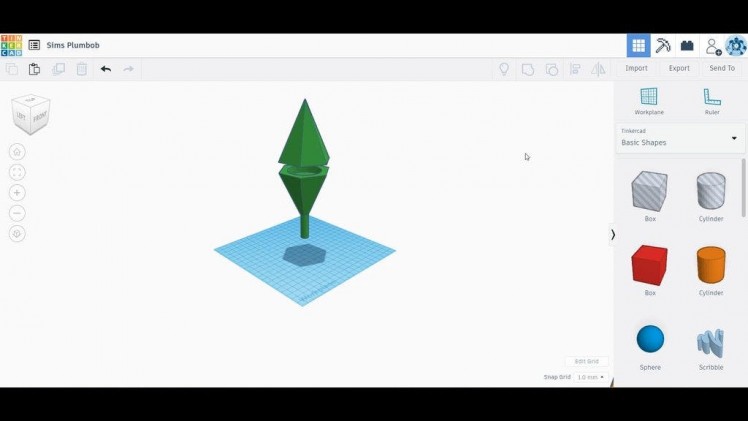
Last but not least, we'll need a plumbob! We designed one that has space for our hardware using Tinkercad. Both halves of the plumbob have a notch for the NeoPixel rings, and the bottom half also has a see-through tube to hold it up on our head and to guide the wires down to the Adafruit Feather.
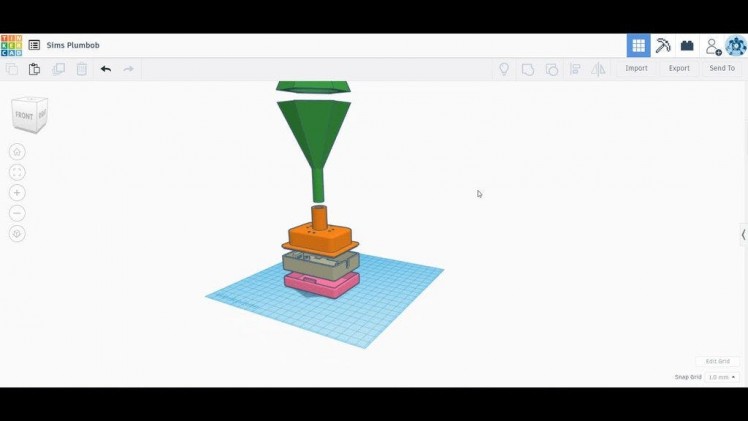
We'll also need something to hold the Feather and to attach the plumbob to our headgear. Adafruit provided the files for this really neat 3D printable Feather Case. We remixed the top of the case to add a tube for the plumbob to slide into, a hole for the wires and holes for stitching. We also added some height to the top, so the jumper wires could fit inside.
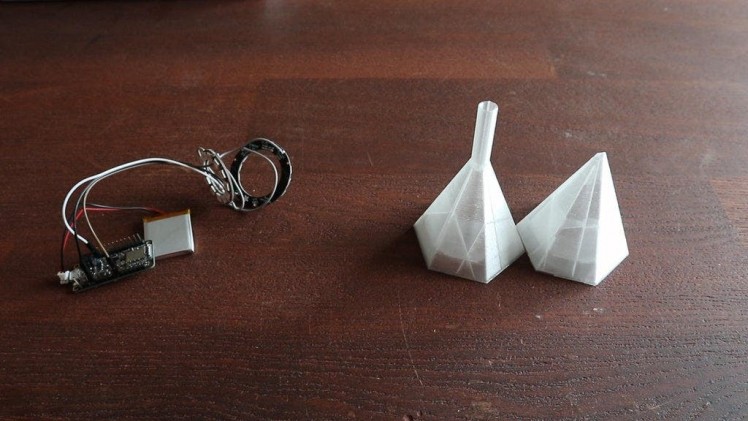
The STL files for the two plumbob pieces and for the adjusted feather case top are added to this step, we 3D printed them with a transparent filament.
We 3D printed the feather-case.stl and the feather-bat.stl by Adafruit to hold the Feather and the LiPo battery.
Headgear

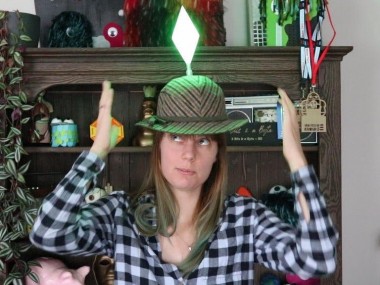
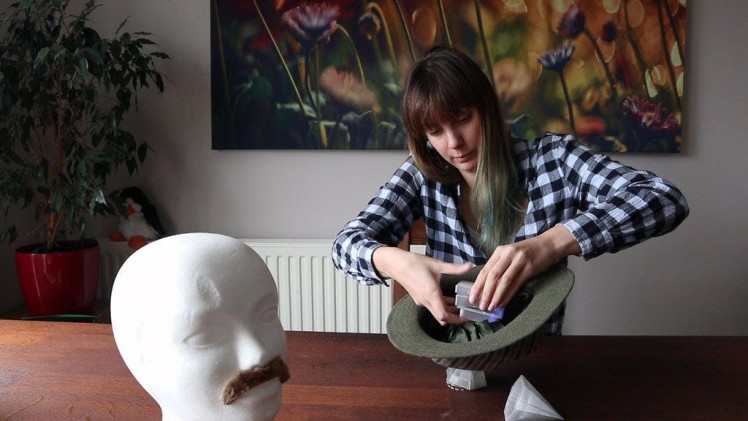
The final step is adding all the electronics to our head somehow. Why not try a stylish hat?
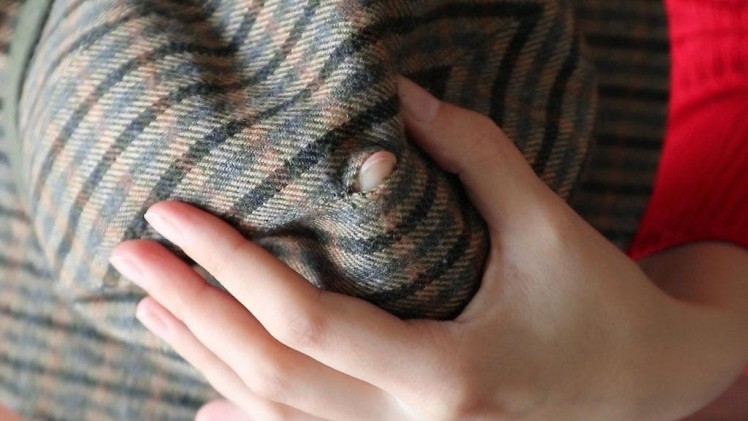
We opened up the lining on the inside of the hat and made a small hole in the seam that goes straight across the top. We pushed the tube part of the case top through it and stitched it in place. That seems to have done the trick!
The bottom part of the plumbob tube should sit snug inside the cylinder that's sticking out of the top of the hat. The NeoPixel Rings should fit nicely inside the notches of the plumbob. All that's left to do is run the wires through to the Feather, snap on the rest of the case, lightly glue the top of the plumbob in place and plug in the LiPo battery.
Happy Halloween
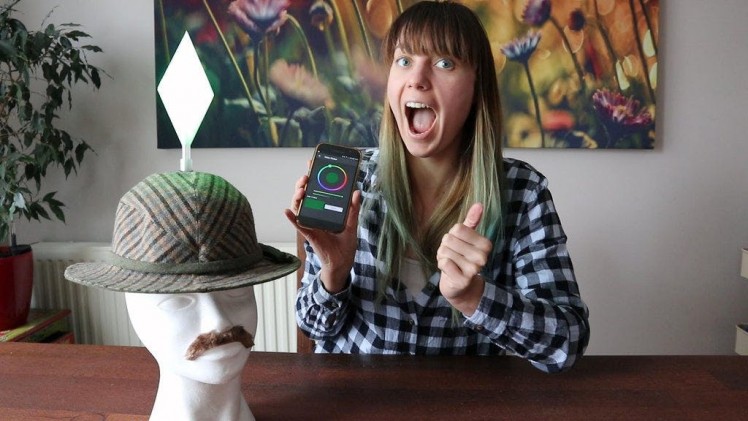
Now if you'll head over to the Bluefruit app like before in step 3, you should be able to control your very own plumbob!
We do have to note that the combination of the three case pieces inside the hat make it a tad impossible to wear, but it should work great inside a top hat!
If you'll excuse us, we'll have to brush up our Simlish and set some kitchens on fire before we pass out on the floor! Dag dag!
Schematics, diagrams and documents
CAD, enclosures and custom parts
Code
Credits
8BitsAndAByte
We’re Dane & Nicole, two makers that create tremendously terrible tech, which we happily share with you on our channel! https://www.youtube.com/c/8bitsandabyte
Related products


Leave your feedback...