
Weather Lamp

Made by mukesh-sankhla / 3D Printing / Art / Communication / Productivity / Weather
About the project
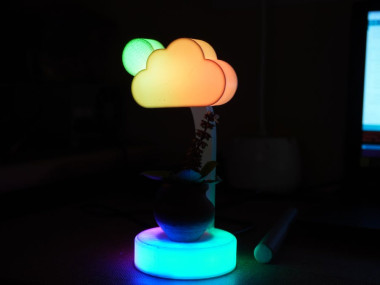
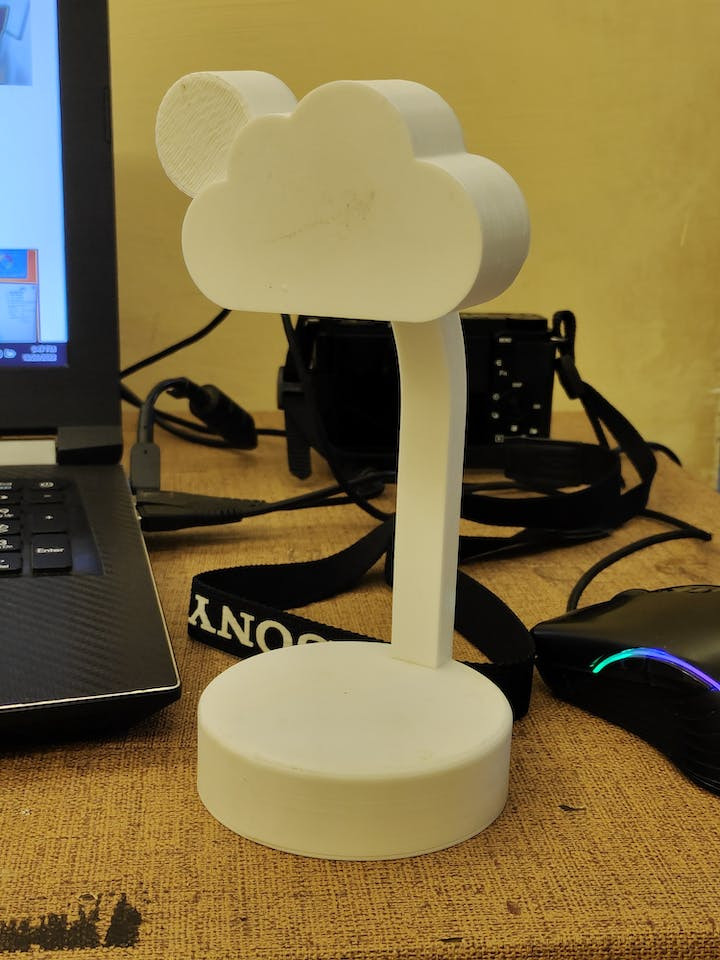
Weather Lamp A IoT based 3D Printed Weather Simulating Lamp
Project info
Difficulty: Easy
Platforms: Android, Autodesk, Raspberry Pi, Seeed Studio, WIZnet
Estimated time: 1 hour
Items used in this project
Hardware components

Story
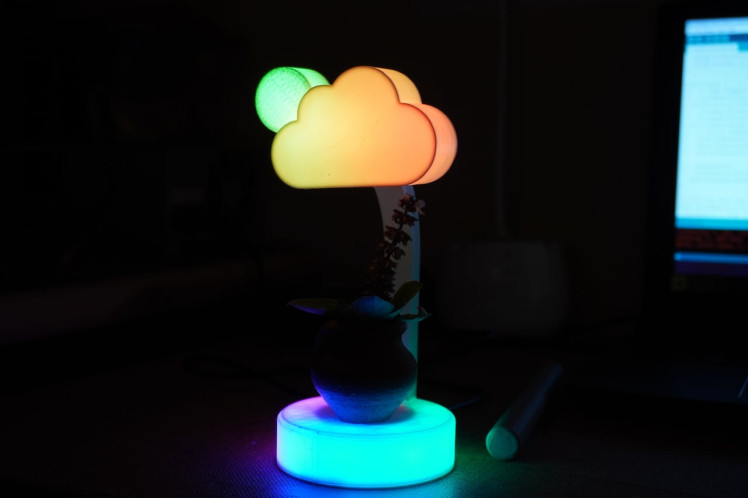
Weather Lamp is a RGB lamp made using Wiznet Pico WizFi360 and WS2812B LED's. The lamp simulates the real-time weather using the openweathermap.org API. It read parameters like cloud intensity, temperature, time and try to mimic the cloud colors, sun/moon and change the base color as temperature range.
Thank You NextPCB:
This project is successfully completed because of the help and support from NextPCB. NextPCB is one of the most experienced PCB manufacturers in Global, has specialized in the PCB and assembly industry for over 15 years. Not only could NextPCB provide the most innovative printed circuit boards and assembly technologies in the highest quality standards, the fastest delivery turnaround as fast as 24 hours.
Guys if you have a PCB project, please visit their website and get exciting discounts and coupons.
Only 0$ for 5-10pcs PCB Prototypes:Nextpcb.com/pcbprototype
Register and get $100 from NextPCB: Nextpcb.com/coupon
Supplies
To get high-quality electronic components at an extremely low cost, hqonline.com is the perfect site. They have labels from all the international brands, so you can find the best components for your device without spending a lot of money. This offers you the best value for your money.
Step 1: Designing & 3D Printing
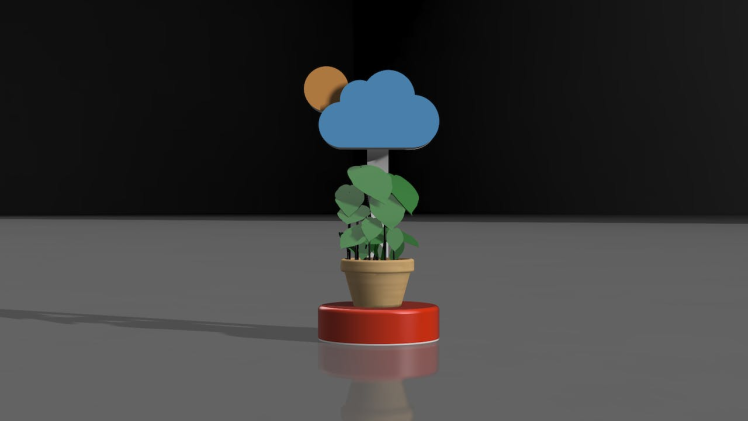
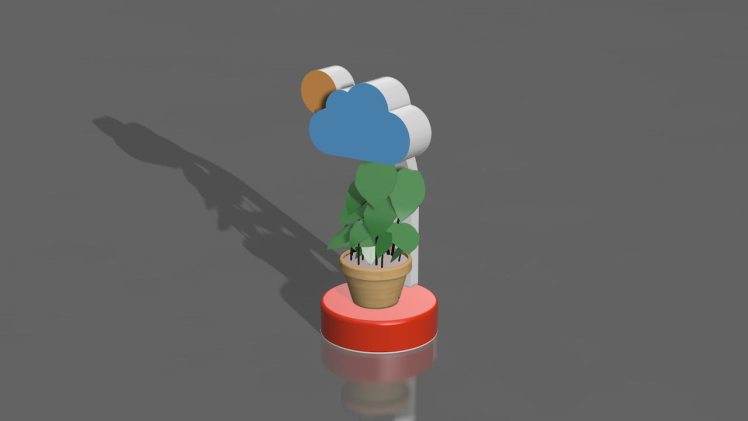
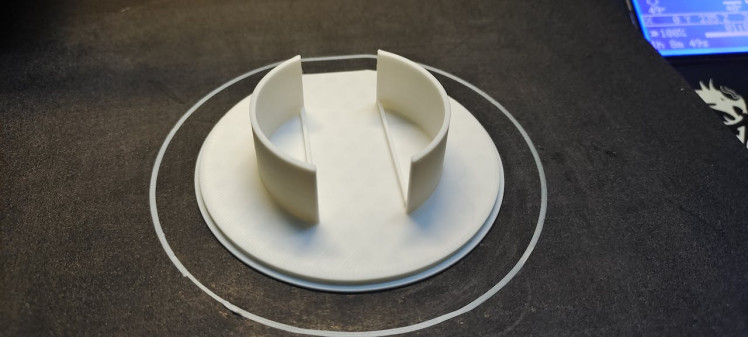
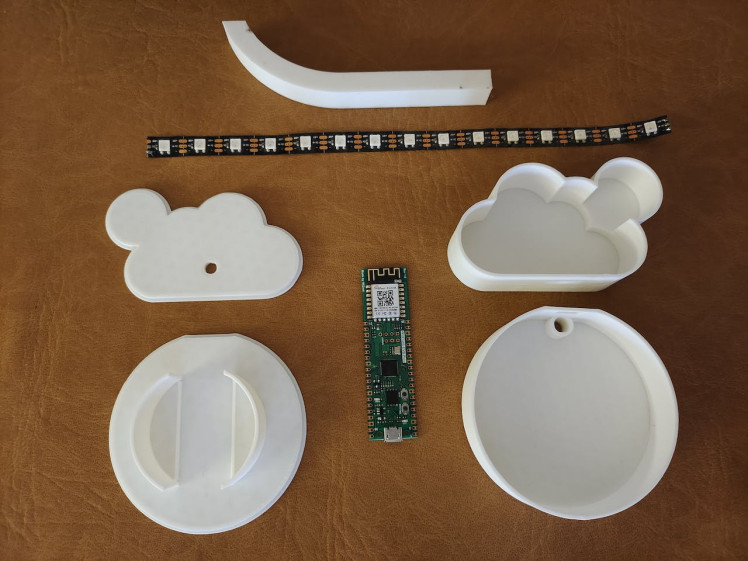
- I have designed the model in Fusion360.
- Download the STL Files and 3D print them.
- By clicking on the 3D Model Link you can view the model in your PC/Mobile browser and the Model can be edited in Fusion360 software.
Step 2: Circuit Connection
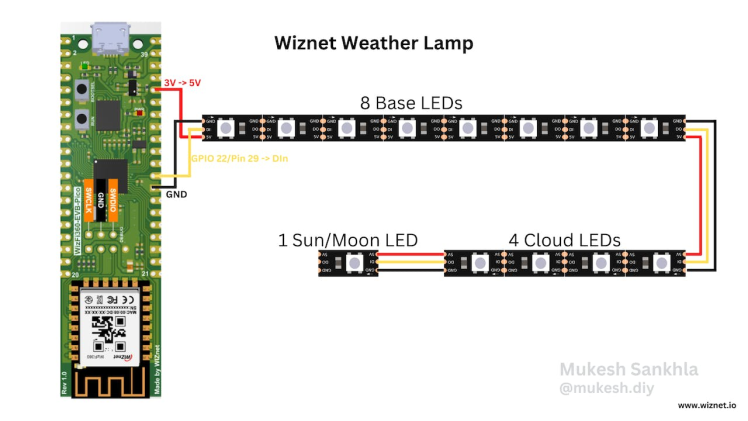
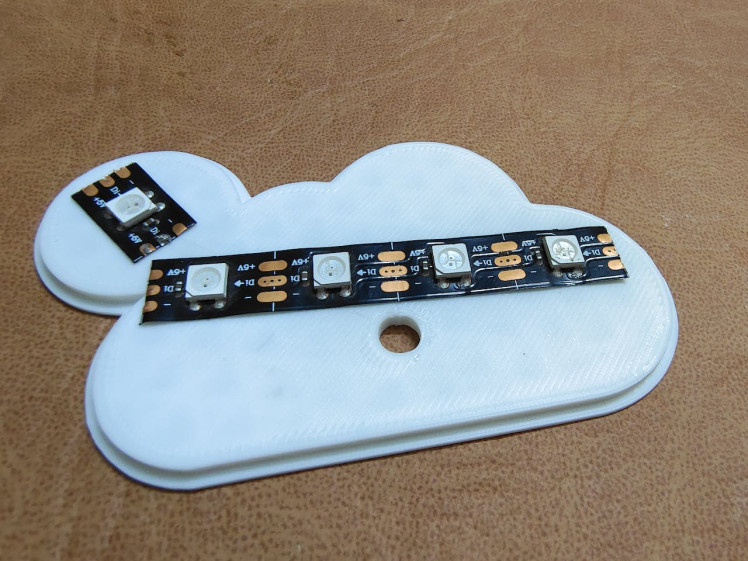
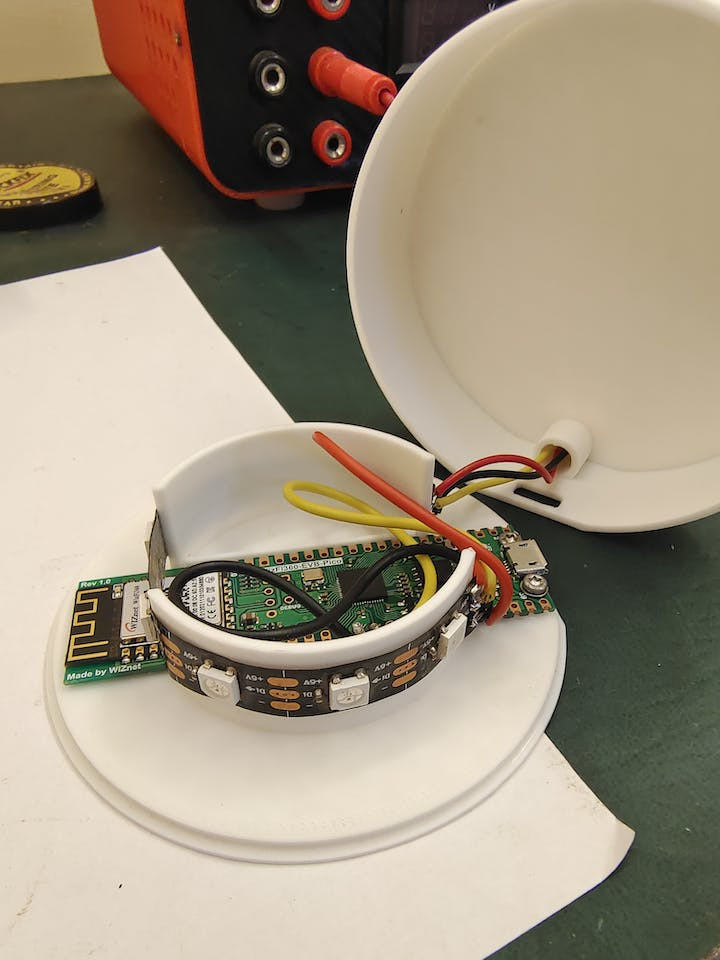
- Connect the WizFi 360 and WS2812B LEDs as shown in circuit diagram.
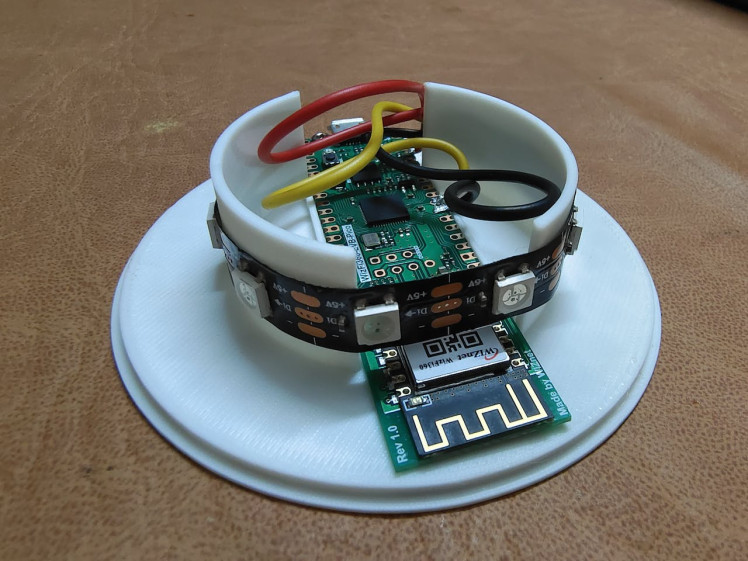
Step 3: Assembly
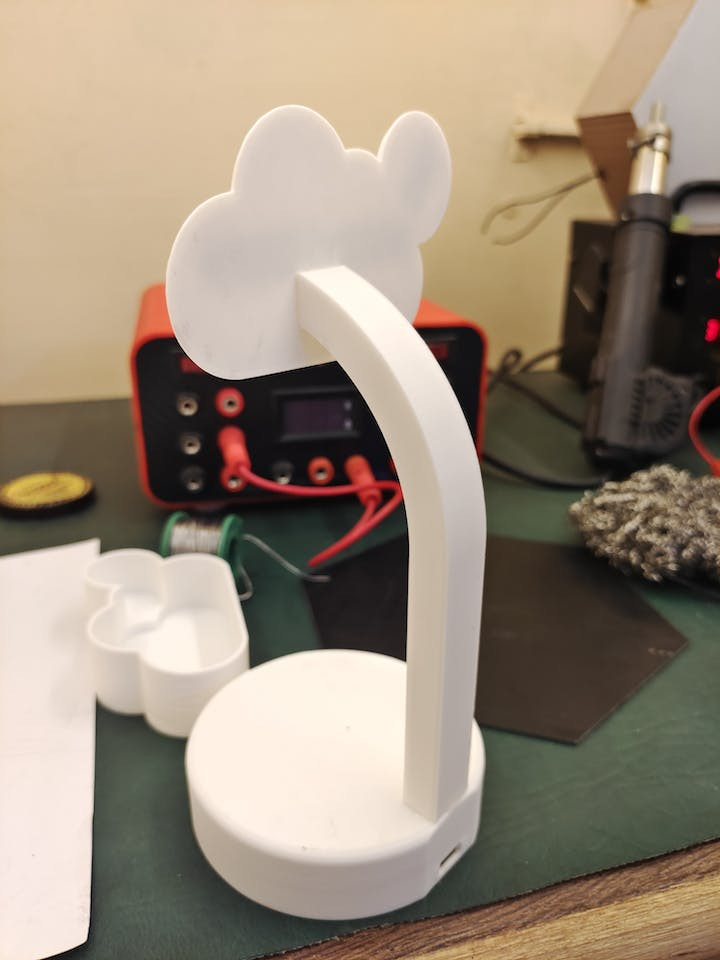
- Assemble all the parts together using quick glue.
Step 4: Getting Openweathermap API Key
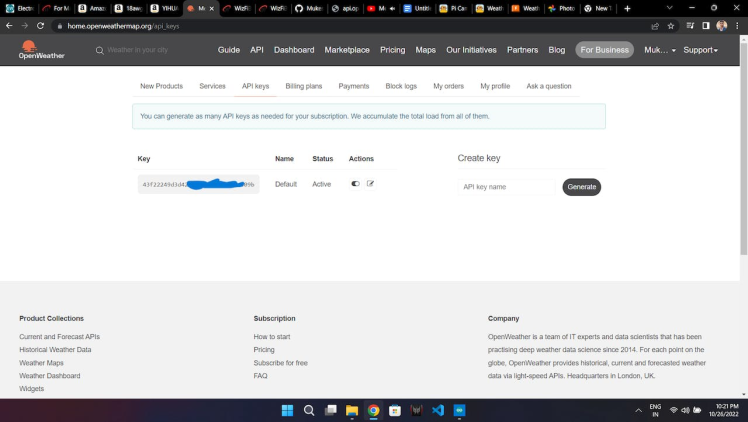
- Go to openweathermap.org and create your account and verify it.
- Now login to your account and click on you profile or right-top corner and go to My API Keys.
- Copy the API Key that you see this will be used later in Step 6.
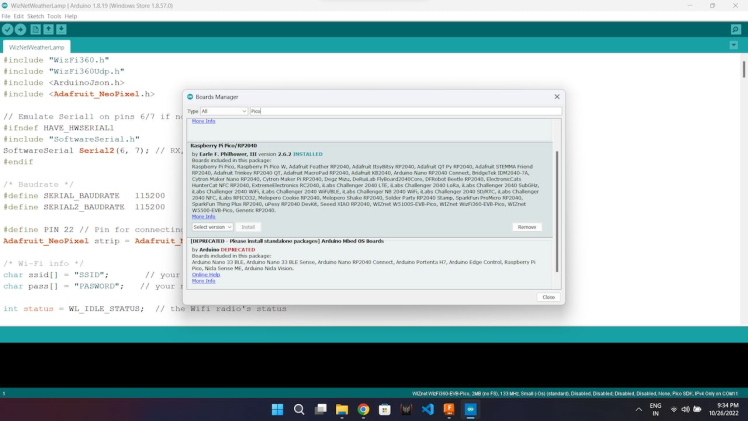
Step 5: Arduino Libraries Setup
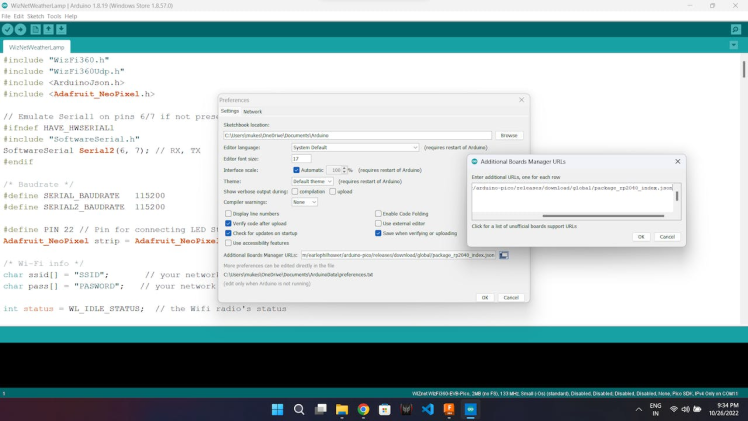
- First go to Files->Preferences and copy paste the following URL in Additional Boards Manager URLs:
https://github.com/earlephilhower/arduino-pico/releases/download/global/package_rp2040_index.json- Go to Tools->Boards->Boards Manager and search for Raspberry Pi Pico/RP2040 and dinstall it.
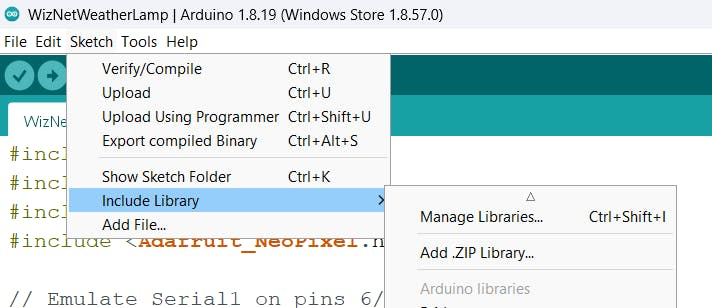
- Download the WizFi360_arduino_library-main.zip , Go to Sketch->Include Library->Add.Zip Library and select the downloaded Zip file.
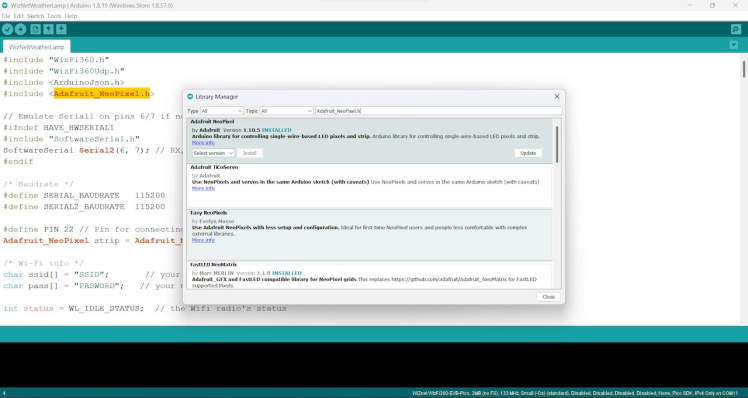
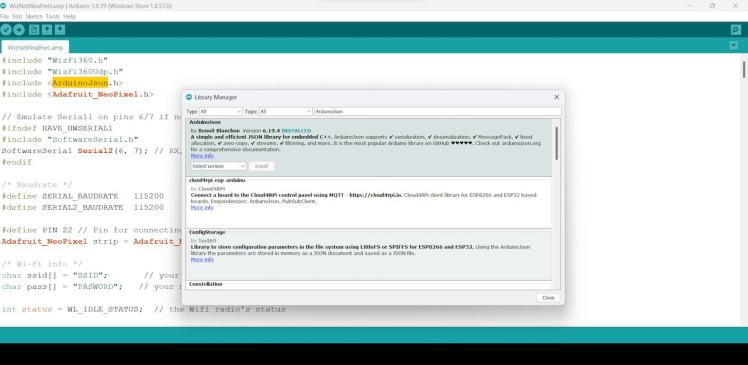
- Now got to Sketch->Include Library->Manage Libraries and Search for ArduinoJson, Adafruit_NeoPixel and install them.
Step 6: Code Changes
- Download the Arduino Code and make the followig changes
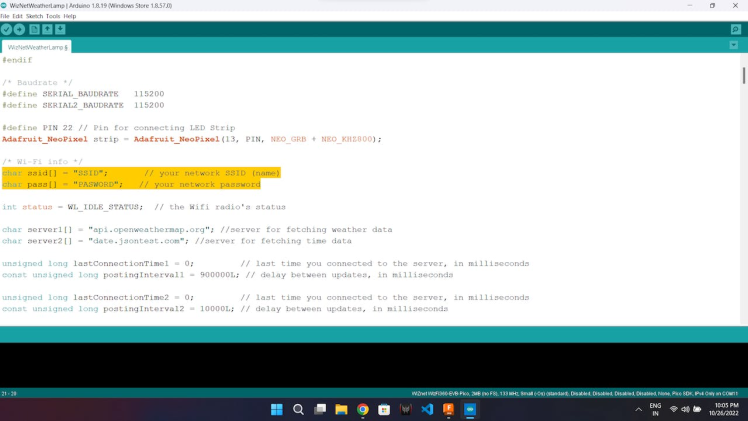
- At Line.No 20 you have to edit your Wifi Name(SSID) and Password.
/* Wi-Fi info */
char ssid[] = "SSID";       // your network SSID (name)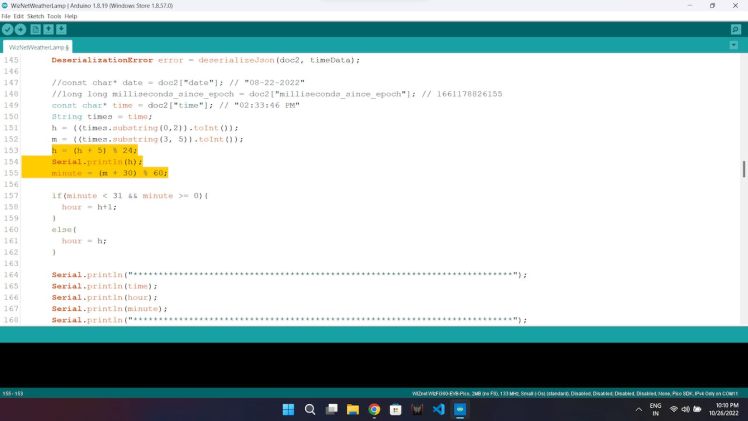
char pass[] = "PASWORD"; // your network password- At line 153 I have added 5 to hour and 30(Indian time zone IST 5:30) to Minutes and applied a maths to convert the APIs GMT time into ISt time zone.
- You may have to change the number(5 and 30) according to your tiem zone.
h = (h + 5) % 24;
      Serial.println(h);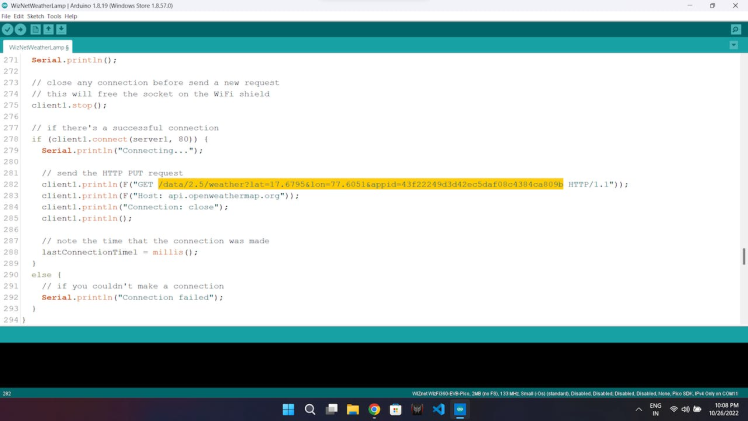
minute = (m + 30) % 60;- At line 282 you have to enter your locations Longitude, Latitude and You accounts openweathermap API key.
// send the HTTP PUT request
    client1.println(F("GET /data/2.5/weather?lat=17.6795&lon=77.6051&appid=43f22249d3d42ec***********ca809b HTTP/1.1"));
Step 7: Code Compile and Uplaod
- Connect your device usinh MicroUSB cable.
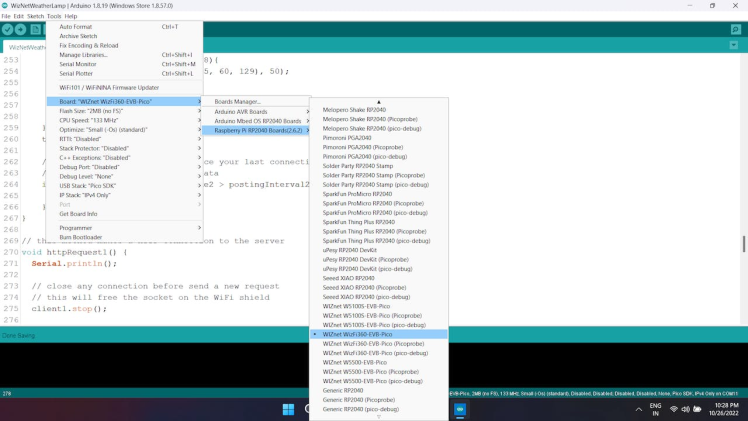
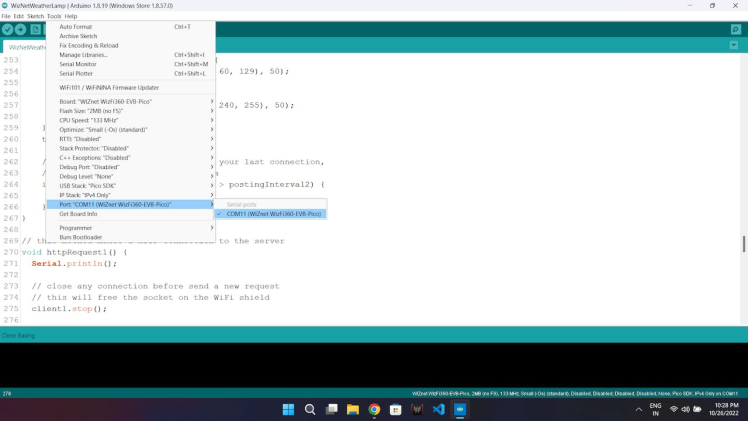
- Select the board type and port from tools.
- Now click on uplaod code, it will automatically compile and uplaod the code.
- After code is succesfully uloaded the device will connect with provided wifi and show the output.
Note: I am using My PCs USB as the power source for the Weather Lamp, you can use a 5V adapter or a 3.7V Lithium Ion battery.
Code
Credits
mukesh-sankhla
Tech Educator | Content Creator | Developer | Maker - Simplifying technology through hands-on learning. Creating high-quality tutorials, projects, and insights on electronics, IoT, robotics, CAD, 3D printing, and software development at Empowering students, professionals, and makers with practical, accessible, and inspiring content.
Related products


Leave your feedback...