
Uv-c Based Germs Disinfecting Machine

Made by yeshvanth-m / Home Automation
About the project
A touch-free germs disinfecting device that can disinfect anything from masks, wallets to mobile phones, killing maximum germs using UV-C.
Project info
Difficulty: Moderate
Platforms: Adafruit, Arduino, ControlEverything.com, Digilent, PHPoC, SparkFun
Estimated time: 2 days
License: GNU General Public License, version 3 or later (GPL3+)
Items used in this project
Hardware components

View all
Software apps and online services
Story
I always wanted to build something useful to the society and the world. Having been experienced in doing several science projects in electronics and IoT, I wanted to utilize my skills in such a way that most of the front-line workers are benefited from that. Due to the ongoing pandemic, things have changed a lot. We need to wear masks everywhere, sanitize our hands time to time, etc. One such issue that I found was, after using our mobile phones or other things outside, we often forget to sanitize them or we do it with liquid disinfectant. Thus, I wanted to build something that could help people stay away from germs by disinfecting their essentials without touching the disinfecting machine itself.
In the current era, e-Waste has been a major threat to the environment. Therefore, this project mainly relies on using the e-Waste effectively as much as possible.
Theory:UV-C Kills the germs by rupturing their cell membrane and altering their DNA/RNA
Source: lightstec.com

Source: lightstec.com
So this was the main idea in doing this project. UV disinfecting chambers have already hit the market, but one of the main feature that they all lacked was, the 360-degree all-surface disinfection. This project overcomes those limitations and disinfects all the surfaces by flipping the items automatically after disinfecting one surface.
Key Features:- Completely Touch-Free
- 360-degree disinfection
- Kills corona viruses also
- UV-C based
- Interactive display
- Adjustable Timer up to 12 Hrs.
- Emergency stop
- The micro-controller continuously monitors for any obstacles in the proximity of the IR sensors. Once there is an obstacle in the close proximity, for required amount of time (1.5 seconds in this case) an event is triggered, based on what's displayed in the LCD.
- When the open tray event is triggered, the stepper motor is driven the required number of steps to open the tray.
- The same way when the close tray event is triggered, the stepper is driven until the limit switch shows a red-flag (the switch changes it's state) so that the tray is closed.
- The timer is set either to default or by measuring the distance between the ultrasonic sensor and the hand.
- After choosing the disinfect option, the relay is turned ON, thus turning on the UV-C lamp. After disinfecting one surface, the items are automatically flipped with the help of servo motors while the UV is still ON.
- Lastly after disinfection the tray is again opened by the stepper motor.
Since this project is made from e-Waste, you need to first gather the parts.
Things you would need:
- An old flatbed scanner / embedded scanner (from printer)
- An old CPU Case
- Geometry box
Then, you would need all the parts listed in the previous section.
Step 2: Building the Case and Tray- Dismantle the scanner and take out the lower part of the scanner that would have the scan head and the stepper motor attached with it. This would be used to take the items inside and outside the disinfecting machine.
- Solder wires to the stepper motor, so that they're lengthy enough to connect to the breadboard.
- Fix a limit switch at the end of the base, so that we can determine the position of the scan head while starting the MCU.
The base with the scan head of an old flatbed scanner, with the stepper motor and limit switch attached.

The base with the scan head of an old flatbed scanner, with the stepper motor and limit switch attached.
- Remove the lamp that's there inside the scan head, you can re-use it later. Fix a firm base (tray) to the scan head. The things to be disinfected will be placed on the tray.
- Now take the geometry box and separate the lid and the base. Attach these two to the servo motors, the servo motors will be used to flip these items.
- Now fix the servo motor set up with the tray such that they can lift items and flip them. Make sure you use a powerful enough servo like a metal geared one, ex. MG90S servo.
- Now mount the tray to the scan head. You should end up something like this:
The tray fixed to the scan head with the servo set-up

The tray fixed to the scan head with the servo set-up
- Remove the front part of the CPU case such that it's completely open in one side.
- Now attach the lower part of the scanner with CPU case using screws. Drill holes if necessary.
The base and tray mounted to the CPU case.

The base and tray mounted to the CPU case.
Step 3: The circuitry and sensors- The primary Micro-controller board will be the Arduino MKR WiFi 1010, and the secondary Micro-controller board will be the Arduino Uno. Give the connections as per the circuit given in the Schematics section below.
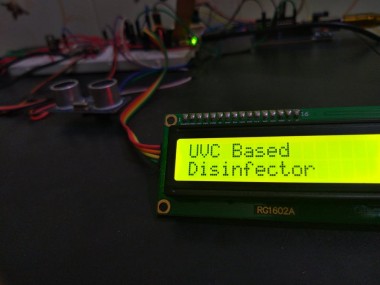
- Fix the IR sensor in front of the top panel and the ultrasonic sensor in the middle, the display should be in the corner and clearly visible to the user.
- The UV-C light should be placed beneath the top panel, in a reasonable position such that max. amount of light falls on the items placed on the tray.
- Test each and every part including the motor and sensor as you connect them to the MCU.
- Make the wires connecting the servo lengthy enough such that it doesn't stop the tray from coming out completely.
- The completed circuitry looked like this for me, but make the connections as neat as possible.
The finished circuit should look something like this

The finished circuit should look something like this
Step 4: Uploading the code- The code that is provided is completely modular, call the functions that you need to execute while checking the circuitry.
This is the function that will be executed once you turn ON the Arduino MKR WiFi 1010, so while building the project, you can check the working of individual components by commenting the rest of the code.
void execute(){ DisplayControl (1); //Display open tray option delay(1000); sense_1(); //To sense sensor 1 DisplayControl (2); //Display status message TraverserControl (1); //Open the tray DisplayControl (3); //Display Close tray option sense_2(); //To sense sensor 2 DisplayControl (9); //Display status message TraverserControl (0); //To close the tray DisplayControl (4); //To display default time int val = sense_1_2_();//To sense both sensors for input if (val == 0) //If user selects to { DisplayControl (5); //Display disinfecting message disinfect(); //Start disinfection } else { changeTime(); //To change default timing DisplayControl (5); //Display disinfecting message disinfect(); //Start disinfection } sense_1(); DisplayControl (6); //Display status message TraverserControl (1); //To open the tray sense_1(); DisplayControl (9); //Display status message TraverserControl (0); //To close the tray DisplayControl (7); //Display thank you message}You can find the full program in the Code section below.
The final model:
The complete set-up

The complete set-up
You're done!You might encounter some hardware errors while building the project, try to fix them and move on. Remember, "Never Give Up". This project failed to work properly several times and it needed many modifications to arrive at the optimal solution. So, with smart work and dedication, you can do anything! The finished project: The Completed project would look something like thisAny queries / doubts or you want to build this project in a large scale to launch it in market, feel free to contact me: E-Mail: ymlabs98@gmail.com
Schematics, diagrams and documents
Code
Credits
Related products


Leave your feedback...