
Tuya Mqtt With Esp32

Made by vilaksh01 / Communication / Displays / Notifications / Sensors / IoT
About the project
Use ESP32 with Tuya IoT platform and MQTT
Project info
Items used in this project

Story
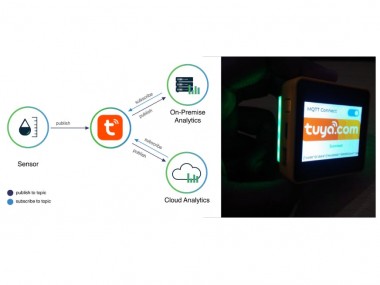
In this tutorial, we are going to see how we can use the MQTT protocol with ESP32 to communicate with Tuya Cloud. Earlier we had been using LinkSDK to control smart devices through the app via Data point (DP) protocol but in this, we will learn to use the Things Data model, to support the features that the DP protocol cannot implement, such as actions, events, and sub-device management. The aim of this article is to help developers to connect their proprietary hardware to the Tuya IoT Development Platform
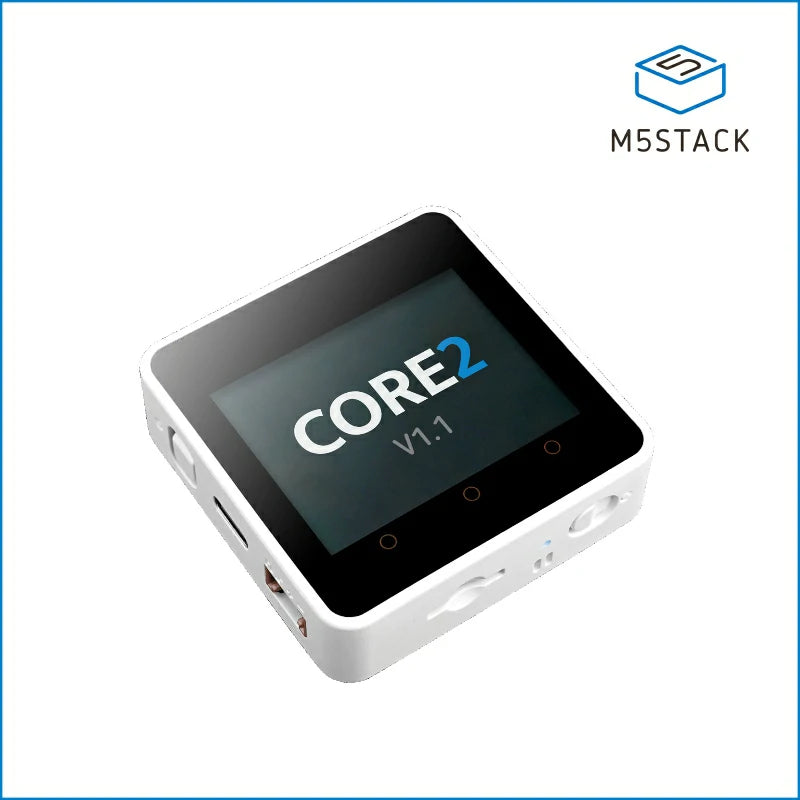
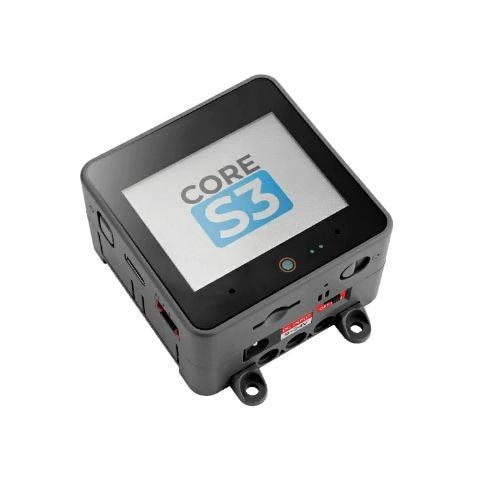
HardwareI have used ESP32 based M5 Core2 (micropython) but it should work with any ESP32 device with an MQTT library for bidirectional communication between a device and the Tuya IoT cloud.
Tuya IoT Platform SetupLog in to the Tuya IoT Development Platform and create a product to get the following parameters. For more information about the detailed processes of product creation, see Create Products.
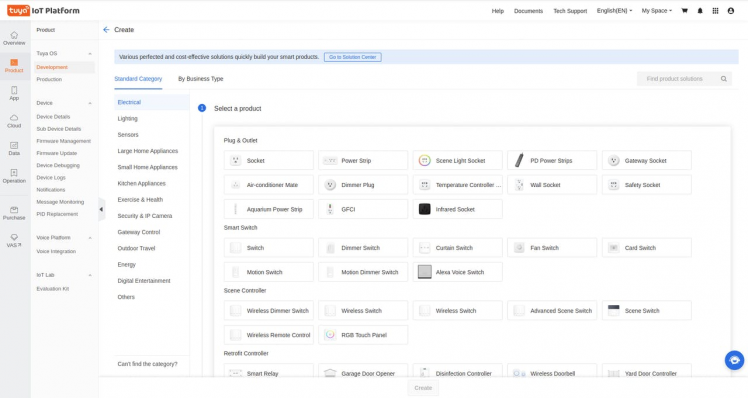
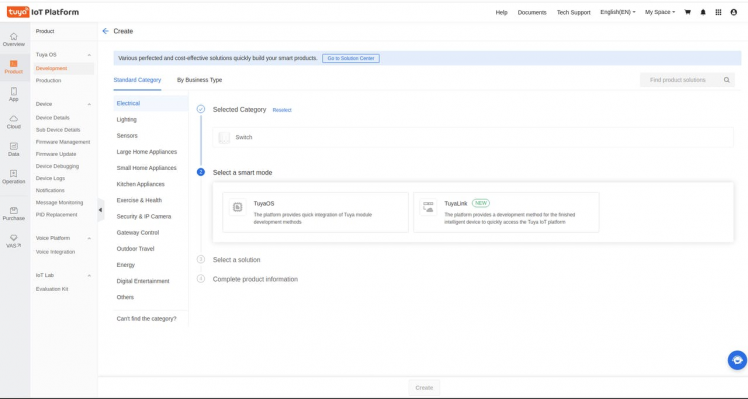
We have selected Switch as our product type (here are lot's of options to choose from). Also, selected TuyaLink as a development mode.
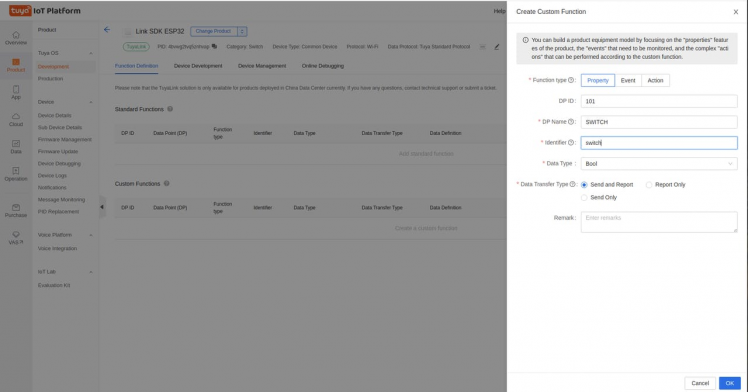
Once the product is created, create custom functions (Property, Events or Actions). If you want to make Data Points select Property. Events and actions are useful for value-based monitoring and alerts or trigger.
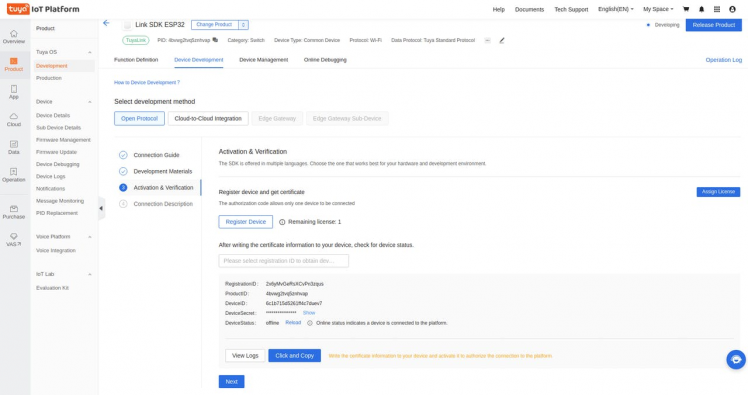
Tuya provides free licenses to debug devices, click on the link to get free licenses in the Activation and Verification shown below.
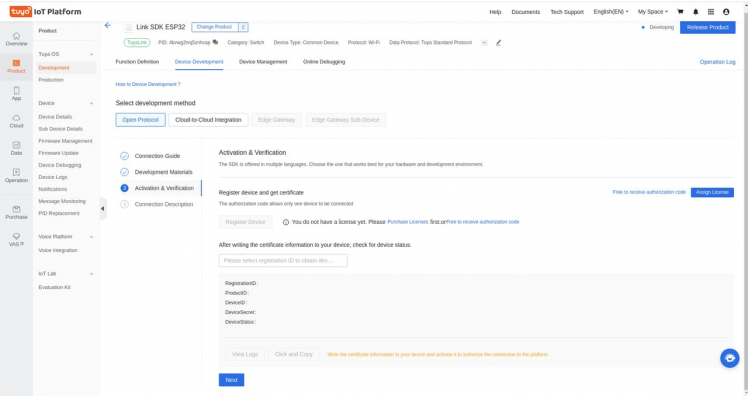
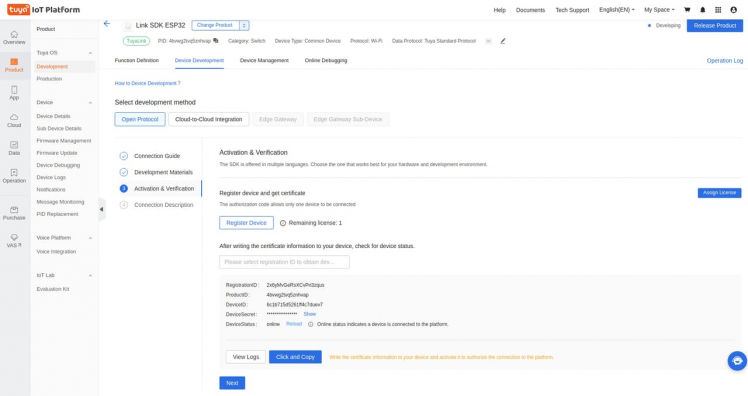
Once your license is obtained, you should be able to see all device information to be used to make a device connection with the ESP32 device.
ProductID - The PID of the product you create.
DeviceID - The device ID that is used for cloud authentication and communication.
DeviceSecret - The device secret that is used for cloud authentication and communication.
M5Stack Core 2 (ESP32) SetupCore2 is an ESP32-based microcontroller with a touch screen display, battery, RTC, microphone, and speaker built-in. This core2 is compatible with Arduino, Micro Python, and UIFlow programming environments. To program with UIFlow, we must first configure our M5Stack Core2 with UiFlow; for this, we will require M5Burner. The above link will take you to a download page. Connect your Core2 to your PC, then run M5Burner, which will instantly detect your device. After that, go to Core2 and choose UiFlow for Core2.
- M5 Burner - https://shop.m5stack.com/pages/download
- UIFlow - https://flow.m5stack.com/
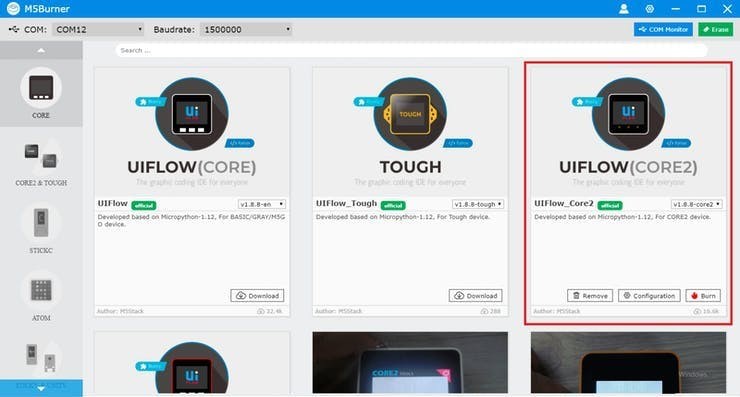
Burn the firmware to your device. Once you are configured with Core2, open UIFlow IDE over the internet (https://flow.m5stack.com/)
Understanding the code and Tuya MQTT connectionFirst, let us understand the MQTT parameters to be used to connect with Tuya Cloud.
-
Client Id: Enter a value in the format
tuyalink_{$deviceid}. Device Id is obtained from the Tuya Setup step. -
Endpoint: Enter an endpoint specified in the MQTT protocol. For example,
m1.tuyacn.comis shown in the screenshot. - Port: Enter a port number. Set this parameter to 8883.
-
Username:
${deviceId}|signMethod=hmacSha256,timestamp=${10-digit timestamp},secureMode=1,accessType=1 -
Password: The password is a 64-bit hexadecimal value obtained using
hmacSha256(content, deviceSecret)The plaintext ofcontentis a string concatenated withdeviceId,timestamp,secureMode, andaccessTypein sequence.For example,contentis made ofdeviceId={$device_id},timestamp=1607635284,secureMode=1,accessType=1(you can use this website to get computed hash https://www.freeformatter.com/hmac-generator.html) - SSL: True
- timeout: 60
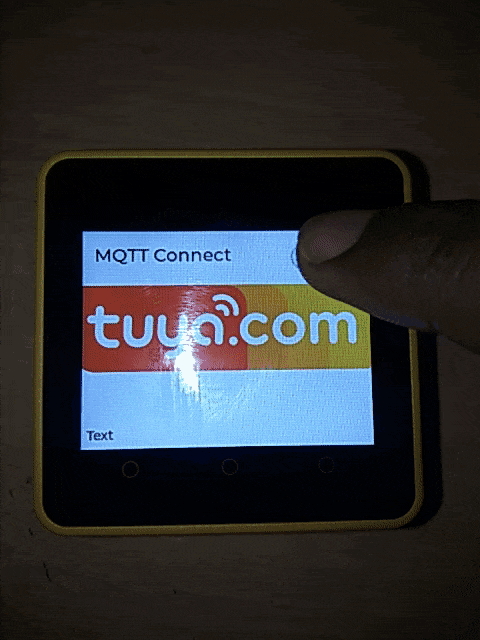
Below is micro python code,
m5mqtt = M5mqtt('tuyalink_6c1b715d5261ff4c7duev7', 'm1.tuyacn.com', 8883, '6c1b715d5261ff4c7duev7|signMethod=hmacSha256,timestamp=1641396180,secureMode=1,accessType=1', 'b71103b496ec7cdf3f58d2e7c787a9b79401dc7b4b34c29f342bde2488bf0e60', 60, ssl = True)
m5mqtt.start()
If your device connected to Tuya Cloud successfully via MQTT you would see DeviceStatus: online
With the MQTT protocol, you can communicate and control the device. For a full list of MQTT topics, refer to the Tuya documentations here: https://developer.tuya.com/en/docs/iot/MQTT-protocol?id=Kb65nphxrj8f1
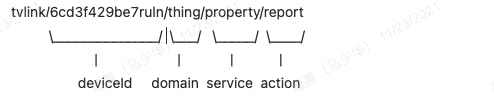
Here is the MQTT topic format
tylink/${deviceId}/${domain}/${service}[/${extend}]/${action}[/?${query}]The device reports properties to the cloud
To test the use case, we will try to use get pub-sub topic and understand it's working.
m5mqtt.publish(str('tylink/6c1b715d5261ff4c7duev7/thing/model/get'),str((json.dumps(({'msgId':'30101','time':'1641829440','data':({'format':'simple'})})))))The payload for the above topic is as follows:
- msgId - A string up to 32 bits in length. The request and response are associated with a message ID.
- time - The Unix timestamp when a message is sent, in seconds (10-digit value) or milliseconds (13-digit value).
- data - format simple (default): the lightweight data format information with fields irrelevant to the device operation excluded such as name and description. complete: the complete data format information.
In response to this publish event we now set up a subscribe event,
m5mqtt.subscribe(str('tylink/6c1b715d5261ff4c7duev7/thing/model/get_response'), fun_tylink_6c1b715d5261ff4c7duev7_thing_model_get_response_)

def fun_tylink_6c1b715d5261ff4c7duev7_thing_model_get_response_(topic_data):
  # global params
  timestamp_label.set_text(str(topic_data))
  ret = json.loads(topic_data)
  if ret['code']==0:
    rgb.setColorAll(0x00ff)
  else:
    rgb.setColorAll(0xff0000)
  pass
In the above code, we listen to the get_response topic from the cloud and if it is a success we turn the side LED bars to Green otherwise RED on failure. See the demo.
Where to go from here?
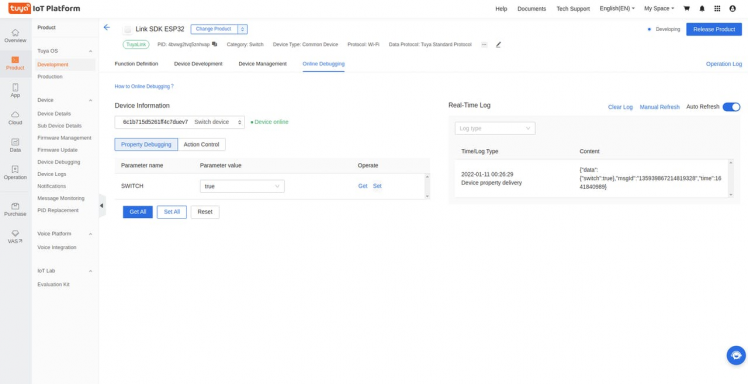
This particular flexibility of the Tuya Open MQTT protocol opens a lot more options to control your devices with greater firmware control with added security and the promise of Tuya IoT. Check the full attached code in the codes section. Also, you can try out an online debugging feature provided by Tuya IoT (or use MQTT topics to handle similar requests)
Schematics, diagrams and documents
Code
Credits
Related products


Leave your feedback...