

Tiny Gaming Mouse

Made by ScienceShack / Games & Gaming / Sensors
About the project
DIY gaming mouse using a PMW3389 and 32u4
Project info
Difficulty: Moderate
Estimated time: 1 day
License: GNU General Public License, version 3 or later (GPL3+)
Items used in this project

Story


Details
Introduction
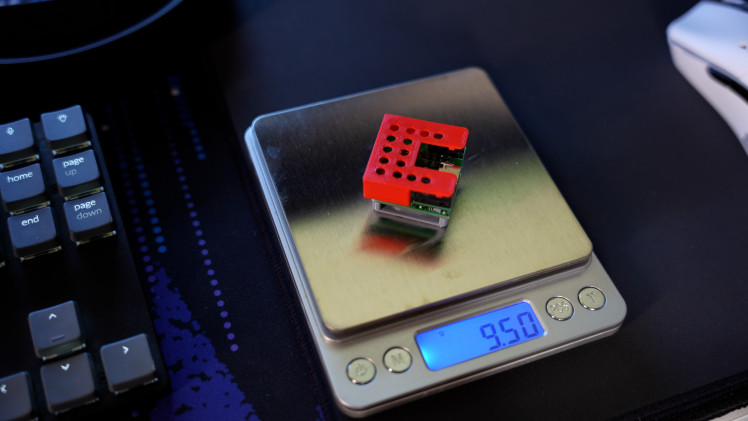
This outlines the creation and development of an ultra-small, ultra-light gaming mouse built from scratch. The mouse, with a volume of 18 cubic cm and weighing less than 10 grams, was designed to explore the limits of size and weight in gaming peripherals.
BuildSensor Selection
The Pixart PMW3389 sensor was chosen for its market-leading performance, as well as its availability via Tindie. Source code for the sensor was also linked to on the Tindie page, simplifying the programming process. I modified the code to not just read sensor data but also write it to the computer and enable left and right click for full mouse functionality.
Microprocessor and PCB Design
To interface with the computer and emulate a mouse, the ATMega 32u4 microprocessor was selected. A custom-designed PCB was created to ensure minimal size and eliminate extraneous components.
Big thank you to PCBWay, who sponsored the project, for providing the high-quality PCBs used in this project. Be sure to go check them out
Component Selection and Soldering
0603 SMD components were chosen for their tiny size. These were soldered on using the solder mask also provided by PCBWay to apply the paste, before the components were added and the whole PCB was heated with a heat gun to melt the solder.
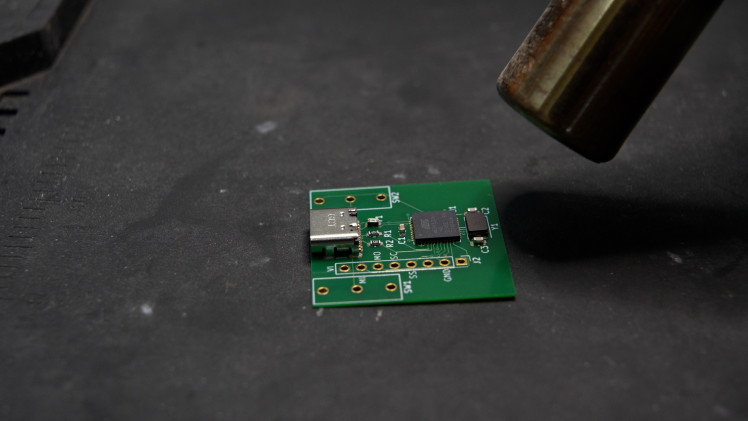
After which the through hole components could be added, and I realized here that there was breakout for the Rest pin so a small lead was soldered directly to that pin. Files included in this project have a breakout added
Bootloader
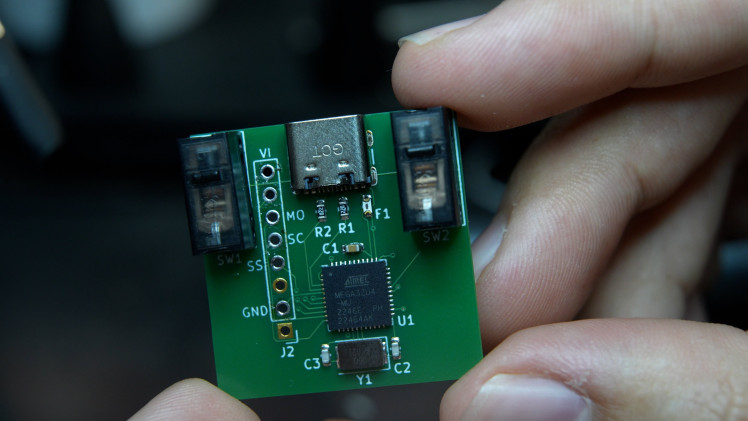
The Serial Peripheral Interface (SPI) was utilized for communication between the mouse sensor and microprocessor, so no other pins (aside from the aforementioned reset pin) were needed for bootloader flashing. The bootloader was flashed onto the chip, and the sensor and microswitches were then soldered on.
3D printing
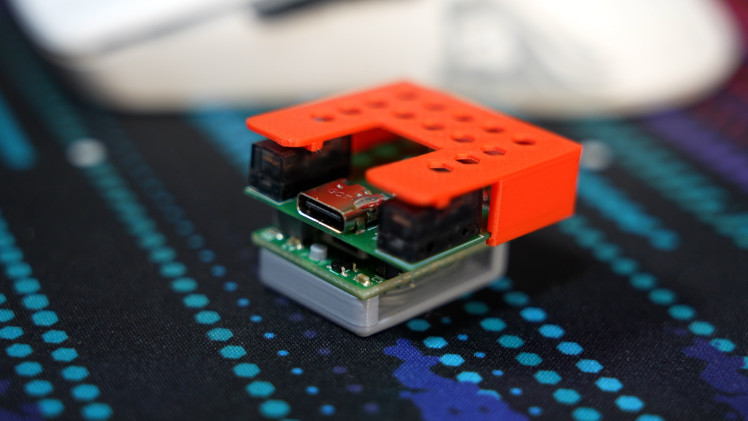
A 3D-printed skirt was designed to protect the sensor lens and provide a smooth surface for movement. Additionally, a red-colored shell was created in order to make it easier to handle.
 Conclusion
The completed ultra-small, ultra-light gaming mouse demonstrates effective functionality. The project showcases the integration of cutting-edge sensor technology, microprocessor programming, and innovative design choices.
Code
Credits
ScienceShack
We like sharing our love of science and technology to explore cool and fun projects through the eyes of a geek. Building, creating, destroying or just playing with the world of science.
Related products


Leave your feedback...