
The Scorpion | Star Trek Inspired robotics

Made by 314Reactor / Artificial intelligence / Robotics / Sensors
About the project
An Elegoo Robot Car Kit V3 with some additional Raspberry Pi tech and TensorFlow image recognition.
Project info
Difficulty: Moderate
Platforms: Arduino, Raspberry Pi, Pimoroni
Estimated time: 4 hours
License: GNU General Public License, version 3 or later (GPL3+)
Items used in this project
Hardware components


View all

Story
Ideas.
First off thanks to Elegoo for sending me the robot car that I’ve used for this project!
When Elegoo first contacted me I said it would be cool to add some extra stuff to their already cool Robot Car V3.0 – they agreed and I got thinking about what could be done.
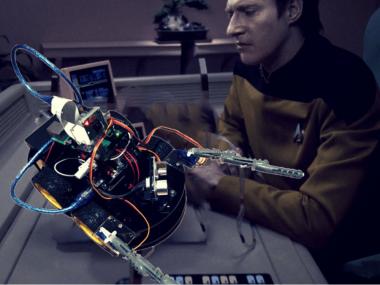
So I was watching the Star Trek TNG episode ‘The Quality of Life’ and thought it would be cool to add on a Raspberry Pi to the bot and see if I can make something similar.
As an overview; in the episode the Exocomps are designed to be used for doing work in dangerous/unreachable areas, until a character suspects that they may have sentience and questions how they should be treated.
I thought this would be a good opportunity to start using TensorFlow to get the bot to take pictures and analyse them, sending the results to the user.
Parts.
- Elegoo UNO Project Smart Robot Car Kit V 3.0
- Raspberry Pi 3 B+
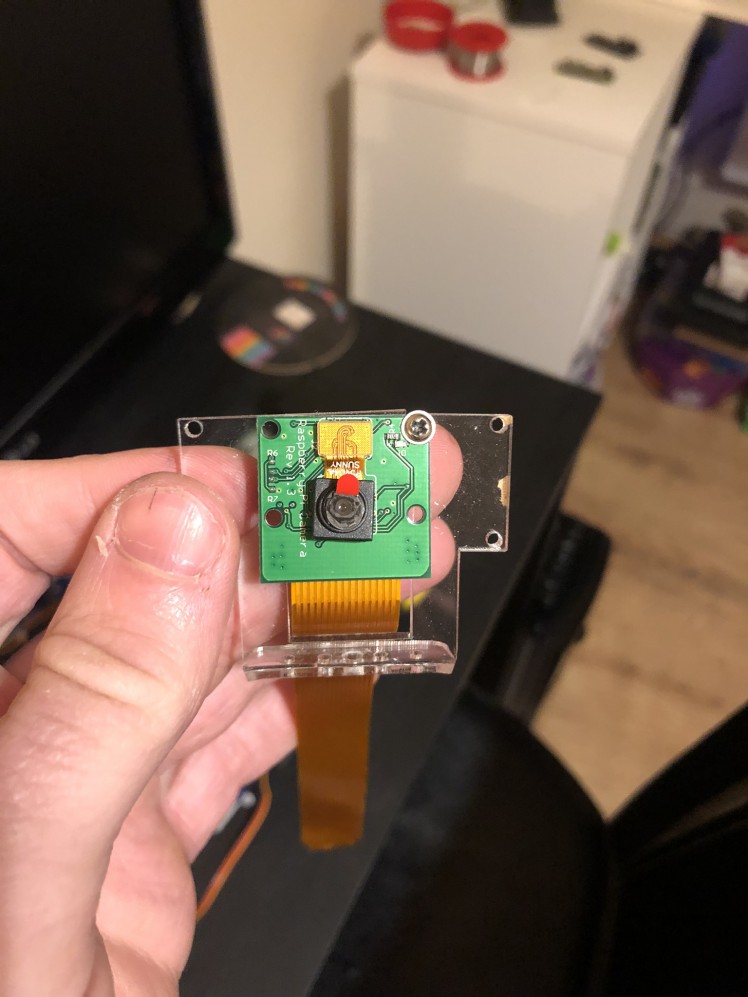
- Raspberry Pi Camera
- Standoffs
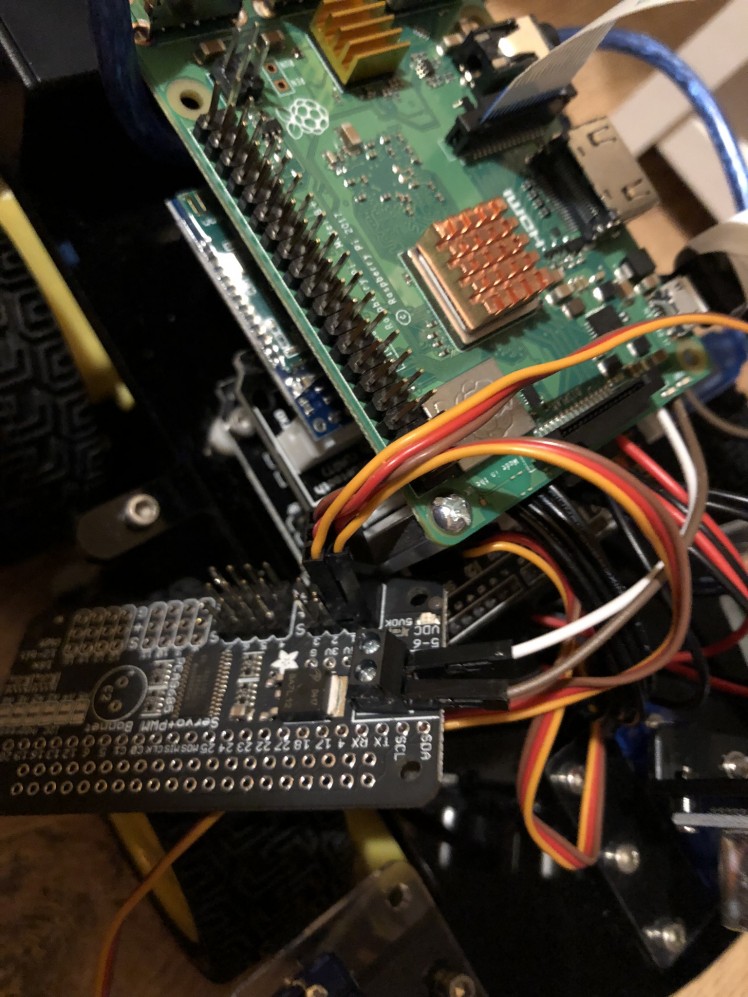
- Adafruit 16-Channel PWM / Servo Bonnet
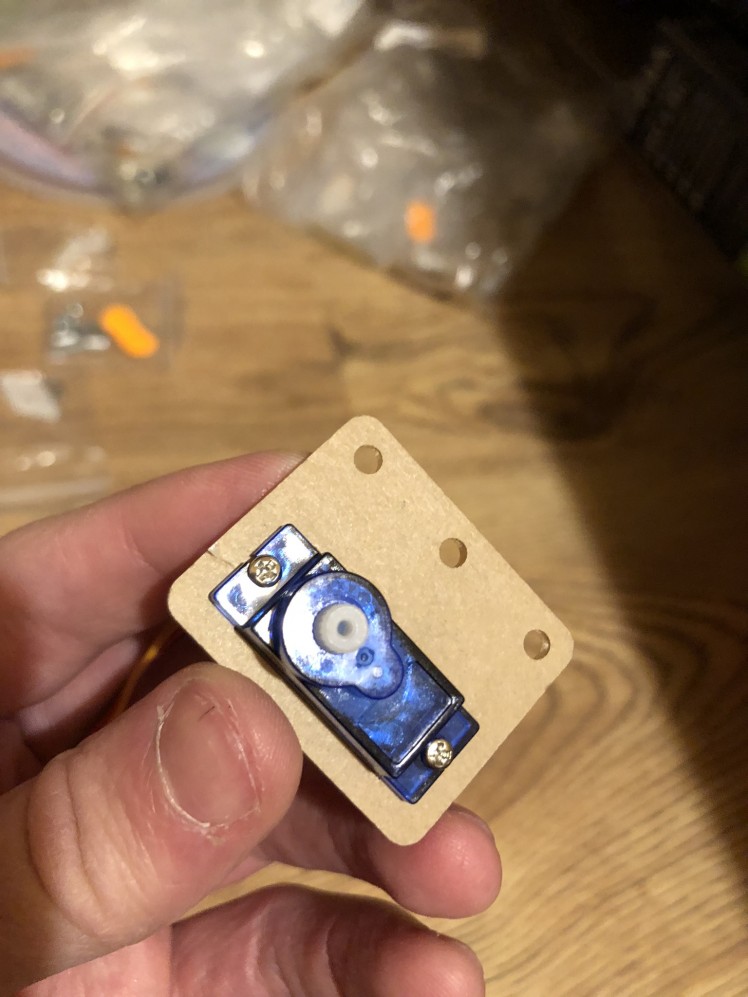
- Micro Servos
- Micro Servo Mounts
- Camera Mount
- Wires
- Some random wall plugs for the pincers
You can see my unbox/overview of the car here:
Build.
So from above you can see the construction of the bot itself is pretty easy, there are full instructions provided and it also comes with all the tools you need.
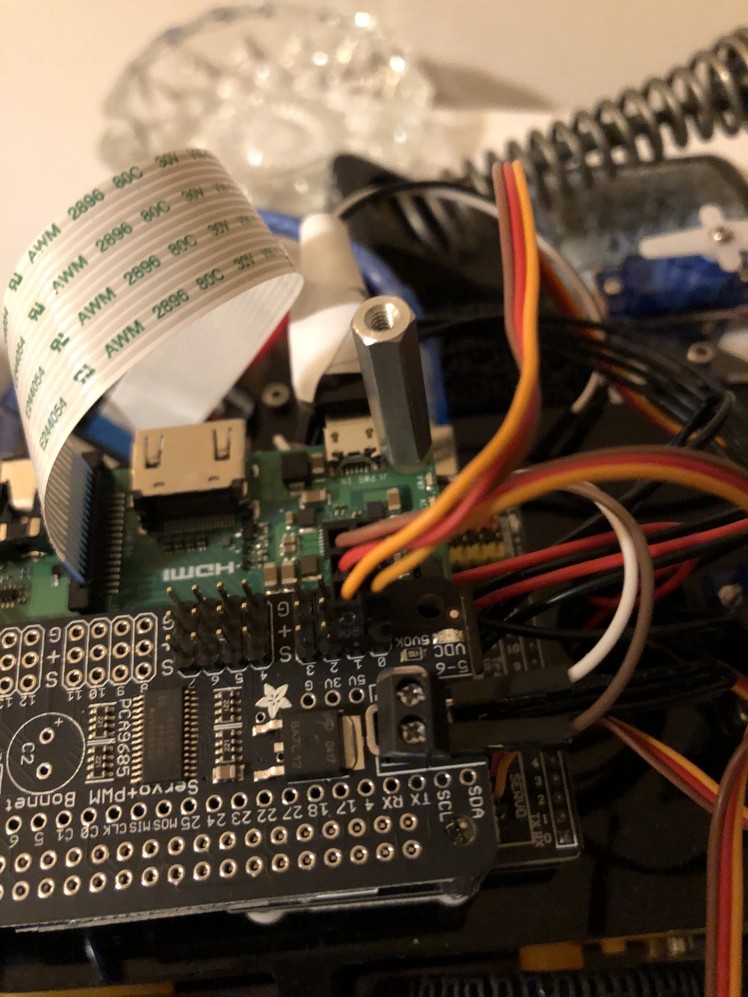
The next part of the build is getting the Pi setup with TensorFlow and getting some image recognition working.
I started off with PiBakery to get the basic setup and installed the camera and servo software then moved onto installing TensorFlow and looked into the image recognition script included.
I then wrote a Python script that will take a photo and call the image recognition and pass in the image taken for analysis.
The script also controls the pincers on the front, closing and opening them.
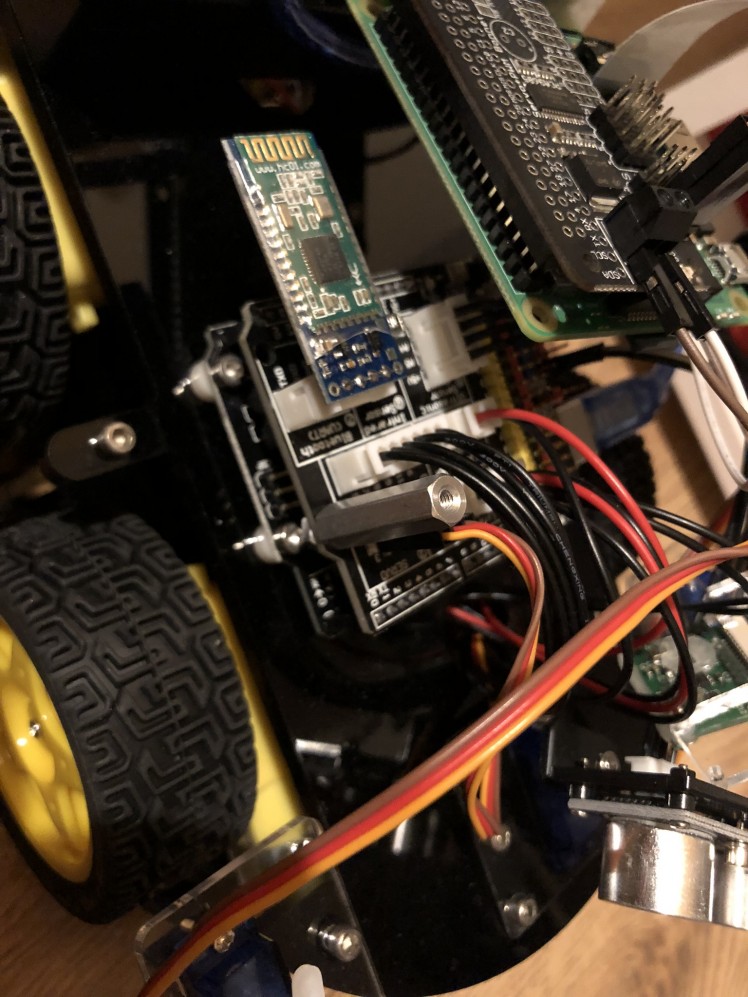
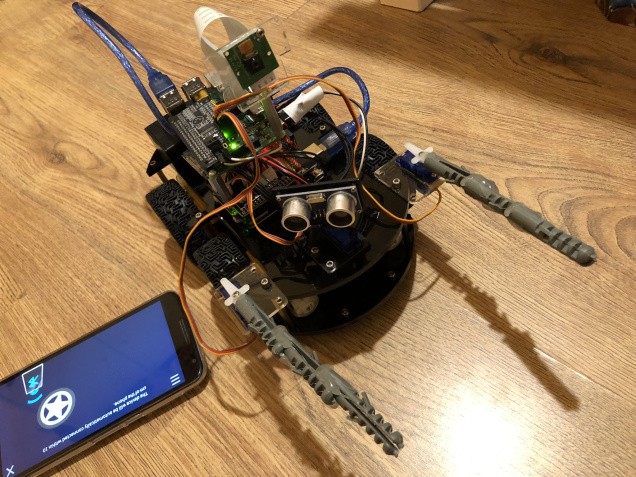
In terms of getting the Pi to activate these functions, I decided to use the serial communications from the Arduino, which will be controlled from the Elegoo app – which allows direct control of the bot but also custom buttons.
These custom buttons send in messages to the Arduino that can be picked up in the code, I modified the standard Bluetooth code to receive these messages and then send commands to the Pi via USB. Allowing the app to control the bot, close/open the pincers and activate the image recognition.
What I originally wanted was for the Pi to read the data back to the Arduino to be send back to the App. But unfortunately writing to the serial on the Arduino isn’t possible with the Bluetooth module on, it can only send serial commands out.
So I did some research and decided to use Telegram, which has a Raspberry Pi client in which the instructions to install are here, there may be an issue during the make process; this can be worked around by looking here.
The link above also has an example.sh file that can be used to send commands into the Telegram CLI when run, I used a modified version of this to send the results from the image analysis along with the picture itself – to myself on Telegram, which is running on the same phone I have the Elegoo Bluetooth app on.
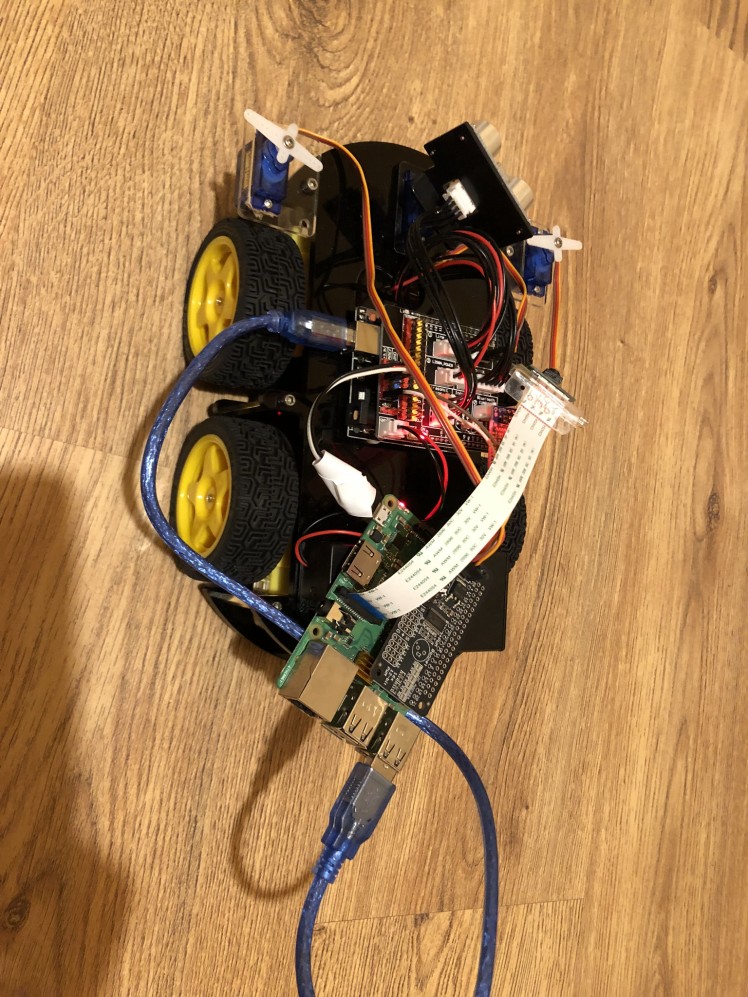
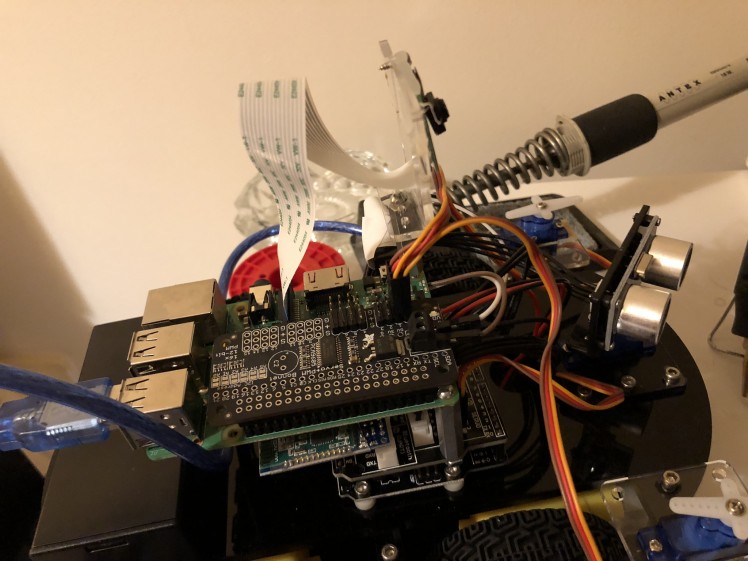
For the servos I attached the servo bonnet to the Pi and experimented with the servos max and min settings until the servos moved in a way that would open and close the pincers when attached.
Then I did a rough hookup to ensure that the serial commands would work from the Arduino to the Raspberry Pi and run the code properly. The Pi is connected to the Arduino via USB and the code on either side establishes a serial connection for passing information from the Arduino to the Pi.

You can grab the code for the Pi and the Arduino on my GitHub.
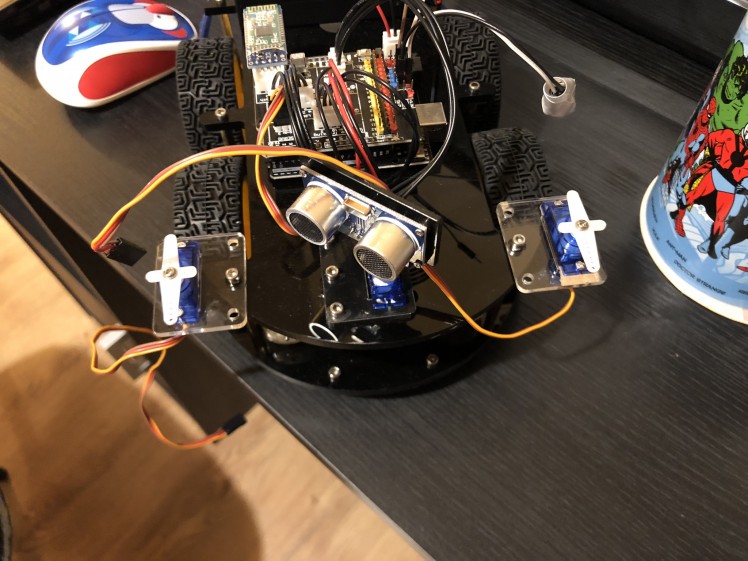
Once that was all done and working it was time to get the servos attached to the front of the bot, using the already existing screws on it to attach the servo mounts:
Next up is to attach the camera to the mount with a screw and some hot glue:
And then using a standoff to mount the Pi on top of the Arduino:
Then hooking up the camera mount on top:
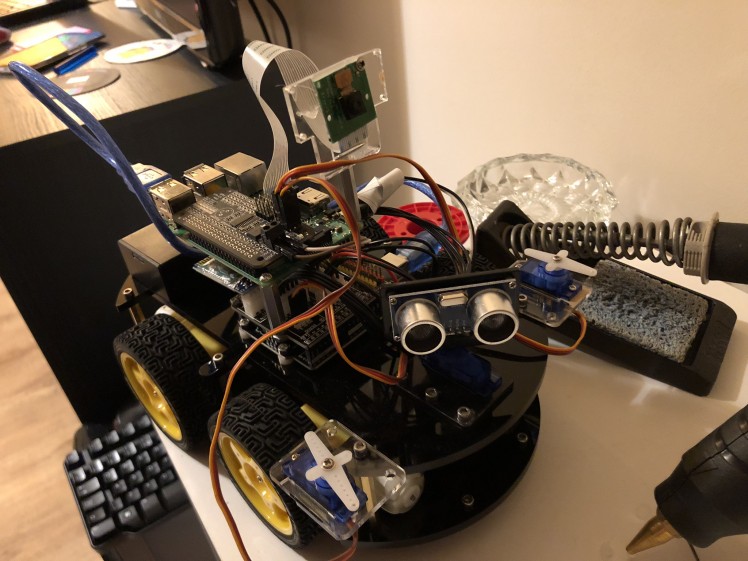
And then I hot glued on the pincers using some old wall plugs I found:
In terms of powering the Pi and the Servo board I have hooked it up to 5v out and ground pins from the Arduino.
And that’s the hardware! – It was also this point I realised that the bot looks a lot like a Scorpion and so the name was born.
In terms of setting up the Bluetooth connection, it’s very easy; with the code on the robot running it’s a simple case of going onto the App store/Google Play store and searching for the Elegoo app (there are 2, it’s the one with the adorable artwork that is the latest that I’m using).

Once loaded you can then hit the Bluetooth button in order to initalise the connection as long as the bot is within range of the phone/tablet.
On the main menu select the robot car, from here you will then see two options for controlling the car directly and another for custom controls; this is where you can program in custom commands to send to the Arduino.
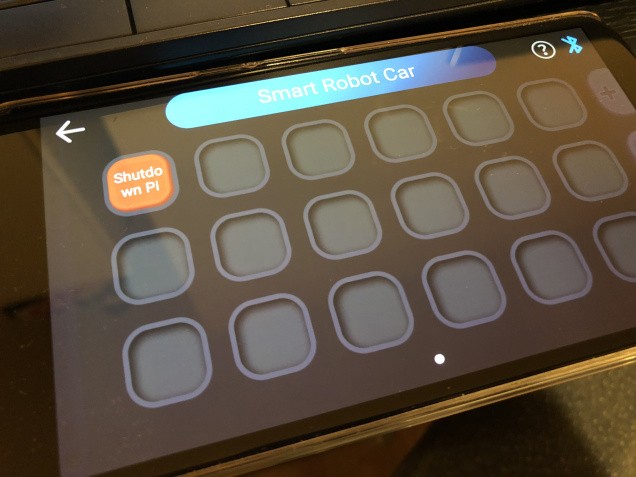
I use this to program in a number of buttons that send in commands that interact with the code I’ve put on the Arduino in order to then send commands to the Pi, such as:
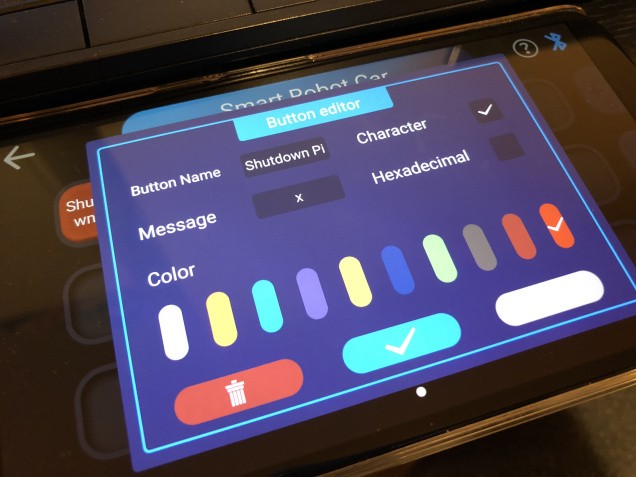
So as you can see from the code on my GitHub linked above, you can see that the ‘x’ character is taken in and used to activate the function that sends the shutdown serial command to the Pi and the python code running on the Pi then sees that and executes a shutdown command.
Here are each of the commands:
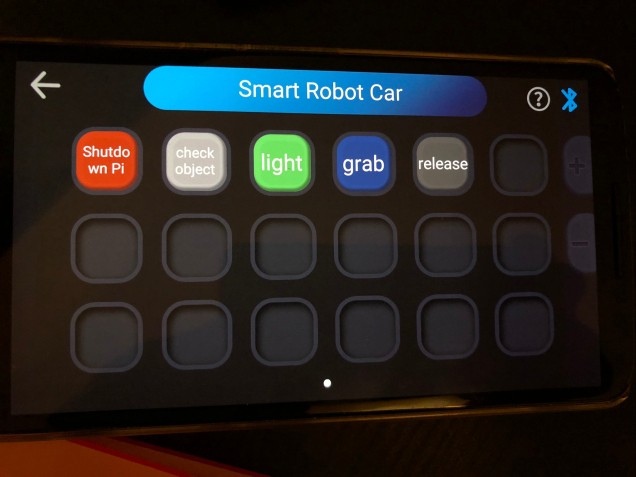
So for each button the following character is sent:
- Shutdown pi – ‘x’
- Check object – ‘z’
- Light – ‘a’ (this activates a green light on the Arduino)
- Grab – ‘u’
- Release – ‘e’
Now with all that setup its time to give it a try!
Working.
https://www.youtube.com/watch?v=BOUb5kaAydw
Now as you can see from the video I can fully control the robot and the Pi functionality all from my android phone and receive the image results back via Telegram on the same phone.
This could easily also be done with any Apple/Android device that is up to date enough to run the app.
Of course I had to try a sentience test by having it analyse a photo of itself but it seemed to think it’s reflection and my room behind it was a shoe shop. Weird.
So there are limitations in what it can recognise from the photos it takes, this is probably because the model could do with some more training. This is something I also want to look into as I am using a standard data set included with the tutorials at the moment.
I’m quite happy with the outcome above – I’d like to consider this a kind of Part 2 to the whole project as there are a few tweaks and additions that could be made for a future Part 3; such as getting the pincers to grip properly or maybe even adding in functionality for them to move small objects out of the way.
The other thing I may need to look into is powering the Pi independently as the voltage to it frequently dropped below 5v while being powered from the Arduino.
I could also use the line tracking functionality of the bot to send it into places and then come back after gathering a photo and analysis. The proximity code is also not active at the moment; this is something I will add in also at some point to keep the bot from hitting walls when under control.
I also plan to add some extra stuff to the Pi and get the whole bot more automated in future. I’ll need to sit down and think of some use cases, but for now; the hardware is there and the possibilities are nearly endless.
Conclusion.
A couple of things I did note are that sometimes the Bluetooth will not connect; but I’ve emailed Elegoo and they say this is due to the Bluetooth module not intialising so it just needs a reboot, luckily either the Pi or the Arduino can be rebooted independently of each other.
The only other thing I noted is that with the Bluetooth control code the robot would not turn very well on the spot, while in test mode it does this fine so I think there may be some issue with the Bluetooth code somewhere in terms of how it’s moving the motors on either side to turn.
When elevated I can see that the wheels both move in the correct directions that would cause a turn, but in practice it seems to struggle. Turning left or right while moving forward/back though is possible.
This was also a great opportunity to start working with Tensorflow and I learned a lot from it; although there is still much to learn about the inner workings of Tensorflow and also getting it to train on new images etc.
It will also be cool to dig further into Tensorflow and see what else can be done with it, very exciting stuff for sure!
Overall I’m happy with the project and excited to expand what it can do and as above; try to make it more of an automated rover for a Part 3 video in future.
Thanks for reading if you got this far and I’ll see you in the next project!
 A fine beard.
Code
Credits
Related products


Leave your feedback...