

The Pokémon Go

Made by carrotdonut / Art / Games & Gaming / Robotics / Vehicles
About the project
A Raspberry Pi controlled Parallax Boe-Bot driven by a web application. And best of all, it's Pokémon themed!
Project info
Difficulty: Moderate
Platforms: Raspberry Pi
Estimated time: 6 weeks
License: GNU General Public License, version 3 or later (GPL3+)
Items used in this project
Hardware components


Software apps and online services
Story
The Pokémon Go - Raspberry Pi Parallax Boe-Bot
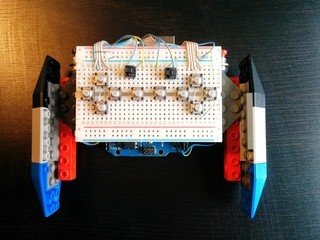
For my Grade 12 Computer Engineering culminating project, my teacher told us that we could create any sort of project we wanted using the Raspberry Pi. We had tinkered around with the Parallax Boe-Bot Robot and used a Parallax board to maneuver the robot around previously in the course, and so, I was inspired by one of my long-time favorite video games, Mario Kart, to use the Raspberry Pi to control the bot instead! I also initially planned to use a breadboard, push buttons, and another Raspberry Pi to create a physical game controller to control the bot. I was imagining something like this:
(Source: https://makezine.com/2014/08/08/a-game-controller-thats-mondo-customizable-with-lego-and-android/)
I was VERY eager to start researching and developing! When I was searching up how I could write Pulse Width Modulation (PWM) scripts with Python (as the boe-bot uses servo motors that requires PWM input) and send the input from the Raspberry Pi on the controller to the one on the bot, I came across a web application called "WebIOPi." It was a Raspberry Pi IoT toolkit that had its own Python and JavaScript library so that one could control a Raspberry Pi's GPIO from a web browser or application. Downloading the toolkit onto the Raspberry Pi gave me access to all the libraries. I was extremely excited when I realized... I could create a web application to use on my iPhone instead to control the bot! I already knew the basics oh HTML and CSS, so I knew I was capable of creating a simple application with buttons that replicated a game controller.
First things first however, I better start figuring out how to maneuver the bot. I knew the basic idea was, for example, to get the bot to turn left, the right wheel had to be turning a lot faster than the left wheel. It was primarily guess and check to figure out what values to input to get the wheels to turn at the desired speed. I then made each function a WebIOPi macro so each JavaScript function could call its corresponding python WebIOPi macro when called. Each python function ended up looking like:
- #Left Forward
- @webiopi.macro
- def leftF():
- GPIO.pwmWrite(leftMotor,0.07)
- GPIO.pwmWrite(rightMotor,0.05)
- time.sleep(0.1)
After confirming that each function moved the Boe-Bot correctly, I then got started on the web application! Building the front-end of the application was pretty simple, as I just used CSS to layout all the buttons.
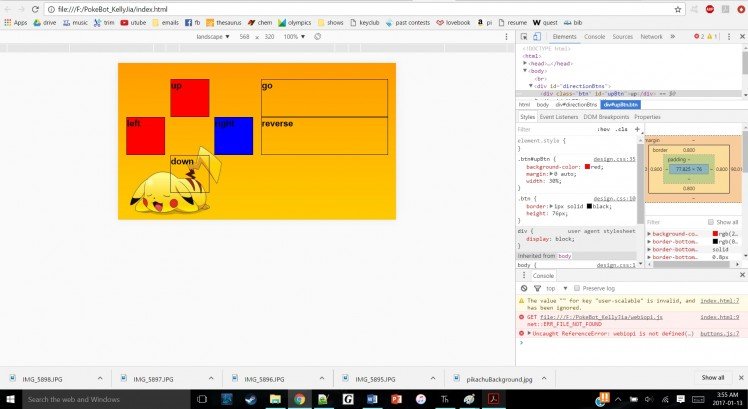

While adding event listeners to the buttons, I realized that I needed to use touch events instead of click events, as I would be using the application on my phone to drive the bot. I implemented a touch and release event for each button, so for example, if the' left' button was released, the program could then check if the 'forward' button was still being held to keep the bot driving forward. The JavaScript functions then all had this structure:
- var left= document.getElementById("leftBtn");
- left.addEventListener("touchstart",leftOn);
- left.addEventListener("touchend",leftOff);
- # Called when the left button is pressed
- function leftOn() {
- if (ifForward) {
- webiopi().callMacro("leftF");
- }
- else if (ifBackward) {
- webiopi().callMacro("leftB");
- }
- else {
- webiopi().callMacro("stop");
- }
- }
- # Called when the left button is released
- function leftOff() {
- if (ifForward) {
- webiopi().callMacro("forward");
- }
- else if (ifBackward) {
- webiopi().callMacro("backward");
- }
- else {
- webiopi().callMacro("stop");
- }
- }
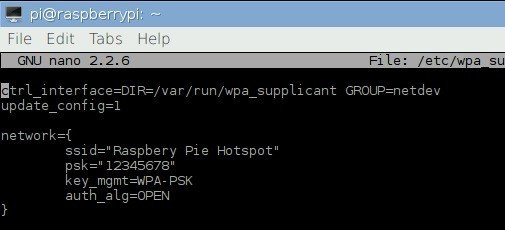
The next task to tackle, which pretty much makes this whole project work, was how to connect WebIOPi to the network so that the web application could actually communicate with the Raspberry Pi. I first configured the Raspberry Pi to automatically connect to the Raspberry Pi hot spot that my teacher had set up in our class for this project. To do this, I went into the network interfaces file of the Raspberry Pi from the command line, and entered auto wlan0 to the top of the file and at the bottom of the file, appended:
allow-hotplug wlan0
iface wlan0 inet dhcp wpa-conf /etc/wpa_supplicant/wpa_supplicant.conf
iface default inet dhcp
This told the Raspberry Pi to automatically connect to the wireless LAN at start-up, and to connect to the hot spot in the wpa-supplicant configuration file. I then entered the hot spot information into the file, essentially the hot spot name and password. (Please disregard the fact that my teacher named the hot spot with "Pie" instead of "Pi")
Then, I tinkered with the rc file on the pi to automatically run the WebIOPi application on start-up. I also had to change the WebIOPi configuration to run the index.html file in my project folder once WebIOPi was booted up. Now, whenever my iPhone was also connected to the local hot spot, I could access the web application with the Raspberry Pi's IP address and drive the bot!
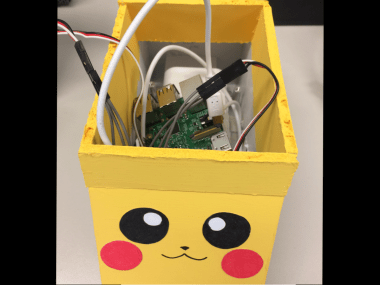
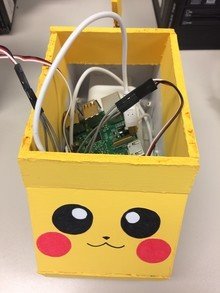
Furthermore, as I needed the final product to be "mobile", I needed an external power source for the Raspberry Pi, and I found that my iPhone's portable battery charger worked perfectly! It's kinda funny cause I initially bought the external battery so that I could play Pokémon Go for longer outside. The final configuration looked like this:

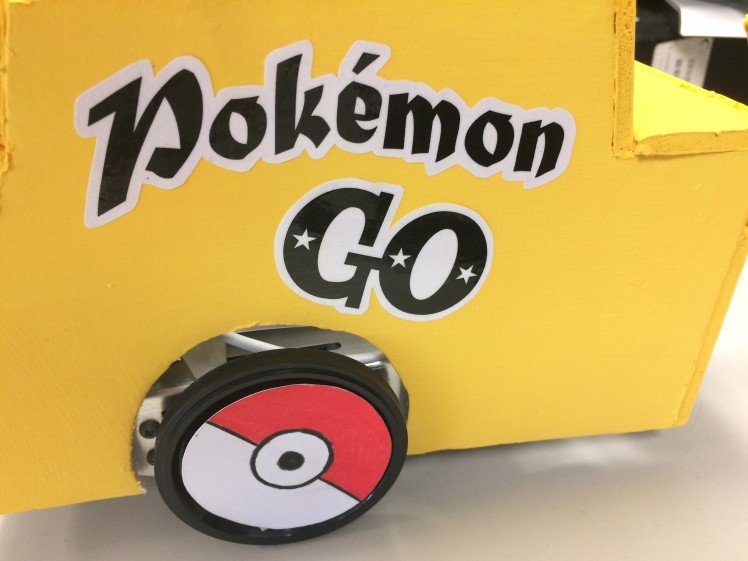
Even though my initial inspiration for this project was Mario Kart, somewhere along the way, I decided to go for a Pokémon theme due to the insane Pokémon Go craze during the summer before. I thought calling my project The Pokémon Go was a clever pun as my project was a driving robot and the game is called Pokémon "Go"... or it's actually just really lame :( you can decide.
Anyways, I couldn't leave my final project looking like that wired mess, so I used foam board and paint to make a Pikachu "shell" for the bot! Sadly, I made the shell the night before the project was due (woops, procrastination), and unfortunately forgot to make the ears. I still think it turned out really cute though :D! I'm definitely really proud of myself for actually successfully building and completing this project!
Schematics, diagrams and documents
Code
Credits
Related products


Leave your feedback...