
Real-time Weather Station With Lark, Arduino And Qubitro

Made by pradeeplogu0 / Environmental Sensing / Weather / IoT
About the project
Will guide you in designing and implementing an Arduino-based real-time weather station with Lark weather station and Qubitro.
Project info
Difficulty: Moderate
Estimated time: 3 hours
License: GNU Lesser General Public License version 3 or later (LGPL3+)
Items used in this project

Story
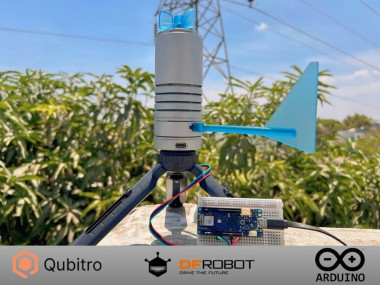
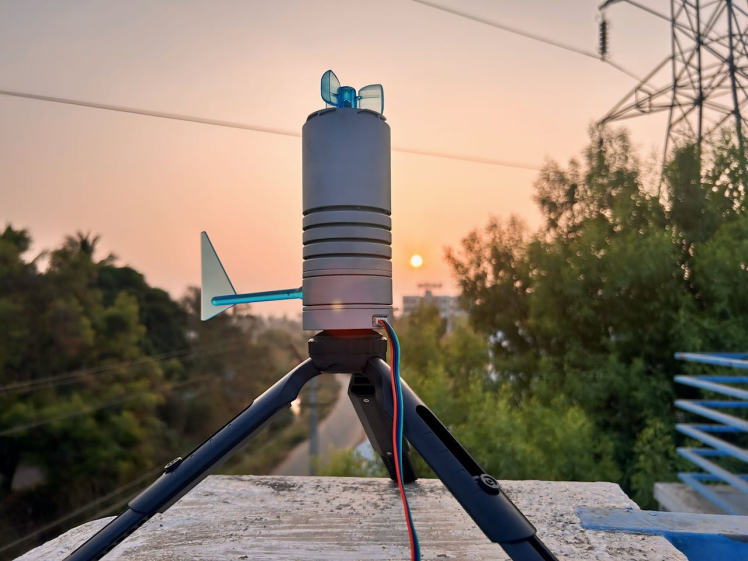
Weather monitoring is essential in various fields, including agriculture and disaster management. In this comprehensive project guide, we will take you through the process of creating an IoT-based Wi-Fi real-time weather station using the DFRobot Lark Weather Station, an Arduino MKR WiFi 1010, and the Qubitro cloud platform. By following this project guide, you will be able to collect, analyze, and visualize atmospheric data such as temperature, humidity, wind speed, and more.
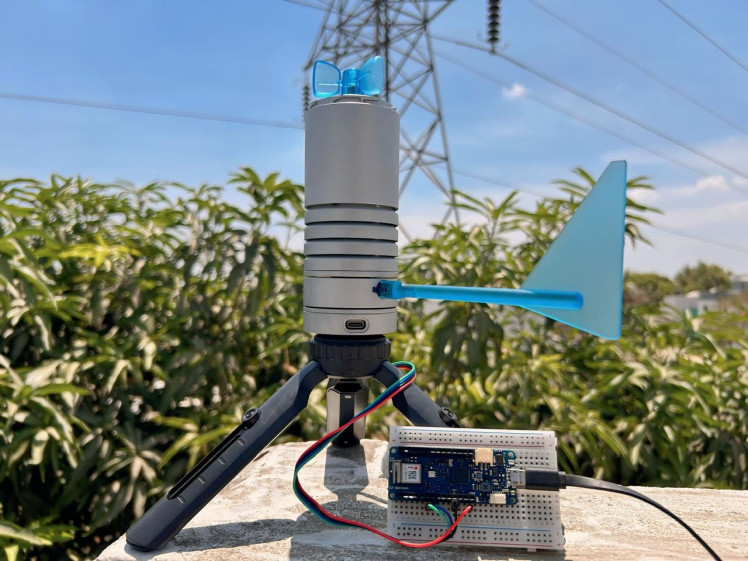
- DFRobot Lark Weather Station: This compact all-in-one device simplifies weather data collection and is compatible with various controllers like Arduino, micro:bit, and ESP32.
- Arduino MKR WiFi 1010: A powerful board with built-in WiFi capabilities for seamless communication with the cloud.
- Qubitro Cloud Platform: A cloud-based IoT platform that enables data storage, visualization, and analysis.
About the Hardware💡:
🌟DFRobot Lark Weather Station🌡ï¸
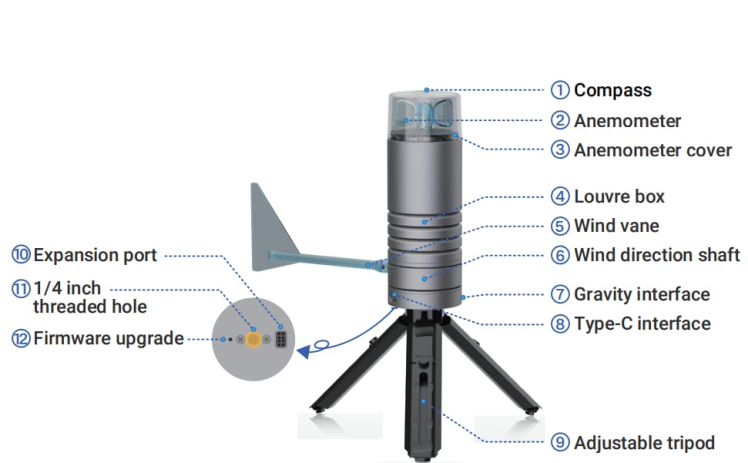
The DFRobot Lark Weather Station is an exceptionally compact weather station designed for precise atmospheric data collection. Whether you’re an educator, student, or researcher, this portable device simplifies the process of measuring and recording key weather elements. Here are the key features of the Lark Weather Station:
Five-Element Measurement:
The Lark Weather Station captures real-time meteorological data across five essential parameters:
- Wind Speed: Measure wind velocity accurately.
- Wind Direction: Determine the direction from which the wind is blowing.
- Temperature: Monitor ambient temperature.
- Humidity: Track relative humidity levels.
- Air Pressure: Record atmospheric pressure variation.
Real-Time Communication:
- The Lark Weather Station offers real-time data output with support for both UART and I2C communication modes.
- Data is provided in physical units, making it directly understandable and usable for users.
Controller Compatibility:
The Lark Weather Station is compatible with popular controllers, including:
- micro:bit
- Raspberry Pi
- ESP32
- Unihiker development boards
Built-In Storage Space:
- It incorporates high-quality sensors internally to ensure precise and stable data.
- The compact size allows for easy storage and transport.
Universal Tripod Interface:
- The Lark Weather Station features a universal tripod interface, making it convenient for field deployments.
Ideal for Education and Research:
- Educators can use it as a teaching tool for meteorology.
- Students can explore atmospheric conditions and learn about weather phenomena.
- Researchers can collect reliable data for meteorological studies.
Whether you’re setting up a weather station in your backyard, conducting classroom experiments, or contributing to scientific research, the DFRobot Lark Weather Station provides a versatile and user-friendly solution.
🌟Arduino MKR WiFi 1010🛜
The Arduino MKR WiFi 1010 is a powerful microcontroller board designed for Internet of Things (IoT) applications. Let’s explore its features and capabilities:
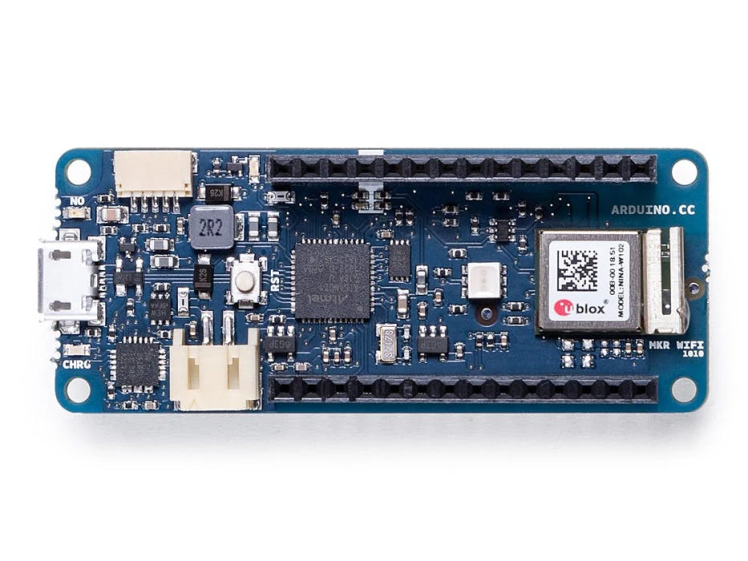
Overview:
- The MKR WiFi 1010 is an improved version of the MKR 1000, specifically developed for IoT projects.
- It features the SAMD21 Cortex-M0+ 32-bit low-power ARM microcontroller.
- The onboard secure element ATECC508 ensures safe and secure WiFi connections.
Key Features:
- WiFi Connectivity: The MKR WiFi 1010 provides built-in WiFi capabilities, making it easy to connect to networks and cloud services.
- Bluetooth Low Energy (BLE): It supports BLE, allowing you to create Bluetooth-enabled devices.
- Low Power Consumption: Ideal for battery-powered applications.
- Compact Form Factor: The board is compact and lightweight, suitable for portable and embedded projects.
- Arduino Cloud Compatibility: Easily integrate with the Arduino Cloud platform for rapid IoT development.
Use Cases:
- Sensor Networks: Build sensor networks connected to home or office routers.
- IoT Devices: Create devices that send data to cellphones via BLE.
- Prototyping: Rapidly prototype WiFi-based IoT applications.
The MKR WiFi 1010 is an excellent choice for beginners, makers, and professionals venturing into the world of IoT. Its flexibility, security features, and compatibility with various shields make it a versatile board for a wide range of applications.
🌟Qubitro Cloud Platformâ˜ï¸
Qubitro is an end-to-end cloud platform designed for building and operating scalable connected experiences in the realm of Internet of Things (IoT). Let’s explore what makes Qubitro a powerful choice for managing your IoT projects:
Collect, Process, and Activate Device Data:
- Qubitro allows you to seamlessly collect data from your IoT devices, process it, and activate relevant actions.
- Whether you have one device or thousands, Qubitro scales effortlessly.
Fleet Management:
- Manage your IoT fleet effectively using Qubitro’s pre-built templates and integrations.
- Collaborate with colleagues and take advantage of device data at scale.
Functions:
- Beyond basic data collection, Qubitro offers functions for data transformation, seamless integration, and connectivity.
- It goes beyond mere device management to help you unleash the full value of your connected fleet.
Developer Friendly:
- Qubitro provides an intuitive API, comprehensive documentation, and native SDKs.
- Get up and running quickly, and scale confidently in a cloud-first world.
Enterprise Ready:
- All Qubitro plans include standard security and compliance features.
- Designed for production use cases, Qubitro ensures reliability and robustness.
Steps to Create the Weather Station:
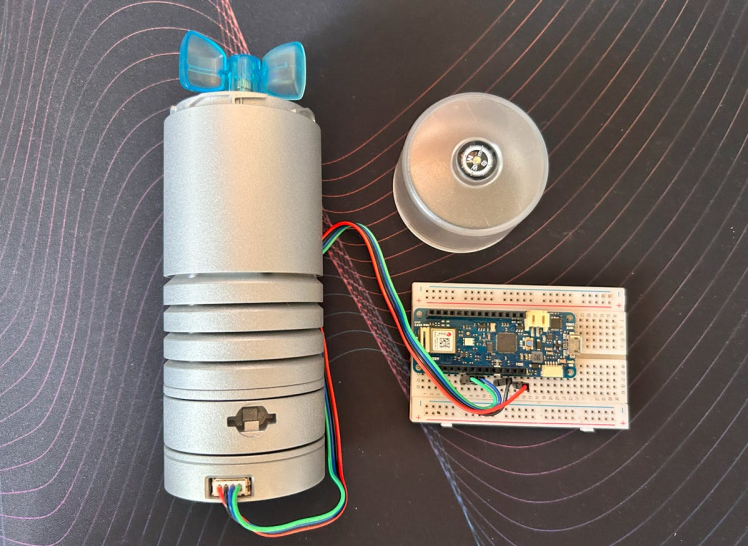
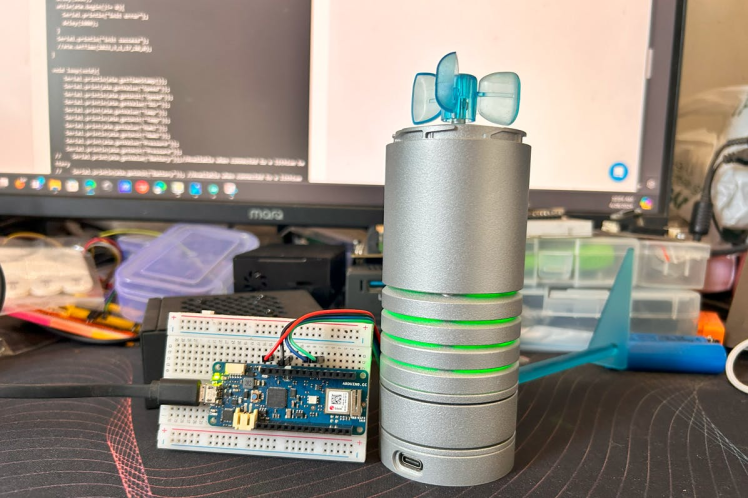
1ï¸âƒ£Assemble the Hardware
- Connect the DFRobot Lark Weather Station to the Arduino MKR WiFi 1010 using the appropriate jumper wires.
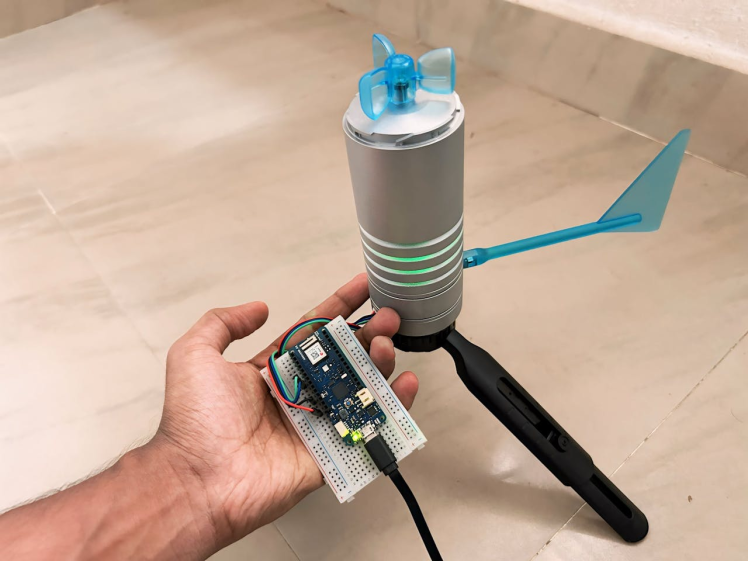
Note: Lark Weather station can communicate with external controllers via I2C and UART protocol. In this, we are going to utilize the I2C.
2ï¸âƒ£Set Up the Arduino Environment
- Install the Arduino IDE if you haven’t already.
- Add the necessary libraries for the Lark Weather Station and the MKR WiFi 1010.
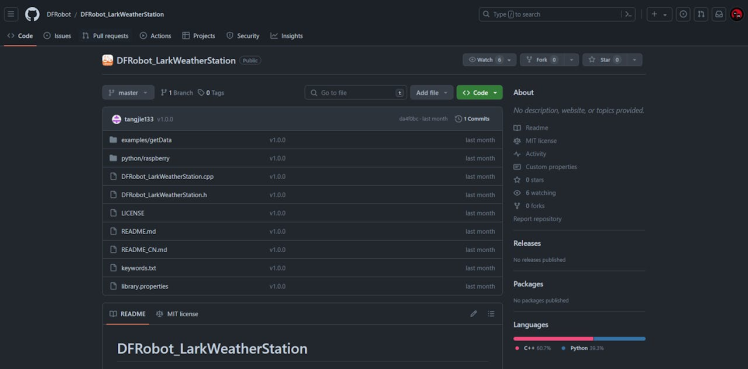
Note: Here is the Arduino library for Lark Weather Station.
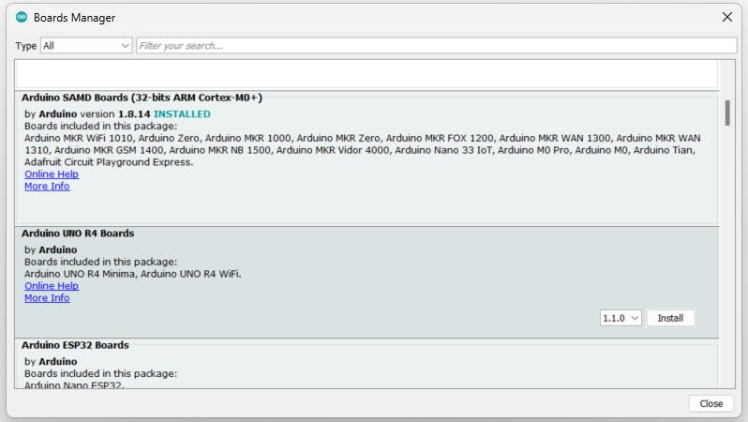
- Install the MKR WiFi 1010 board libraries.
Note: Look for Arduino SAMD Boards
3ï¸âƒ£Write the Arduino Sketch
- Create an Arduino sketch that reads data from the Lark Weather Station sensors. Use the sample sketch below to read the lark data via I2C.
#include "DFRobot_LarkWeatherStation.h"
#define DEVICE_ADDR 0x42
DFRobot_LarkWeatherStation_I2C atm(DEVICE_ADDR,&Wire);
void setup(void){
Serial.begin(115200);
delay(1000);
while(atm.begin()!= 0){
Serial.println("init error");
delay(1000);
}
Serial.println("init success");
//atm.setTime(2023,3,1,17,20,0);
}
void loop(void){
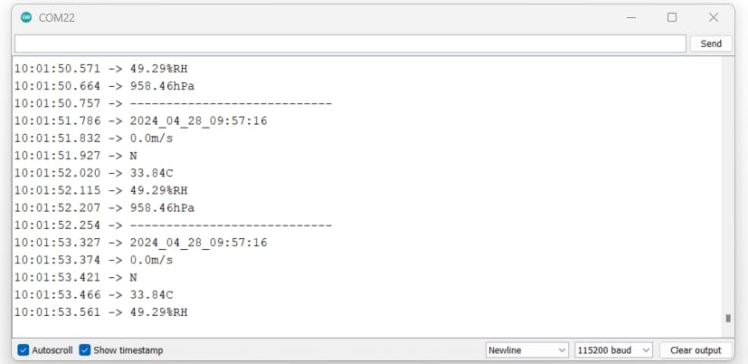
Serial.println(atm.getTimeStamp());
Serial.print(atm.getValue("Speed"));
Serial.println(atm.getUnit("Speed"));
Serial.println(atm.getValue("Dir"));
Serial.print(atm.getValue("Temp"));
Serial.println(atm.getUnit("Temp"));
Serial.print(atm.getValue("Humi"));
Serial.println(atm.getUnit("Humi"));
Serial.print(atm.getValue("Pressure"));
Serial.println(atm.getUnit("Pressure"));
// Serial.print(atm.getValue("Battery"));//Available when connected to a lithium battery
// Serial.println(atm.getUnit("Battery")); //Available when connected to a lithium battery
// Serial.print(atm.getValue("Lat"));//Available when connected to a GNSS module
// Serial.print(atm.getValue("Lon"));//Available when connected to a GNSS module
Serial.println("----------------------------");
// Serial.println(atm.getInformation(true));
delay(1000);
}- Select the appropriate board and the port, then upload the demo sketch.
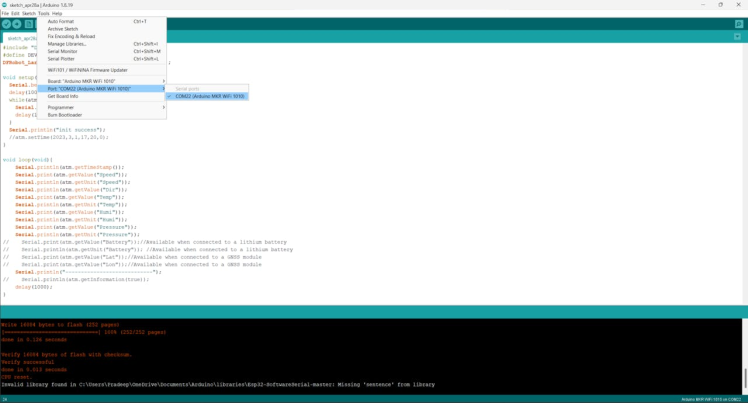
- Use the Lark Weather Station’s I2C communication modes to retrieve real-time data.
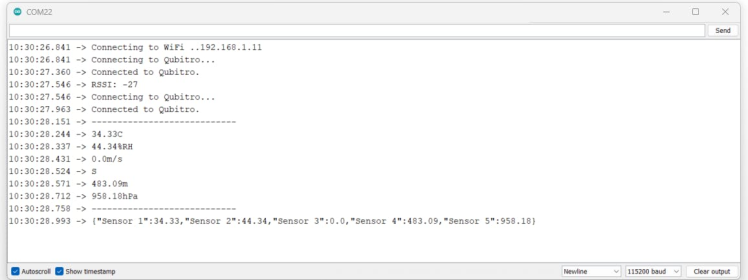
- Finally, look at the serial terminal response.
4ï¸âƒ£Configure WiFi and Cloud Integration
- Next, we need to add a WiFi library to IDE, MKR WIFI 1010 using the WiFiNINA library.
Note: WiFiNINA Library
- Also, we need to add one more library to send data to Qubitro cloud network.
Note: MQTT Client Arduino

- Once you install all the necessary libraries, use the following code.
#include <WiFiNINA.h>
#include <utility/wifi_drv.h>

#include <QubitroMqttClient.h>
WiFiClient wifiClient;
QubitroMqttClient mqttClient(wifiClient);

// Device Parameters
char deviceID[] = "*****Change the Cred*****";
char deviceToken[] = "*****Change the Cred*****";

// Replace with your network credentials (STATION)
const char* ssid = "*****Change the Cred*****";
const char* password = "*****Change the Cred*****";

#include "DFRobot_LarkWeatherStation.h"
#define DEVICE_ADDR                  0x42
DFRobot_LarkWeatherStation_I2C atm(DEVICE_ADDR, &Wire);

unsigned long previousMillis = 0;
unsigned long interval = 10000;

void initWiFi() {
  WiFi.begin(ssid, password);
  Serial.print("Connecting to WiFi ..");
  while (WiFi.status() != WL_CONNECTED) {
    Serial.print('.');
    delay(1000);
  }
  Serial.println(WiFi.localIP());
}

void setup() {
  Serial.begin(115200);
  WiFiDrv::pinMode(25, OUTPUT); //define green pin
  WiFiDrv::pinMode(26, OUTPUT); //define red pin
  WiFiDrv::pinMode(27, OUTPUT); //define blue pin

  while (atm.begin() != 0) {
    Serial.println("init error");
    delay(1000);
  }
  Serial.println("init success");
  initWiFi();
  qubitro_init();
  Serial.print("RSSI: ");
  Serial.println(WiFi.RSSI());
}

void loop() {
  unsigned long currentMillis = millis();
  // if WiFi is down, try reconnecting every CHECK_WIFI_TIME seconds
  if (WiFi.status() != WL_CONNECTED) {
    Serial.println("Reconnecting to WiFi...");
    WiFi.disconnect();
    //    WiFi.reconnect();
    WiFi.begin(ssid, password);
  }

  qubitro_init();
  Serial.println("----------------------------");
  Serial.print(atm.getValue("Temp"));
  Serial.println(atm.getUnit("Temp"));
  Serial.print(atm.getValue("Humi"));
  Serial.println(atm.getUnit("Humi"));
  Serial.print(atm.getValue("Speed"));
  Serial.println(atm.getUnit("Speed"));
  Serial.println(atm.getValue("Dir"));
  Serial.print(atm.getValue("Altitude"));
  Serial.println(atm.getUnit("Altitude"));
  Serial.print(atm.getValue("Pressure"));
  Serial.println(atm.getUnit("Pressure"));
  Serial.println("----------------------------");

  // Send telemetry
  String payload =  "{"Sensor 1":" + String(atm.getValue("Temp"))
                    + ","Sensor 2":" + String(atm.getValue("Humi"))
                    + ","Sensor 3":" + String(atm.getValue("Speed"))
                    + ","Sensor 4":" + String(atm.getValue("Altitude"))
                    + ","Sensor 5":" + String(atm.getValue("Pressure")) + "}";

  Serial.print(payload);
  Serial.println("");
  mqttClient.poll();
  mqttClient.beginMessage(deviceID);
  mqttClient.print(payload);
  mqttClient.endMessage();

  WiFiDrv::analogWrite(25, 255);
  WiFiDrv::analogWrite(26, 0);
  WiFiDrv::analogWrite(27, 0);

  delay(100);

  WiFiDrv::analogWrite(25, 0);
  WiFiDrv::analogWrite(26, 255);
  WiFiDrv::analogWrite(27, 0);

  delay(100);

  WiFiDrv::analogWrite(25, 0);
  WiFiDrv::analogWrite(26, 0);
  WiFiDrv::analogWrite(27, 255);

  delay(100);

  WiFiDrv::analogWrite(25, 0);
  WiFiDrv::analogWrite(26, 0);
  WiFiDrv::analogWrite(27, 0);

  delay(30000);
}

void qubitro_init() {
  char host[] = "broker.qubitro.com";
  int port = 1883;
  mqttClient.setId(deviceID);
  mqttClient.setDeviceIdToken(deviceID, deviceToken);
  Serial.println("Connecting to Qubitro...");
  if (!mqttClient.connect(host, port))
  {
    Serial.print("Connection failed. Error code: ");
    Serial.println(mqttClient.connectError());
    Serial.println("Visit docs.qubitro.com or create a new issue on github.com/qubitro");
  }
  Serial.println("Connected to Qubitro.");

  mqttClient.subscribe(deviceID);
}- After that, change the wifi credentials to the Arduino MKR WiFi 1010.

- The next step is to create aQubitro uplink.
- Integrate the Qubitro cloud platform by creating an account and setting up a new device.
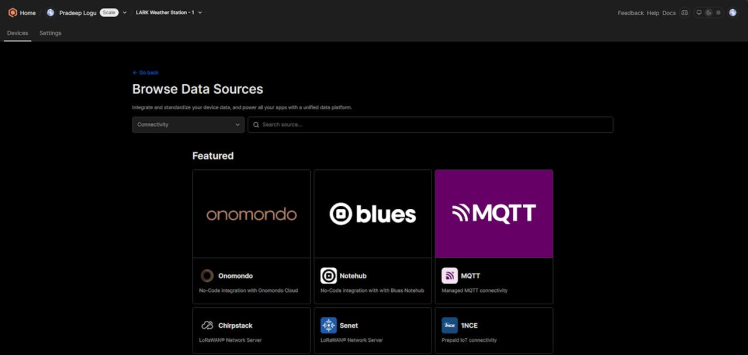
5ï¸âƒ£Setup Qubitro Account
- Navigate to the Qubitro portal and set up a new account.

- Then create a new project and add an MQTT data source.
- After that, you can able to see the connection details.
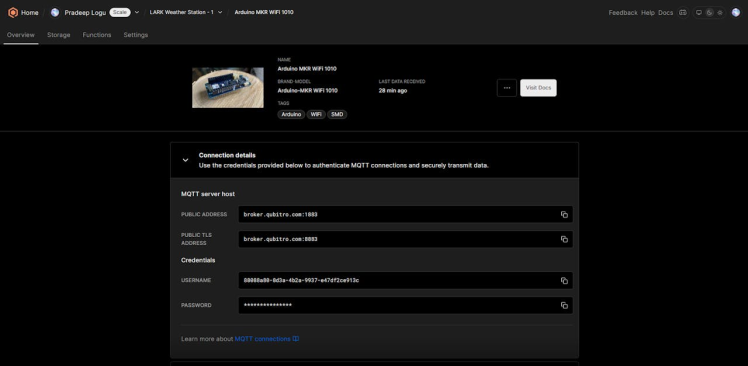
- We need these user names and passwords in the above Arduino sketch.

- Finally, update the Arduino sketch to the MKR1010 and look for the serial terminal response.
- Next, look at the storage in the Qubitro portal and look for the incoming data.
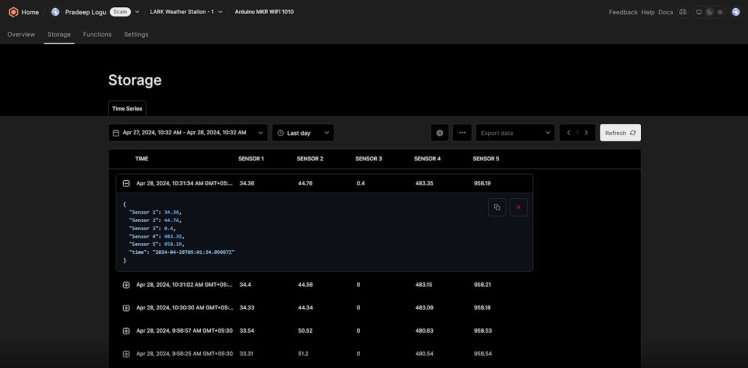
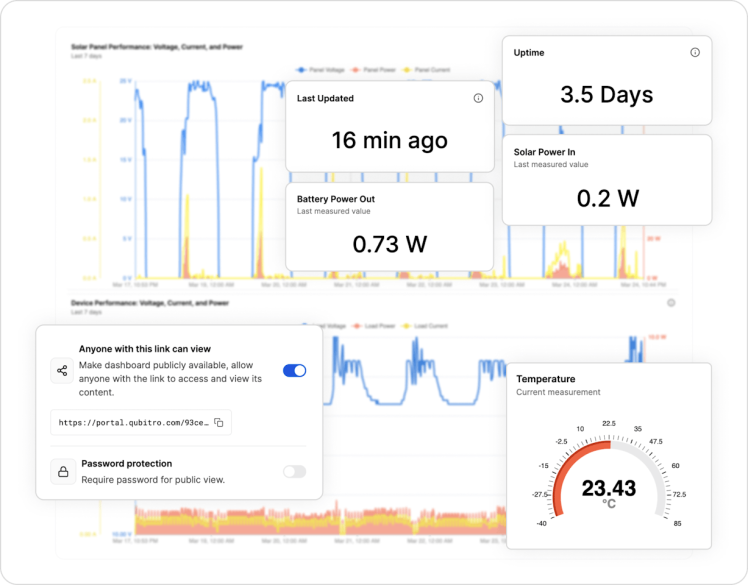
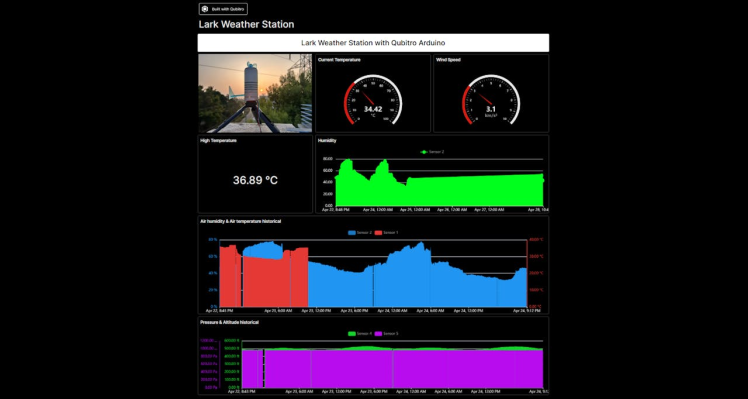
Here Sensor 1 is Temperature, 2 is Humidity, 3 is Speed, 4 is Altitude and 5 is Pressure.
6ï¸âƒ£Visualize Data
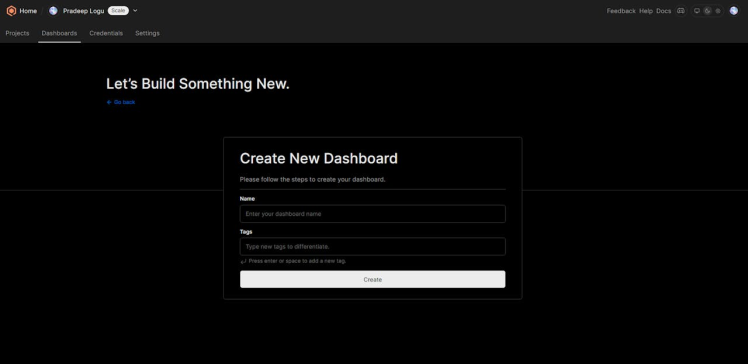
- Log in to your Qubitro account and create a dashboard.
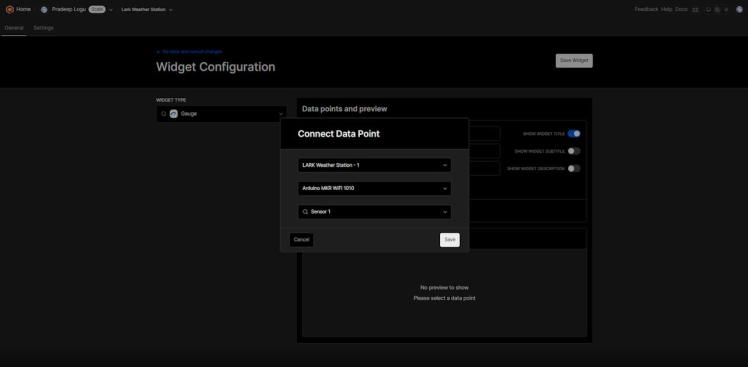
- Add widgets to display real-time weather data (charts, gauges, etc.).
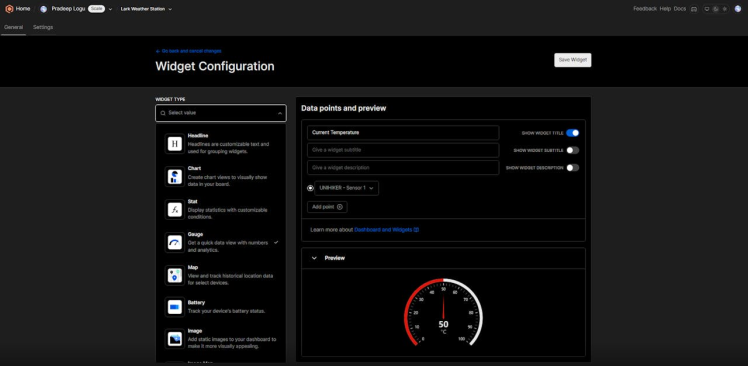
- Customize the dashboard layout according to your preferences, and select the data source and the data.
- Here is a sample dashboard with my data.
7ï¸âƒ£Monitor and Analyze
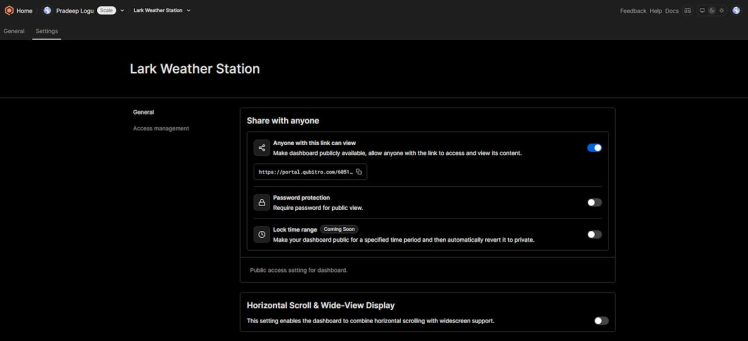
- Access your weather station data from anywhere using the Qubitro platform using the public sharing option in the dashboard.
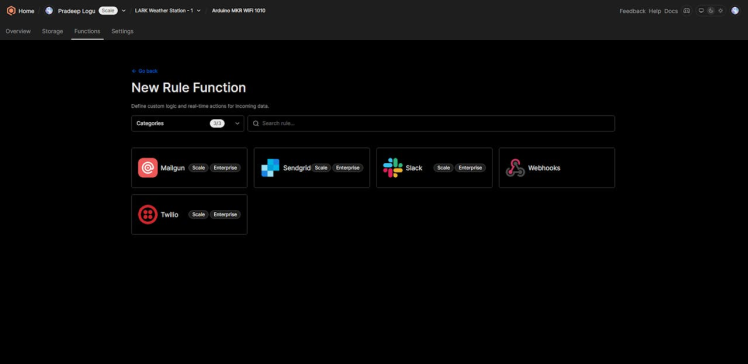
- Set up alerts for extreme conditions (e.g., high wind speed, low temperature) by using the functions option in Qubitro.
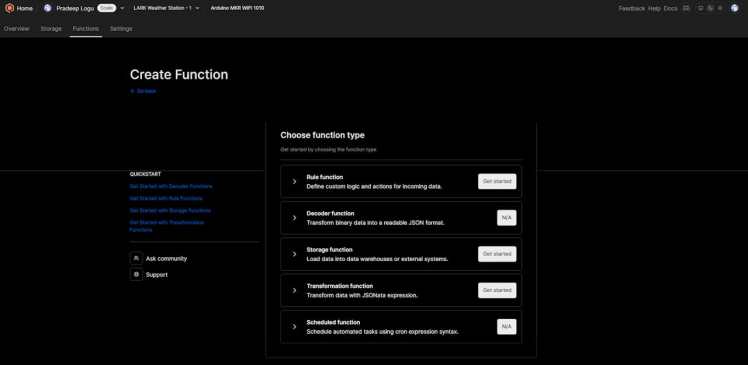
- Navigate to the rule engine and select the rule type as you need.
Conclusion🚀:
Now you’ll have a functional IoT-based weather station that provides real-time weather information. Whether you’re an educator, student, or researcher, the Lark Weather Station combined with the Arduino MKR WiFi 1010 and Qubitro cloud platform offers a versatile solution for meteorological studies.
Happy weather monitoring! 🌦ï¸ðŸŒ¡ï¸ðŸ’¨
Credits
Related products


Leave your feedback...