
Ramduino Deluxe

Made by jsweet1979 / Artificial intelligence / Communication / Displays / Home Automation / Productivity
About the project
With many projects adding SPI flash or SRAM for additional storage, why not implement a cost effective solution by giving your Arduino access to your computer’s RAM and Hard Drive space that already exists?
Project info
Difficulty: Moderate
Platforms: Arduino, Atmel, Microsoft, Raspberry Pi, Windows
Estimated time: 2 hours
License: Creative Commons Public Domain Dedication version 1.0 or later (CC0 1+)
Items used in this project


Story
One thing I’ve always been interested in was finding a way to add various memories to Arduino circuits, and I kept seeing people wanting to create memory arrays for their projects.
Creating huge arrays of SPI flash or SRAM would be cost prohibitive so a better solution would be creating a super huge variable array in Visual Basic.net or C# and giving the Arduino access to that array through serial port programming.
With my current computer having 32GB of RAM and several Terabytes of storage, I’m making a way for the Arduino to be able to read and write memory locations in the memory array in a linear fashion with the Arduino acting as a sort of host.
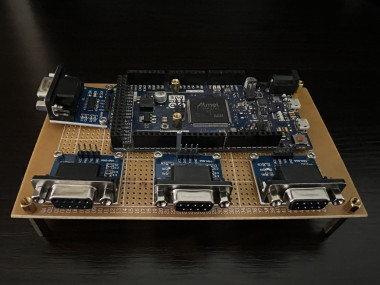
With the board I put together, I gave it four RS232 ports for connecting up to four computers the Arduino Due can mediate between where the computers initiate data transfer.
I figure the COM ports can have variable char values ‘0’, ‘1’, ‘2’, and ‘3’ in code with the Arduino running a loop checking each serial port for data. When it finds a char, it breaks off into another dynamic function where the first char received specifies the Source of data transmission, and the second byte specifies the Destination, followed by HEX char streams where another loop continues reading and forwarding hex chars to the destination until something like a termination char ‘*’ is read marking the end of transmission and returning focus back to the initial loop checking the four serial ports for any chars.
On the PC side, maybe I can hand Opcode Chars in the hex stream meaning different functions are triggered based on char value through select case statements. The more functions there are that can be triggered on the PC end, the more automated the interoperability between devices.
Another option could be creating peripheral boards for this board that could contain an LCD Display or possibly another MCU like a Raspberry Pi Pico, that had onboard flash storage. I did see they do have 3.3volt 8Gigabit SPI flash chips now. That could be something interesting to wire up and try to program.
Another peripheral board I had in mind would be a solid state digital logic board that could compute between 74HC series logic chips to hand FPGA logic to the Arduino realm with: AND, NAND, OR, NOT, XOR, XNOR and NOR gates. Possibly creating a way for a single bitstream to flow with comparator bits and even hand it a way to change digital logic function per bit of each byte.
There are lots of ideas that could be implemented, I think here its all about creativity and creating a solution for the ideas we come up with. Its very nice though when circuits work exactly as you plan them but some of these ideas take extra thinking well in advance.
Aside from handing an Arduino, PC RAM and Terabytes of File IO inside Visual Basic.net or C#, I can probably have the Arduino hand a sum of available memory and keep track of how many bytes of free space is left across the four devices that might be connected to it.
Currently putting code together in my head for the Arduino side and the PC side, and to limit errors, I made my board so that all I have to do is plug jumper wires in instead of soldering.
I’ll be sure to update this project page as the project makes progress. With RS232, we’re triggering functions with chars so this is where creativity comes in. First things first, I’ll have the Arduino Due send communication messages through each of the four serial ports it can handle. Nifty programming will occur after then but the goal is to create flawless communication between the PC’s and the Arduino board who can see their preallocated RAM and dedicated files that can be Terabytes in size.
They should create an Arduino.net series of boards. Will be updating this page as this project progresses.
Update:
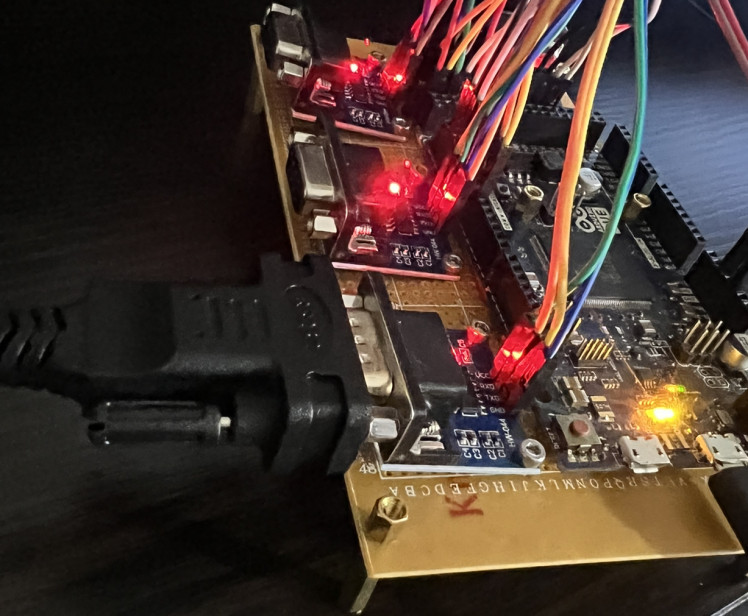
The first thing I did was test all the communication ports by soldering on two rows of pin headers to run power from the Arduino over to the individual ports, and all the LEDs came on showing they’re all receiving proper power.
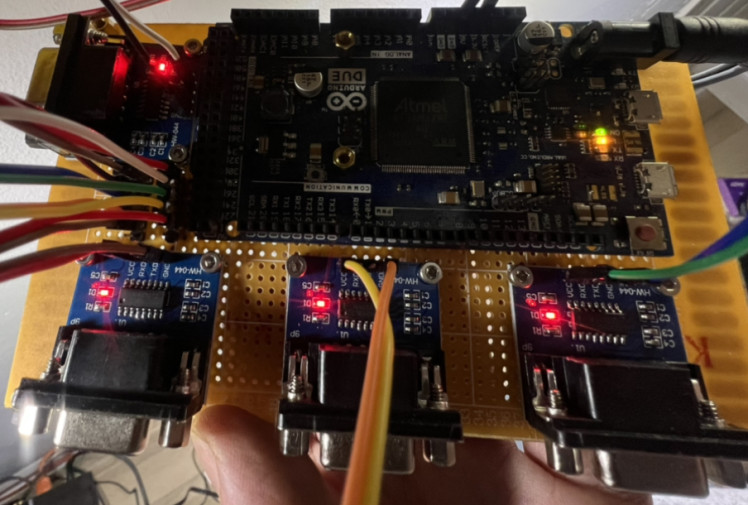
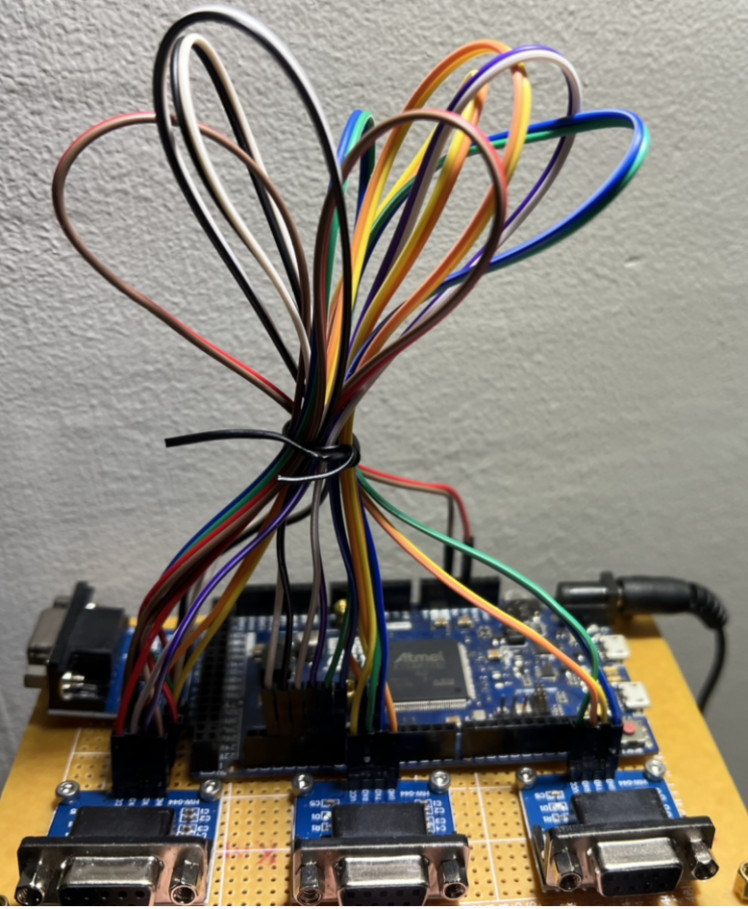
After finding the com ports came on, I finished wiring up the ports to the serial ports of the Arduino Due, and then used a bread tie to secure the loose wires and to keep them nice and tidy.
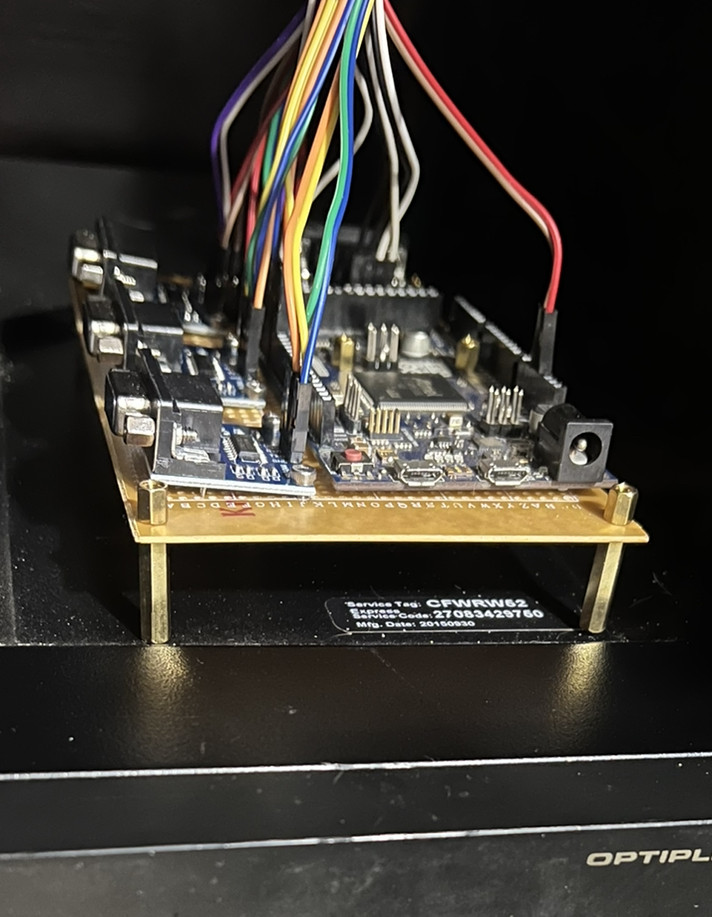
It’s almost time to start programming the board, so I placed the board on top of my computer tower which should be a very convenient place for it to stay during programming. The first thing I’ll have it do is send messages through each of the four ports and try to read them in the serial port monitor of the Arduino IDE.
Update:
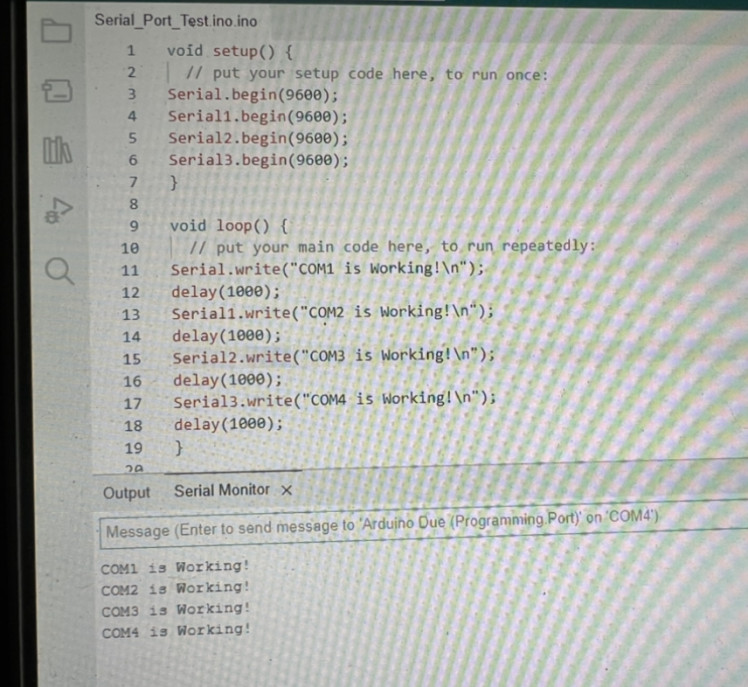
After a few minutes of programming, I created a method for the ports to write their corresponding names out of each port through a USB to DB9 cable that has an integrated FTDI chip and required a driver download from the ftdi website before the cable would work to create a virtual com port.
After uploading my simple sketch, I was watching a TX light by the barrel connector on the Due as a timing mechanism to know when to switch ports the DB9 side of the cable was connected to.
Moving the cable between ports in intervals, we can see that all four COM ports are working as anticipated the very first try. I have never done anything like this before but feel it is a great start. With basic communication working, we can check the Baud Rates supported by the cable in the Device Manager after finding that all four ports are working correctly at 9600 baud. The Arduino IDE 2.0+ version has integrated 1,000,000 and 2,000,000 but it is more likely that we don’t want to exceed the maximum baud rate the USB Cable supports.
Credits
Related products


Leave your feedback...