
Make Simple Raspberry Pi Weather Station With Hexabitz

Made by Aula_Jazmati / Environmental Sensing / Home Automation / Kids & Family / Sensors / Weather
About the project
Embark on a journey to create a weather station like no other!
Project info
Difficulty: Moderate
Platforms: DFRobot, Raspberry Pi, STMicroelectronics
Estimated time: 1 hour
License: MIT license (MIT)
Items used in this project
Hardware components

View all
Story
Get ready to take your weather tracking game to the next level! With this simple DIY weather station project, you can easily monitor temperature and humidity levels using a Raspberry Pi and Hexabitz Sensor Hub module (H0AR9).
? Temperature, Humidity, Light, Color and Motion Sensor Hub:H0AR9x is sensor hub module with STM32G0 MCU and a variety of sensors:
- Weather: TI HDC1080DMBT digital temperature and relative humidity sensor.
- Light: Broadcom (Avago) APDS-9950 proximity, ambient light and RGB color sensor.
- Motion: Panasonic EKMC1601111 proximity infrared motion detector (PIR).
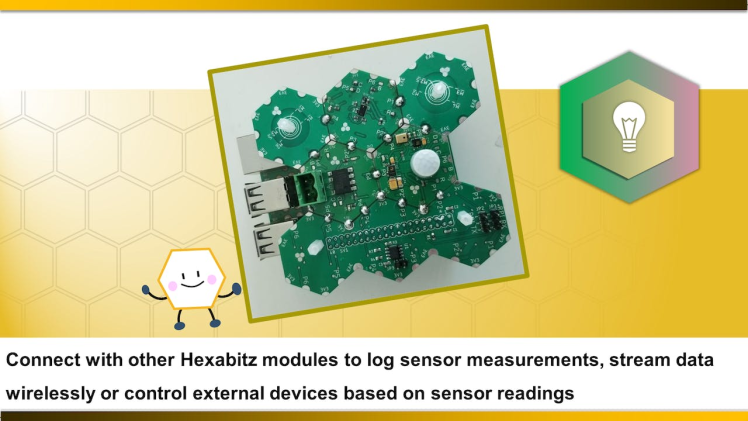
Use this module as an indoors weather station, room monitoring node or put on board aerial or ground robotics platform to gather surrounding data. Connect with other Hexabitz modules to log sensor measurements, stream data wirelessly or control external devices based on sensor readings.
1 / 4 • Hexabitz Sensor Hub Module

Hexabitz Sensor Hub Module

Hexabitz Sensor Hub Module

HDC1080DMBT digital temperature and relative humidity sensor
Check out this article for writing code with STM32CubeIDE.
H0AR9x Firmware H0AR9.h code:
Let's disable P5 port by commenting its directive in H0AR9.h.
H0AR9.h

H0AR9.h
H0AR9x Firmware main.c code:
First, we define the temperature and humidity variables:
float temper;
float humidity;
and then defined the other variables used in the code.
uint8_t MESG_T[5];
uint8_t MESG_H[5];
And in the repeated closed loop, we made sure that MCU periodically checks the temperature value of the sensor using the API from module factsheet and sends it via uart.
SampleTemperature(&temper);
sprintf(MESG_T, "%f",temper);
For transmitting data in interrupt mode, we use a HAL function called HAL_UART_Transmit_IT()
HAL_UART_Transmit_IT(&huart5, MESG_T,5);And we repeated the same steps to send the value of the humidity variable to the same port after an appropriate time delay.
SampleHumidity(&humidity);
sprintf(MESG_H, "%f",humidity);
HAL_UART_Transmit_IT(&huart5, MESG_H,5);
Delay_ms(10);
These values were first monitored using the STM32CubeIDE debugging function to monitor our weather live expressions, as shown in the figure.
STM32CubeIDE Debugging Function Window

STM32CubeIDE Debugging Function Window
Raspberry Pi interface module(HF1R0x):HF1R0x is Hexabitz Raspberry Pi interface module. It interfaces seamlessly to Raspberry Pi 3B/3B+/4B single-board computers and enables you to connect and control your favorite Hexabitz modules from the Raspberry Pi operating system and build your own Raspberry Pi Hat.
You can use C++ Hexabitz Interface library on Raspbian, Ubuntu or other compatible Linux distributions from within your C++ or Python applications.
Hexabitz Raspberry Pi interface module

Hexabitz Raspberry Pi interface module
Hexabitz Raspberry Pi interface module

Hexabitz Raspberry Pi interface module
Make sure to connect your Hexabitz module at the right spot or left spot then put the Jumper JP1 and JP2 at right position.


Python pyserial:
This module encapsulates the access for the serial port. It provides backends for Python running on Windows, OSX, Linux, BSD (possibly any POSIX compliant system) and IronPython. The module named “serial” automatically selects the appropriate backend.
Depending on the version of python, there are several commands to install the package pyserial.
sudo apt-get install python-serial python3-serialPython code to read the serial port: This section of code primarily instantiates the serial class, setting it up with all the various bits of information that it needs to make the connection with.
port – This defines the serial port that the object should try and do read and writes over.
baudrate – This is the rate at which information is transferred over a communication channel.
parity – Sets whether we should be doing parity checking, this is for ensuring accurate data transmission between nodes during communication.
stopbits – This is the pattern of bits to expect which indicates the end of a character or the data transmission.
bytesize – This is the number of data bits.
timeout – This is the amount of time that serial commands should wait for before timing out.
import serial
ser = serial.Serial(
               port='/dev/ttyUSB0',
               baudrate = 921600,
               parity=serial.PARITY_NONE,
               stopbits=serial.STOPBITS_ONE,
               bytesize=serial.EIGHTBITS,
               timeout=1
           )
1 / 2 • Hexabitz Module

Hexabitz Module

FTDI USB-UART 3.3V cable
Python TkinterTkinter is the standard GUI library for Python. Python when combined with Tkinter provides a fast and easy way to create GUI applications.
Tkinter provides a powerful object-oriented interface to the Tk GUI toolkit.
Creating a GUI application using Tkinter is an easy task.
All you need to do is perform the following steps :
- Import the Tkinter module.
- Create the GUI application main window.
- Add one or more of the above-mentioned widgets to the GUI application.
- Enter the main event loop to take action against each event triggered by the user.
You can start Python3 from the command line (with python3) then
import tkinterIf you get an error message then exit out of Python3 and call
sudo apt-get install python3-tkto install it.
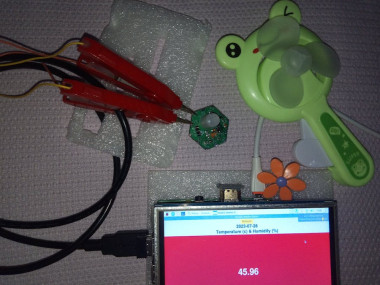
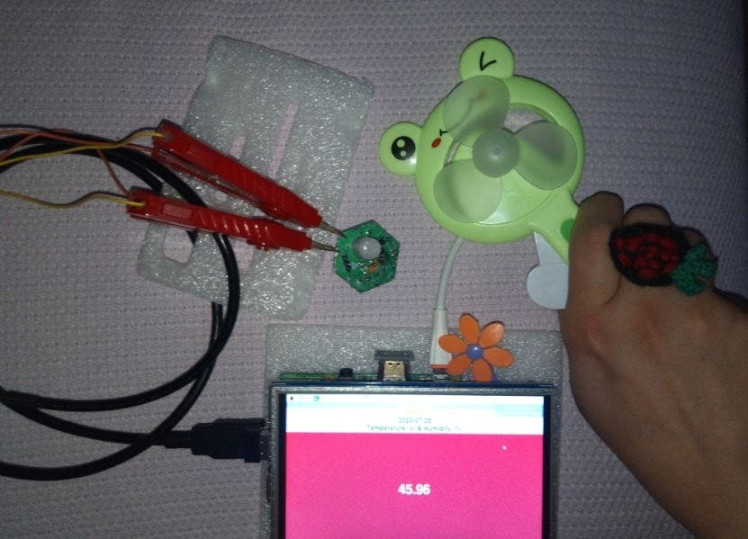
I chose a way to display the temperature and humidity variables through tkinter GUI in which the weather update button (Refresh) when pressed for the first time shows the value of the temperature ?️ in degrees Celsius, and when pressed again, the percentage of humidity ? appears.
1 / 2 • Humidity (%)
")
Humidity (%)
")
Temperature (c)
? Test the System ??️⛈️??☔️?1 - GUI Test with FTDI USB-UART 3.3V cable:Hexabitz Weather Station TestTools

Tools
1 / 3

Temperature (c)
")
Temperature (c)
Humidity (%)
")
Humidity (%)
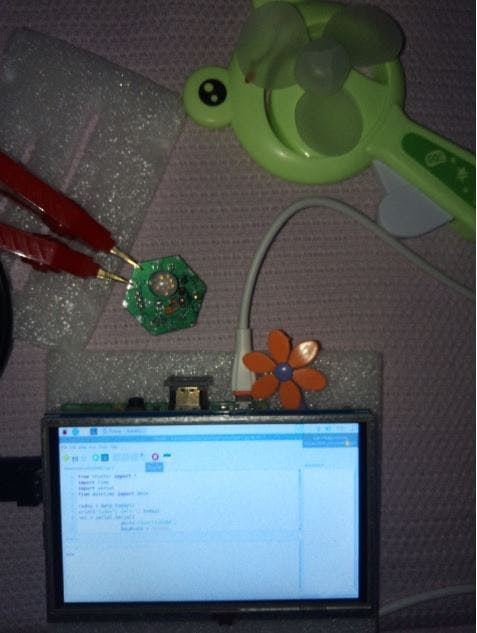
2- GUI Test with HF1R0 module: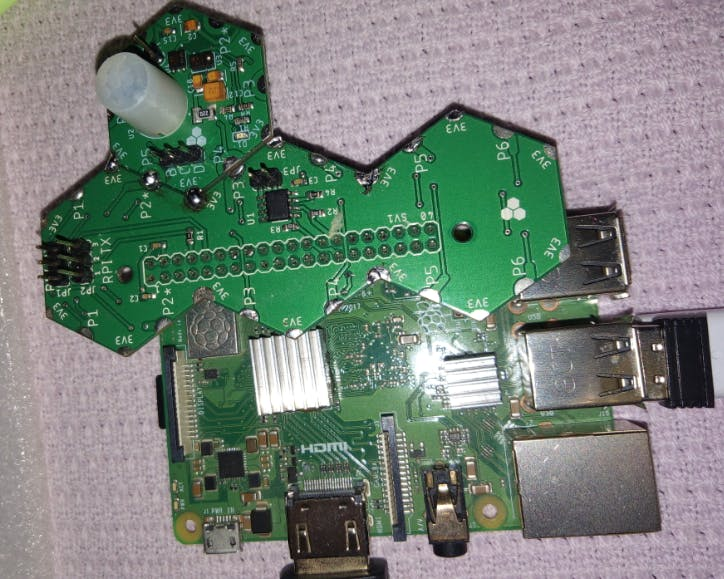
Tools

Tools
Run the code

Run the code
Temperature Reading (c)
")
Temperature Reading (c)
Temperature Reading (c)
")
Temperature Reading (c)
Humidity Reading (%)
")
Humidity Reading (%)
? Future Work:We will create a weather station that not only displays real-time temperature and humidity readings but also provides historical data analysis through data logging capabilities. This feature enables users to track weather patterns over time and make informed decisions based on the collected data.
Additionally, we plan to enhance the functionality of our weather station by integrating it with online platforms. This will enable users to access their weather station remotely through their smartphones or computers, ensuring they are always up-to-date with the latest weather conditions.
Thanks to the distinctive Hexabitz specifications such as scalability, we can add other weather sensors and connect them via Hexabitz Bluetooth or Wi-Fi modules to measure the temperature and humidity outside the house.
The system can also be expanded by adding sensors measuring wind speed, atmospheric pressure, light sensor and a rain sensor.
In conclusion, our project aims to provide individuals with a simple yet effective solution for monitoring temperature and humidity levels in their surroundings. By utilizing Raspberry Pi's computing power and Hexabitz Sensor Hub module's versatility, we can create a weather station that not only meets the basic requirements but also offers advanced features for data analysis and remote accessibility. Stay tuned as we embark on this exciting journey of designing and building our very own weather station!
Please feel free to leave a comment here if you have any questions or ideas regarding this project ?
Remember to stay cool in this heat ???

Remember to stay cool in this heat ???
Schematics, diagrams and documents
Code
Credits
Related products


Leave your feedback...