
Low-power Iot Intruder Detector With Raspberry Pi 4 + Pico

Made by carlo-grisafi / Artificial intelligence / Security / Sensors / IoT
About the project
Use a Raspberry Pi Pico board along with a motion sensor to wake up the Raspberry Pi 4 and run a CV script that alerts you if a stranger is seen.
Project info
Difficulty: Moderate
Platforms: IFTTT, Raspberry Pi, MicroPython
Estimated time: 1 hour
License: GNU Lesser General Public License version 3 or later (LGPL3+)
Items used in this project
Hardware components

View all
Software apps and online services
Story
The Raspberry Pi Pico is wired to a motion sensor that turns on the Raspberry Pi 4 when movement is detected. When turned on, the Raspberry Pi 4 uses a face recognition algorithm to recognize human faces and compare the detected face with the familiar faces stored on the Pi. It then makes a post request to IFTTT to send a notification to your phone if a stranger is detected. The script then turns off the Raspberry Pi to conserve energy. This coordination is enabled via a cron job that executes the CV script automatically on boot.
Part 1: Wiring the sensor and LED
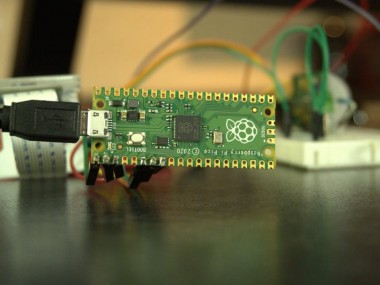
First, you'll have to solder some pins onto the Pico board to connect cables to it. Make sure you use the right solder tip size and good quality flux so that you don't do a poor soldering job as seen in the picture above.
Wire-up the sensor:
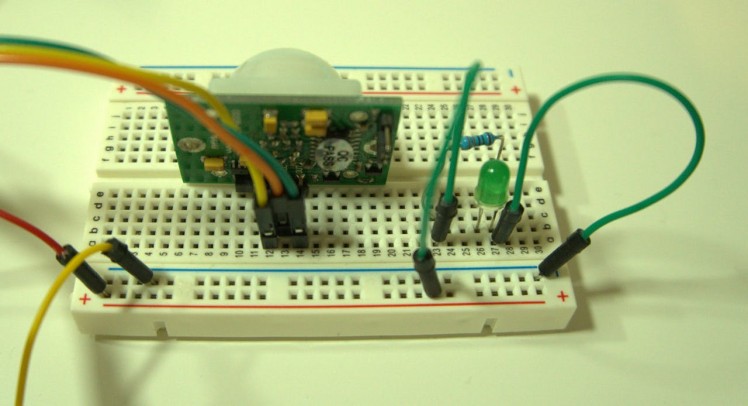
* GP1 - power to the LED
* GND1 - ground for LED
* GP4 - power to the sensor (VCC)
* GP5 - output of the sensor (OUT)
* GND2 - ground pin of sensor (GND)
from machine import Pin, Timerdef check_sensor(timer): global sensor if sensor.value() == 1: gp1.value(1) else: gp1.value(0)#GP4 - 5v outputgp4 = Pin(4,Pin.OUT)gp4.value(1)#GP1 - output for LEDgp1= Pin(1,Pin.OUT)#GP5 - input from sensorsensor = Pin(5,Pin.IN)tim = Timer()tim.init(freq=1.5, mode=Timer.PERIODIC, callback=check_sensor)At this point, you should save the script as "main.py" on your board, run it by unplugging and plugging the board and ensuring that it works as expected (LED turns on if motion is detected).
In the final part of this project, you'll turn on the Raspberry Pi rather than an LED.
Part 2: Computer vision, IFTTT and cron jobs
First, you need to hook your camera to the Pi and figure out how to get it to recognize your face (so that it can tell if there is a stranger in the frame). Initially, I considered writing my own ML model for this but eventually decided to go for a face detection library instead since this would get me to a working project much faster.
1.) Install the dependencies for the face detection library
sudo apt install build-essential cmake gfortran git wget curl graphicsmagick libgraphicsmagick1-dev libatlas-base-dev libavcodec-dev libavformat-dev libboost-all-dev libgtk2.0-dev libjpeg-dev liblapack-dev libswscale-dev pkg-config python3-dev python3-numpy python3-pip zip python3-picamera2) Run updates
sudo pip3 install --upgrade picamera[array]3) Increase the swap file size so you can build dlib
sudo nano /etc/dphys-swapfileFind CONF_SWAPSIZE and change its value from 100 to 1024. Save and exit then run this command:
sudo /etc/init.d/dphys-swapfile restart4) Build and install dlib
cdgit clone -b 'v19.6' --single-branch https://github.com/davisking/dlib.gitcd ./dlibsudo python3 setup.py install --compiler-flags "-mfpu=neon"This may take about 40 minutes to run (on RPi4)
5) Revert the swap size
sudo nano /etc/dphys-swapfileFind CONF_SWAPSIZE and change its value from 1024 to 100. Save and exit then run this command:
sudo /etc/init.d/dphys-swapfile restart6) Install face_recognition and examples
sudo pip3 install face_recognitionPhew! that's the dependencies done. Time for something more exciting. The face recognition code :)
import face_recognitionimport picameraimport numpy as npimport timeimport requestsimport subprocessdef ping_cloud(): requests.post('https://maker.ifttt.com/trigger/unknown_person_detected/with/key/YOUR_API_KEY')#function for triggering the face recognitiondef find_face(): # Get a reference to the Raspberry Pi camera. # If this fails, make sure you have a camera connected to the RPi and that you # enabled your camera in raspi-config and rebooted first. camera = picamera.PiCamera() camera.resolution = (320, 240) camera.rotation = 180 output = np.empty((240, 320, 3), dtype=np.uint8) # Load a sample picture and learn how to recognize it. person_image = face_recognition.load_image_file("carlo_pic.jpg") person_face_encoding = face_recognition.face_encodings(person_image)[0] # Initialize some variables face_locations = [] face_encodings = [] while True: # Grab a single frame of video from the RPi camera as a numpy array camera.capture(output, format="rgb") # Find all the faces and face encodings in the current frame of video face_locations = face_recognition.face_locations(output) #print("Found {} faces in image.".format(len(face_locations))) face_encodings = face_recognition.face_encodings(output, face_locations) # Loop over each face found in the frame to see if it's someone we know. for face_encoding in face_encodings: # See if the face is a match for the known face(s) match = face_recognition.compare_faces([person_face_encoding], face_encoding) name = "<Unknown Person>" if match[0]: name = "Carlo" if name == "<Unknown Person>": ping_cloud() subprocess.call("sudo shutdown -h now",shell=True)#after warning the user shutdown time.sleep(60*5) #sleep for 5 minutes before sending another message to cloud breakwhile True: try: find_face() except: passHere, you pass the face encoding from the image in person_image (you should put a picture of your face in the local folder where this scrip will live). So, if your picture is "my_pic.jpg" then you should have:
person_image = face_recognition.load_image_file("my_pic.jpg")Note: aim for small images so that this program runs fast.
Next, you need to set up our IFTTT hook so that you can send a notification from your program running on the RPi 4. After this step, you'll simply have to substitute your API key on the code above.
IFTTT
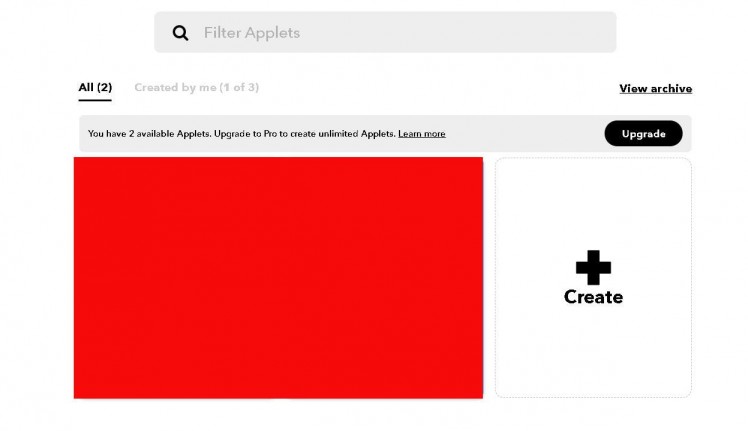
1) Create a new Applet
2) Click on "Add"

3) Choose the Webhooks service

4) Click on "Receive a web request"
5) Click on "Create trigger"

6) Click "Add"

7) Click on "Notifications"

8) Click on "Send a notification from the IFTTT app"

Note: ensure you have logged in with the same account on your phone's IFTTT app.
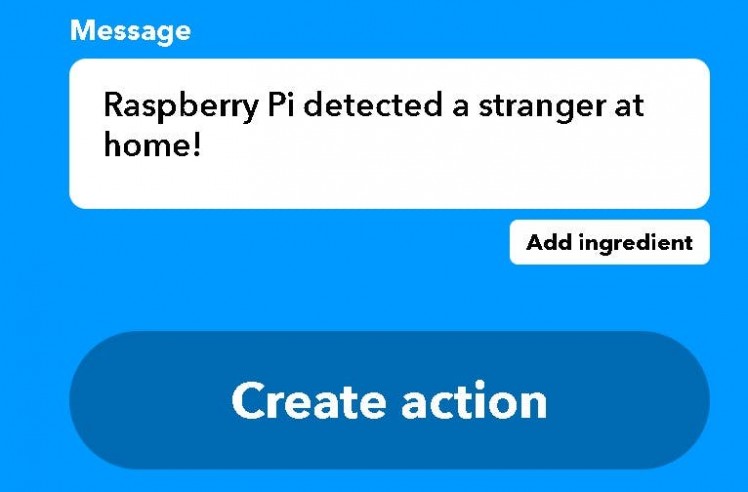
9) Add a message and click on "Create action"
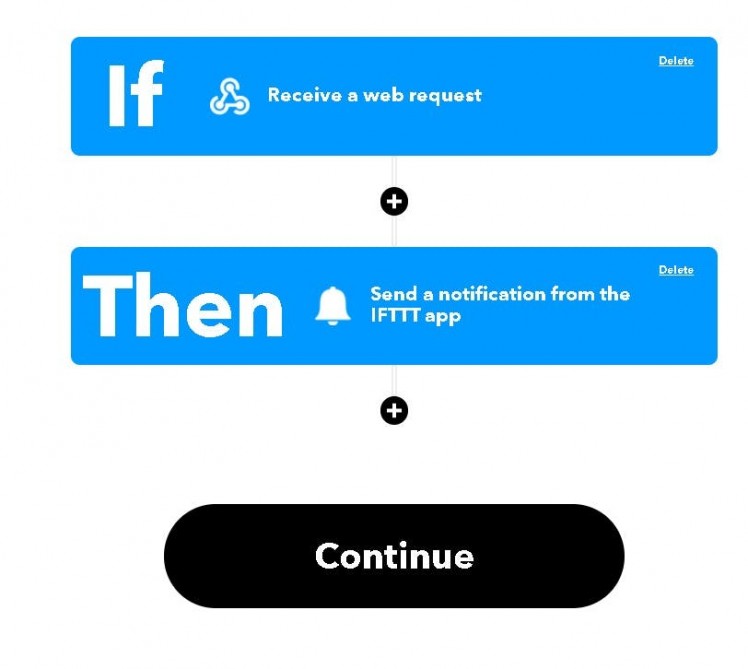
10) Ensure your flow looks like this then click "Continue"
11) Search for Webhooks service and click on "Documentation"

12) Make a note of your API key

With that done, you should now change the following line in the startup script running on the Raspberry Pi to have the actual key you see above.
requests.post('https://maker.ifttt.com/trigger/unknown_person_detected/with/key/YOUR_NEW_API_KEY')At this point, you should test this program and ensure everything is working correctly. I suggest running the script and putting yourself in front of the camera first and ensure the notification is not triggered. Afterwards, point the camera at someone else (or a picture on your smartphone). You should receive a notification on your phone in a few seconds.
Have you ever wondered if there is a way to automatically execute programs in a Raspberry Pi based on conditions such as the time of the day or whether the Pi has just booted up? Well, today is your lucky day. Cron jobs let you schedule precisely these tasks in a Linux based system such as the Pi.
Run the following command on your Pi's terminal:
sudo crontab -eScroll down to the bottom of the file and place the following command:
@reboot cd /home/pi/Code && python3 /home/pi/Code/startup_script.py &This should make the computer vision script execute on the Pi upon turning on.
Next, you'll do a bit of re-wiring to turn on the Pi from the Pico board by momentarily shorting pin 6 on the Raspberry Pi. First add a transistor which will act as a switch so that when we apply power from the Pico board on Pin 1, the current will flow from GPIO 5 to GPIO 6 on the Raspberry Pi, thus momentarily shorting it and turning the Pi on.
* Pico GP4 - power to the sensor (VCC)
* Pico GP5 - output of the sensor (OUT)
* Pico GND2 - ground pin of sensor (GND)
* Pico GP1 - Base (transistor)
* RPi4 GPIO5 - Emitter (transistor)
* RPi4 GPIO6 - Collector (transistor)
Note: this only works on the latest Raspberry Pi OS.
I know that this is probably not the best way to turn the Pi on and off so I'm looking to implement a better solution. If anyone has a suggestion for how to do this, please leave a comment below or raise an issue on GitHub.
To raise issues or see the newest version of this project, check its GitHub page. Dependency instructions from here.
Leave your feedback...