
Logo Rocket Automated

Made by Mellow_Labs / 3D Printing / Games & Gaming / Home Automation / Robotics
About the project
How to transform a small LEGO rocket toy into an automated, USB-powered wonder that spins smoothly without any manual cranking!
Project info
Difficulty: Easy
Estimated time: 3 hours
License: Creative Commons Attribution CC BY version 4.0 or later (CC BY 4+)
Items used in this project

Hand tools and fabrication machines
Story
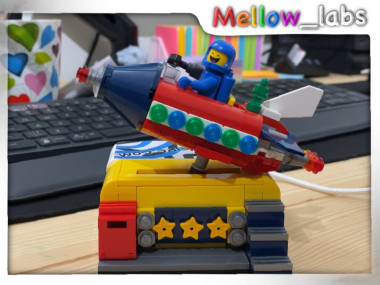
Do you remember those little LEGO rockets that came as a free bonus with some of the big LEGO sets? Well, I still have one of them and I love it. It’s so cute and colorful and it makes me feel like a kid again.

But there’s one thing that bothers me about it: I have to crank it manually to make it move. And that’s no fun at all. I mean, who has time for that in this busy world? Not me. So I decided to do something about it. I decided to automate it.
It’s actually not that difficult to do. All you need is a motor that can go slowly and a way to power it. And of course some creativity and patience.
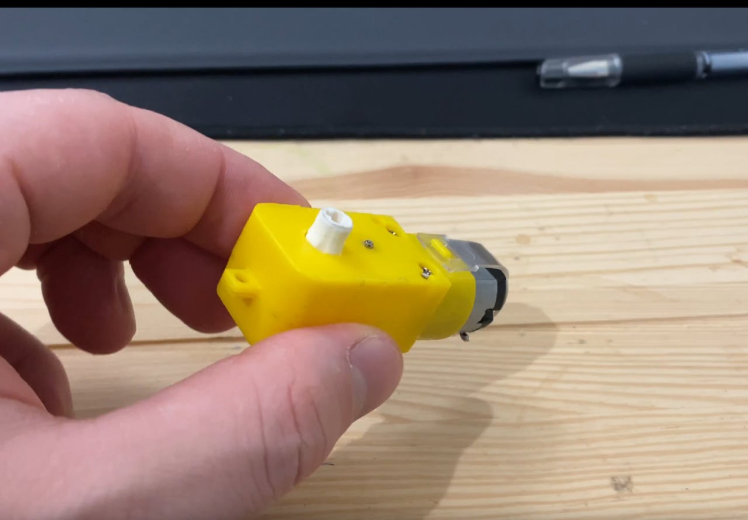
I started off by picking a motor. I had one of these plastic geared motors at hand which is a bit big for what I wanted but it works great. It’s also very cheap and easy to find online.

Then I wanted it to be USB powered so I could plug it into any device or power bank. So I grabbed a micro USB breakout board which is also very handy.
But there was a problem: when I connected the motor directly to the USB board, it moved extremely fast. Like crazy fast.
So between them I installed a buck converter which is basically a device that can lower the voltage output from one source to another. It was pretty big but it’s what I had at hand and it did the job.
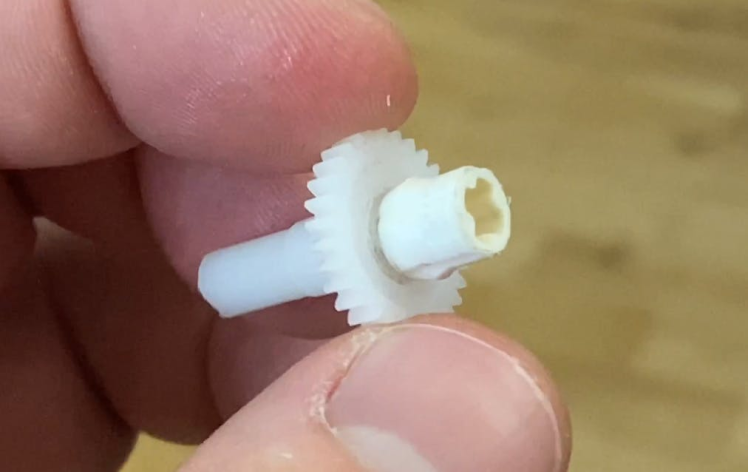
Now the tricky part: I had to attach the LEGO part to the motor shaft. This required some careful disassembly and modification of both parts.
I took apart the gear motor and removed the shaft, because I wanted this to be compact I cut down the shaft and also cut down the original LEGO handle that was used for cranking.
Then I glued them together using some super glue which is very strong and durable.
Then I had to enlarge the original hole for the shaft on the LEGO rocket base to make the new LEGO piece fit through.
Then I put all of the gears back in place and closed up the gear assembly.
Next, I went and designed a 3D printable enclosure to put all of the components in. It was a very simple rectangle with a cut-out at the back to fit the USB board.
And then came my favorite part: printing! There’s something magical about watching your design come alive layer by layer on your 3D printer.
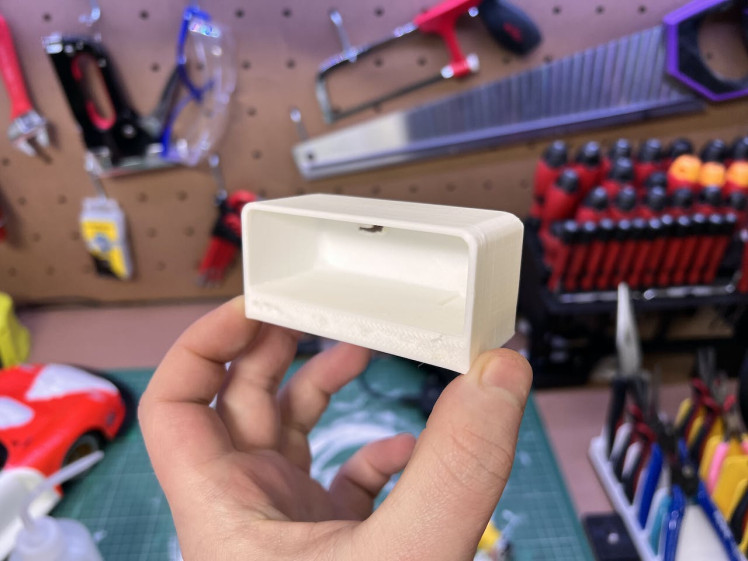
I also made sure that the bottom of the enclosure was 10 mm thick to keep the motor in an ideal position relative to the rocket base.
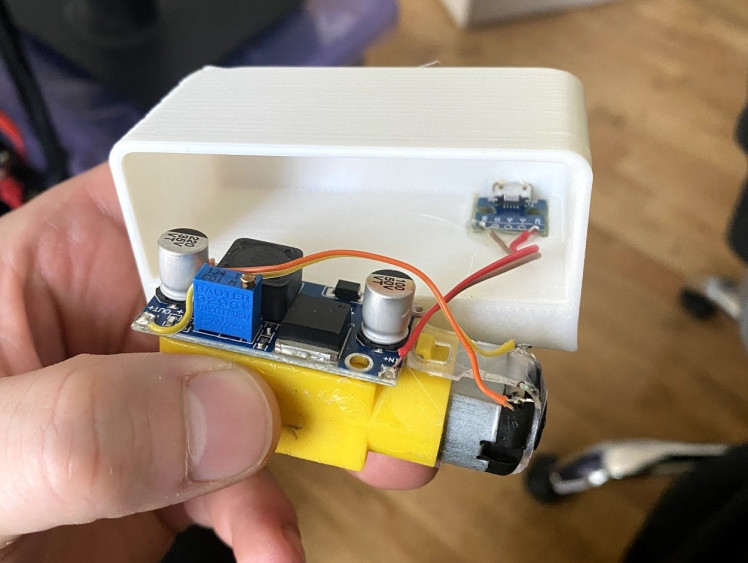
I also left an exposed hole at the back so that I could use a screwdriver to adjust the voltage on the buck converter if needed. And then I put everything together with a healthy dose of hot glue which is always fun and satisfying. And voila! My automated LEGO rocket was ready!
Isn’t it awesome? It spins smoothly at just the right speed. It makes me happy every time I look at it. It’s like having my own mini space station on my desk. And best of all, it doesn’t require any manual cranking!
If you liked this project, please consider supporting me on Patreon where you can get access to more cool stuff like this. Your support helps me keep making these fun projects for you and sharing them with the world. You can find my Patreon link below:
https://www.patreon.com/Mellow_labs
Thank you so much for reading this blog post. I hope you enjoyed it as much as I did making it. Let me know what you think in the comments section below And don’t forget to subscribe to my channel if you haven’t already for more awesome DIY projects like this one! See you next time!
Credits
Related products


Leave your feedback...