
How To Use Rgb Led Hc‑sr04 (rus‑04) Ultrasonic Sensor

Made by Ron / Lights / Notifications / Robotics / Sensors
About the project
In this tutorial, you’ll learn how to use the HC‑SR04 (RUS‑04) ultrasonic distance measuring sensor with a built-in RGB LED and Arduino.
Project info
Difficulty: Easy
Platforms: Adafruit, Arduino, Visuino
Estimated time: 1 hour
License: GNU General Public License, version 3 or later (GPL3+)
Items used in this project

Story
In this tutorial, you’ll learn how to use the HC‑SR04 (RUS‑04) ultrasonic distance measuring sensor with a built-in RGB LED and Arduino. Using Visual Programming tool Visuino, we’ll create a simple yet effective setup to detect nearby objects and provide color feedback using the onboard LED.
The LED will:
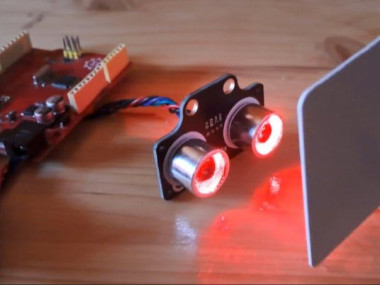
- Glow green when the distance is safe
- Turn red when an object is closer than 5 cm
This setup is perfect for beginners and makes a great first step toward building robot car obstacle avoidance systems or proximity alert devices—no manual coding required!
Watch the video to see how easy it is with Arduino and visual programming!
Step 1: What You Will Need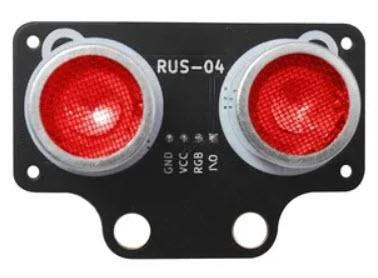

- HC‑SR04 (RUS‑04) ultrasonic distance measuring sensor
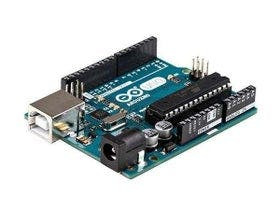
- Arduino board (or any other board
- Jumper wires
- Visuino program: Download Visuino
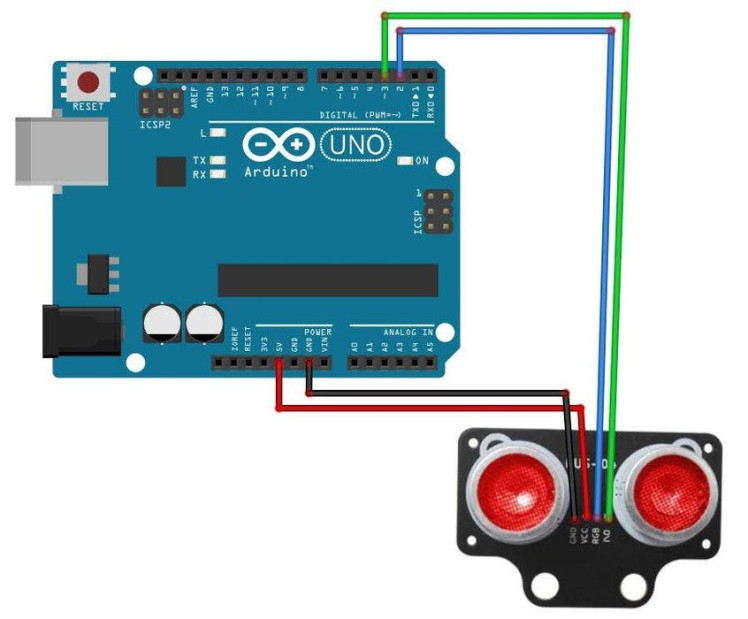
- Connect RUS‑04 pin [VCC] to the [5V] pin on the Arduino
- Connect RUS‑04 pin [GND] to the [GND] pin on the Arduino
- Connect RUS‑04 pin [I/O] to the [D3] digital pin on the Arduino
- Connect RUS‑04 pin [RGB] to the [D2] digital pin on the Arduino
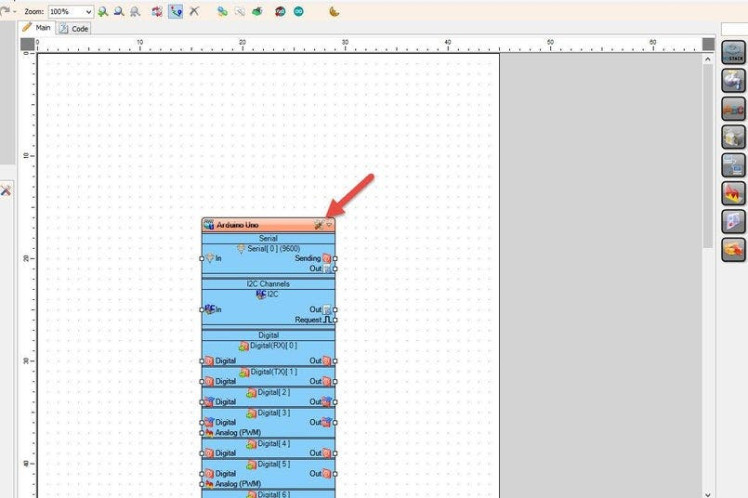
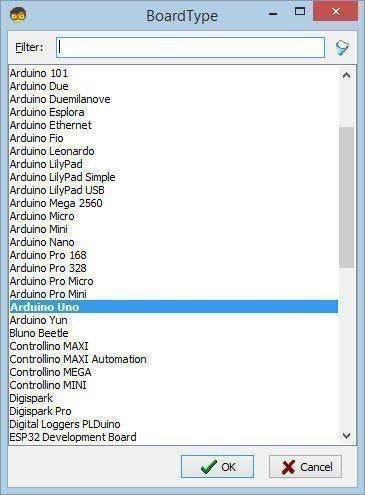
Start Visuino as shown in the first picture Click on the "Tools" button on the Arduino component (Picture 1) in Visuino When the dialog appears, select "Arduino UNO" as shown on Picture 2
Step 4: In Visuino Add & Set Components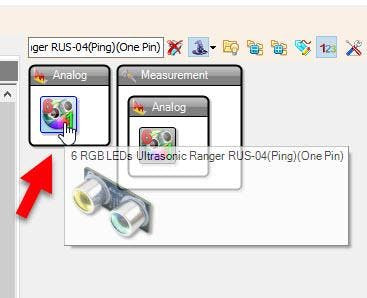
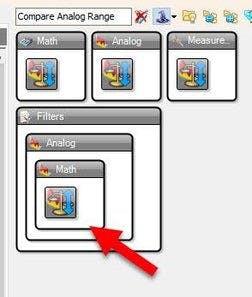
- Add "6 RGB LEDs Ultrasonic Ranger RUS-04(Ping)(One Pin)" component
Note: there are several different variants of this sensor, mine has pins (RGB) and {I/O}, so choose the right component in Visuino according to your sensor. You can see available sensors by typing in the search box "RUS-04" or "Ultrasonic"
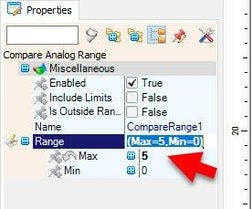
- Add "Compare Analog Range" component, and in the properties window set "Range" > "Max" to 5, this means that the red LED will turn ON if the distance will be below 5cm. Feel free to experiment with the settings.
Alternatively you could just use "Compare Analog value" component.
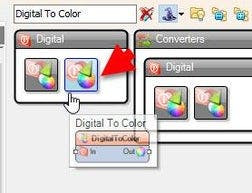
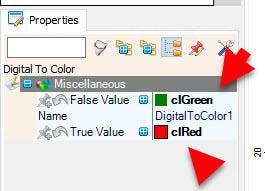
- Add "Digital To Color" component and in the properties window set "False Value" to ClGreen and "True Value" to ClRed
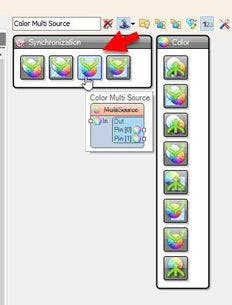
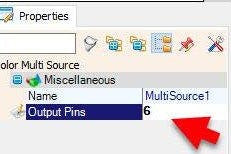
- Add "Color Multi Source" component, this is optional, you could connect the pins directly, I have added this component so that the project is more organized, in the properties window set "Output pins" to 6
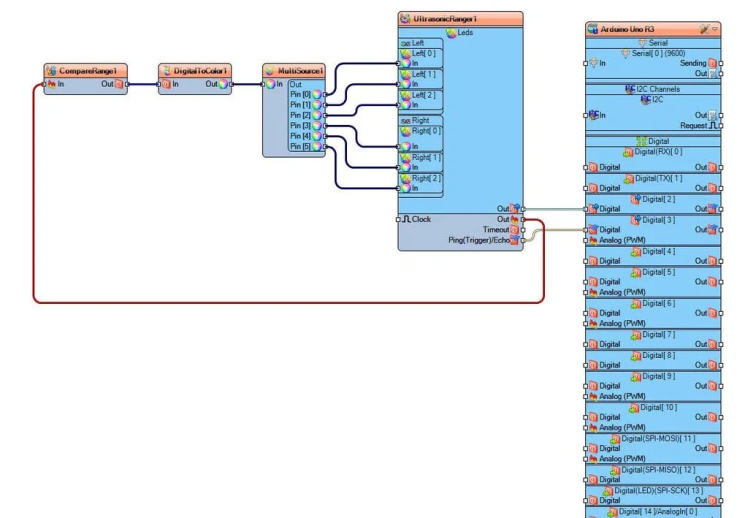
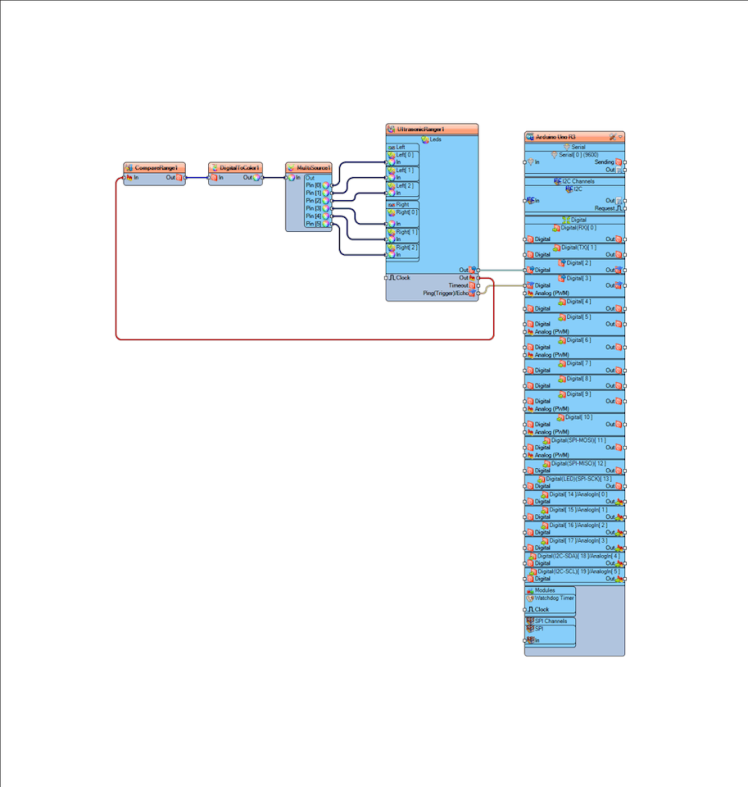
- Connect "CompareRange1" pin [Out] to "DigitalToColor1" pin [In]
- Connect "DigitalToColor1" pin [Out] to "MultiSource1" pin [In]
- Connect "MultiSource1" pin [0] to "UltrasonicRanger1" Left [0]
- Connect "MultiSource1" pin [1] to "UltrasonicRanger1" Left [1]
- Connect "MultiSource1" pin [2] to "UltrasonicRanger1" Left [2]
- Connect "MultiSource1" pin [3] to "UltrasonicRanger1" Right [0]
- Connect "MultiSource1" pin [4] to "UltrasonicRanger1" Right [1]
- Connect "MultiSource1" pin [5] to "UltrasonicRanger1" Right [2]
- Connect "UltrasonicRanger1" pin [Out] to "CompareRange1" pin [In]
- Connect "UltrasonicRanger1" LED pin [Out] to Arduino digital pin [2]
- Connect "UltrasonicRanger1" pin [Ping (Trigger) Echo] to Arduino digital pin [3]
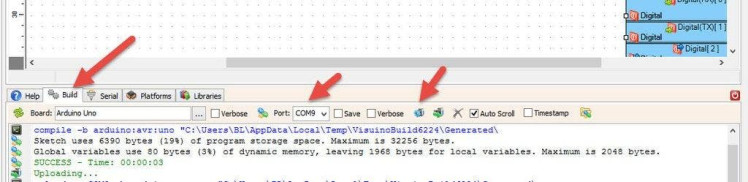
In Visuino, at the bottom click on the "Build" Tab, make sure the correct port is selected, then click on the "Compile/Build and Upload" button.
Step 7: PlayCongratulations! You have completed your project with Visuino. Also attached is the Visuino project, that I created for this Instructable, you can download it and open it in Visuino: https://www.visuino.com
Schematics, diagrams and documents
Code
Credits
Related products


Leave your feedback...