

Hexabitz Security And Alarm System

Made by Aula_Jazmati / Games & Gaming / Home Automation / Kids & Family / Security / Sensors
About the project
In this project, we will learn how to make a Hexabitz Security and Alarm System.
Project info
Items used in this project
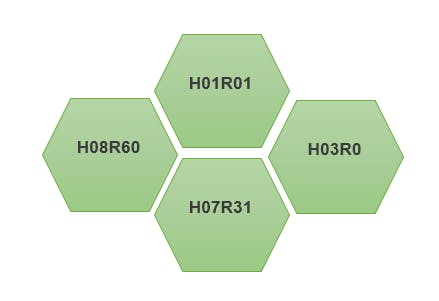
Hardware components

Story
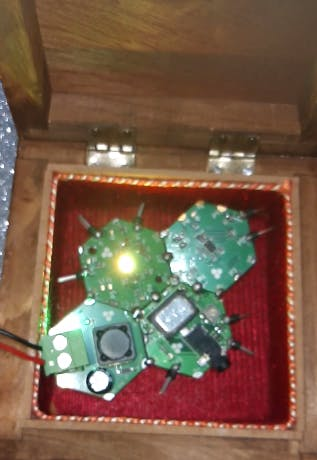
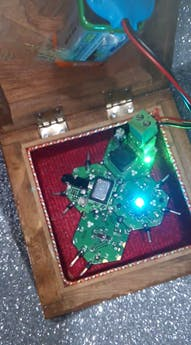
This project creates a security system for a box or container.
Place the Hexabitz modules in a box.
When the box is opened the audio Hexabitz module will sound letting everyone know that the box has been opened and RGB LED module will shining in the box.
How I built it Step 1 - Plan the array and assemble the hardware:We prepare the project components and plan our array design by aligning modules side-by-side.
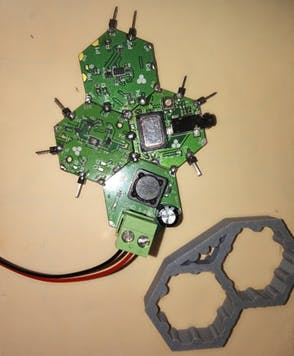
- Then we solder the modules together using Hexabitz Fixture.
Note:· Be sure to download the firmware on each module before soldering.
Step 2 - CLI ConnectionInstall MobaXtrem from here for Windows OS or we can install Putty for
Raspbian Buster (1) or any Linux/MacOS (2).
1. Connect the FTDI USB to UART Serial cable to the USB hub.
2. Connect the red wire of the FTDI cable to H08R60 module power port top side.
3. Connect the black wire of the FTDI cable to module power port bottom side.
4. Connect the yellow wire of the FTDI cable to module port P2 top side.
5. Connect the orange wire of the FTDI cable to module port P2 bottom side.
6. You should see a single red indicator LED blink on the modules.
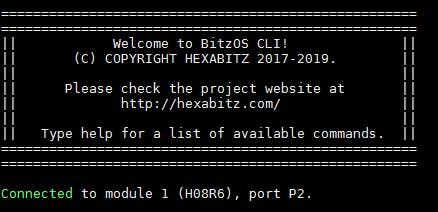
7. Press enter in the Commands window, you should see BOS CLI welcome message.
You can use backspace if you misspell a letter.
8. Type status to view a report on module ports, firmware, etc.
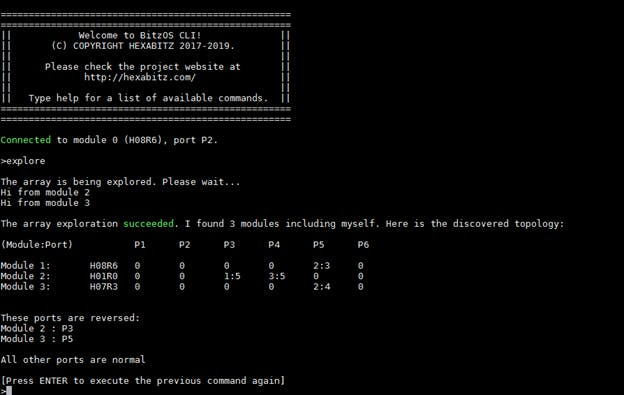
Connect to IR module and type explore, the modules start discovering each other and building their array topology.
Type all.ping, both module will ping.

The array topology is stored permanently. If you power cycle, the modules keep their topology and show multiple blinks.
Note:Type default array to remove the topology and restore native firmware when you decided start a new project.

Enable array response with:
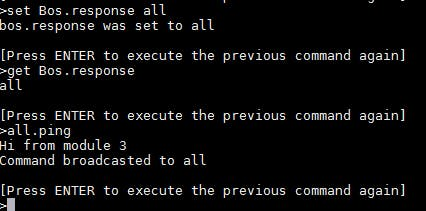
Then try sending command to Modules and seeing the result.
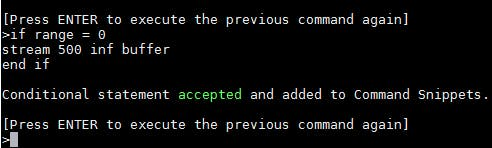
Step 4 - Command Snippets:Type the following commands each on a separate line followed by pressing enter to activate the measurement process:
You can choose any Alarm tune or RGB colors to activate when the box is opening like this:
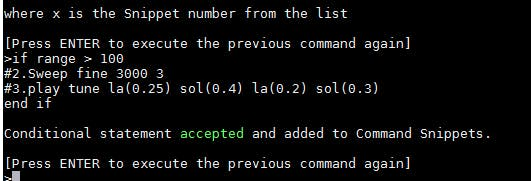
Or this:

· Musical notes are: Cx, Dx, Ex, Fx, Gx, Ax, Bx OR DOx, REx,MIx, FAx, SOLx, LAx, SIx where x is octave number 1 to 9.- Add # after the note to raise it by a semitone (half-step).- Add note time in seconds with [t]. If omitted, default is t = 1.- Add silence with [t] without a note.
· Type snip, to view the list of Command Snippets, then type del-snip 1 to delete Snippet 1. Snippets and button settings are stored permanently. If you power cycle the module, they are still there.
· You can also activate and deactivate (pause) a Snippet without deleting it.
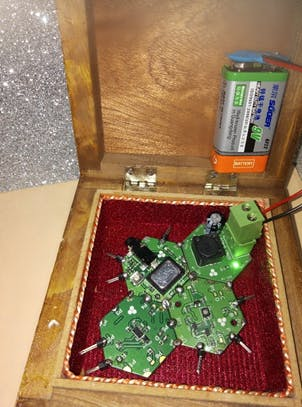
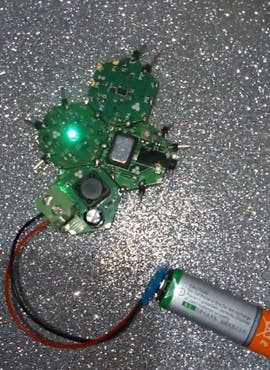
Step 5: Attaching the Battery· Using DC-DC power module (H03R0) with 9V battery to power system.
· Note that it's better to write Command Snippets using power from USB cable connection without DC-DC power module (to avoid power confusion and reset states). Once done, you can insert the batteries and then remove the USB cable.
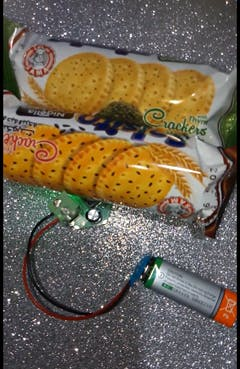
· You can use Hexabitz Security and Alarm System to save our Cookies, Toys, and any important thing ^_^
· You can put the saved thing above or near the modules and calibrate the distance measurement

https://hexabitz.com/product/hexabitz-intro-kit/
Schematics, diagrams and documents
Code
Credits
Related products

Leave your feedback...