

Haptic Swim Assistant For Low Visibility Swimmers

Made by donutsorelse / 3D Printing / Environmental Sensing / Fitness / Sensors / Wearables
About the project
Help low visibility swimmers avoid obstacles and know when they're approaching a wall with haptics, as well as provide safety features.
Project info
Difficulty: Difficult
Platforms: Arduino, DFRobot, Blues Wireless
Estimated time: 1 day
License: GNU General Public License, version 3 or later (GPL3+)
Items used in this project
Hardware components

Story
This project is specifically inspired by the low-visibility swimmers involved in the Build2gether challenge. Through discussions in Discord, what I gleaned was that this would ideally be usable in any body of water without setup, and that feedback should be provided via haptics, which to me means the device should be a wearable. The basics of this are pretty straightforward, but our goal here is to blow this out of the water (pun very much intended). We'll be adding every convenience feature that actually makes sense to include as well as balancing cost-effectiveness and integrating the parts that will get the job done best.
Even as someone without low-visibility issues, I wouldn't exactly mind having an automatic warning system so I could just focus on swimming without worrying about concussing myself against a wall. If this can be just universally beneficial, it may as well also get some features that benefit swimmers in general. So, without further ado, here are the goals of the project:
ProjectGoals:
- The device should be a convenient solution, allowing the user to simply put it on and enter any body of water without initial setup.
- Full haptic warning systems for obstacles and walls, with increasing haptic feedback as the wearer approaches the object to convey distance as well as direction.
- Provide a convenient, automatic safety system that detects issues and notifies an outside party via Blues Wireless in the case of an emergency.
The microcontroller I'm using is the FireBeetle 2 ESP32-E. It offers extra UART pins which are necessary for running our two ultrasonic sensors smoothly, it can handle a lot of code, and they're still cheap. For haptics, we can use coin vibration motors. We're not trying to shake the user silly; we just need a little buzz that can clearly convey that there is an obstacle ahead, and for that we only need these little buzzers. As for the ultrasonic sensors, I'm specifically using underwater ultrasonic sensors. These are made for applications exactly like this, so going this route made a lot more sense to me than trying to use normal ultrasonic sensors with a see-through enclosure (my initial thought). To be clear though, these sensors only work in water, so when you're testing them you need to put them in water to begin getting readings.
The ultrasonic sensors have to be in water to work

The ultrasonic sensors have to be in water to work
We're also adding a safety feature, which requires an accelerometer and Blues hardware. For this, I got the Blues North America Starter Kit, and we'll be using the Notecard and Notecarrier-F (as well as the Swan for testing the setup). To assemble this, you slot the notecard into the Notecarrier-F and connect the Molex antenna from LTE and GPS to MAIN and GPS, respectively.
The Notecarrier-F with the antenna and Notecard connected

The Notecarrier-F with the antenna and Notecard connected
To use these with an external microcontroller is surprisingly easy - just connect the SDA from the FireBeetle to the SDA, the SCL to SCL, and the GND to GND. The accelerometer is used to determine if the user is face-down for an extended period of time.
Here's a full pinout of the setup:
MPU6050 Sensor:
- SDA (Data Line) → Connect to SDA of your microcontroller (MCU)
- SCL (Clock Line) → Connect to SCL of your MCU
- VCC → Connect to 3.3V
- GND → Connect to Ground
Notecard Module:
- Serial Communication (RX/TX) → Connect to corresponding RX/TX pins on MCU
- Power and Ground → Connect to appropriate power source and Ground
HardwareSerial sensorLeft:
- RX → Pin 16 of MCU
- TX → Pin 17 of MCU
SoftwareSerial sensorRight:
- RX → Pin 15 of MCU
- TX → Pin 4 of MCU
Motor Pins:
- motorPinLeft → Pin 18 of MCU
- motorPinRight → Pin 19 of MCU
With that, the project should be
The Blues setup:
I'm happy to say, this part is pretty easy - I had a notably more difficult time getting the accelerometer to give me accurate values than I did in getting the microcontroller to get an alert routed to my phone via text, which is pretty cool.
You can find the quick start guide here. Step 1 is to create your project. You click your name in the top right, go to View Projects and click Create Project.

This gives you your project id that you'll need going forward.
We went over the hardware setup previously, but in getting up and running I did connect the Swan instead of the FireBeetle initially, which can be done by just inserting it onto the Notecarrier-F. Be sure to plug everything into your computer, including the Notecarrier-F. I also am using the recommended SWD programmer/debugger, found here. It's not required but I found things went smoothly while using it.
From the same quick start section, go to the Notecard Quickstart. This, you do need to go through to get your initial setup done, but it's pretty painless. You just get your Notecard connected and synced with your project and you'll be good to go for using it on the Arduino.
I do want to briefly note that the VS Code PlatformIO Extension was noted as the preferred setup, but I had no issues utilizing the Arduino IDE. Before starting with it, you need to install a couple of prerequisites here and here. If you forget to install them, the debugger output will specifically tell you that these are missing and where to get them.
To add the board (the Swan in this case), add this URL to your board manager:
https://github.com/stm32duino/BoardManagerFiles/raw/main/package_stmicroelectronics_index.json
Then install the following board:
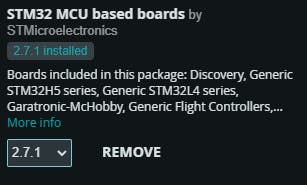
With this, you should now see "Blues Wireless Boards" as an option under the STM32 lists, and the Swan can now work with your sketch.
As for the sketch, I'll also attach a simple starting sketch within this project that is designed to just send one test message to ensure that everything is working correctly.
From here, events will begin appearing in your Events tab as you send messages, but we need to actually do something with them. To accomplish this, click the Routes tab in your project, go to Create Route, and choose where you want it routed. In my particular case, I wanted text message alerts, so I utilized Twilio.
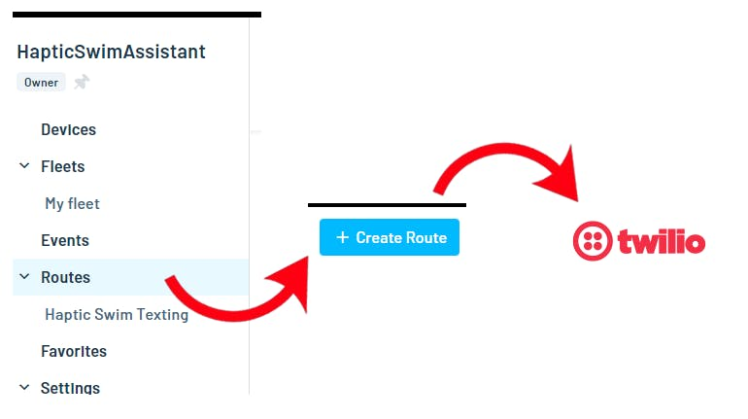
With that, we have everything we need to be able to send alert messages to our phone from the Haptic Swim Assistant device, which brings us to the code!
Code:Starting with the basic functionality, we continuously check for distance with both underwater ultrasonic sensors and update what kind of haptic feedback to give accordingly. As noted, one sensor runs on hardware serial while the other runs on software serial, which I found gave a consistent and notably smoother result than putting both on software serial. To help the user get an actual sense of the distance, we increase both the frequency and intensity of the buzzing as we approach an object. Since one ultrasonic sensor faces slightly left and one faces slightly right, the user can then know if something is in front of them to one side or the other and how far away it is all based on just 2 vibration motors. When both buzzers go off, this means something is in front of the user, which will most commonly be the wall. The underwater ultrasonic sensors have a maximum distance of 6 meters, which we'll use as the starting point of when warnings begin. This begins with low power vibrations and less frequent feedback. By 1 meter, we provide full haptic feedback, which is full strength vibration with constant buzzing, since any wearer doing laps would need a good heads up on when to slow down to ensure they don't hit the wall. This can all be easily adjusted.
For our safety feature, we use an accelerometer and specifically look for when a user is face down with minimal movement for an extended period of time. In the 3d model of the enclosure's lid, you'll notice that it's rounded - this is to avoid false positives in this segment, since the enclosure then can't be left on and face down by accident. When a user is detected to be face down, we start a timer. When that timer reaches the first threshold, we begin haptic feedback. If the user remains face down, we send out an alert via Blues.
The Wearable Enclosure!This brings us to the last part of the puzzle, the actual wearable. In the video, I made a point to make this out of materials anyone would have, but I do think that realistically people aren't going to want to be seen out and about wearing something like Tupperware even if it does have some logic to it. As such, let's put together something a bit nicer, shall we?
The non-3d modeled version of the haptic swim assistant

The non-3d modeled version of the haptic swim assistant
Thankfully, there's a solid starting place to ensure we get a nice result, so I want to credit this waterproof box and this adapter model for providing a surefire basis for this enclosure. You can find the latch and hinge models in the waterproof box link. For everything else, I'll be making modifications and will share those models within this project. As far as those modifications go, the top of the enclosure is rounded because it reduces the resistance as the user swims, but also because it is going to help us get false positives in our safety feature, as noted previously. This enclosure solution also offers a much easier and realistically feasible way to charge the power bank. The ultrasonic sensors will be able to neatly screw into place with the printed enclosure, but I would still recommend using some clear silicone sealant to ensure no water gets in.
The waterproof enclosure with places for each ultrasonic sensor to screw in

The waterproof enclosure with places for each ultrasonic sensor to screw in
ConclusionWith that, we have our device fully online. It is something that the user can just start and use without any setup. It can warn the user with clear and intuitive feedback not just if there are obstacles, but also where they are and how far away they are. And, it can provide a safety net for the wearer by alerting others via text message if the user has been face down in the water for an extended period of time. Hopefully you enjoyed the read, and hopefully it helps someone out there.
CAD, enclosures and custom parts
Code
Credits
Related products


Leave your feedback...