
Hal 9000 Talking 3d Replica

Made by alexaldridge / Art / Communication / Retro Tech / Robotics / Voice
About the project
3D printed push button talking movie prop replica from 2001: A Space Odyssey.
Project info
Difficulty: Difficult
Platforms: Arduino
Estimated time: 4 days
License: Creative Commons Public Domain Dedication version 1.0 or later (CC0 1+)
Items used in this project
Hardware components

View all
Hand tools and fabrication machines
Story
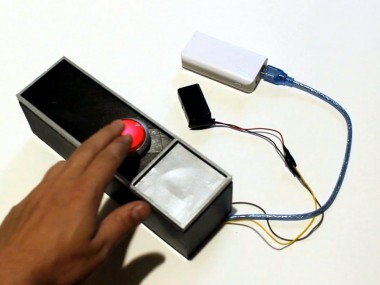
I wanted a replica HAL 9000 but I didn't want to buy a premade one. I designed, printed and assembled my own model from scratch with a lot of inspiration from other replicas shared online. It took me 4 days to complete assembly once I had all the parts printed and together.
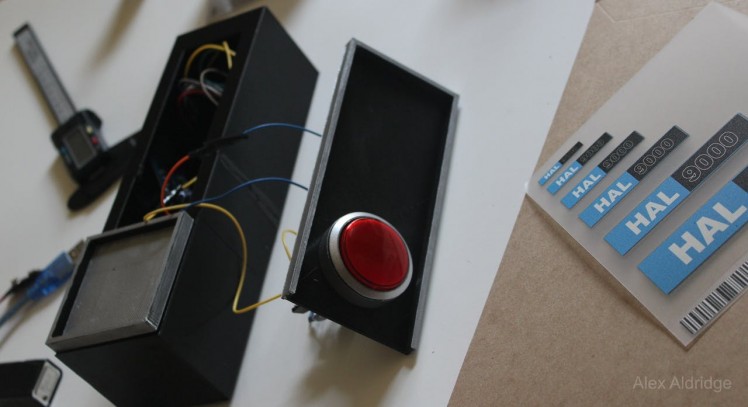
I started with the 45mm red arcade button and worked around it making a 3D model on Sketchup. I printed the front faceplate and the box behind it in four different sections. The red arcade button didn't breakdown into paintable parts and needed a lot of taping to prevent overspray. I couldn't print the grill and used an old radio grill for my first attempt. I ordered perforated plastic canvas for future models. Custom single stickers are not easy to get so I ordered a 5 x 5 inch window sticker with a series of different sized HAL 9000 logos on it. I cut out the logo that fit the best.
I wanted a single audio file (HAL's voice) to play when the red arcade button was pushed so I hired someone to help me with an Arduino based circuit that fits inside this model.
Step 1: 3D Printing and Preparation
Print all of the 3D parts and carefully paint them. Measure, cut and paint the perforated plastic sheets. Glue the two front pieces together and then glue the two back pieces together. Glue the speaker grill in place.
Step 2: Arcade Button
Disassemble the arcade button as much as possible and paint the bezel. Use hot glue or super glue to secure the momentary button to the back of the arcade button. The button will fit inside the stock plastic holder and work with the 45mm button.
Momentary button detail.

Momentary button detail.
Step 3: Circuit and Code
Follow the provided diagram and example pictures to assemble the circuit. Make sure to transfer the test.wav audio file to the micro SD Card and upload the hal.ino code to the UNO board.
Step 4: Final Assembly
Insert and fasten the UNO board inside the model. Fasten the micro SD card module, amplifier board and the speaker.
Note: The main circuit does not have enough power to produce a loud enoughvolumeforHAL'svoice so a9Vamplifier was temporarilyadded. Combine both circuitdiagrams to complete the circuit. Youwillnotneeda9Vbattery.
Schematics, diagrams and documents
CAD, enclosures and custom parts
Code
Credits
alexaldridge
I'm an entrepreneur and hacker who enjoys learning, creating, business, law, science and design.
Related products


Leave your feedback...