
Hack Your Own Smart Gadgets Using Tuya Cloud Platform

Made by vilaksh01 / Home Automation / Kids & Family / Lights / Productivity / IoT
About the project
Use Python and Tuya CloudAPI to make custom Ambient Lighting/Mood Lightening gadgets.
Project info
Items used in this project
Hardware components

Software apps and online services
Story
Tired of buying Philips Hue smart bulbs! Don't worry in this tutorial I will explain in very simple steps to make a small Ambient/Mood lighting solution for homes or any commercial spaces along with a mobile app control feature. Smart rooms and ambient lighting is something that really helps you to feel more productive and creative. Just by one tap, you can easily adjust the indoor colour and brightness and can set different lighting scenes for different occasions, creating a warm, relaxing, interesting and inspiring living space, which greatly enriches your life. “Do I really need to get a mood lighting setup? I already have enough lights to light up the room.” A valid thought in every house owners mind. Well, different people see their homes differently. Some see it as their sanctuary, some might see it as a party pad and some might see it as a place to kick back and relax after a long day's work. Whatever it may be, you need the help of mood lighting to give your house that effect. Mood lighting highlights and enhances any space dramatically, and make your home look much nicer and more inviting.
Increasing adoption of smart mood lightning solutions during Covid! With the increasing demands of a single space that meets the atmosphere and requirements of both working stations and living places, the necessity of smart lighting for the home has gained new ground. This technology of smart lighting for homes actively minimizes energy consumption to a significant level, benefiting work from home workers to stabilize their electricity usage. It also adds convenience allowing the utility of lights only when absolutely necessary, while keeping track of the daylight control system. This lighting system is home helps to efficiently create an environment that suits both the moods of the workspace and relaxing space whenever required.
I prefer to make my own smart bulb with immense amount of customization and reverse engineering factors.

I prefer to make my own smart bulb with immense amount of customization and reverse engineering factors.
Technology Used:Based on the Tuya Smart platform, a smart light can be developed simply and quickly. This tutorial introduces how to use the Tuya Cloud API and IoT platform to quickly complete a smart light product prototype. You don't need to have any prior experience with Arduino programming or any soldering for this tutorial, it is purely in simple Python language. If you haven't signed up for the Tuya IoT account, sign up here, c'mon it's free for all developers to Sign up and join the Tuya Developer Arduino Beta Test
Also, I have been preparing several articles for people and hobbyists who are new to the Tuya IoT platform, do visit those for reference:
- https://steptostem.com/3553/aquamon-aquaponics-and-fish-tank-monitoring-with-tuya-iot/
- https://steptostem.com/3360/getting-started-with-arduino-iot-control-with-tuya-iot-platform/
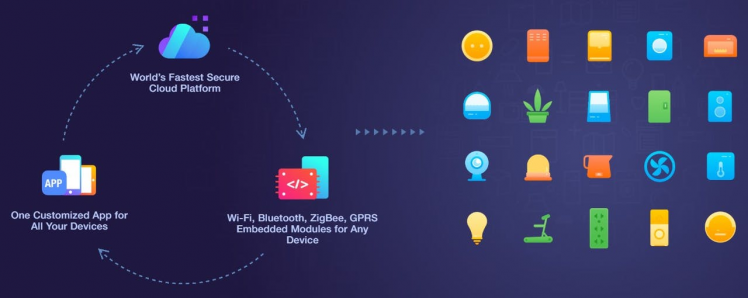
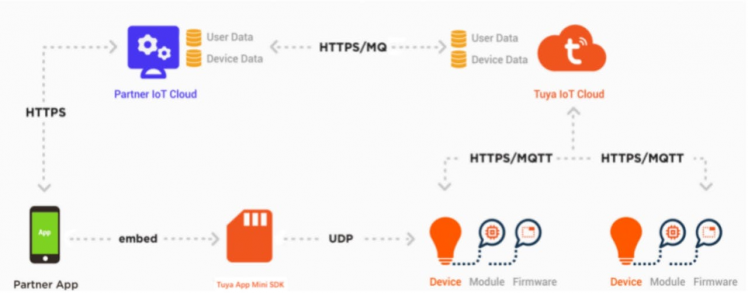
Tuya Is a leading global IoT Cloud Platform that connects the intelligent needs of brands, OEMs, developers, and retail chains. The platform provides developers with a one-stop IoT PaaS-level solution that contains hardware development tools, global cloud services, and smart business platform development, Tuya offering comprehensive ecosystem empowerment from technology to marketing channels to build the world’s leading IoT Cloud Platform. Even you can use the Tuya Cloud platform to connect hardware to the cloud and then use their API to control and monitor these objects.
Hardware Setup:
All the hardware we need here, just added sink and fan with thermal tape to keep the device performance consistant

All the hardware we need here, just added sink and fan with thermal tape to keep the device performance consistant
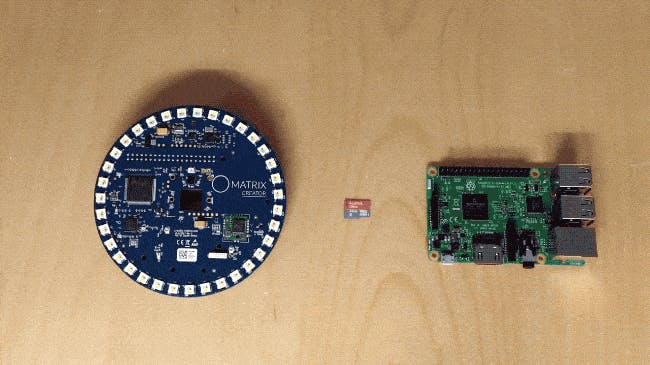
Let's set up the hardware first, we are going to use Raspberry Pi 3B+, you can use any version above it as well, for the LED array I am going to Matrix Creator Board, this board is my favourite of all boards with many on-board sensors and 35 RGBw LEDs.
1 / 2
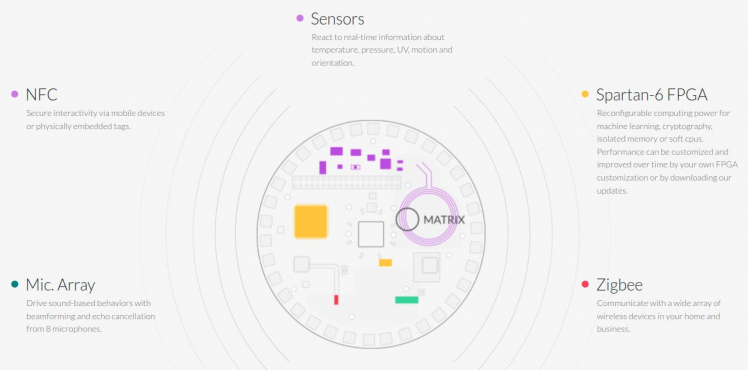

matrix Expanded Overview
Recommended 5V 3A Micro USB Power Supply, now use MicroSD Card with the latest version of Raspberry Pi OS installed. Flash and burn the Raspberry OS usingEtcher.io for easy flashing.
After OS is flashed, try connecting a monitor for the first time and then later you can access the device remotely through VNC or SSH. Let us install the Matrix Creator device drivers and packages, https://matrix-io.github.io/matrix-documentation/matrix-hal/getting-started/installation-package/
# Add repo and key
curl -L https://apt.matrix.one/doc/apt-key.gpg | sudo apt-key add -
echo "deb https://apt.matrix.one/raspbian $(lsb_release -sc) main" | sudo tee /etc/apt/sources.list.d/matrixlabs.list

# Update repo and packages
sudo apt-get update
sudo apt-get upgrade

# Install MATRIX HAL Packages
sudo apt-get install matrixio-creator-init libmatrixio-creator-hal libmatrixio-creator-hal-dev

# reboot device
sudo reboot
To interface with Matrix device through codes, let us install the Matrix Lite python3 package
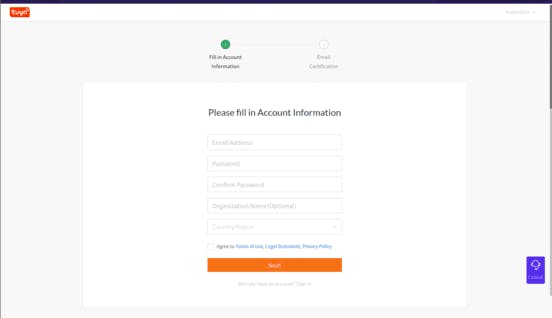
python3 -m pip install --user matrix-liteStep 1: Create an account on Tuya Platform, http://iot.tuya.com/?_source=3bb57e086a1738fc4d1ecf7a7f79188e Fill in your details and Sign Up as an Individual Developer.
Step 2: Next click Cloud > Development from the left navigation bar and then select the TRIAL EDITION option:

On the next page select TRIAL EDITION and click Buy Now. Don't worry, you don't have to add a credit card, the process is completely free.

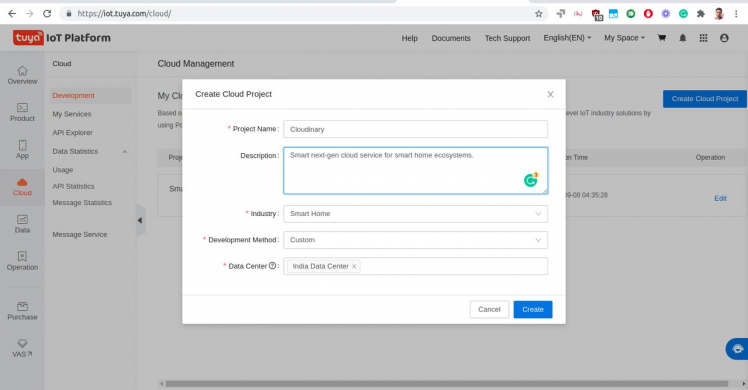
Step 3: Create a Cloud Development Project
Now we need to create a cloud project. Click Create Cloud Project on the right side of the page. On the dialogue box, fill in the form and click Create.
For Industry select Smart Home, for Development Method select Custom, and for Availability Zone select the server address corresponding to your area. For me it's India Data Center:
On the Authorize API Services page, you can see that there are some APIs services selected by default (on the right) but we also need to add other APIs. The ones that we are looking for are Device Status Notification, Industry Project Client Service, Weather Service, and LBS API. Select them and click Authorize. In fact, you can select all relevant ones for future customizations. After that, you will see the Project Configuration page to create an asset and a user, do remember we will use the same email and password for Cloud SDK and API authentications, even on the mobile app too.
The important things to notice here are: we just created user and asset, this is how it works- for large scale enterprise IoT solution there can multiple user under single asset.

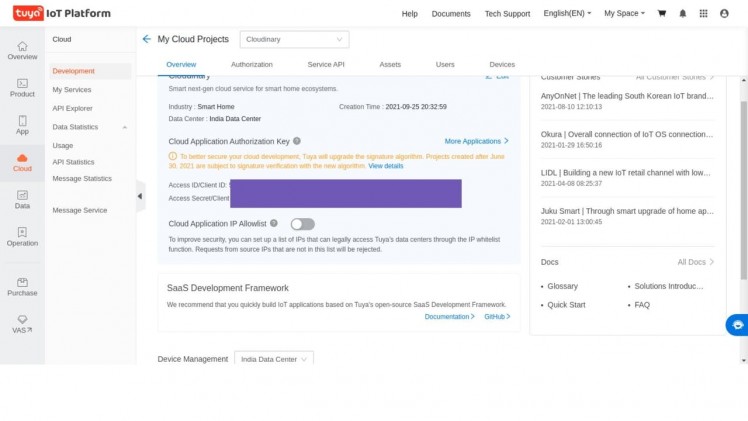
You can see the Cloud Device summary
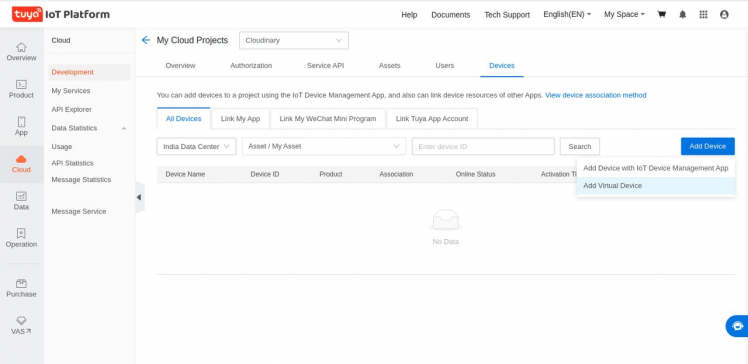
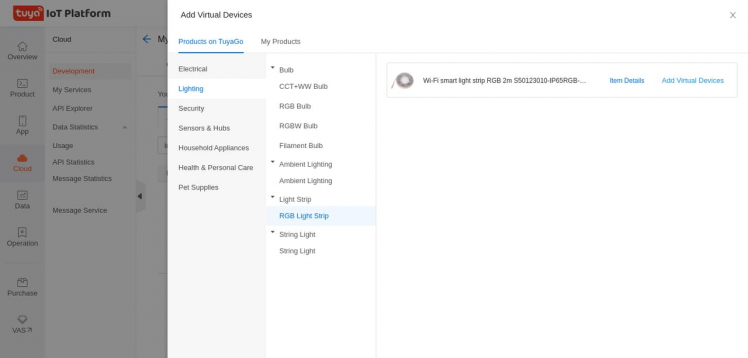
Step 4: In this step, we are going to add a virtual smart device to the asset we create.
Under the Devices section, hover the mouse on Add Device, and click Add Virtual Device. The device that we are looking for is called Wi-Fi Smart Light Switch... which you can find by clicking Lighting > Light Strip > RGB Light Strip.
To add it, simply click Add Virtual Devices, for Asset Path just select the asset that you created before and click OK,
1 / 2
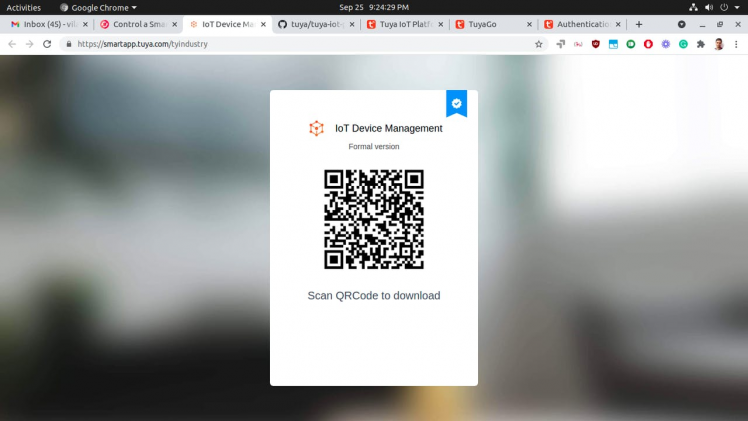
Step 5: Download the Tuya IoT Management App (It is not available on App Store/Play Store). You can scan the below QR code it should download it on your device:
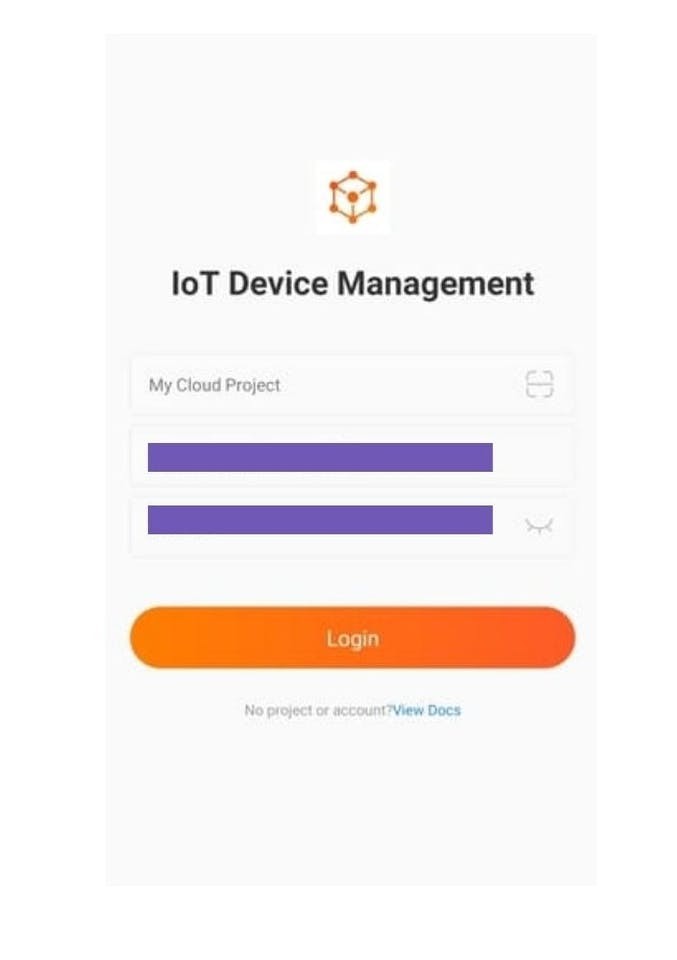
Once you have installed the app, log in using the QR code of the project, the username, and the password you used when you created the asset and the user.
You can find the QR code of the project by going to Cloud > Development > My Cloud Project > Devices > Add Device > Add Device with IoT Device Management App
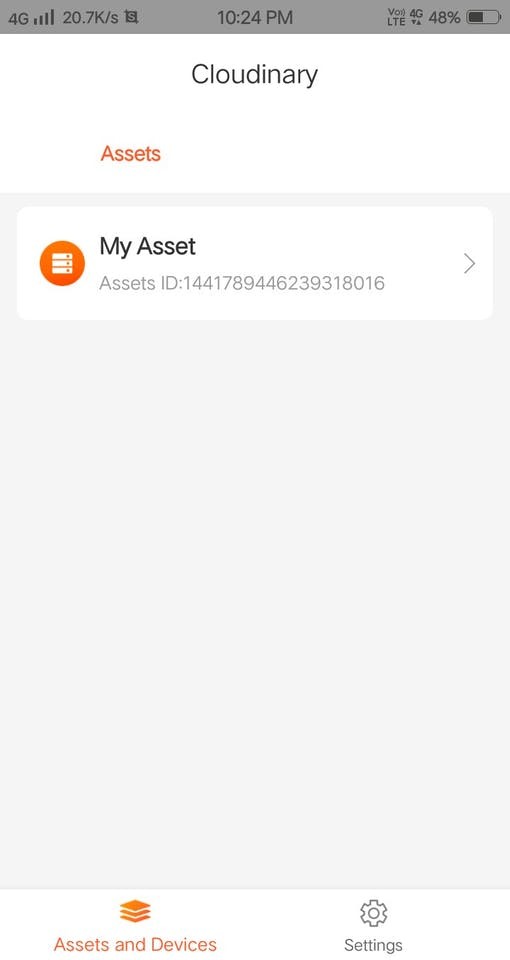
After that, you will be redirected to a page where you can see all your assets. Click on the asset we created before, then navigate to the Devices section, you should see the virtual device we added before.
1 / 3
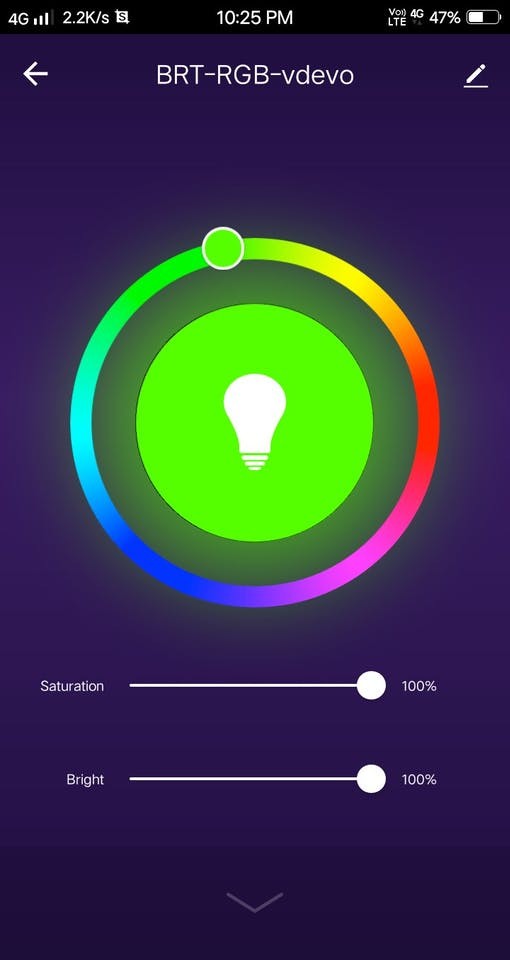

The virtual device which we are working on is BRT-RGB-vdevo
Here are the exciting parts of this project happening, you write some simple Python-based codes and connect to your device over cloud and control and know its status,
First, we need to install the Tuya-iot-python-sdk package. Open a new terminal window and run this command:
pip3 install tuya-iot-py-sdkAfter installing SDK let's write code to connect the device to Tuya Cloud and based upon app user actions, set the mood lighting of Matrix Creator 35 RGBw LEDs connected to the raspberry pi.
from matrix_lite import led
from time import sleep
from tuya_iot import TuyaOpenAPI
import json

# Cloud project authorization info available n Tuya Cloud console
ACCESS_ID = 'your-access-id'
ACCESS_KEY = 'your-access-key'

# Select an endpoint base on your project availability zone
# For more info, refer to: https://developer.tuya.com/en/docs/iot/api-request?id=Ka4a8uuo1j4t4
ENDPOINT = "https://openapi.tuyain.com"

# Project configuration
USERNAME = 'your-username'
PASSWORD = 'your-password'

DEVICE_ID = 'your-device-id'

# Initialization of tuya openapi
openapi = TuyaOpenAPI(ENDPOINT, ACCESS_ID, ACCESS_KEY)
openapi.login(USERNAME, PASSWORD)
The Tuya Cloud API documentations are super easy to follow, check here:
- https://developer.tuya.com/en/docs/cloud/device-control?id=K95zu01ksols7#title-35-Send%20instructions%20to%20the%20device
- https://developer.tuya.com/en/docs/cloud/device-control?id=K95zu01ksols7
Few lines of codes to understand, we make a request, the result is in Python dict structure, so key-value pair or index should work. For our device we have switch_led, having a value of either True or False, based upon app interaction.
# Get device status summary
request = openapi.get(f'/v1.0/iot-03/devices/vdevo163258475955988/status')
switch_led = request[ 'result' ][0]
If the user has activated the LED and sets HSV (Hue-Saturation-Value) we are going to prompt our script to change the device led colours accordingly,
if switch_led['value'] == True:
    # print(request)

    # returned colour_data key has hsv values
    colour_data = request['result'][3]
    # print(colour_data)
    value = colour_data['value']
    # print(value)
    hsv_val = json.loads(value)
    h = float(hsv_val['h'])
    s = float(hsv_val['s']) / 255 * 100
    v = float(hsv_val['v']) / 255 * 100

    r, g, b = hsv2rgb(h, s/100, v/100)
    # print(r,g,b)
    # print(int(h), float(s)/100, float(v)/100)

    led.set({'r': r, 'g': g, 'b': b, 'w': 0})  # set Matrix device colour

else:
    led.set('black')
sleep(5)
Also, we are using a separate function to convert HSV values to RGB,
# Value of S and V is between 0-1, H has value between 0-360

def hsv2rgb(h, s, v):
    h = float(h)
    s = float(s)
    v = float(v)
    h60 = h / 60.0
    h60f = math.floor(h60)
    hi = int(h60f) % 6
    f = h60 - h60f
    p = v * (1 - s)
    q = v * (1 - f * s)
    t = v * (1 - (1 - f) * s)
    r, g, b = 0, 0, 0
    if hi == 0:
        r, g, b = v, t, p
    elif hi == 1:
        r, g, b = q, v, p
    elif hi == 2:
        r, g, b = p, v, t
    elif hi == 3:
        r, g, b = p, q, v
    elif hi == 4:
        r, g, b = t, p, v
    elif hi == 5:
        r, g, b = v, p, q
    r, g, b = int(r * 255), int(g * 255), int(b * 255)
return r, g, bHow simple it was to interface with Tuya Cloud SDK, much easier compared to Arduino Tuya Codes and no hassles of soldering a huge bunch of wires.
I hope you enjoyed hacking, you can make such awesome smart home lighting with Tuya Cloud SDKs, Raspberry Pi's and LEDs in lesser than an hour. Even, what about starting a brand for your own smart products with the Tuya enterprise model... Visit their website and check out their offerings!
Stay Tuned!Some more exciting projects coming up with more interesting use cases of Tuya Platform, in case if you have any problems using Tuya Platform in your projects don't hesitate to ping me here. I am also adding a quick glimpse of our next tuya Project App Panel.
Full custom device and solution for smarter city and device management using Tuya

Full custom device and solution for smarter city and device management using Tuya
Hit a like and follow me for future article updates :)
- Tuya IoT Platform:iot.tuya.com/...
- Tuya Developer Platform:Tuya Developer - Tuya Smart - Global IoT Development Platform
Schematics, diagrams and documents
Code
Credits
Related products


Leave your feedback...