
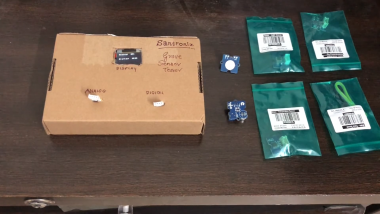
Grove Sensor Test Box

Made by santronix / Home Automation / Sensors / Wearables / IoT
About the project
If you are using Grove Sensors quite often then you need a Grove Sensor Test Box to quickly test your sensors before using in your projects!
Project info
Difficulty: Easy
Platforms: Arduino, MediaTek Labs, Seeed Studio
Estimated time: 1 hour
License: Apache License 2.0 (Apache-2.0)
Items used in this project
Hardware components

Story
If you are using Seeed Studio’s Grove sensors quite often then you would have had the need to test these sensors before you use them in your maker projects. However, testing them is quite a pain!
As we understand it, we endeavoured to make a test box for you! It’s quite easy and would take only 10 minutes to build one if you have all the components with you!
So what you need?
Here’s what you need to get started with
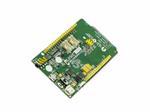
- MediaTek LinkIt one x1
- Grove Shield for MTK LinkItOne x1
- Grove cables x3
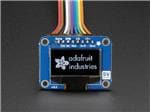
- 1.2” OLED Grove shield
- Cardboard box
- Arduino IDE on Windows, Linux or Mac
How to build?
Just connect the components as shown in the picture below
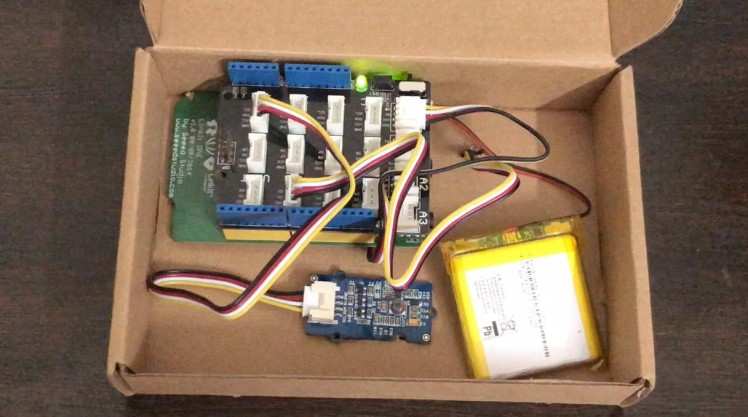
Wiring connection for Grove Sensor Test Box
- Connect Grove shield for MediaTek LinkIt One board on top of MTK LinkIt one board
- Connect 1.2” OLED Grove Display to any of the I2C port on Grove shield
- Connect a Grove cable to A0 port on Grove shield for Analog sensor testing and take it out of the cardboard
- Connect a Grove cable to D2 port on Grove shield for Digital sensor tasing and take it out of the cardboard
- Connect a Lithium Ion Battery to battery port
In order to program the board with the Arduino code, you can connect the USB cable to LinkItOne board and keep it in the programming mode. Once the program is flashed successfully you can use the Li-Ion battery for power.
We are providing an Arduino code for free. You can find the Arduino code on our official Github link : https://github.com/santronix/IoT/tree/master/Gove_Sensor_Tester
Here’s the code snippet for quick view
/******************************************************* * SANTRONIX <info@santronix.in> * * This file is part of SANTRONIX Mediatek LinkIt Tutorials Project. * * SANTRONIX Mediatek LinkIt Tutorials Project can not be copied and/or distributed without the express * permission of SANTRONIX *******************************************************/#include <math.h>#include <Wire.h>#include <SeeedOLED.h>const int analogSensor = A0;const int digitalSensor = 2;void setup() { // put your setup code here, to run once: Serial.begin(9600); Wire.begin(); SeeedOled.init(); //initialze SEEED OLED display SeeedOled.clearDisplay(); //clear the screen and set start position to top left corner SeeedOled.setNormalDisplay(); //Set display to normal mode (i.e non-inverse mode) SeeedOled.setPageMode(); //Set addressing mode to Page Mode pinMode(digitalSensor, INPUT);}void loop() { int a = analogRead(analogSensor); int b = digitalRead(digitalSensor); SeeedOled.setTextXY(0,0); //Set the cursor to Xth Page, Yth Column SeeedOled.putString("Analog: "); //Print the String SeeedOled.putNumber(a); SeeedOled.setTextXY(4,0); SeeedOled.putString("Digital: "); if(b == HIGH) { SeeedOled.putString("HIGH"); }else{ SeeedOled.putString("LOW "); } delay(100);}Watch the complete video of Grove Sensor Test Box on our YouTube channel for more details
SANTRONIX - Maker Hacker on building Grove Sensor Test BoxSchematics, diagrams and documents
Code
Credits
Related products


Leave your feedback...