
Getting Started With Powershell Iot & Sensehat - Temp Sensor

Made by DanielSSilva / Productivity / Sensors / Weather / IoT
About the project
With this project, you will get a brief explanation about what's PowerShell, why I'm using it and how you also use it on your projects. I will guide you through how you can install PowerShell on RaspberryPi, getting started with it, and write a function to get temperature!
Project info
Difficulty: Moderate
Platforms: Microsoft, Raspberry Pi
Estimated time: 2 hours
License: GNU General Public License, version 3 or later (GPL3+)
Items used in this project
Story
PowerShell Core (from now on abbreviated as PS) is a powerful scripting language that became Generally Available (GA) on January 10th this year and continues to grow every day. Quoting the Microsoft documentation,
" PowerShell is a task-based command-line shell and scripting language built on .NET. PowerShell helps system administrators and power-users can rapidly automate tasks that manage operating systems (Linux, macOS, and Windows) and processes.". As stated, it is known to be useful for automation and maintenance, offering a really useful set of commands, called command lets (cmdLets).
What will we do?
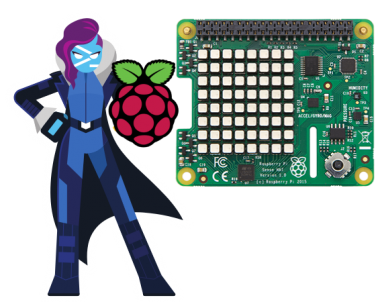
In this tutorial we will explore an unusual use case for this scripting language - IoT. We will use PowerShell to interact with Hardware and fetch information or perform actions. In this tutorial we will use the Sense Hat to get the current temperature. We will also have to read the datasheet in order to understand how get the temperature.
Before we start
Keep in mind that both PS and the IoT module are bleeding edge. PS is constantly being used and the community is always reporting bugs and improving it’s usage, but even so, we can experience bugs, crashes and unexpected behavior. If you do, check their Github pages (PowerShell and IoT Module) and report the issues, they are active and friendly!
Are you ready? Let's go!
We will start by installing PowerShell on our Raspberry Pi (Note: As stated here, currently it's only supported on Raspbian Stretch and on Pi 2 and 3). Head to the Github page and select whichever version you want to use. Don't get intimidated with the multiple files there to choose. This is because PS is cross-platform and can run on Windows, Linux and MacOS. The "installer" for raspberry Pi is the *-linux-arm32.tar.gz. In this case, we will use the powershell-6.1.0-linux-arm32.tar.gz. We will rely heavily on the terminal during this tutorial, so start your SSH session or open your terminal if you are doing this directly on your raspberry Pi. PS has its' dependencies, so let's start by installing them and install it right after:
- # Install prerequisites
- sudo apt-get install libunwind8
- # Grab the latest tar.gz
- wget https://github.com/PowerShell/PowerShell/releases/download/v6.1.0/powershell-6.1.0-linux-arm32.tar.gz
- # Make folder to put powershell
- mkdir ~/powershell
- # Unpack the tar.gz file
- tar -xvf ./powershell-6.1.0-linux-arm32.tar.gz -C ~/powershell
After doing this, if we simply do
- ~/powershell/pwsh
PS will be launched. I suggest that you create a symbolic link, so that you don't have to specify the full path whenever you want to launch PowerShell. In order to do so, simply run the following:
- sudo ln -s ~/powershell/pwsh /usr/bin/pwsh
After this, we can simply type pwsh whenever we want to launch PS! Let’s check if it is working as expected. The following command shows you the information regarding both PS and your OS:
- $psversiontable
If you are more familiar with the unix commands, those are still supported on PS.
One thing to keep in mind: Get-help cmdlet is really helpful and provides explanations and examples. Don’t be afraid to use it!
Next Step: Install-Module Microsoft.PowerShell.IoT
We already have PS installed, but we still need the cmdlets to interact with hardware. Let's install them and explore those commands.
NOTE: Because we have to work with hardware, we have to run PS with higher privileges (either with sudo or as root user)
After launching PS, we need to install the IoT Module, so we do
- Install-Module Microsoft.PowerShell.IoT
As the command name implies, this will install the module that we specified. You might be questioning “Install from where? I haven’t specified any path!”. Using the command
- Get-Help Install-Module
we can read the following “Downloads one or more modules from an online gallery, and installs them on the local computer.”. After the installation is successful we can start messing around with what can we do with this module.
Exploring the Module
PS is a self-documented language, meaning we have cmdlets that help us find other commands, or to get information about a specific cmdlet (as we have seen with the Get-Help). The easiest and best way to explore the module, is by doing
- Get-Command -Module Microsoft.PowerShell.IoT
This will list all the commands that are available on the IoT module, let's see what we have:
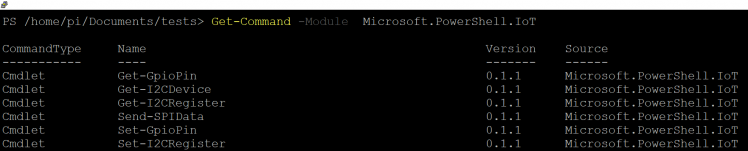
So we only have 6 commands... that seems a small set... But it's not! It has all we need. As you might notice, it has support for GPIO, SPI and I2C. In this tutorial we will focus on the I2C, since it's what the Sense Hat uses to communicate.
About the I2C protocol
Regarding the I2C protocol, I will not enter in details, but basically what we need to know is that it has a master (device) and a set of registers (slaves). We can Get and Set values for those registers. What we will do, will depend on how the chip works (which we will see in a few moments)
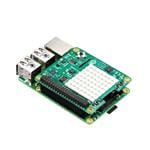
Back to the SenseHat
As mentioned before, we will work with the temperature sensor. Before jumping into the code, we should analyse its' datasheet. Here are the important notes:
-
On address 0x20 we have our "control register". We want it to activate it and block the update data until we read the values. This corresponds to the value 0x84.
On address 0x21 we have another "control register". This is the one used to request a new sample. We will set its value to 0x83.
When we set the values for this register, it will affect two registers with the result of this request: TEMP_OUT_L and TEMP_OUT_H with addresses 0x2A and 0x2B respectively.
As stated on the datasheet: "The relative humidity and temperature values must be computed by linear interpolation of current registers with calibration registers"
Those calibration registers are on addresses 0x32 and 0x33. On either case we need to get the Most Significant Bit - address 0x35
With this in mind, let's check the code!
I will place here the whole code required to get the temperature. The code is like the "translation" of what we've just pointed above. Although this might be a "wall of code", i'll explain it through.
- Import-Module Microsoft.PowerShell.IoT
- #Get the device (master).
- #after checking this website, found that the address is 0x5F
- #https://pinout.xyz/pinout/sense_hat
- $deviceAddress = 0x5F
- $Device = Get-I2CDevice -Id $deviceAddress -FriendlyName tempSensor
- #Set the configuration register with the values we talked
- #Check the datasheet if you have any doubts
- $controlRegisterAddress = 0x20 #CTRL_REG1
- $controlRegisterValue = 0x84 # Active mode (8), do not update until values are read (4)
- Set-I2CRegister -Device $Device -Register $controlRegisterAddress -Data $controlRegisterValue
- #Define a function that reads the actual temperature from the registers.
- #Remember that the values obtained here will have to be calculated with the calibration values!
- #As we have seen before, we can set values to registers and read values from them. In the next functions,
- #we will read the values.
- function Read-TemperatureSample(){
- $tempLowRegisterAddress = 0x2A
- $tempHighRegisterAddress = 0x2B
- #READ VALUES
- [int16]$temperatureOutL = (Get-I2CRegister -Device $Device -Register $tempLowRegisterAddress).Data[0]
- [int16]$temperatureOutH = (Get-I2CRegister -Device $Device -Register $tempHighRegisterAddress).Data[0]
- #because it is 2s complement, we need to do a "bitwise or" between the lsb and the msb
- [int16]($temperatureOutH -shl 8) -bor $temperatureOutL
- }
- #The following four functions calculate the calibration values
- #in order to calculate those values, we need to get the less significant byte (LSB) and the most significant byte (MSB)
- #After it we need to "merge" them, by doing a bitwise or (bor operator)
- function Get-T0_degC_x8(){
- $lsbTemperatureCalibrationRegisterAddress = 0x32
- $msbTemperatureCalibrationRegisterAddress = 0x35
- [int16]$lsb = (Get-I2CRegister -Device $Device -Register $lsbTemperatureCalibrationRegisterAddress).Data[0]
- [int16]$msb = ((Get-I2CRegister -Device $Device -Register $msbTemperatureCalibrationRegisterAddress).Data[0]) -band 0x03 # 0011
- [int16]($msb -shl 8) -bor $lsb
- }
- function Get-T1_degC_x8(){
- $lsbTemperatureCalibrationRegisterAddress = 0x33
- $msbTemperatureCalibrationRegisterAddress = 0x35
- [int16]$lsb = (Get-I2CRegister -Device $Device -Register $lsbTemperatureCalibrationRegisterAddress).Data[0]
- [int16]$msb = ((Get-I2CRegister -Device $Device -Register $msbTemperatureCalibrationRegisterAddress).Data[0]) -band 0x0C # 1100
- $msb = $msb -shr 2 # we need to shift twice because it was on the 3rd and 4th position, wee need to be on 1st and 2nd
- [int16](($msb -shl 8) -bor $lsb)
- }
- #Again, T0_OUT and T1_OUT are needed to do the maths. Check page 25 of the datasheet.
- function Get-T0_OUT(){
- [int16]$registerAddressL = 0x3C
- [int16]$registerAddressH = 0x3D
Code
Credits
DanielSSilva
Software developer, focused on .NET Core and EF Core. DYI enthusiast and like to explore new things. Mainly focusing on PowerShell Core IoT and Raspberry Pi
Related products


Leave your feedback...