
Getting Started With Arduino Iot Control With Tuya

Made by vilaksh01 / Communication / Robotics
About the project
Struggling to connect your cheap Arduino UNO to a reliable IoT network, meet Tuya, an enterprise-grade IoT development suite.
Project info
Difficulty: Easy
Platforms: Arduino
Estimated time: 3 hours
License: GNU General Public License, version 3 or later (GPL3+)
Items used in this project
Hardware components

Software apps and online services
Hand tools and fabrication machines

Story
Introduction:
I have always enjoyed using Arduino UNO since it was my first programmable board but it lacks IoT network capabilities even if you have a network module like HC-05 Bluetooth module or ESP8266 you still struggle to find a perfect IoT management software suite. According to Juniper Research, there are over 46 billion IoT devices in 2021. But we must not turn blind when it comes to security, we all want a secure plug-and-play IoT device and here comes Tuya IoT development suite into play.
What is Tuya?
Tuya is a leading global IoT Cloud Platform that connects the intelligent needs of brands, OEMs, developers, and retail chains. The platform provides developers with a one-stop IoT PaaS-level solution that contains hardware development tools, global cloud services, and smart business platform development, Tuya offering comprehensive ecosystem empowerment from technology to marketing channels to build the world’s leading IoT Cloud Platform. 
With Tuya, you implement IoT networks to your devices and leverage their ecosystem to make a commercial product with mobile apps, AI integrations, and real-time authentications. But one has to start somewhere, let's see a small introductory example on how to use the Tuya IoT platform - Tuya Developer - Tuya Smart - Global IoT Development Platform
But, how do I join Tuya as a developer?
Tuya is open to all, join as a beta tester and developer with their recent Arduino Library and Tuya Development kits release. Sign up and join the Tuya Developer Program with this link Sign up and join the Tuya Developer Arduino Beta Test to get your development gifts and make your own Arduino projects with Tuya Support. Don't forget to share your feedback with the whole community. 
Setting up Arduino UNO Tuya IOT Control with ESP8266:
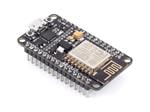
- Hardware: Arduino UNO, NodeMCU ESP8266
- Software: Arduino IDE, Tuya IoT Console
Let's build it!
Step 1: Create a device on Tuya
To start developing with Tuya, you need to sign up for an account on Tuya.com. After creating an account, log in and follow the steps shown below. Click on create button to create a new IoT device. 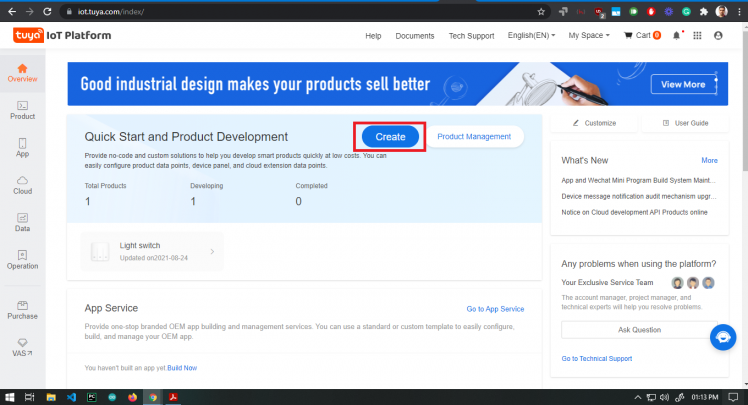
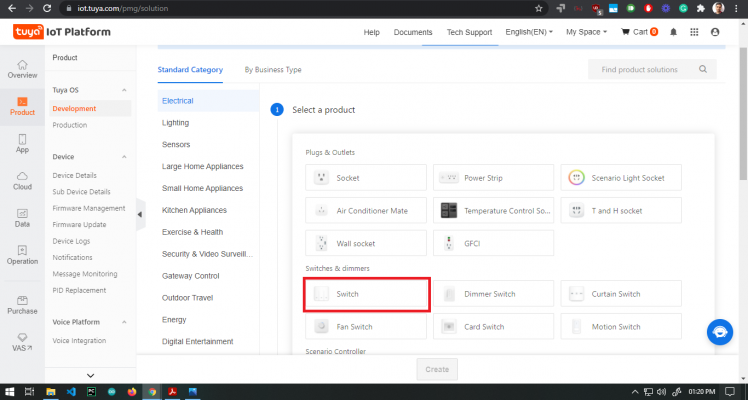
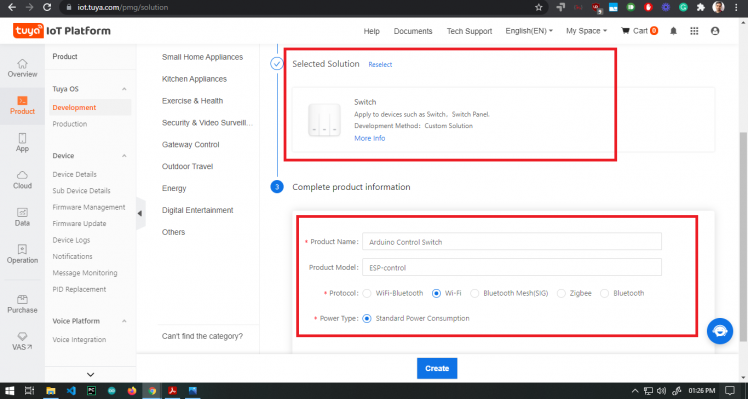
Once you click create you get several options to select the type of your device, in fact, there are hundreds of IoT device types to select from, Tuya has more than 410.000 different SKUs in over 1, 100 categories, covering over 220 countries and regions. . For this demonstration, we are going to select switch (you can use Light Source as well, both works the same for the Arduino example).
 Once the switch solution is selected you will be presented with the option to select development type, here, we choose 'Custom Solution' as shown below and then fill out product details, since we are using ESP8266 as Tuya IoT node so we will select WiFi (ESP32 has both WiFi and BLE).
 After doing the above steps you now need to select which functions does your solution need, there are already standard functions available for most of the sensor data types like temperature, humidity, on-off, pulse rate, etc. if you cannot find any standard function you can create a custom function in easy steps too, check here https://developer.tuya.com/en/docs/iot/custom-functions?id=K937y38137c64
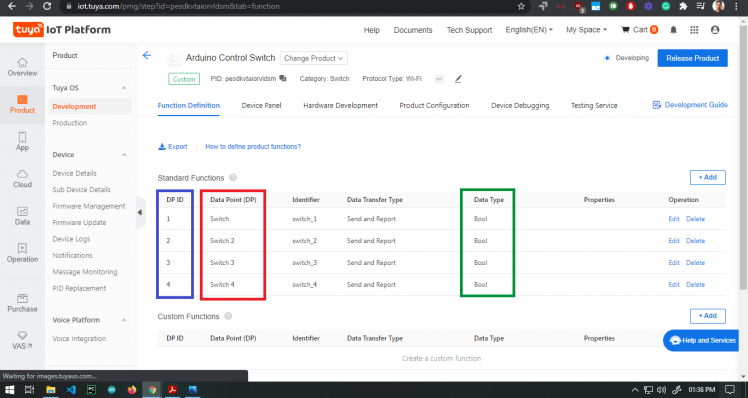
Here, the important things or basic concepts to keep in mind from the above image (we have added 4 switch data points though we will test only one for this example, add as many peripherals you want to control) are:
Data Point: represents functions of smart devices and parameters.DP ID: indicates the code of a data point. Subsequent function data transfer between the device and the cloud is through data point ID.Name: indicates the name of a custom function.Identifier: indicates code value of a data point, displaying function name in multi-language on the app. Support letters, digits and underlines, starting with a letter.Data type:- Boolean: indicates the binary variable value (true or false). For instance: switching function (On or Off).
- Integer: represents data that can be linearly adjusted. For instance: temperature adjustment, ranging from 20 to 40 °C.
- Enum: indicates custom finite set value. For instance: working level (low, middle and high).
- Fault: specified for fault report and statistics. Support Only report when multiple faults occur.
- Char type: indicates data transfer in char type.
- RAW type: indicates data transfer in a raw binary format. Generally, it is recommended to use raw data transfer when the other five types cannot cope with the complicated product functions.
Data transfer type:- Issue and report: indicates two-way data transfer between the device and the cloud.
- Only report: indicates one-way data transfer. Data can only be reported from the device.
- Only issue: indicates one-way data transfer. Data can only be issued by the cloud.
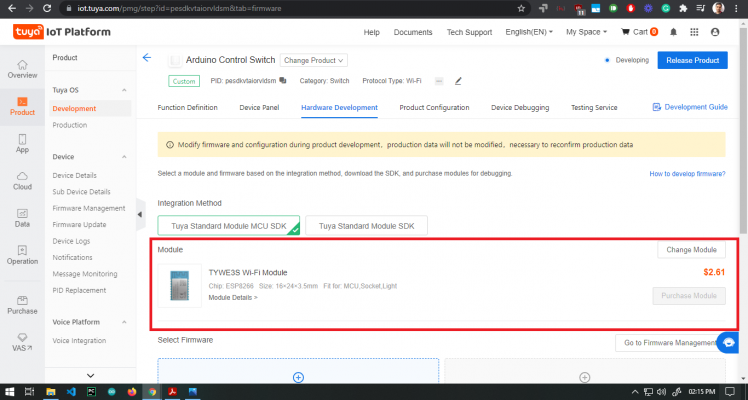
Select TYWE3S Wifi Module from Hardware Development. The module is based upon ESP8266 and it works simply using serial communication or UART with our Arduino. In the device panel, we have the option to make a mobile app using drag and drop style tools but we will use the default app for this demonstration.
Step 2: Burning Tuya Auth Token to ESP8266
To be able to use the NodeMCU ESP8266 as a Tuya product for this project, you need to flash and authorize it with the required firmware. To authorize the ESP8266, you have to send the product ID (PID) and your Tuya IoT account name (e-mail) to devops@tuya.com. After a while, they will send you a Token ID. Then, follow the steps below:

First, go to the Tuya PMS service page https://pms.tuya.com/en/login and sign up for an account if you don't have one. Then, go to Production Manage ➡ Work Order Management ➡ Activation Code Verification. To activate the production certificate for the product, enter the Token ID. When the Token ID is confirmed, the ESP8266 is ready to be flashed and authorized. Remember only once ID can authorize from a single account. To check your activated Tokens go to Activation Code List in the Production Manage -> Work Order Management list.
You can download the cloud auth token burning application from the PMS console Software Download section or Download installations package on the Google drive from Tuya ESP8266 guide(link in reference section) and login with your PMS account https://drive.google.com/file/d/1SF-rM5qDLaPJiuMHrkqFauVyRXSSHMkj/view?usp=sharing
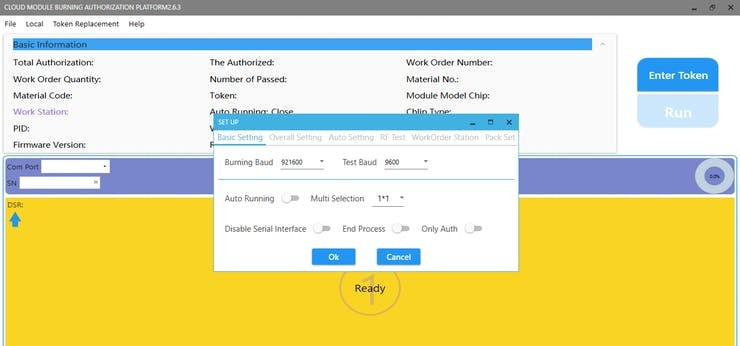
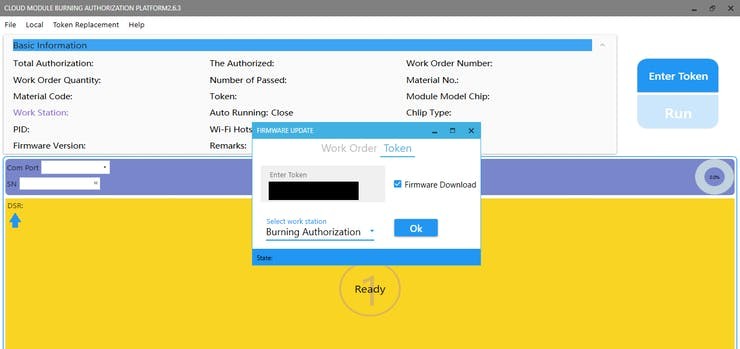
Set the baud rate and test baud as shown in the above image. Also, click on Enter Token button and enter the token you got from the Tuya devops@tuya.com email reply.
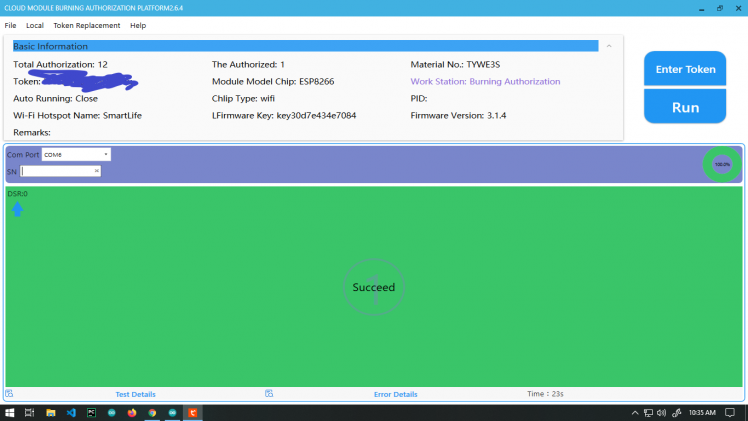
Now, connect the NodeMCU V3 LoLin ESP8266 to the computer via a USB cable and select its port number, such as COM5. If you did not use it with the Arduino IDE or other compilers before, you may need to install its driver. Finally, click on flash to burn auth tokens. You would see a green box with success if nothing breaks.
Step 3: Arduino Program and Mobile Control App
1. Download and install Arduino IDE if you don’t have it already
2. After installing the IDE, you need to install a library by Tuya. It is very easy to install a library in Arduino IDE. First, open the IDE and click on Tools >> Manage Libraries. This will open a pop-up window, in this window type in the search bar “Tuya” and hit enter.
3. Now click on File >> Example >> Tuya_WiFi_MCU_SDK >> Start. This will open a pre-built sketch which I have modified for our usecase, check attached code.
4. Now select the correct port for your Arduino UNO board and flash it.
The connections for this project are very simple. All you will need is 4 male-to-male jumper wires, ESP8266, and Arduino UNO. Follow the connections given in the diagram below. But make sure you disconnect the boards before. Otherwise, it will be problematic while uploading the codes since RX, TX pins would be easy and it won't allow flashing codes. After the connections are made, let’s proceed to the app which will control the Red, Blue led on pin 12, 11. 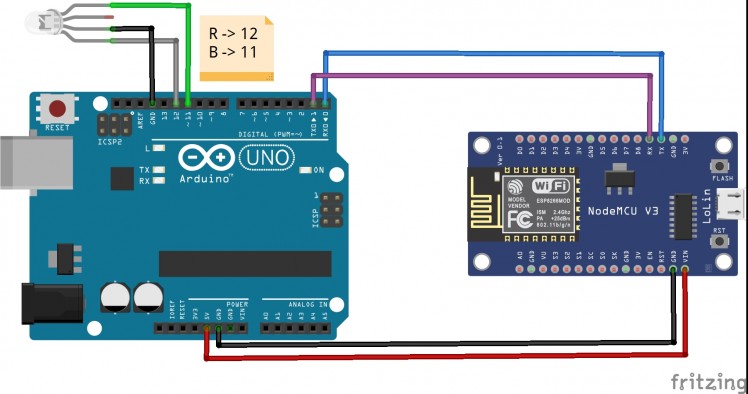
Using the App:
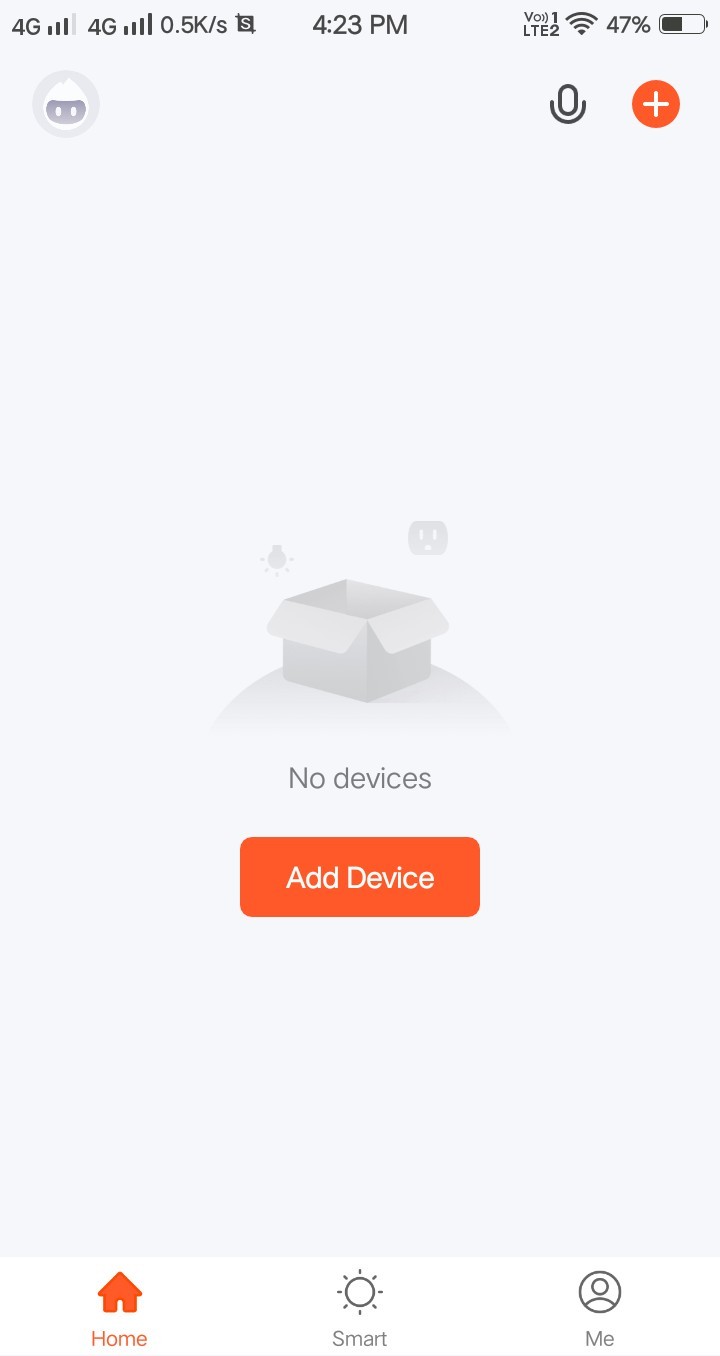
First head over to the Play Store or App Store and download the Tuya Smart app. After the app is installed you should be greeted with the following screen.
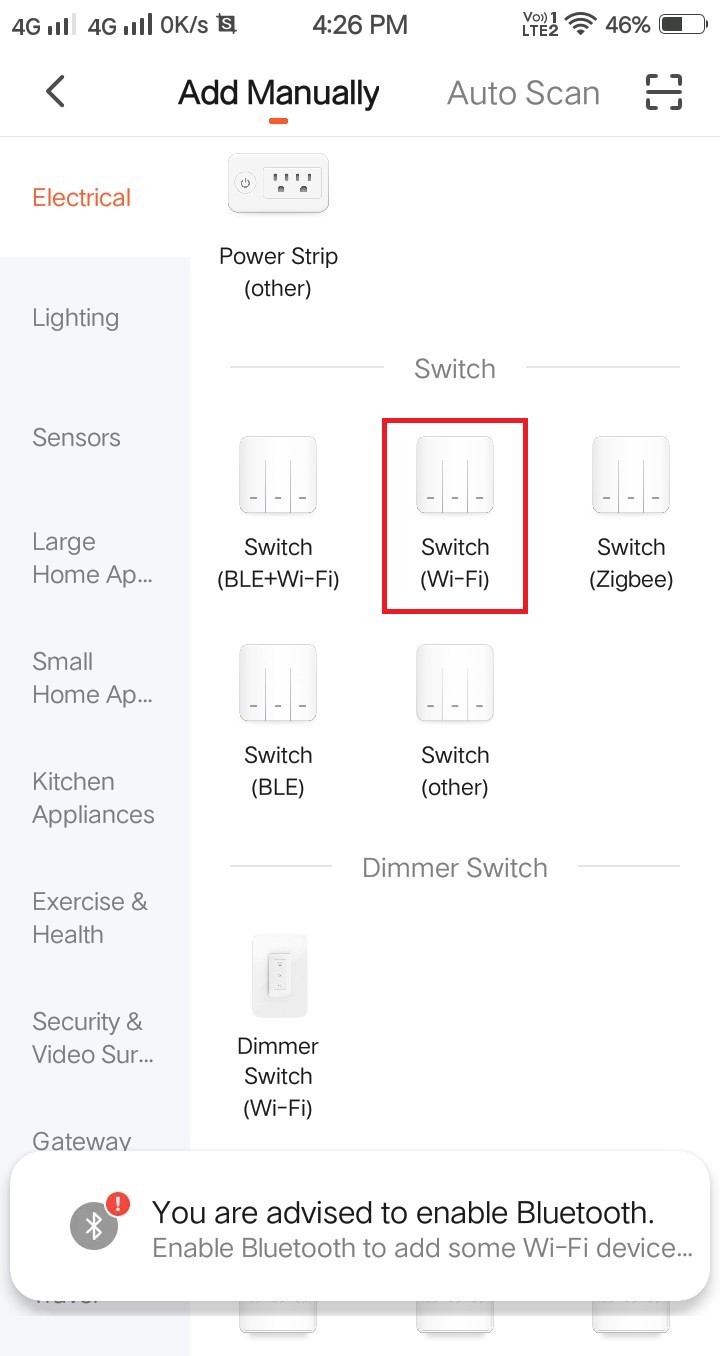
1. Click on Add Device button. This will take you to the next page where we will create a switch. Here click on Add Device button and select Switch (Wifi) as we have made in the Tuya IoT console.
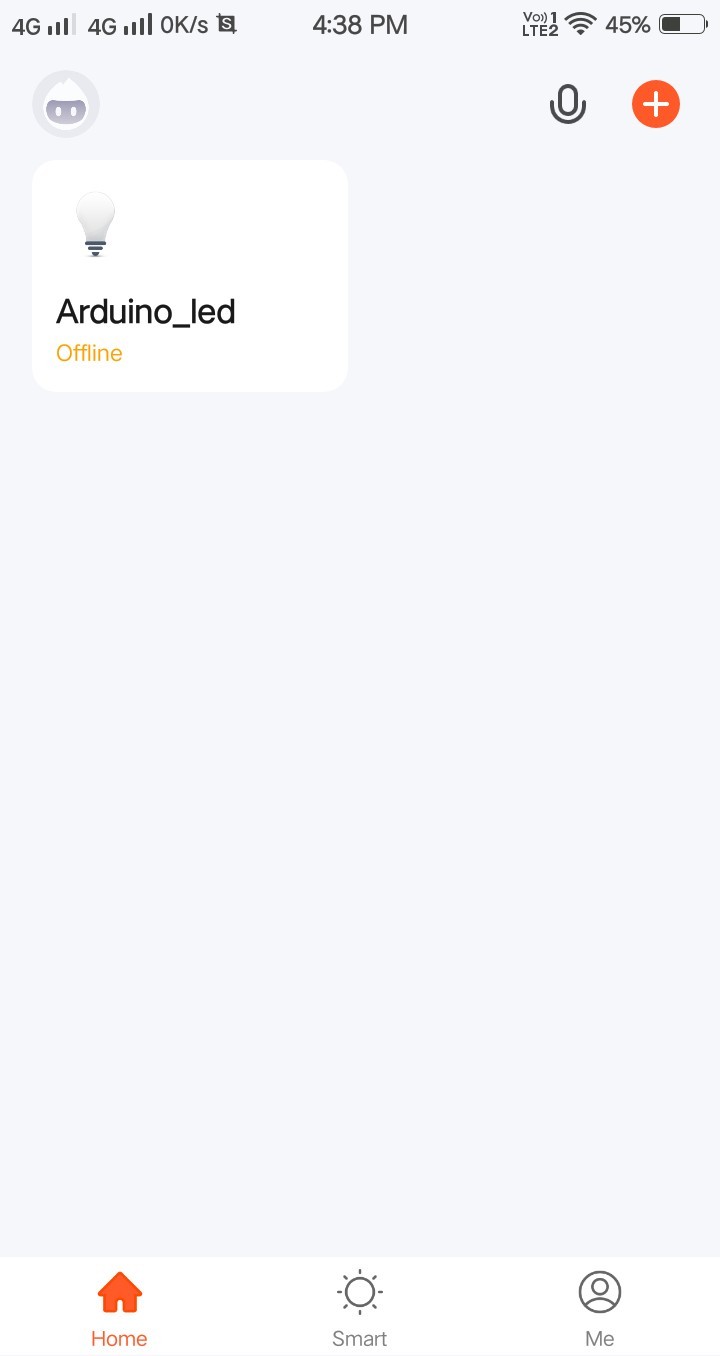
Then proceed to select WiFi network, remember the device connecting to Tuya i.e ESP8266 and app should be on the same WiFi network. The app would control led on pin 13 but you can add a relay or other actuators to control it through the app. Happy hacking! Check the below UI which is made for out IoT App (very finished look and in my next projects I will show you how easy it is to build UI and functional apps with Tuya.
Now you can see the real potential and simplicity of Tuya IoT, make sure to give it a try and experiment well. Keep checking here, I will share some more interesting projects with Tuya IoT.
Check out the project test video:
References:
- Tuya IoT Platform: iot.tuya.com/...
- Tuya Developer Platform: Tuya Developer - Tuya Smart - Global IoT Development Platform
- Tuya Arduino Developer Program: Join Tuya Arduino Beta Test
- Firmware burning guide: GitHub - GITOLEO/Tuya-ESP8266-firmware-burningauthorizations-guide
Schematics, diagrams and documents
Code
Credits
Related products


Leave your feedback...