
Diy Breathalyzer

Made by CodersCafeTech / Fitness / Food & Drinks / Sensors
About the project
Make a DIY rechargeable alcohol detector your own.
Project info
Difficulty: Easy
Platforms: Arduino, DFRobot, Digispark
Estimated time: 3 hours
License: Apache License 2.0 (Apache-2.0)
Items used in this project
Hardware components

View all
Hand tools and fabrication machines
Story
Hi friends, we are back with an easy DIY project. We will be building a DIY rechargeable breathalyzer. As we all know, breathalyzers use the amount of alcohol in exhaled breath to calculate the amount of alcohol in a person's blood. In this project, we will be showing how to build a breathalyzer on your own. Now what? Let's get building.
Electronic Components
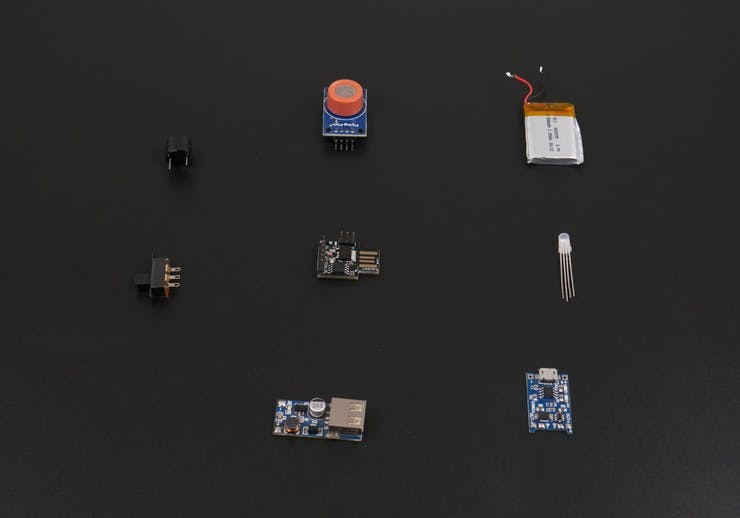
Digispark ATTiny85
Here we are using Digispark ATTiny 85 as the microcontroller. You can use any Arduino board instead.
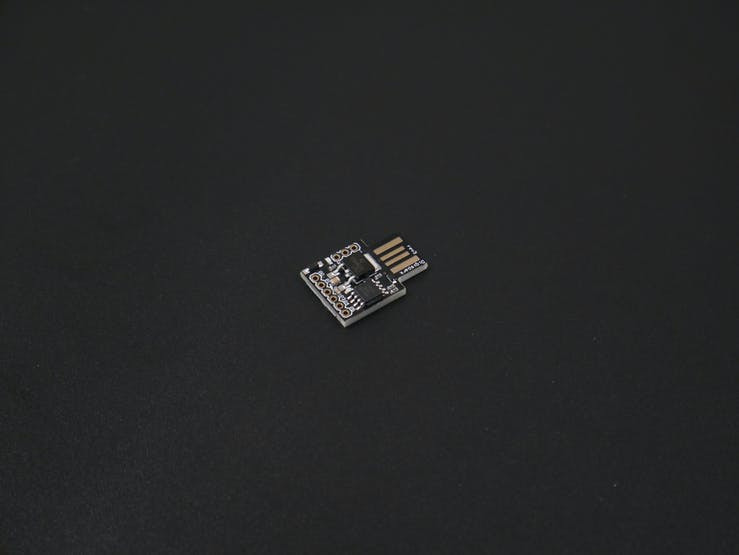
Here we considered the Digispark ATTiny 85, for making the device a compact one. Just as most Arduino boards come with a USB port for programming and sometimes as a source of power, Digispark comes with an onboard USB connector that can be plugged directly into a computer for programming of the device. The board can be powered via the USB port which will feed 5V to the board or from an external source via its VIN pin that can accept ~7 to 35V which will be regulated down to 5V through an onboard 78M05 voltage regulator.
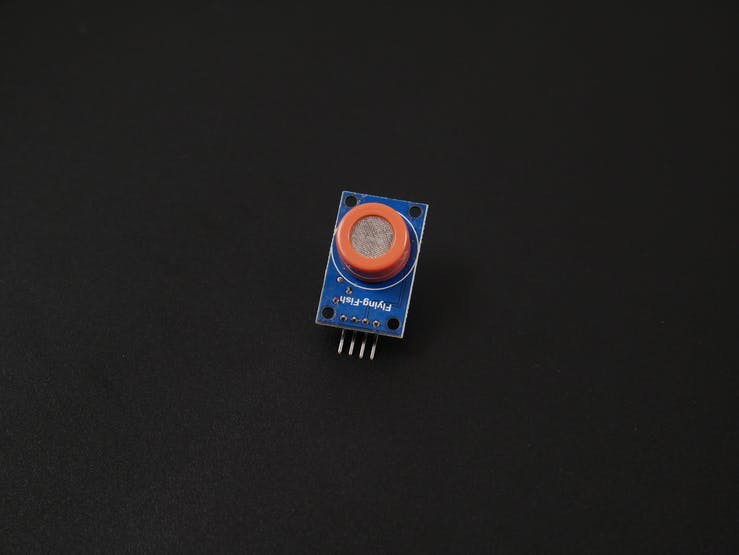
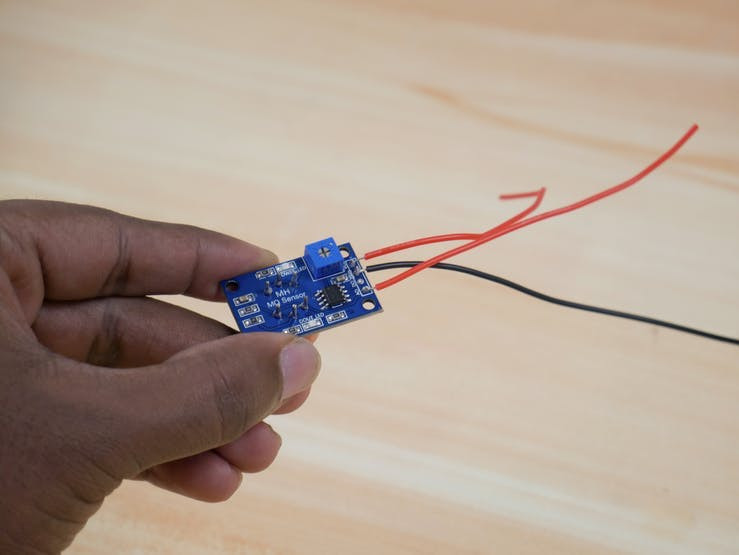
MQ3 Sensor Module
We used the MQ3 Sensor module for the detection of alcohol in the air. MQ3 alcohol sensor module is a great option because this module can be easily integrated into the microcontroller.
Piezo Buzzer & Common Anode RGB Led
For alerting the alcohol presence, we used a Piezo Buzzer and Common Anode RGB LED.

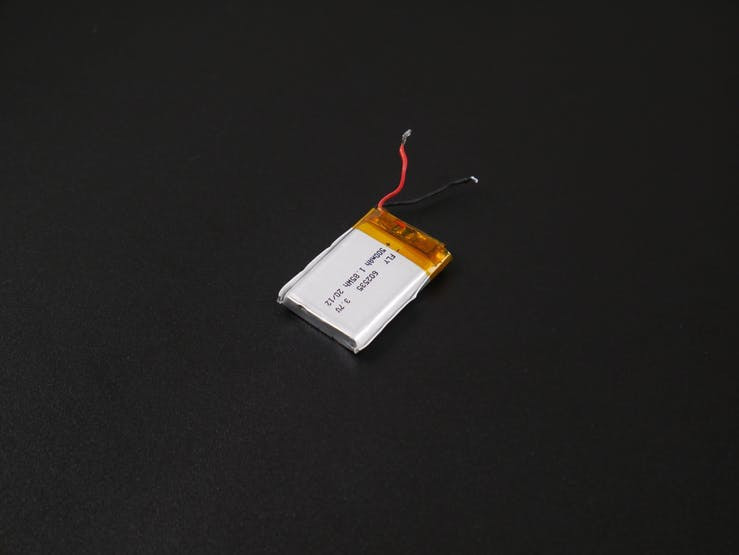
Lipo Battery
Here we used a lipo battery for powering up the project. The battery capacity is about 500 mah, so the device can run over a long time. The lipo battery has high energy density, thin thickness, low internal resistance, good charging-discharging characteristics, high voltage, good safety performance, and long cycle life.
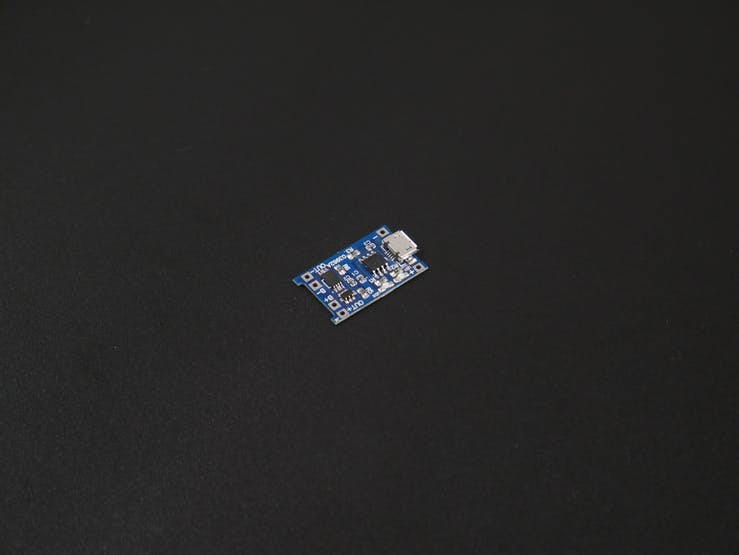
TP4056 Charge Controller
The charge controller used in this project is TP4056. The reasons why we used this are
- Constant Current / Constant voltage charging method.
- C/10 Charge termination.
- 2.9V trickle charge threshold (for deeply discharged batteries).
- Upper charge stop voltage: 4.2V.
- Soft start inrush current limit.
- Automatic recharge (keeps batteries optimally charged when connected to a charger).
- And it's very cheap.
DC-DC Boost Module
The micro-controller needs 5V to operate and the lipo battery can provide up to a max of 4V. That is really a big issue that's why we used a DC-DC Boost converter for converting 3.7 Volts to 5 Volts coming from the lipo battery.

And we also used an SPDT slide switch for regulating the current flow in the circuit.
MQ3 Alcohol Sensor Module and Calibration
MQ3 is one of the most commonly used sensors in the MQ sensor series. It is a Metal Oxide Semiconductor (MOS) type of sensor. Metal oxide sensors are also known as Chemiresistors because sensing is based on the change of resistance of the sensing material when exposed to alcohol. So by placing it in a simple voltage divider network, alcohol concentrations can be detected.

MQ3 alcohol sensor works on 5V DC and draws around 800mW. It can detect Alcohol concentrations anywhere from 25 to 500 ppm. If you need more knowledge about this, please read here. The lastminutengineers made an excellent write-up there.
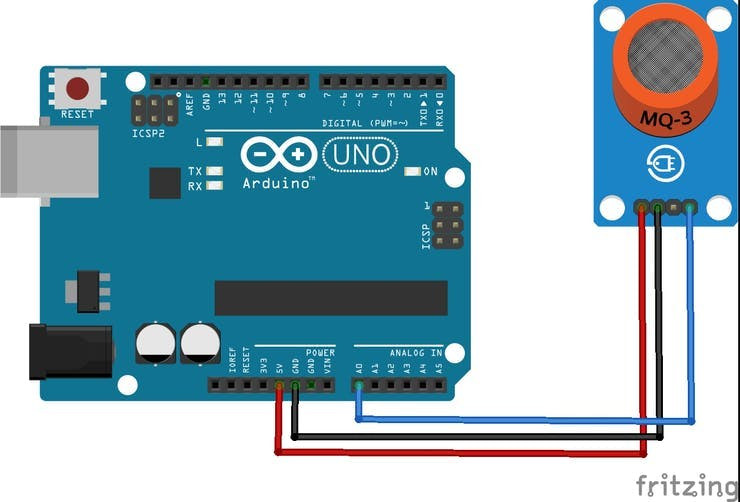
For the calibration process, we are using the sensor with the Arduino, because Digispark does not provide any Serial Output. So it is very hard to play around. Connect the sensor to the Arduino as per the schematics.
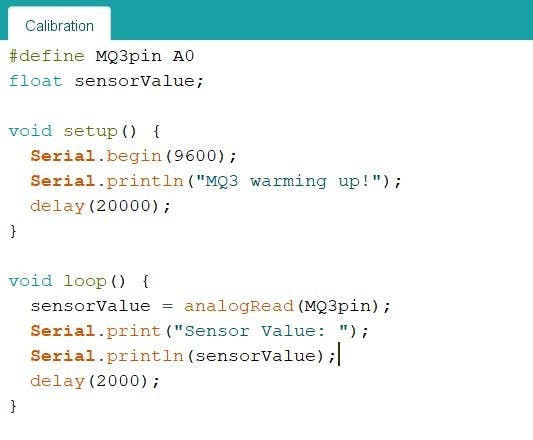
Use the sketch above to note what values your sensor outputs when you blow your breath on the sensor without consuming alcohol vs after consuming alcohol. Here we used sanitizer for the job because we don't have access to alcohol. You can also use isopropyl alcohol if you are not permitted to use the alcohol.

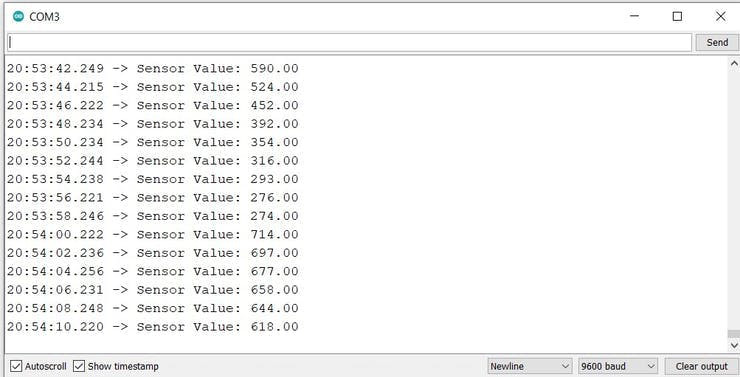
Without alcohol, we actually get a sensor value below 400 and getting a value above 400 in the presence of alcohol. So we are setting 400 as the threshold for triggering actions.
Note: To get accurate readings from your alcohol sensor, it is recommended that you calibrate it first. You need to find out what values equate to specific percentages or even blood alcohol concentration in the case of a breathalyzer. Our device can only detect the presence of alcohol.
Testing Circuit
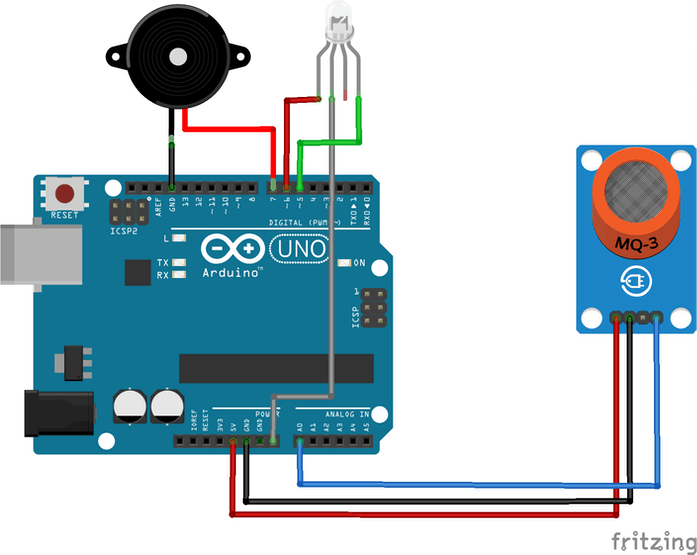
We connected all the components to the Arduino including the buzzer and common anode RGB led as per the schematics shown above in the breadboard. The breadboard is used to build and test circuits quickly before finalizing any circuit design.

Then we wrote some code for detection of the alcohol and also for alerting the presence and uploaded it to the Arduino. It is working as expected.

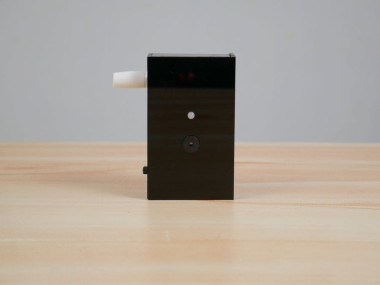
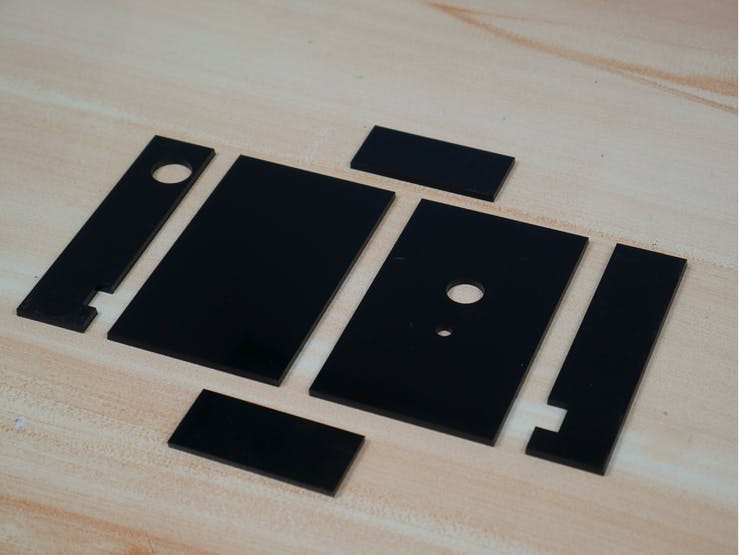
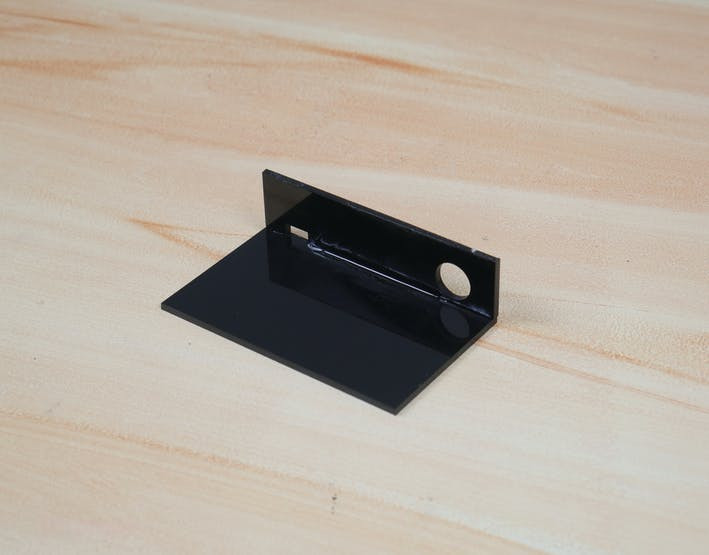
Enclosure
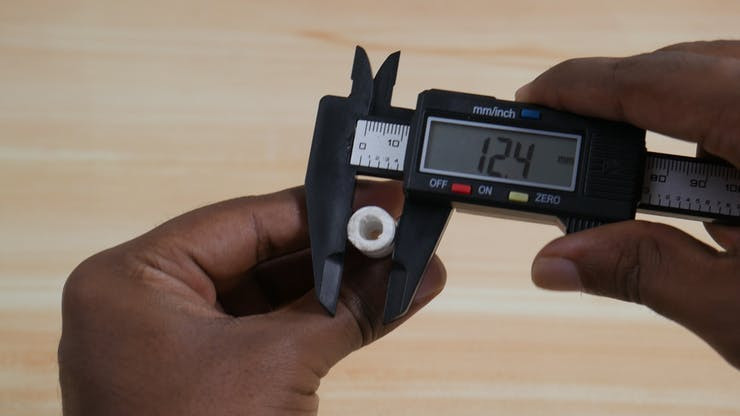
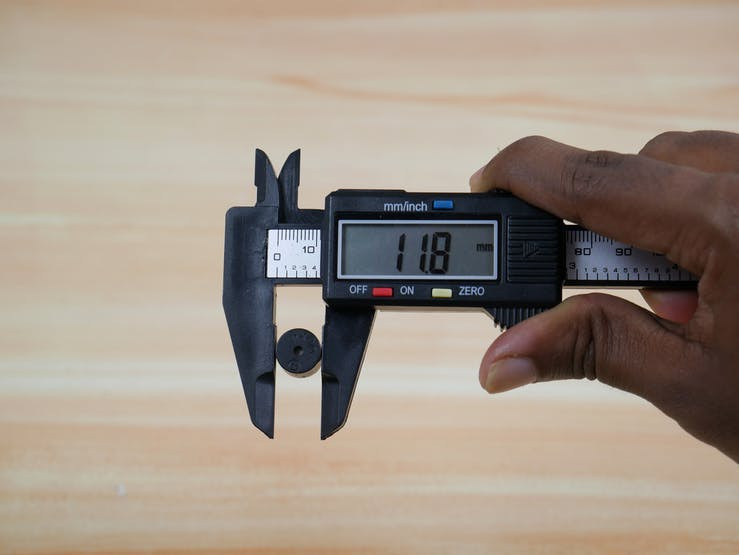
The upcoming task is to build an enclosure for the device. First, we measured the size of the pipe in which air flows to the sensor using vernier calipers, then we measured the sizes of the buzzer and the RGB led. Vernier caliper is much more comfortable when measuring diameters.

We also estimated the sizes for the charging port and switch by measuring the ruler.
We choose the 3mm acrylic for the enclosures. 3mm thickness can provide optimum strength for the enclosure and it can be easily stuck together.
Here we designed the SVG file in the Corel draw as per the dimensions.
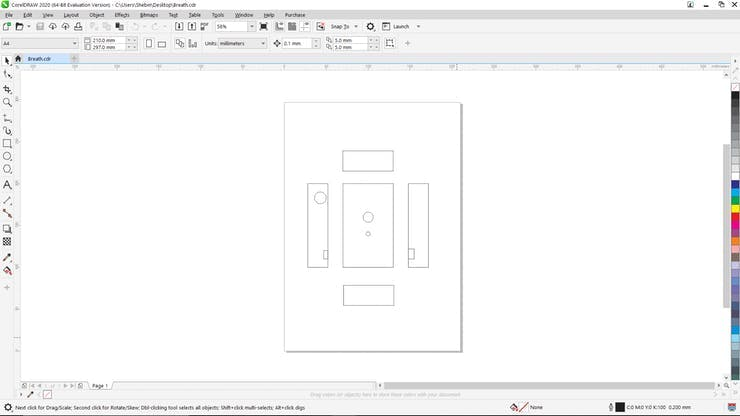
Then we laser cut the acrylic.
Preparations for Assembly
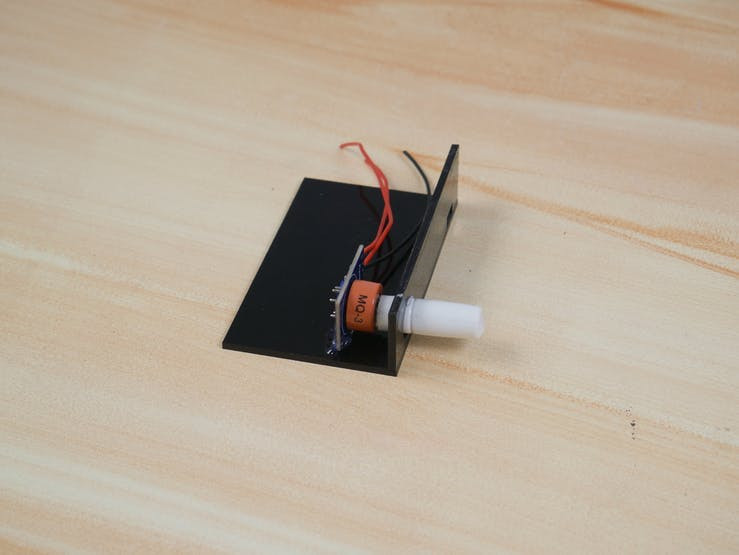
Before assembly, we need to do some tasks. First, we removed the headers of the MQ3 Sensors so we can easily put them into the enclosure and then we soldered the wires into it.
Then we cut out a small PCB in which the female headers are soldered, so we can easily attach and detach the connections with the microcontroller.
Our lipo battery has a current rating of 500 mah, so the TP4056 charge controller here our users as an output current of 1A. It has a current programing resistor(R3), in which we can set the output current up to 1A by giving a suitable value to it.
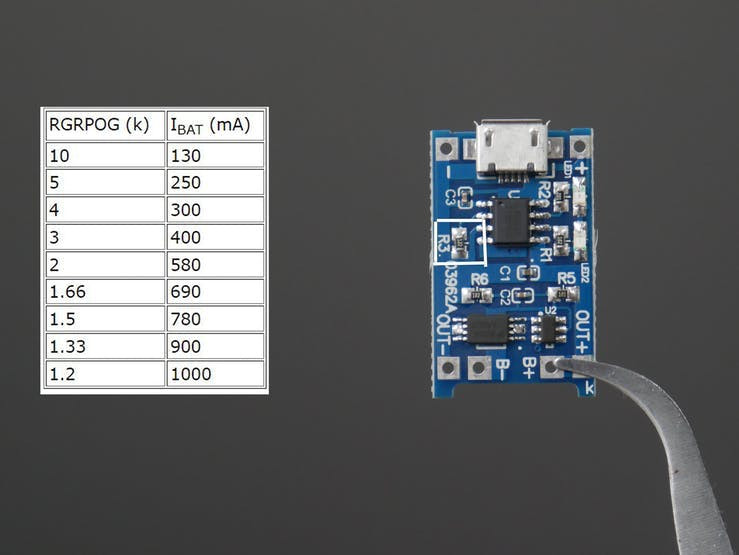
Here we are giving a resistance of 2.2k for our 500 mah lipo battery.
We also uploaded the code to the microcontroller. You can find the entire code here.
Assembly
First of all, we attached the MQ3 with the pipe after assembling the side piece with the base.

After attaching the switch, we attached the Lipo battery and the DC-DC boost converter with the help of double-sided tapes. The microcontroller is plugged into the boost converter after attaching the headers. The TP4056 charger module is secured in the appropriate position with the help of a glue gun.
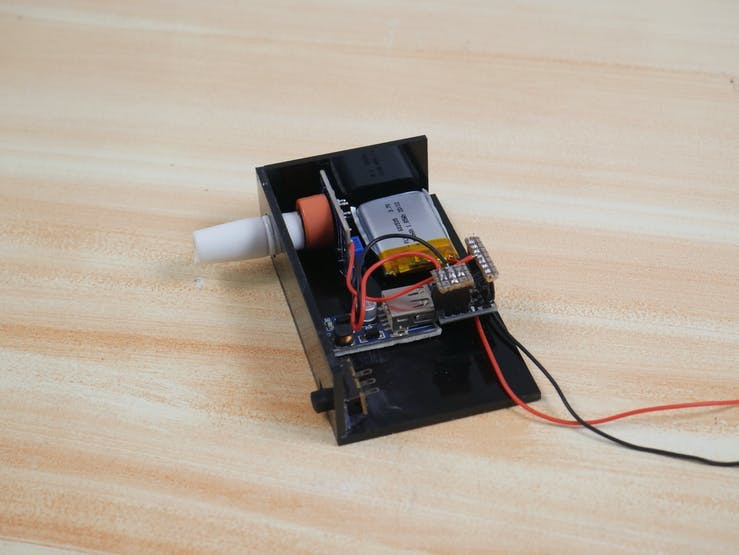
Then we started soldering as per the schematics. Circuit1 and Circuit2 comprise the whole circuit which is given above.


Finally, we attached the buzzer and the Led on the lid and wired them to the microcontroller.
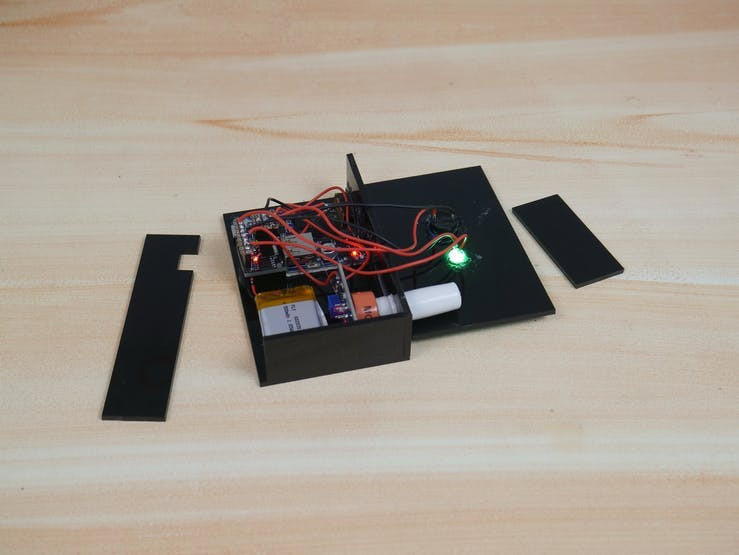
Then we glued the remaining acrylic pieces.
Results!
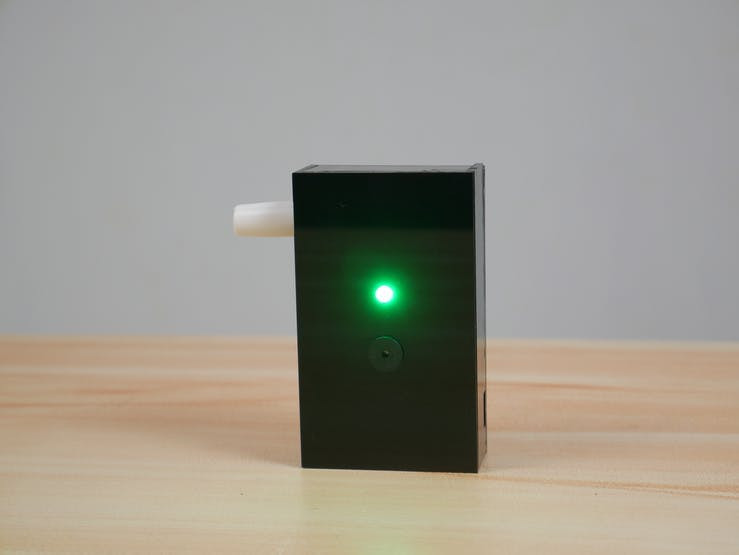
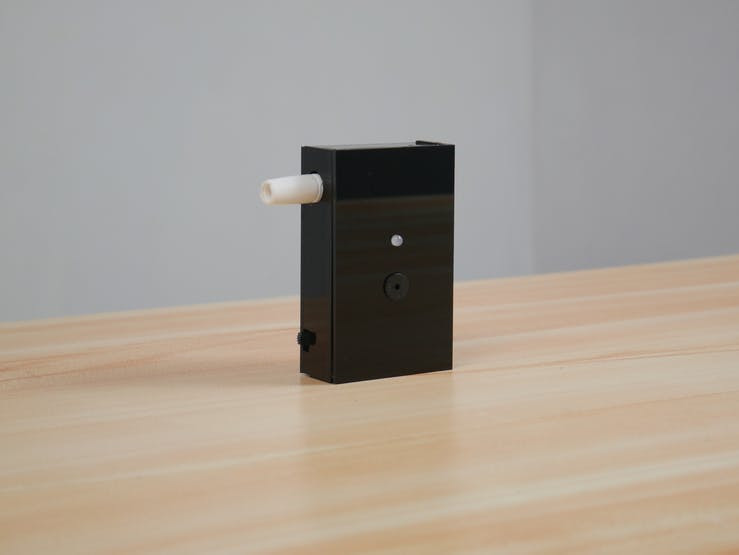
Oh, our alcohol detector is ready !! Just turn on the device and detect the presence of alcohol.
Schematics, diagrams and documents
CAD, enclosures and custom parts
Code
Credits
Related products


Leave your feedback...