

Using Machine Learning To Mind Control A Flamethrower

Made by NathanielF / 3D Printing / Artificial intelligence / Fire & Pyrotechnics / Sensors
About the project
A mind controlled flamethrower that works off of thoughts of fire: no need to try to control your meditation or concentration values. It uses a one dimensional convolution neural network to classify between standard and fire mind data. Take the code to make your own model and control your own projects with your mind!
Project info
Items used in this project
Hardware components

View all
Software apps and online services
Hand tools and fabrication machines
Story
Mind Control
The core of the project is the mind control and machine learning aspect. To do this part of the project, you only need the HC-05, any computer fast enough (I used a Raspberry Pi 4), and a mindflex. By the end, you will control any hardware or software switch you can connect to a Raspberry Pi!
Hacking the Mindflex
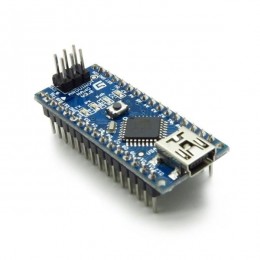
To hack a mindflex, you will first need to buy one: make sure to get at least one HC-05 and 2 HC-05s, and one extra Arduino if you want a reliable connection. You only need the headset, so you can get one on eBay for around 15 dollars. Make sure not to buy the new Starwars Force Trainer because it costs more, the electrodes are worse, and it takes a little more effort to get working.
Once you get your mindflex, you will need to set it up to wireless transmit the raw data. By default, the headset sends attention/meditation values, signal quality, and EEG power bands but only once per second at a 9600 serial baud rate. To get the mindflex into raw mode, you need to send the byte 0x02 in 9600 baud; however, since the HC-05 will be communicating in a baud rate of 56700, you will either need to send bytes that imitate 9600 in 56700 (unreliable) or use another device like an arduino nano to send the message.
I recommend using two HC-05’s that are bound together as it proves a more reliable connection than just using a standard Bluetooth connection. I won’t explain how to bind two of them together here, but here is a source on how to do it.
Open up the left side of the mindflex; you should see the internals of the mindflex. Wire the 5V of both the HC-05 and Arduino to the output of the switch on the mindflex; the GND of both to ground input of the mindflex; the RX of the HC-05 to the TX of the mindflex; and the TX of the arduino (HC-05 if not an arduino) to the RX of the mindflex. The TX and RX of the mindflex are labeled by T and R, respectively. Flash the arduino with 0x02.ino. Your mindflex should now output raw data 512 times per second.
Here is another project that deals with hacking the mindflex.
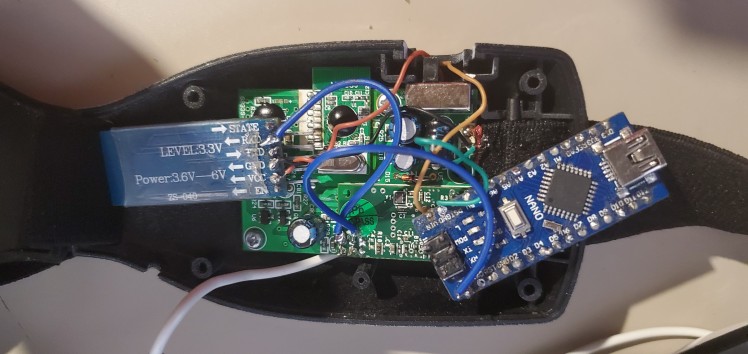
Inside of the Mindflex
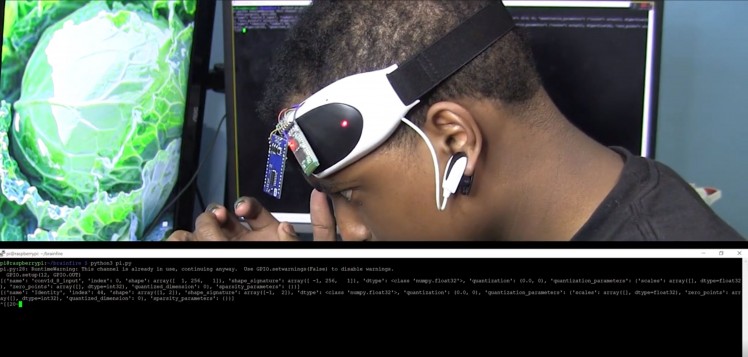
Connecting the Mindflex to Raspberry Pi
To start collecting the data, you need to connect the Raspberry Pi to the mindflex using the built-in Bluetooth module or another HC-05. I connected the HC-05 to the RPI’s serial pins in the GPIO as I found it was much more reliable.
Here is a post that deals with connecting an HC-05 to an RPI.
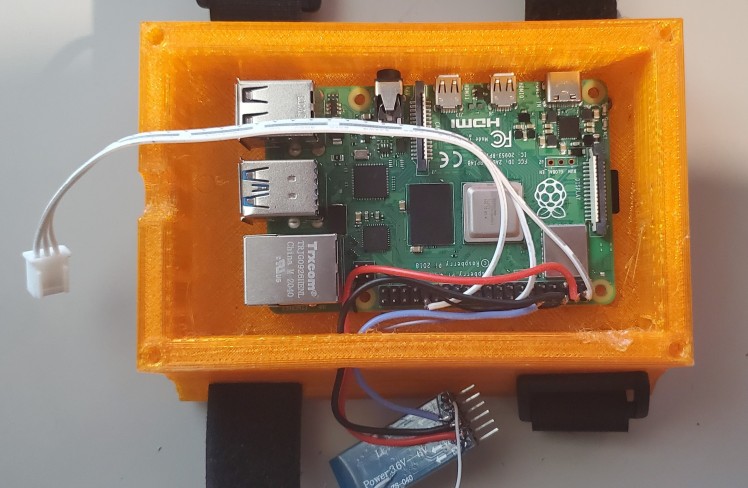
RPI Connected to HC-05
Collecting the Data
Come up with a good activation in your mind. You don’t have to use “fire” data but use whatever concept that you think would be good for an application (make sure to choose something that can be differentiated).
Use data.py on the RPI to collect data, and it should save it in a data folders called standard and fire (change the code if you want to change the titles). I recommend short recording periods of your activation state as you want the activation to be fast when actually using your model - I recorded my fire sessions for a quarter of a minute while my standard ones sometimes were an hour long.
You will probably not get equal amounts of standard and activation data as it takes much more effort and concentration to get. We will just multiply the activation data - still try to get at least 15 to 30 minutes - when preparing to train the model.
The purpose of a neural network is to handle noise: so remember to get a wide range when collecting your standard mind data. For example, when the signal quality is low, one or all of the electrodes aren’t on (these go under standard and do not pollute your other classification). All of these going under standard will help you build a resilient and accurate model. Also, try to collect data over multiple sessions to capture many different mental states.
What Collecting Data Could Look Like
Training the Model
After you think that you have gotten enough data, move the files from the RPI onto your computer, keeping the fire and standard data in separate folders. Make sure to move some standard data and fire data into respective standard and fire test folders to test the accuracy of your model.
The model uses one-dimensional CNN, a convolutional neural network: it extracts the features relevant to classifying between standard and activation. To train the model, try using my Jupyter Notebook: you just have to define the folders where you put the training standard and activation data and test data for those same types (used to test accuracy). Try new preprocessing methods, window times, and optimizations. After you click a bunch of times, you should get a TensorFlow Lite model that can be run on an RPI. If you don’t like the accuracy try collecting more data or a new activation concept- you probably won’t get over 80%.
Some of the parts are hard to understand and confusing as the code is not refined and some old unused features are still in there: ask me if you can’t figure something out. If you don’t have a desktop with a good graphics card, you can use Google Colab, a free service by Google.
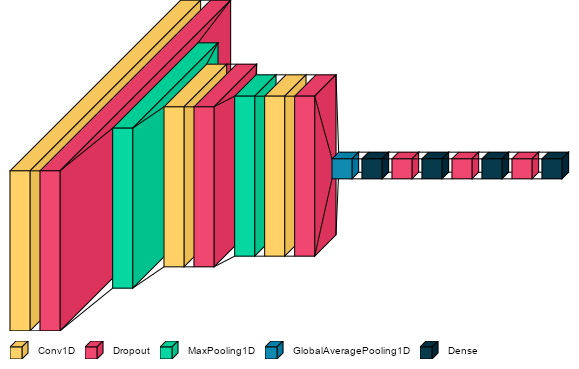
The Model Architecture
Running the Model
Once you get your TFLite model, move the file onto the computer and put the model name in mind.py. Right now, I have the RPI turn on a GPIO pin, but you can define anything you want in the if statement. Good luck!
Building a Flamethrower
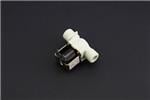
Honestly, I don’t recommend building a flamethrower as I think you could make some incredible and safer ideas with your AI-enabled mindflex. But if you want to build one, the concept of the flamethrower is pretty simple as it is just a solenoid valve shooting propane at an arc lighter. For this project, I 3D printed an enclosure, added buttons, and a screen to control the safety features. For the power source, I used a LiPo battery connected to a power distribution board typically used by drones: it had 5v and 12v outputs. The arc lighters are controlled by a relay, while the solenoid valve is controlled by a transistor. I use a relay to control the arc lighters and a transistor to control the solenoid valve.
I have included the stl files for the enclosures below. If you are going to use my design, I recommend wearing flame-resistant gloves. I have also included the code for the arduino nano that runs the whole thing - if you want, you can switch between mind and punch mode.
If you want to see more of the flamethrower aspect I recommend going here.
CAD, enclosures and custom parts
Code
Credits
Related products


Leave your feedback...