

Cyberpunk 3d-printed Fabric Light-up Corset
Made by amiedd / 3D Printing / Lights / Sensors / Wearables
About the project
3D-printed spikes on fabric and using a Circuit Playground that reacts with movement to light up NeoPixels.
Project info
Items used in this project
Hardware components


Hand tools and fabrication machines

Story
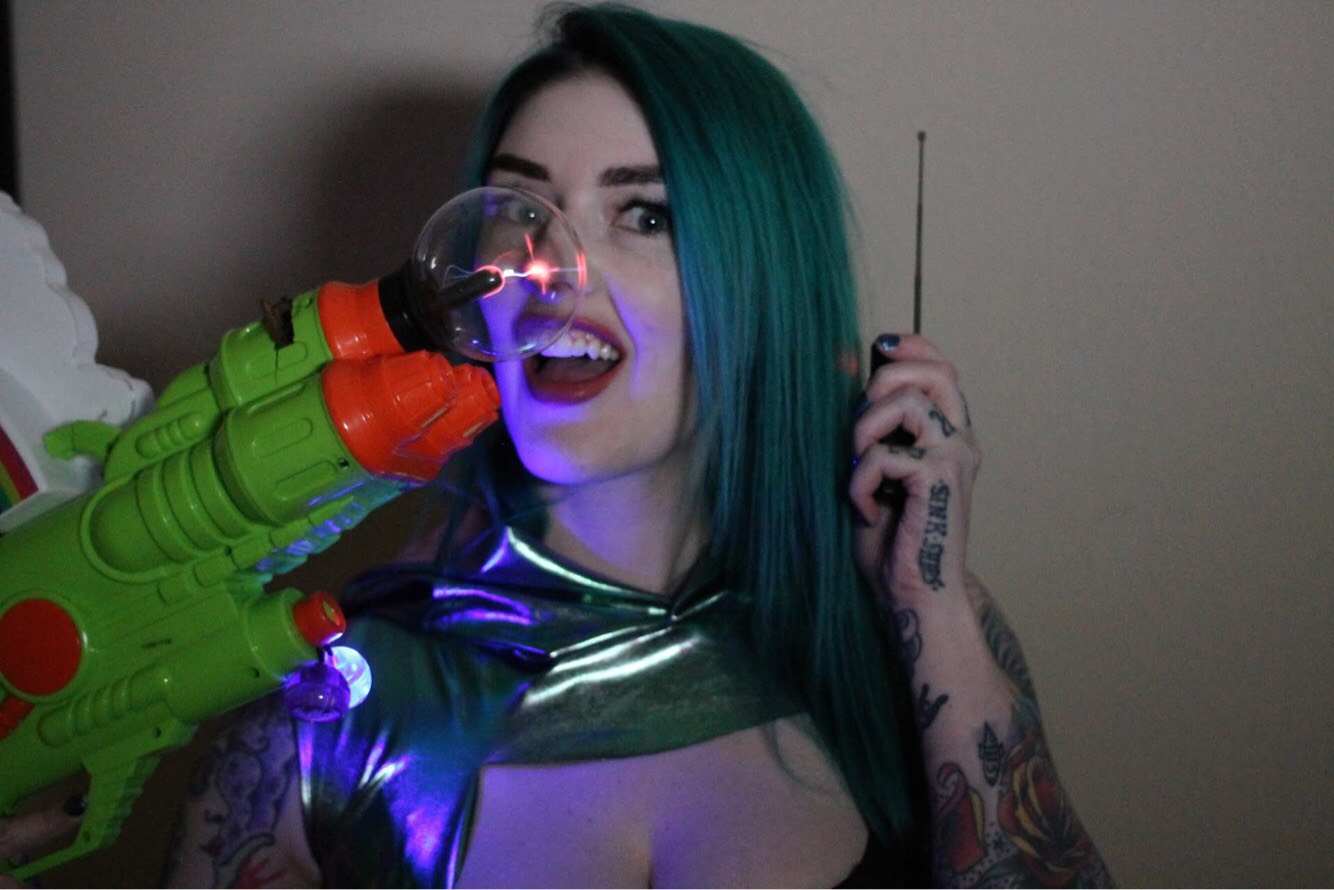
Dystopian Night City Cyberpunk 2020
There be dragons...well dragon 3D-printed spikes on fabric...close enough.Dragon Con is my favorite cosplay fandom event I attend every year in Atlanta.
I like to set challenges for myself when I make new costumes, using something I already know and adding something new, everythings a remix.
I usually say I make everything with love... and few curse words.Potion List: Using my Ultimaker S5 and a Circuit Playground Express from Adafruit mixed with some Neopixels, I was able to program the LEDs to light-up with movement.
The LEDs in the shoulder piece are simple surface mount LEDs, with a push button and a CR2016 coin cell battery(held together with copper tape) that I designed in KiCad. I didn't plan out the PCB that well, hence the copper tape. Also poor planning on my part, because I ended up just using some double sided tape to get the PCB to stay attached to the shoulder piece the entire night.
I'll attempt to improve the PCB for that design and *gasps* maybe share it in the future. I think I'll have OSH Park print my circuit boards next round.
 Dragon Con 3D-Printed Spikes on Fabric
 3D-Printed Spikes on Fabric
3D Printer Magic
- 3D Printer: Ultimaker S5
- 3D Print filament: Ultimaker Transparent CPE 3.00mm
- Fabric is Yaya Han Metallic Netting Oil Slick
3D Printer Settings
CPE is easy to print with and with the right print settings gives a nice icy FX. I started the print and after the first 2 layers, pause the printer and lay down your fabric(works best on porous fabrics). You can tape down the edge of the fabric to the build plate with painters tape, just make sure that it is not overlaying in the way of the print or nozzle area.
- Quality Layer Height:.2mm
- Shell
- Wall Thickness 1mm
- Wall Line Count 3
- Top/Bottom Thickness
- Top Thickness 1.2mm
- Top Layers 6
- Bottm Thickness
- Bottom Thickness 1.2mm
- Bottom Layers 6
- Infill Density: 10%
- Infil Pattern: Zig Zag
- Print Speed 50 mm/s
- Travel: Z Hop When Retracted
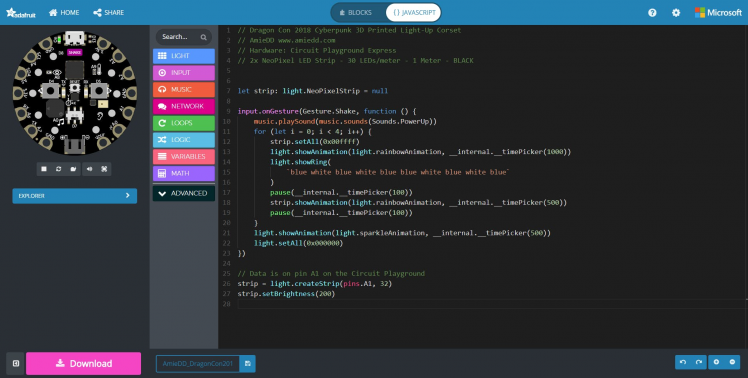
Uploading the Code to the Circuit Playground
Take your micro USB cable and plug it into the computer and the Circuit Playground Express. Press the RESET button to put the Circuit Playground into programming mode(the light on the Circuit Playground will turn green). From the file explorer on your computer, click and drag you code file you downloaded onto CPLAYBOOT (this is what the computer recognizes/names the Circuit Playground).
Words of Wisdom
Make sure your Micro USB Cable is for data transfer, some micro usb cables are just for charging and don't transfer data, you won't be able to upload the code to the Circuit Playground.

You can also view my project in makecode.com
 Make Code - AmieDD - Dragon Con 2018
Schematics, diagrams and documents
CAD, enclosures and custom parts
Code
Credits
Related products


Leave your feedback...