
Cheshire Cat Apartment Building - Halloween Light Show
About the project
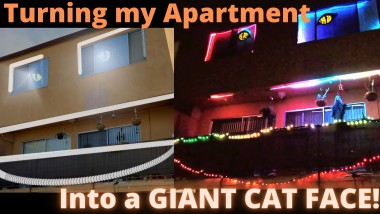
I turned my apartment building into a GIANT CHESHIRE CAT for Halloween, with an animated light show timed to music, all with Free and Open Source Software, and equipment I already owned!
Project info
Difficulty: Expert
Platforms: Arduino, Raspberry Pi, Espressif
Estimated time: 2 weeks
License: MIT license (MIT)
Items used in this project
Hardware components


View all
Software apps and online services
Hand tools and fabrication machines
Story
TocCATa and Fugue
A Halloween Light Show, arranged for apartment building
With my gigs still cancelled this year, I decided to go all out for Halloween!
As a professional musician and theater technician, October is normally my busiest month between playing in Oktoberfest bands and working in theaters. But instead of sitting around waiting for shows to reopen, I decided to create a show right where I was: by turning my entire apartment into a GIANT CHESHIRE CAT!!!
Cost
All hardware was either obtained for free from doing past shows, or recycled from other projects.
Designed exclusively with Free and Open Source Software!
Would have cost: around $800
Total spent: $0
Design
The most important part of any show is the concept. Everything stems from this core idea. In this case: we want the two upstairs windows of my apartment to look like eyes, and the balcony to become a smiling mouth, with a line for the whiskers in between.
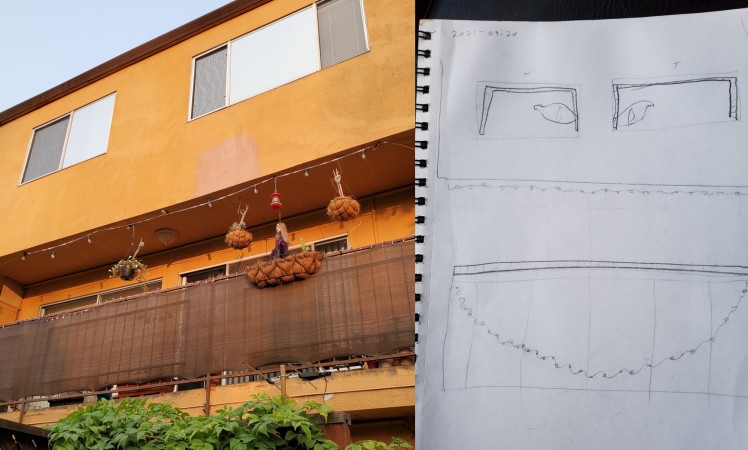
I've been kicking around this idea for a while, but this year is the first time I've had the time, tools, and motivation all at once to make it all work!
Hardware
Pixels
Over the years, I have acquired several strips of WS2811 (or their fraternal twin WS2812b) pixels in lieu of payment for working on theater shows, along with their associated 5V power supplies and the custom cables we created for those projects.
The pixels come in both PCB form (printed circuit board) as well as "Christmas light" style. Both come in IP67 water resistant casings, which is perfect for outdoor applications, where it might get rained on, but will never be submerged in water.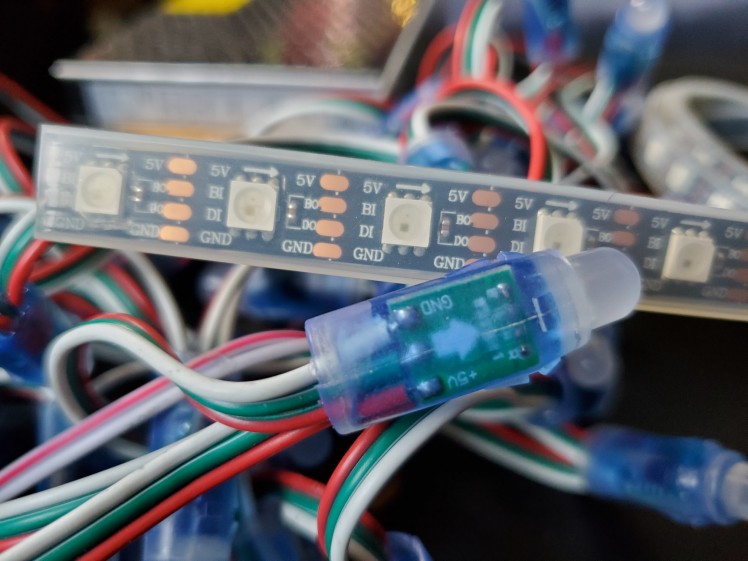
Because they are individually addressable, we can cut each segment to any size we want! (As long as the power is off when you cut it!)
We will be using a PCB strand of 300 for each eyebrow, as well as another 300 pixel PCB for the whisker line, and 4 x 50 pixel "Christmas light" strands for the mouth, for a total of 1100 pixels!
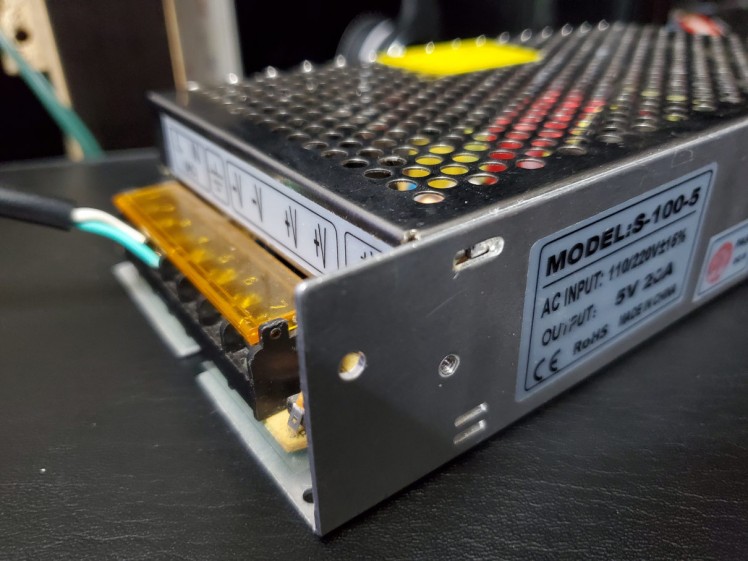
Power
At full brightness, each pixel uses (in theory) around 60 milliwatts of power. That doesn't sound like much, but each PCB is 300 pixels long, which means the full strand would pull 18A, a non-trivial amount of power running through 5V wires. Make sure you use an adequately sized power supply for each strand!
While it's possible to use multiple power supplies together, the best results (and fewest problems) come when using a single power source to supply each controller and lights unit.
I soldered an XT60 (female) connector on each pixel segment in order to safely and quickly attach power cables after installing. Each power cable has a a matching XT60 male plug soldered on the end of the wire (14 gauge copper stranded speaker wire, in my case).
When installed correctly, these plugs ensure it's impossible to connect things the wrong way.

It's also important to note that voltage drop is a real thing, and not to be underestimated, especially for long lines of wires (more than 2 meters). When the voltage drops substantially, pixels flicker in unpredictable ways (and even though it looks appropriate for Halloween, it's still distracting and annoying).
The best way to solve this is to not have long runs of wire, and keep the power supply / microcontroller as close as possible to the start of the pixels.
This of course is rarely possible, so the next best thing is an appropriate gauge of wire. Use a voltage calculator to find the appropriate size / type for your application.
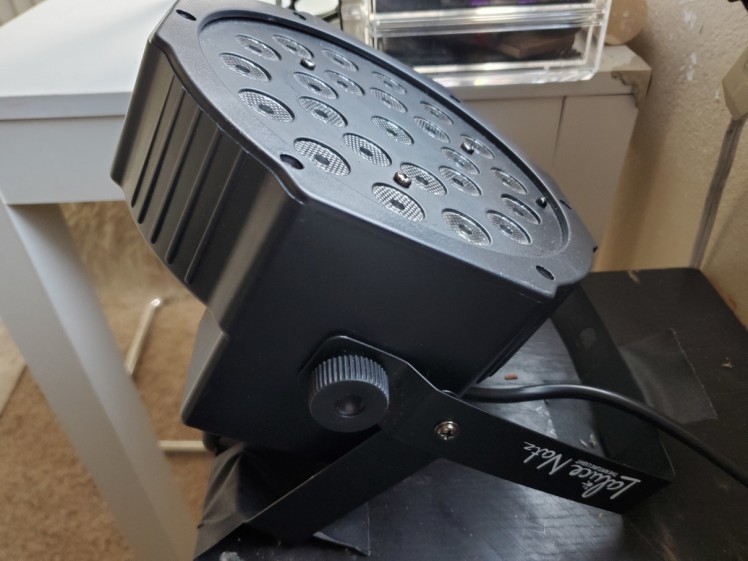
Lighting
In addition to the pixels, I also have two LED PAR cans, which will provide a nice color wash behind each eye to make a color changing iris effect!
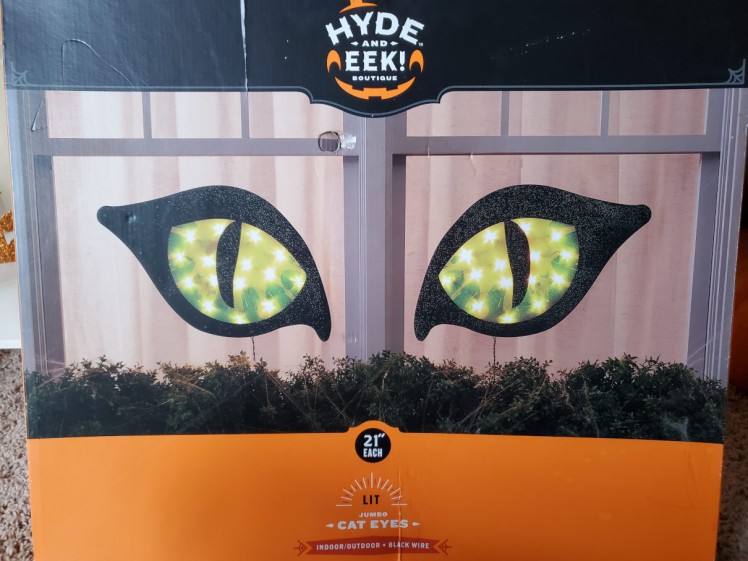
Cat Eyes
My favorite part of this whole display might be the giant cardboard cat eyes we got from Target several years ago! They each have lights inside (incandescent "Christmas light" style bulbs) that plug into the wall, so we will need a proper dimmer pack and a USB DMX controller to light them up on cue.
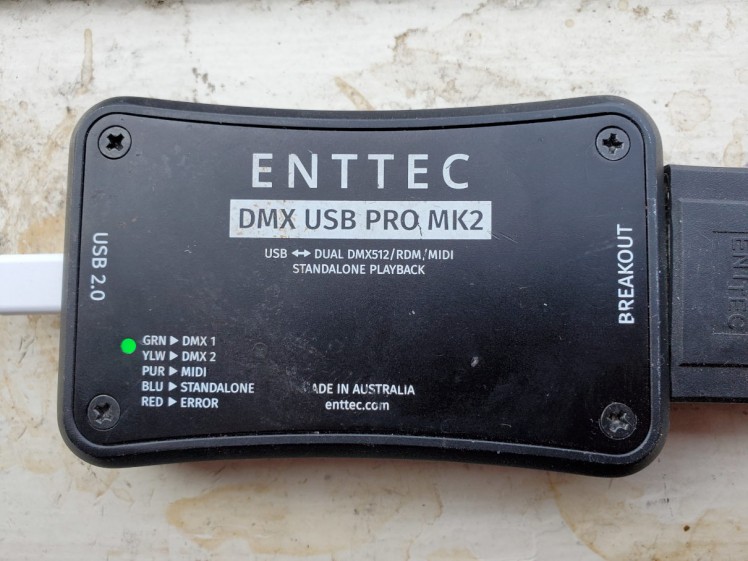
DMX
If you don't know (now you know!), DMX512 (Digital Multiplex) is the industry standard protocol for controlling lighting and effects in theaters. A single universe of DMX is designed to send 512 separate channels of information, where each channel has a value between 0-255.
What does the value represent? It could be anything from light intensity (brightness), color (normally using 3 channels: Red, Green, and Blue), or even activating special effects like fog machines and strobe lights.
We'll be using our DMX universe to control the intensity of each cat eye (left and right separately), as well as send color information to the PARs behind each eye.
Plugging everything in is simple, since each fixture has a "DMX In" and "DMX Out" port: just connect the controller to the input of the 1st device, then the output of that 1st device to the input of the 2nd device, and so on.
All the fixtures should be "daisy chained" together, in a long line, allowing them to listen to the master controller simultaneously!
Each fixture also needs to be set to an "address" so we can talk to all devices separately. In my case, the PARs are configurable with buttons on the back, and the dimmer pack uses the older DIP switch style.

This 4 channel dimmer device is set to DMX address 16, which means it controls channels 16-19 (despite what the handwriting indicates).
If you are unsure about which switches to set for an address, don't panic: there are many DMX DIP switch calculators available online.
Circuit
For the WS2811 pixels, we need a total of 3 controllers: one for each office (eyebrows), and one for the outside balcony (whiskers and mouth).
Each controller will be an ESP32 (or ESP8266, or WT32-ETH01) with a circuit set up like the following:
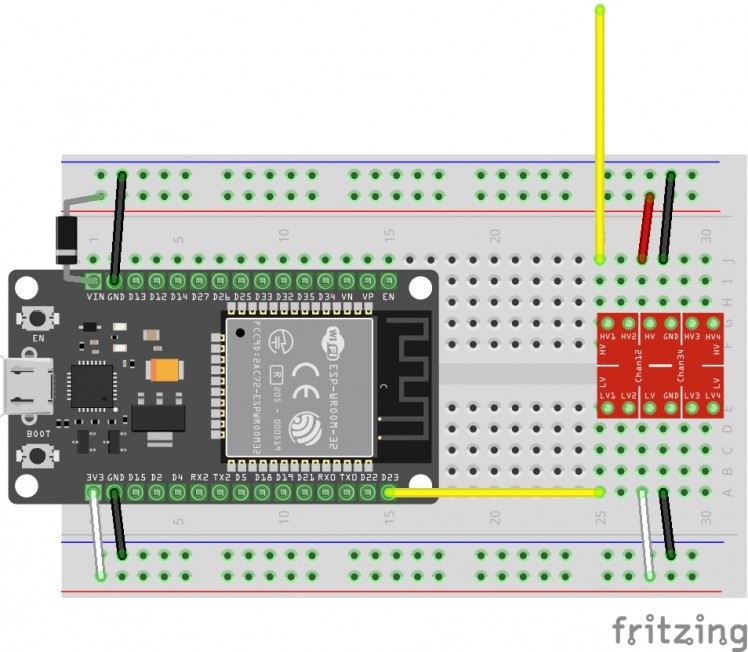
In this case, the top rows are the 5V side ("high" voltage) and the bottom side is 3.3V ("low" voltage). The yellow signal pin runs to the LV side of the logic level shifter and out through the HV side to the DATA IN pin on the pixels.
Since the outside balcony has two separate strands to control, we will use two pins and two channels of the level shifter. We also gain a faster frame rate by running them in parallel instead of in series.
NOTE: The diode between power and the microcontroller is just for extra safety when using both an external power supply and USB simultaneously. It's not needed if you disconnect the external power supply before attaching the USB for programming.
Software - WLED
To drive the pixels, we are using a free and open source software called WLED. This allows us to run effects from a web browser, without needed to touch any code!
To install, download the latest release from github and flash it to your ESP32.
The first time it starts, the device creates a WiFi network, which allows you to connect directly and set the wireless network name and password for your router. Then, after restarting, you should be able to connect from any computer in your network!
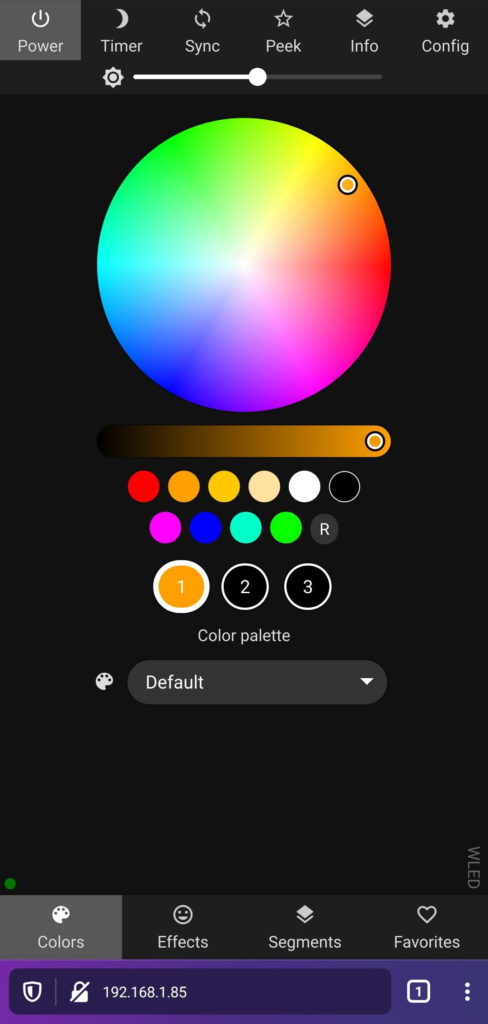
Configuring WLED is very straightforward: simply set the total number of pixels on each strand, and which pin they are plugged into, and save the settings!
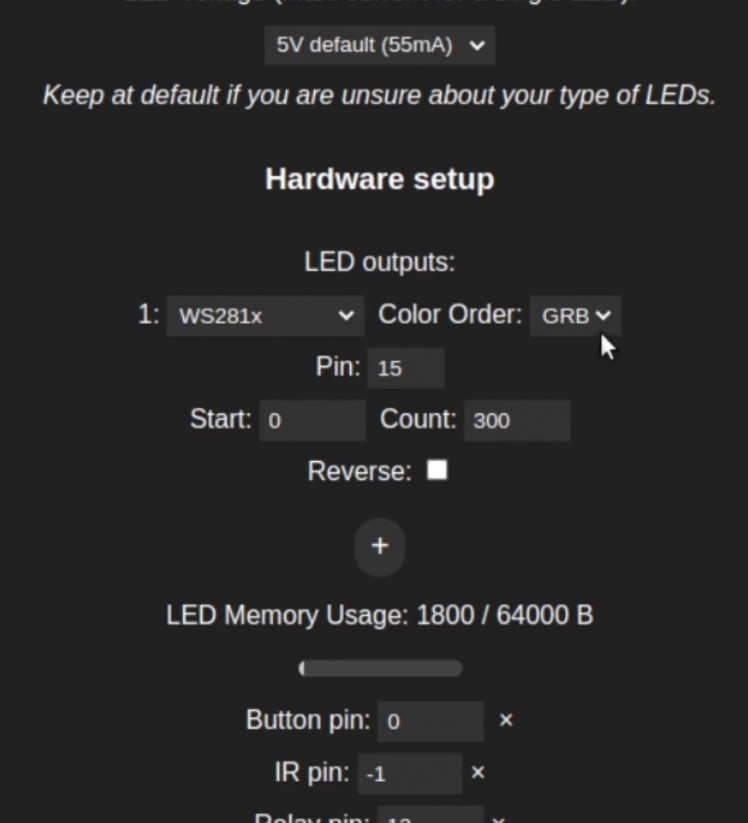
There are lots more options than this, and it's certainly worth spending a minute looking through them all!
E1.31 / DDP
Just like we used DMX to control our physical lights, we are going to use a special kind of DMX over the network to talk to each WLED and send pixel information. The good news is we don't need to plug in anything else, since the ESP32 is already attached to our network!
E1.31 (Art-Net) is the most common way of sending DMX information over a network to any number of nodes. This is the default communication protocol for many devices including WLED.
DDP does the same thing, but is slightly more efficient, which allows us to use less network traffic for the same amount of information, which gives a slightly faster animation frame rate.
Either protocol works fine, we just need to configure the appropriate sync settings in WLED.
Finally, we need a central controller to tell all three WLED controllers what to do at any given moment, plus we need to model the setup we created and synchronize everything to music.
xLights
xLights is an incredibly powerful open-source lighting sequencer. This will allow us to animate all the pixels across all our devices, and even set up schedules to play shows automatically.
Model
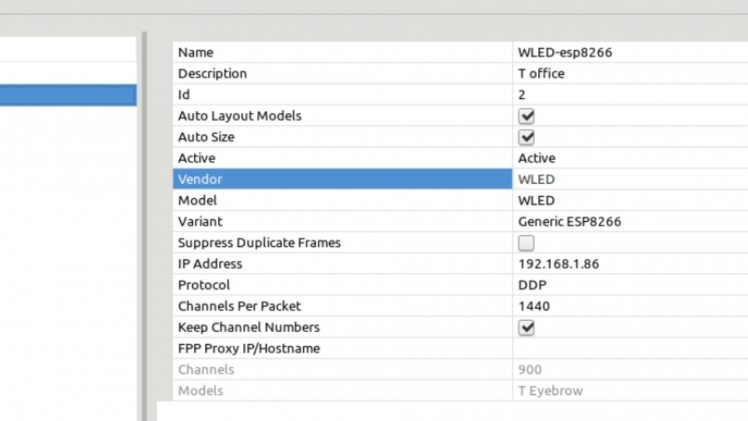
First, we need to set up our controller models, just like we have them in the real world.
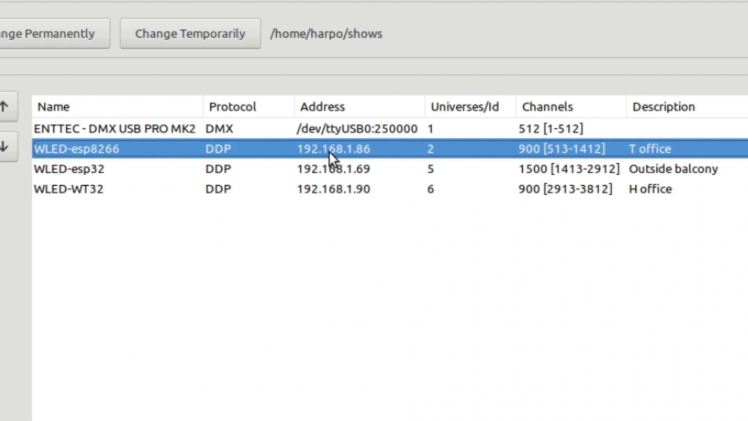
Each controller is defined with an id, an IP address, and a description which we use to note its physical location. We also need to set the protocol as DDP, to match our WLED configuration.
Layout
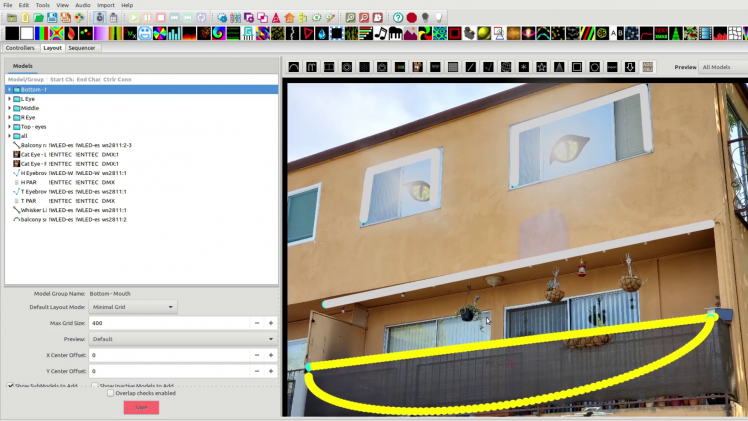
Once that's done, we need to establish the physical layout of all the pixels in the "Layout" tab.
Using a photo from the desired viewpoint, we set up each strand with the proper number of pixels, as well as the correct start and end points.
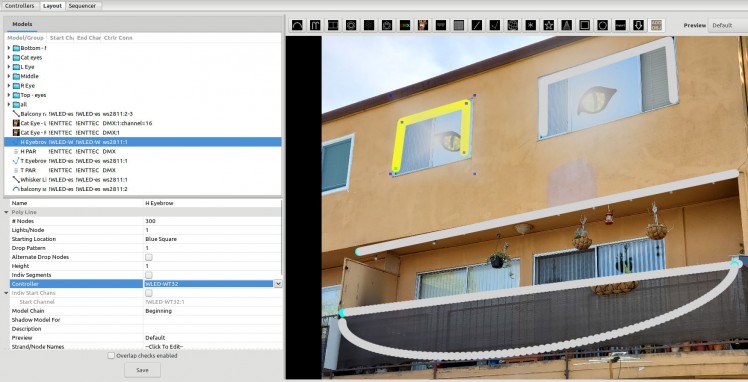
Multiple items can be combined into groups in order to play an effect on combined segments.
I grouped these into sections like "Left Eye", "Right Eye", "Mouth" and "All".
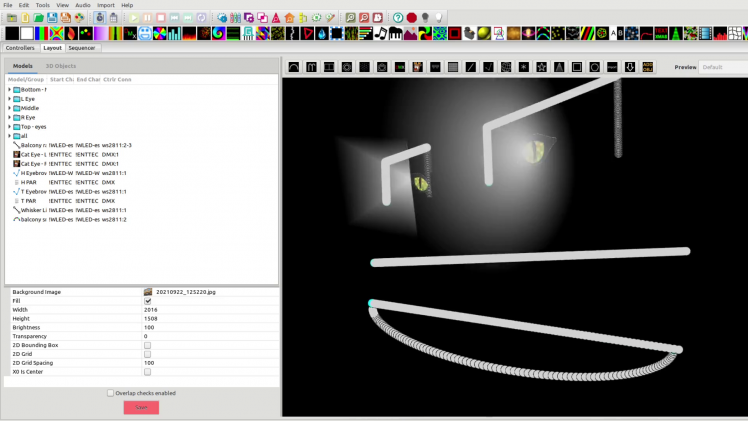
Everything can also be previewed in a 3D render, which allows us to move a virtual camera around to see the show from all angles!
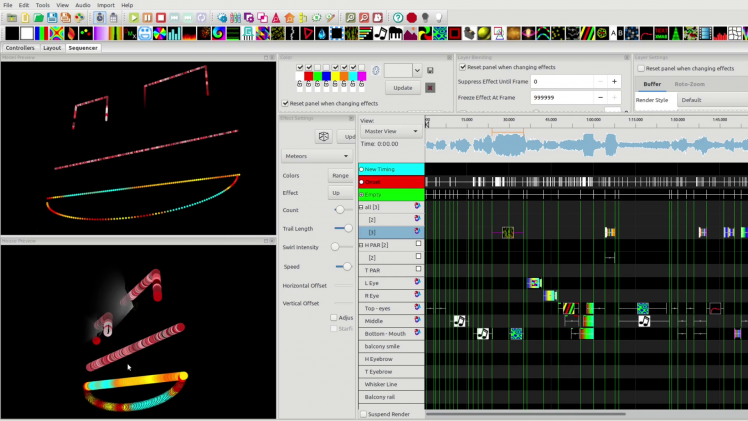
Sequencer
The final step is also the most time consuming: sequencing the show.
In concept, it's very straightforward: set effect(s) for each moment in the song in a way that "looks cool".
In practice, for every minute of finished show, it's many hours of toying with random effects until it "looks right".
Even though there's only a few dozen base effects, there's an unlimited number of shows we could make, because:
- Each layer can play a different effect at any time
- Each group (and each segment) can play multiple layers simultaneously
- Each layer can blend with other layers in several different ways
- Each effect can use a different palette of colors
- Each effect has numerous parameters
- Each parameter can be animated over time
- Each animation parameter can have several parameters of its own
Designing like this can be difficult because you don't know what an effect will look like until you see it. The 3D model preview is helpful, but, the only way to know what it will actually look like is to wait until dark, go outside and watch it in action!
Beyond creating interesting looking moments, a good lighting sequence is extremely challenging to create and equally rewarding to watch. A good sequence tells a story, not with words, but with light. It compliments the emotions of the music, yet doesn't distract from the whole performance.
Basically, when we do our job right, people forget about the lights, and become engrossed in the show!
Showtime
Once the sequence is set, all that's left is to output everything to the lights, and watch the magic!
xLights also comes with a built in scheduler, which can automatically run sequences in a playlist, according to whatever schedule you set.
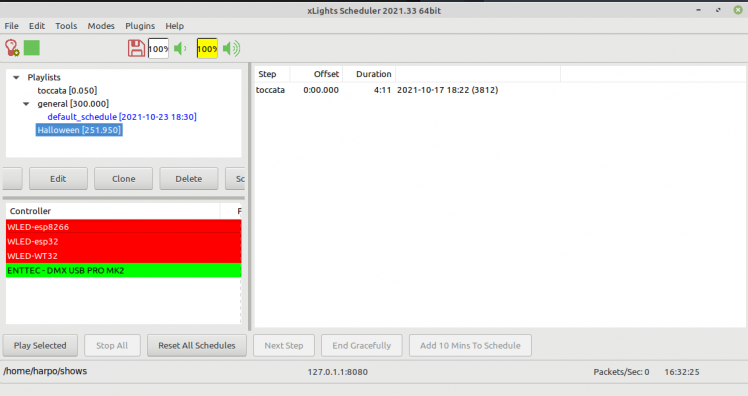
It can run on something as small as a Raspberry Pi, and even features a web interface, so you can start and stop the show from your phone, while standing outside, enjoying the magic you created!
Music
J.S. Bach - Toccata and Fugue in D Minor (BWV 565)
Public Domain
Recording courtesy of smallchurchmusic.com
Build Video
Here's a visual summary of the entire process, from design to installation and testing!
Show files
All the xLights sequence files are available for FREE to all my Patreon supporters!
Other projects
More details and other projects are available on my website:
Schematics, diagrams and documents
Code
Credits

Related products


Leave your feedback...