
Cattle Collar Using Sensecap T1000a And Qubitro
About the project
Will deploy Seeed Studio's SenseCAP T1000A to the cattle and monitor their behavior via LoRaWAN and Qubitro
Project info
Difficulty: Moderate
Platforms: Seeed Studio, The Things Network
Estimated time: 1 hour
License: GNU General Public License, version 3 or later (GPL3+)
Items used in this project

Story
Have you ever wondered how to track your sheep on a large farm? Do you want to monitor their health and location remotely and easily? If so, this blog is for you. In this blog, I will show you how to use the SenseCAP T1000 A, a low-power, long-range GPS tracker, to build a smart sheep tracking system1. You will learn how to connect the tracker to the TTN network, and how to use Qubitro, a platform for IoT data management and visualization, to create a dashboard and an alert system. By the end of this blog, you will be able to track your sheep’s position, temperature, and battery level in real-time, and get notified when something goes wrong. Let’s get started!
The Problem Statement ?:
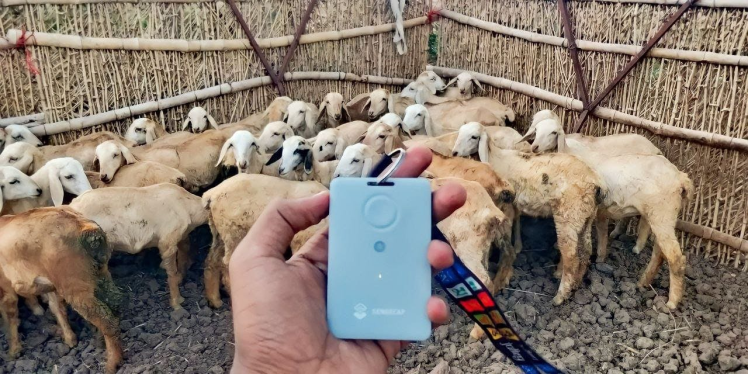
Our farm has sheep that roam freely in a fenced area. They return by themselves every evening and live as a herd. However, some young sheep can slip through the gaps in the fence. Also, they often come back with health problems like indigestion and stomach parasites by eating some bad kinds of stuff. It is difficult to identify the cause in such a large space. Therefore, I want to develop a system to track sheep for extended periods and distances.

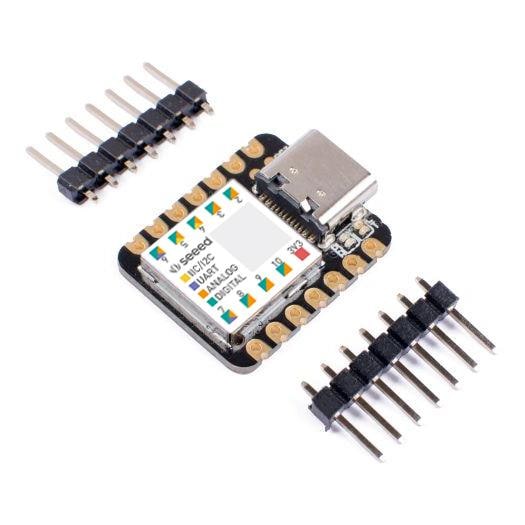
SenseCAP T1000 A ?:
Here is the solution, The Seeed Studio's SenseCAP T1000 A, a packet-size portable, low-power, long-range GPS tracker. It has many features, which will be explained in the next section.

In Seeed Studio's SenseCAP series, there are plenty of valuable sensors and gateways. These T1000 series sensors are low-power GPS trackers, you may think it's just a GPS tracker, right? but it's not an ordinary GPS tracker.
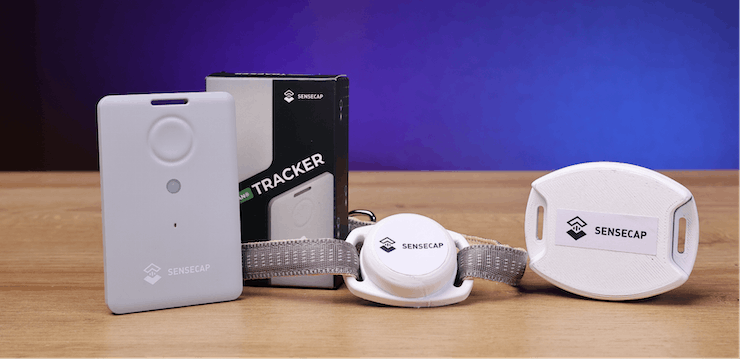
It can give you accurate positioning both indoors and outdoors Also it has a dedicated SOS trigger button, onboard light, and temperature sensor. So, it can be used in many ways from emergency rescue missions to health care and much more.
In some cases, farms were in remote locations. And we won't always be available near the farm. Our SenseCAP T1000 A will send the data to TTN Helium or another LNS, but we need a system that can help us visualize the data and some functions to make an alert that allows us to inform where there is abnormal activity detected.

For this matter, I'm going to use Qubitro, will see what is Qubitro in the next section.
Qubitro Device Data Platform (DDP)☁️:
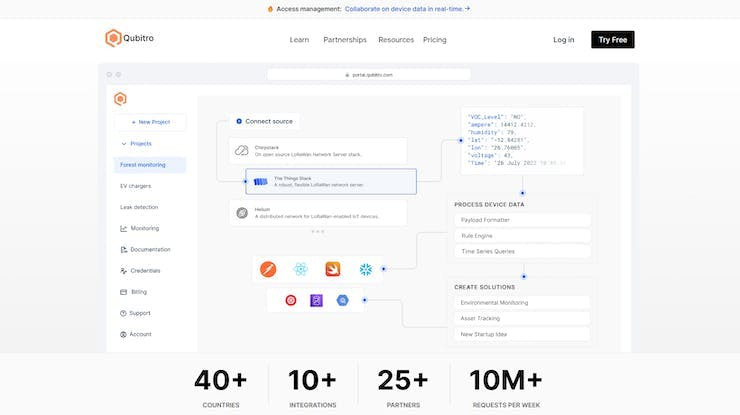
Qubitro is a Device Data Platform (DDP) for developers that provides the tools, workflows, and infrastructure you need to develop solutions faster, without the need for manual integration of multiple services.
You can use Qubitro to build IoT solutions without coding or use its APIs and SDKs to develop custom applications.
Initial Setup of SenseCAP T1000 A ?:
Before connecting the SenseCAP T1000 to the TTN, we first need to set up the Tracker with the SenseCAP Mate application. Use this QR to download the SenseCAP Mate application.

Once you installed the application open it and select the add device then Scan the device QR and it will ask for authorization click the authorization.
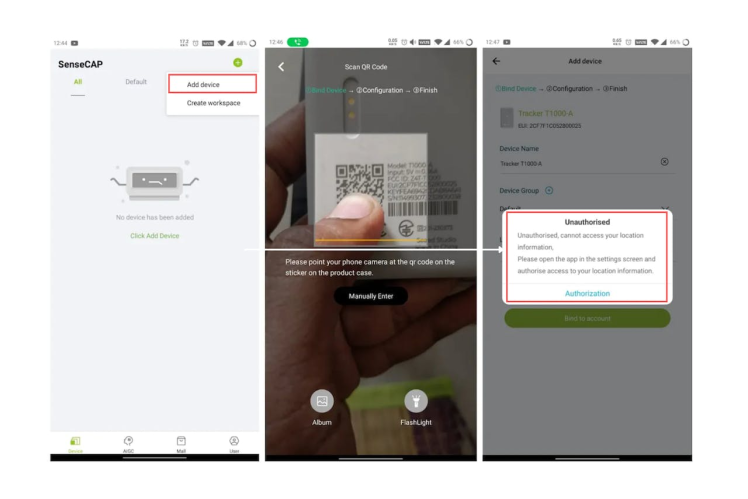
Next, it will ask you to bind the account. Fill in all the details as per your need and select the configure now option. Select your device's SN.
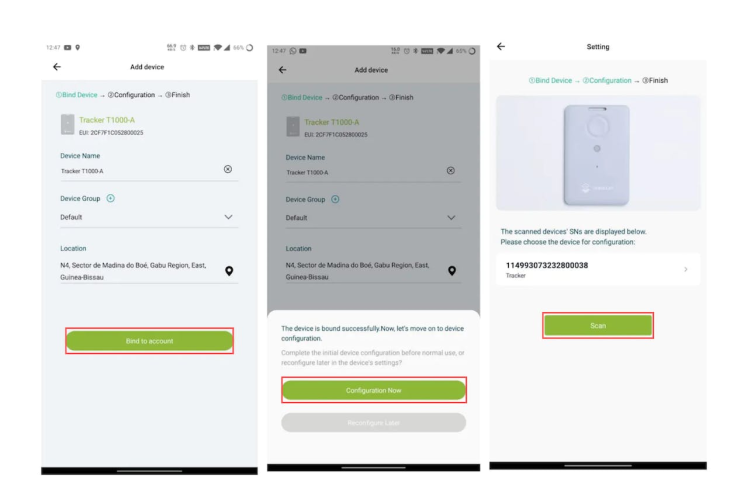
Next, go with the advanced configuration and navigate to Settings and LoRa. Then select the platform and the frequency then send and save the configuration.

That's all now your tracker is configured successfully, the next thing is connecting to the TTN.
SenseCAPT1000 A with TTN ??:
We have already configured the SenseCAP T1000 to the TTN. Next, we need to connect to the TTN. If your device is near to the LoraWAN coverage it will auto-connect to the network and give you a beep sound. Then the next step is configuring the TTN for SenseCAPT1000 A.
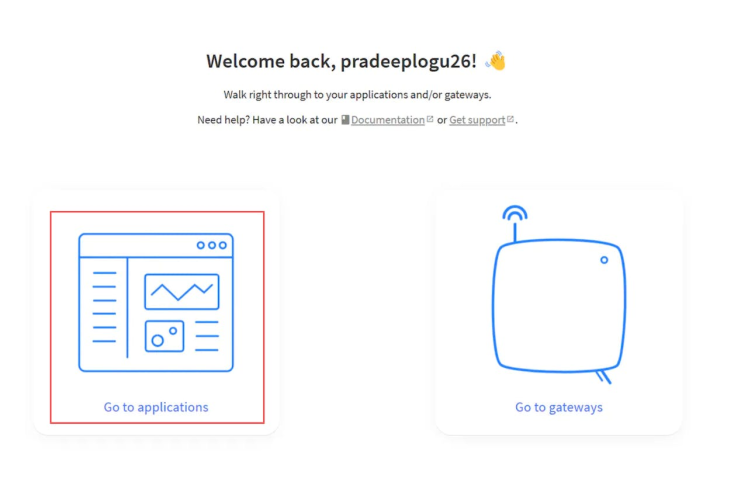
Navigate to the TTN console and go to the application.
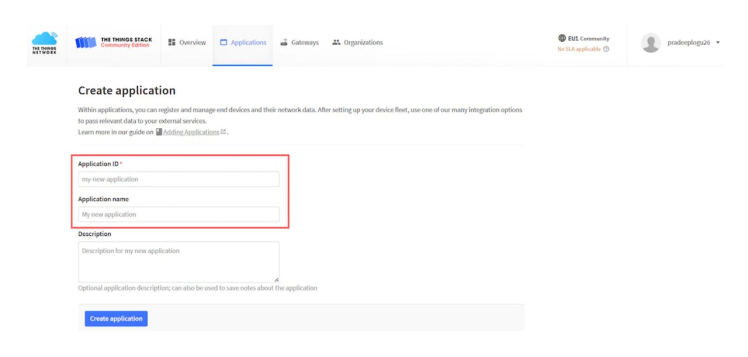
Next add a new application, with all your details.
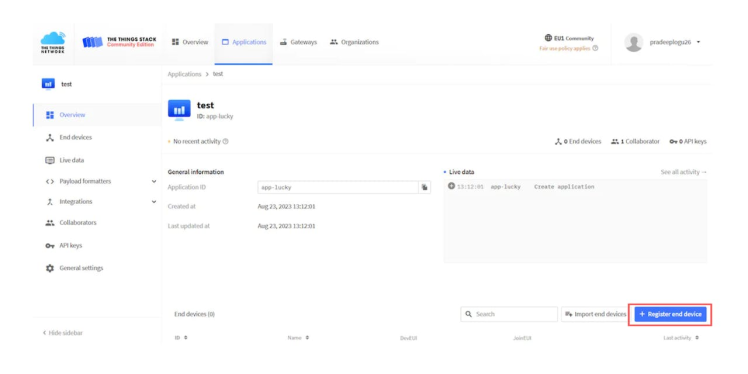
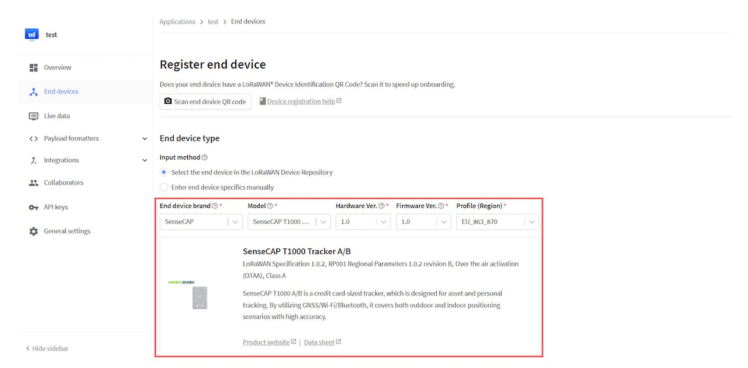
Once, the new application is created. Then try to add the end device.
Seeed already added the device template to the TTN. So, you can just select from the templates. Then add your secret keys based on the SenseCAP Mate application configuration.
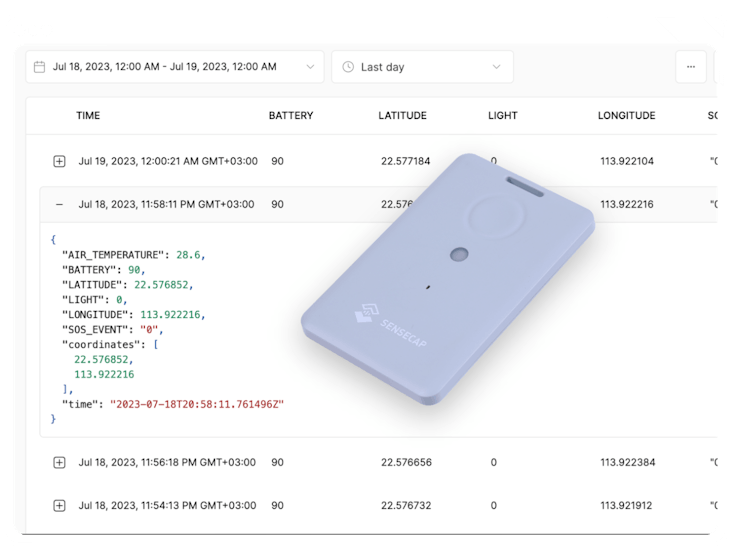
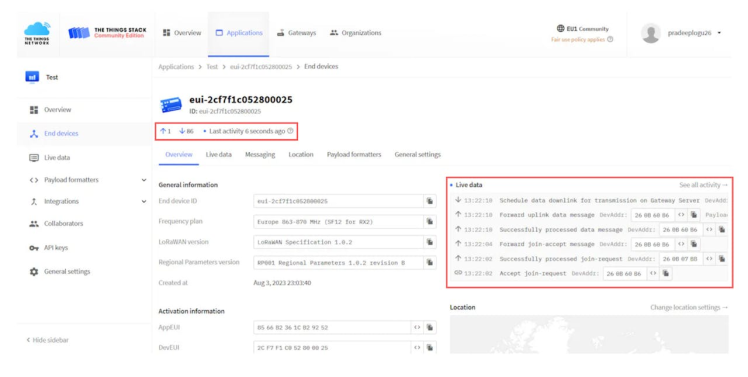
Finally, once your end device is connected to TTN. It will show all the live data.
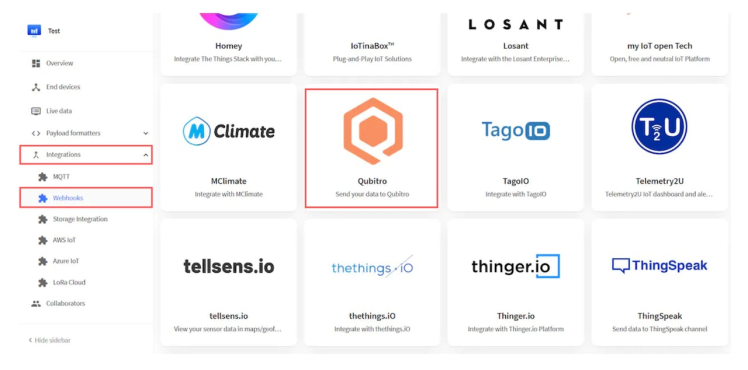
Qubitro Integration with TTN ?:
Now our data has already reached the cloud. The next thing is we need to connect TTN with Qubitro to visualize and store our data. Just navigate to the integration options in the Application, which we have just created now. Then select Webhooks. Here you will see the Qubitro.
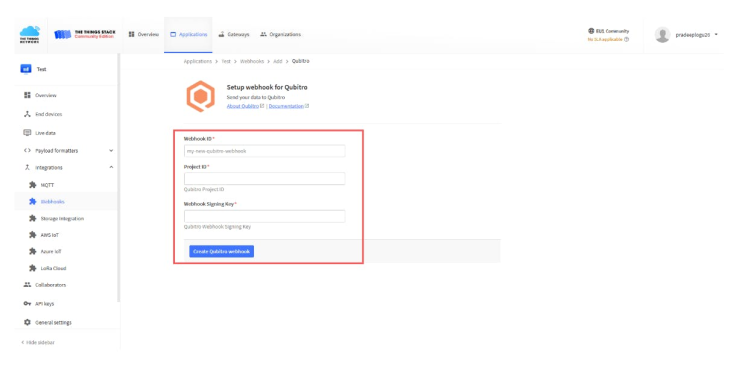
Select Qubitro and add the Webhook ID then it will ask you for some credentials. You can find these credentials on the Qubitro portal.
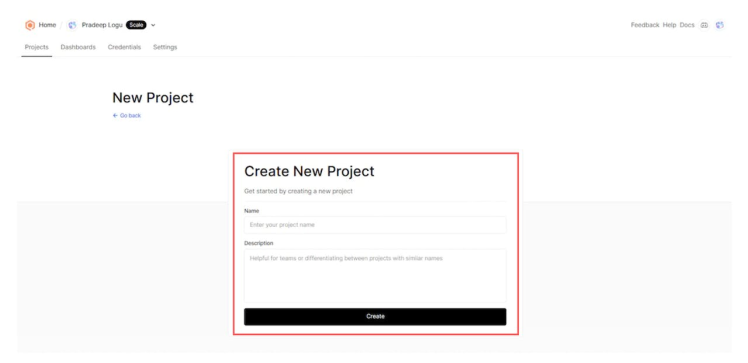
Login to the Qubitro portal and create a new project.
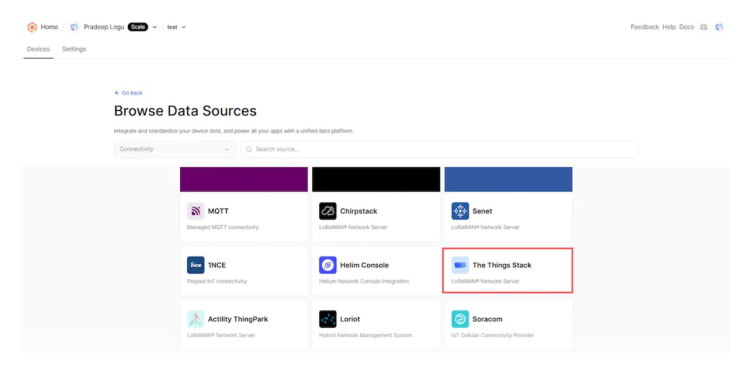
Then add TTN as the data source.
Next, you will see the Webhook signing key and project ID.
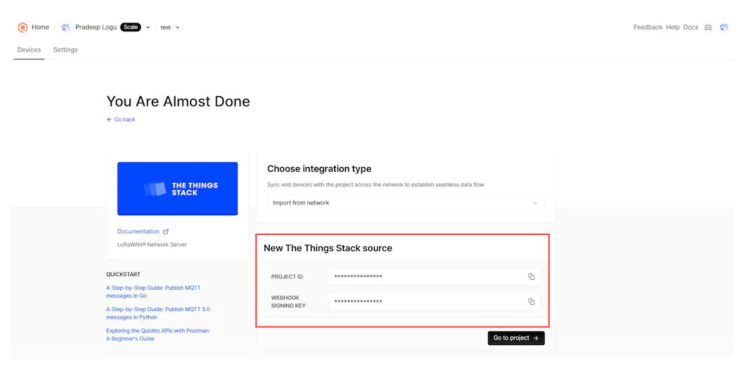
Copy and paste these credentials into the TTN Webhook setup, that's all. Now you can see your device which is waiting for the data.
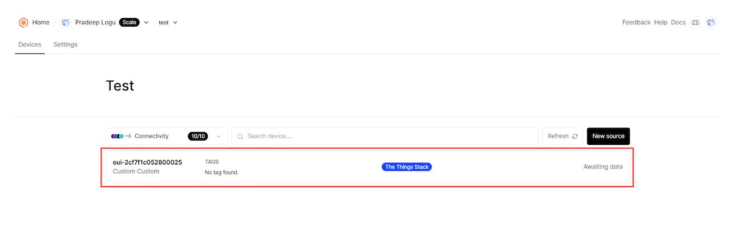
Next, select the device and see the message, it will show this kind of notification message.
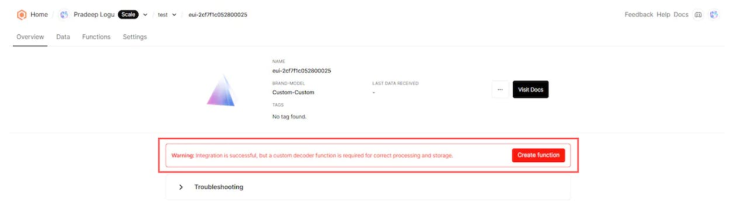
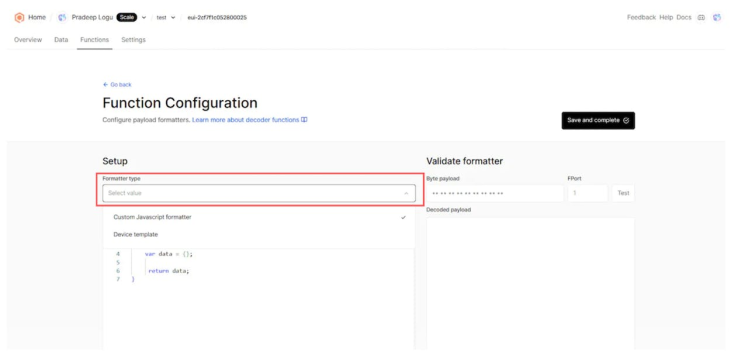
It shows that integration is successful, but it still needs some custom decode functions to decode the data. So, we need to add the decoder to see the incoming data. Navigate to the functions and create a new function, then select the custom decoder.
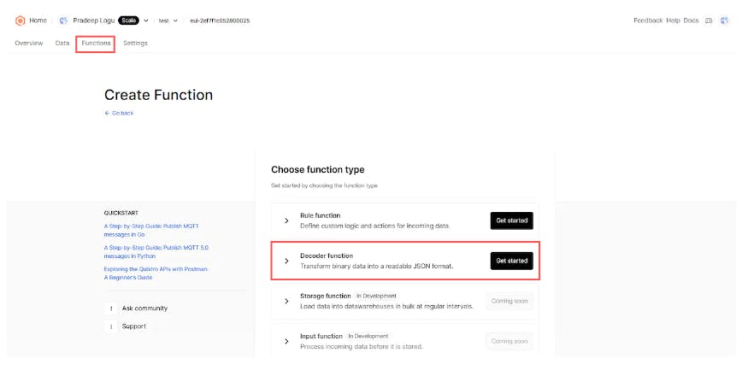
Next, select the decoder from the template. In Qubitro there are many inbuild templates available to decode your incoming data.
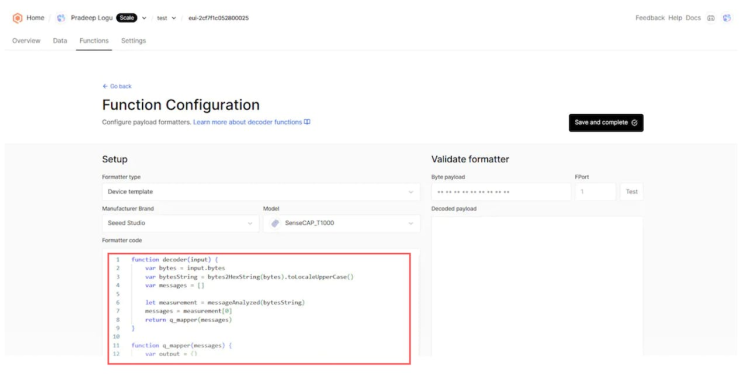
Here you can see the available templates for the Seeed Studio.

Then select the SenseCAPT1000, it will auto-add the JS function to decode the raw data.
If you want to test the decoder means, just copy-paste the payload and try to test the output data. Next, let's see the decoded data in our device data tab.

Data Visualization ?:
Now we can see all our Tracker data in the dashboard but it's not easy to visualize. So, we are going to build a dashboard that helps us to visualize our sensor data.
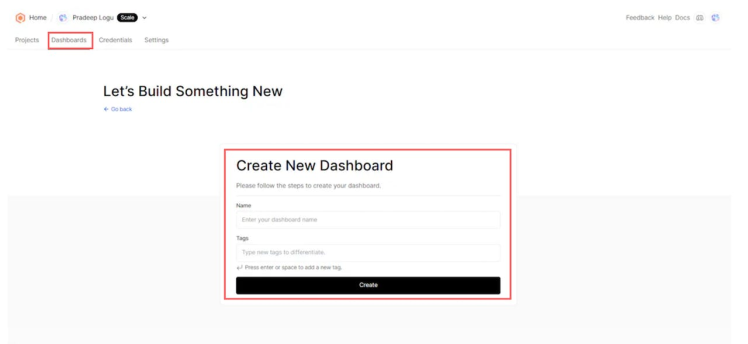
Just navigate to the dashboard tab and create a new dashboard.
Next, we need to add some widgets to visualize the data.
Click on the edit tab and select the widgets.

Next, select the data which is going to be applied to the widgets.
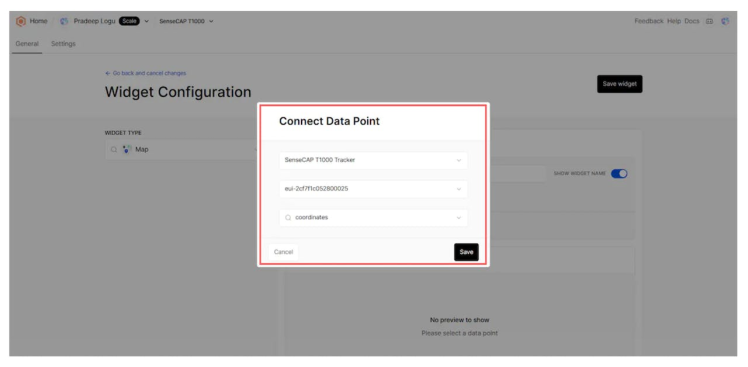
Then you can customize it as per your needs.
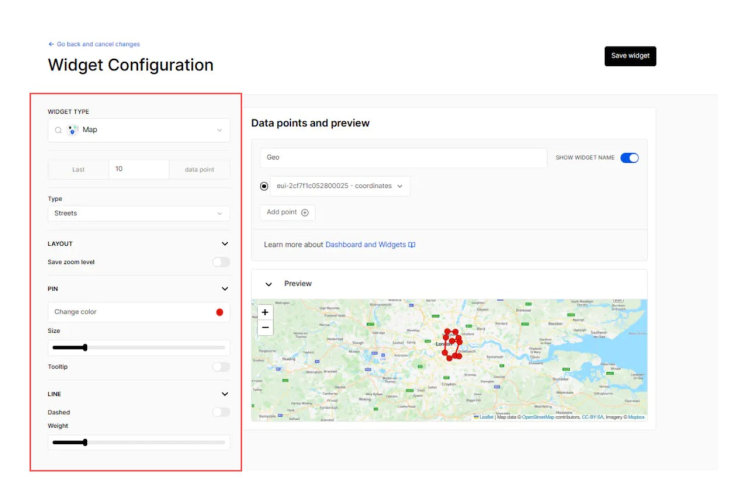
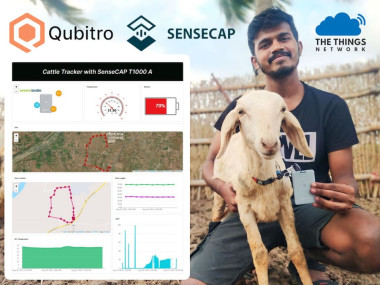
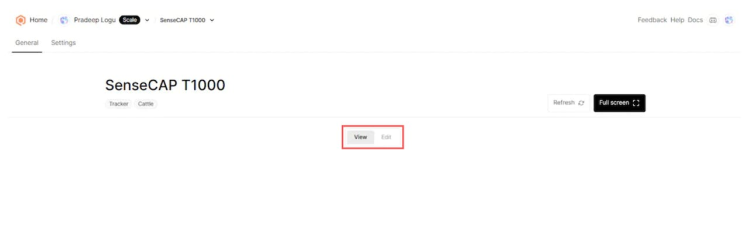
Finally, save the widget, here is my final dashboardwith all my device data.

NodeJS SDK ❇️:
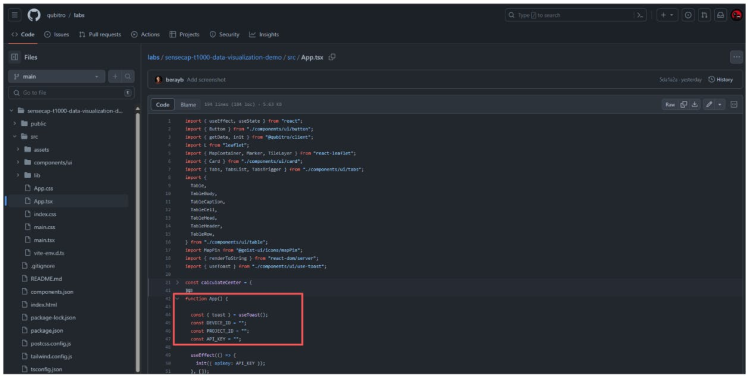
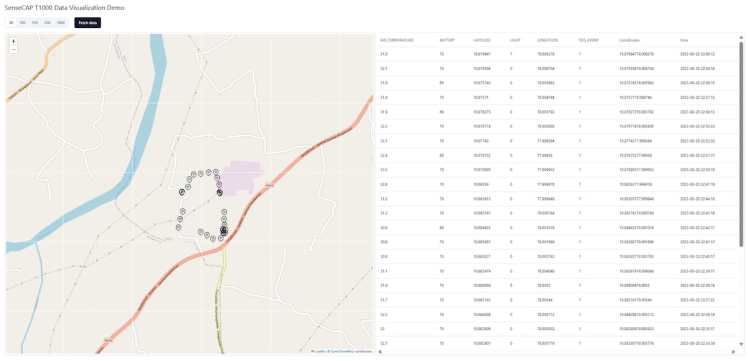
Qubitro allows users to build their own web or mobile application via API’s and SDK. Here we can see how to deploy our SenseCAP T1000 with Qubitro’s Node JS SDK. First, navigate to the Qubitro Lab’s Git Hub and download the sensecap-t1000-data-visualization-demo project. Follow the project instructions and build/run the project.
Note:You have you have to add your Qubitro project credentials in the App.tsx file
It will generate a web application that you can view on your local machine at port 5175.
Data Alert Mechanism ?:
Next thing is we need to define an alert engine, which can alert us when abnormal data is detected. Here in this case, I want to build an alert system that informs me when the tracker's battery is below 10 percent.
Navigate to the functions tab and create a new rule function.
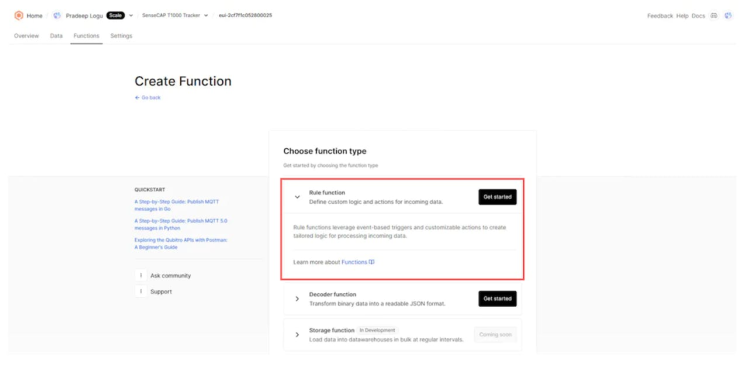
Then select the rule engine as per your need.
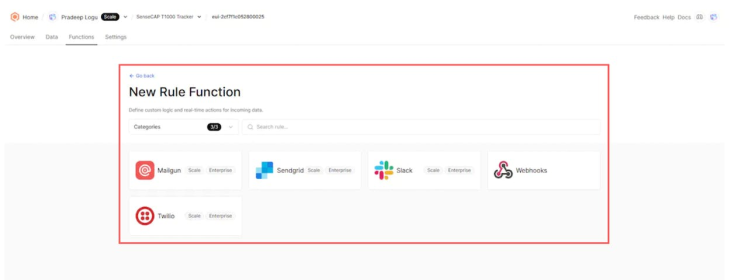
For this demo let's try the webhooks. Select the Twilio.
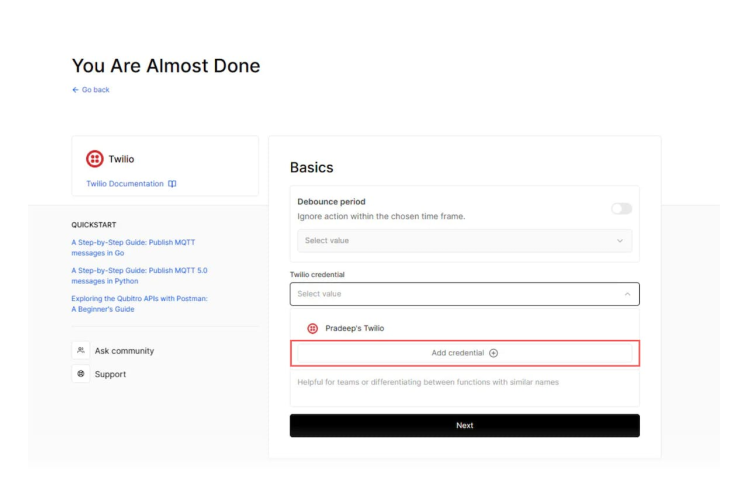
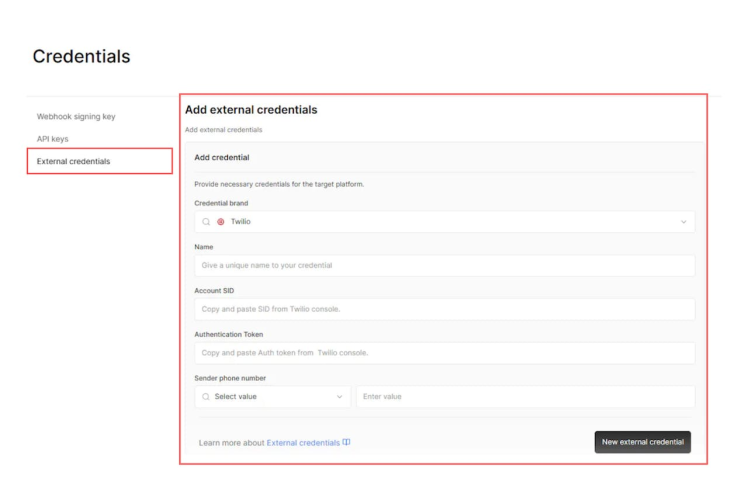
Add your Twilio credentials.
Once you have added the credentials, let's name the rule.
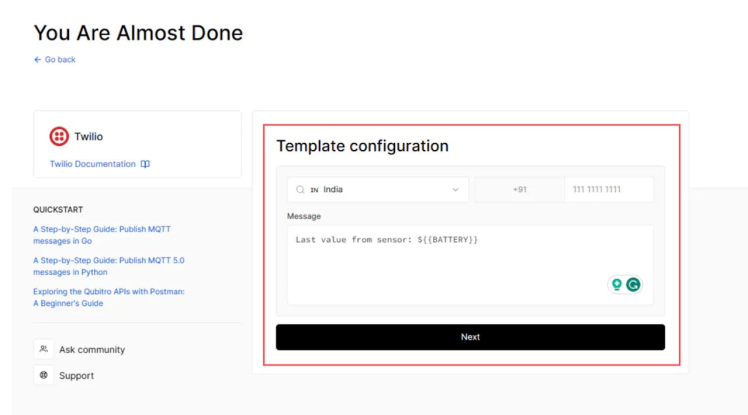
Next, let's set the cellular and the message option. Then finally we set the conditions.

That's all, Now if my tracker's battery level is below 10 it will auto-trigger the Twilio SMS.
Wrap-Up ?:
In final words, SenseCAPT1000 A enables low-power, long-range communication for various IoT applications. One of the applications is animal tracking, which can help farmers monitor and manage their livestock remotely and easily. In this article, we have discussed how to use SenseCAPT1000 A, TTN Qubitro, and Qubitro NodeJS SDK to build a smart animal tracking/monitoring system.
Credits

Related products


Leave your feedback...