
Breathing And Company Helper (bach)

Made by electrouser881 / Communication / Health / Home Automation / Robotics / IoT
About the project
Check in on a loved one instantly and have fun!
Items used in this project
Hardware components


Story
Intro: Breathing and Company Helper (BACH)
Story
According to the forum of International Respiratory Societies, more than 4 million people die of respiratory illnesses each year. The worst part is, many of these deaths were preventable had another person been present to help and notify certified personnel. With many people, especially the elderly, living alone, this is a big issue families need solved. After all, they can't always drive out to help at the smallest hint of danger, even if they did know about it.
The Breathing and Connectivity Helper allows users to control a robot with visual and auditory feedback through the Internet, while providing breathing info from a Walabot to the caregiver's phone and serving as a companion in their house. User's will be able to command this rover in their loved one's home without having to leave the comfort of their own. They will be able to drive around, speak, listen, and observe anything in the house. Using Walabot, users will also be able to check if someone is breathing well, or not at all. This design is adaptable as well, allowing users to modify the robot chassis and software to suit their needs.
If the user is not free to check in on the person, he or she may make the robot public and allow others from around the world to control the robot and interact with the person. This way, your loved one is safer and less lonely.
Step 1: Building the Robot
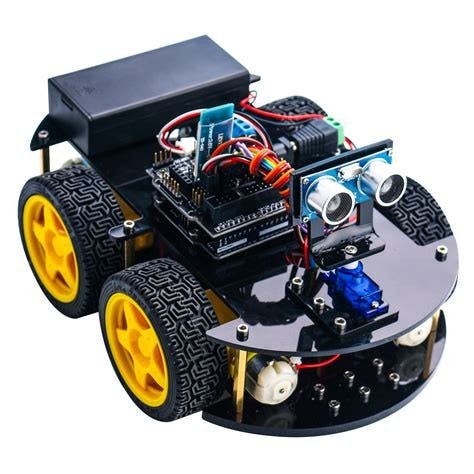
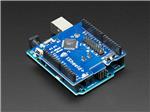
The robot chassis used for this project is an Arduino Car v3 sponsored by Elegoo. The kit is easy and fun to build with instructions and example software on this page. You can assemble the kit fully to play around with it, but don't screw the battery case in too tight as we will be moving it later on to make room for a Raspberry Pi 3 (RasPi). The software for this is in the same download page. You will need to upload the program called "bluetooth_car" to the Arduino on the top of the car. Remember to remove the Bluetooth module before doing this as it will block the signal coming from your computer and you will not be able to upload anything! Now, test to make sure everything works by downloading the app and controlling the car from an Android device. Alternatively, you can open up the Serial Monitor tool in the Arduino IDE and type 'f' for forward, 's' for stop, 'b' for back, 'l' for left, and 'r' for right.
This program is named bluetooth_car because that was it's original purpose. However, we will be using it in a more ambitious project! Our Arduino interprets data sent from the bluetooth module, and the Serial USB port in the same way. That's why you can only do one at a time. Our grand use for this program will be to tell the Arduino Car what to do from our first RasPi. The Pi 3 will take commands from the internet, upload video and audio, and relay the movement information to the Arduino. The Arduino will then react depending on the commands it receives. We need to use both and not just one of the two as they were each made for specific tasks.
Now, let's connect it to the Internet!
Step 2: Adding the Networking Hardware
; ; 1 / 3
1 / 3
To connect our Health Bot to the Internet, we will be using the Let's Robot platform. This platform is like Twitch but for robots where users can control robots all over the world from their own homes. Your robot can be set to private of public, depending on what you will be using it for.
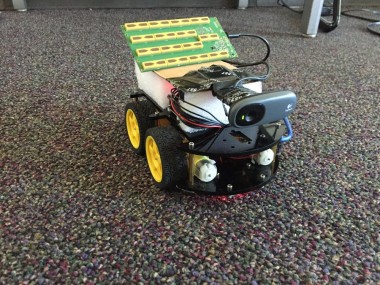
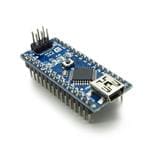
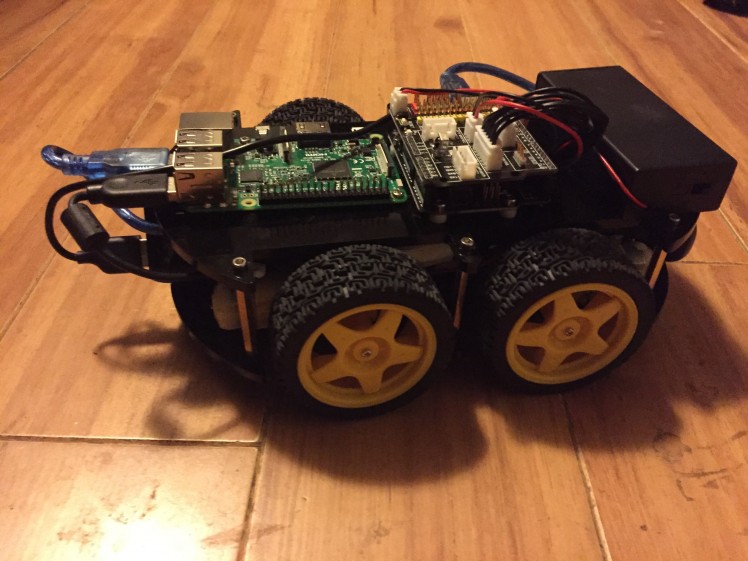
First of all, we will need to make space on our robot. Remove the battery case and place it beside the robot for now. Also, I should have warned you, but you'll need to remove the ultrasonic sensor and servo as well. This is where you can put the battery case (if you wish, there will be another spot later on). Now place the RasPi in the empty space behind the Arduino and Motor Shield where the case used to be. To drill holes for the Pi and the case, I suggest drilling pilot holes and then drilling the screws. I went to a well ventilated room and wore protective gear while I used an old soldering iron to melt holes into the robot chassis. This worked out for me, but don't do it if you don't have the appropriate Personal Protective Equipment (PPE).
With that mounted, take a small speaker and place it on or in your robot. Connect it via aux cord to the RasPi. This will let it talk. Connect a webcam to the Pi and place it like shown in the images (or get creative like with the speaker). Plug in your Arduino to the Pi, and add a spot for a rechargeable battery for the Pi. It will need its own power source. Also, don't forget to remove the bluetooth module or the RasPi and Arduino will not be able to communicate!
Step 3: Adding the Networking Software
We've already programmed our Arduino to follow commands, but who will give them?
The best resources are on the Lets Robot support page here: https://letsrobot.readme.io/, but I will summarize.
1. Download the OS image from that page to your laptop and transfer it to a microSD card for the Pi
2. Using Etcher or a similar img writing software, flash it to your card and plug It into the Pi
3. Create a LetsRobot account and make a robot in your settings page (you will need your Robot and Video IDs)
4. Update the software to make sure all dependencies are working, and run the Install Robot file. It will ask you to input your IDs, so check your LetsRobot profile again if you didn't write them down
5. Make sure your controller.py is being ruun with --type serial as that is the type of communication we will be using.
6. If you need any help, check out the LetsRobot Discord channel. The developers are usually online and if they aren't you can ping me @mitomon or DM me if you need help.
Once this is all done, you should have your very own internet controlled robot. Congratulations! You could leave it at a friend's house and "drop by" their place anytime and they could leave one in your place, too. The possibilities for fun with robots like this one are endless! However, if you are building this for the health part of the project, the next part will show you how to setup a Walabot Breathing App on BACH.
Here's a video of the robot at this stage playing around with my follower robot:
Step 4: Adding the Walabot
We will need another Raspberry Pi 3 for this part. I know, I know, "Why another computer?" Well for one, there are never enough computers, and secondly, since our first RasPi is processing video, audio, taking in movement commands, and translating text to speech, adding a high quality sensor to that load might not be the best idea. Also, it uses Serial communication too so adding the Walabot to the Pi would be unnecessarily messy with regards to code. We will be using Blynk to connect to the Raspberry Pi 3 from.your Android device.
Hardware
; ; 1 / 4
1 / 4
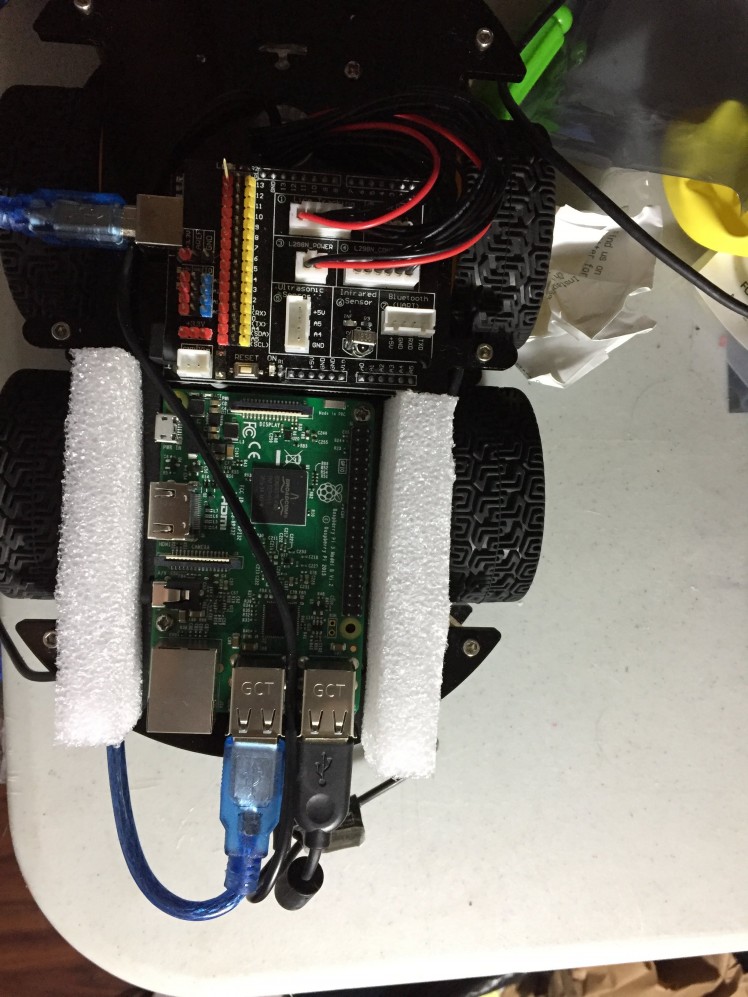
The hardware for this is really up to you, but I will show you how I did it. Your Walabot will need to be unobstructed and be facing upwards at a 45 degree angle. BACH is quite short, so he must look up to be able to detect breathing (unless the person is lying on the ground, but in that case your camera should be enough to convince you to call the paramedics.) I completely redid the previous design and added a third floor to the robot with foam and cardboard. First, I cut three pieces of foam, tall enough to give the boards and wires space and long enough to support the next stage. I hot glued a rectangular piece of cardboard onto the pieces of foam, and while it dried cut notches for the ports on the first Raspberry Pi. Then, I cut a smaller piece of cardboard to act as insulation and put it on top of the first RasPi. The second Pi went on top of this and was connected to the Walabot and a battery bank. I then gently screwed the battery case on the back edge of the new floor of the robot and used tape to secure the Walabot to it at an angle. I also used tape to secure the camera to the top of this new floor to make the people using the robot feel taller :P.
Software
I'm just using Raspbian on this one, nothing fancy. You will need to download the Walabot beta API and SDK. I don't want to make this tutorial longer than it already is, so if you need detailed help, check out the excellent Walabot documentation(with video): https://api-beta.walabot.com/
To connect your Raspberry Pi to the internet (and by extension you phone), just follow these directions by the Blynk team: https://github.com/blynkkk/blynk-library/blob/mast... Bonus: If you plan on restarting this many time, you can add this to the startup file in your Pi so that it starts up along with your robot automatically.
Now, start up the Breathing example found in the Walabot API. If you have the Walabot in front of you, the console should be displaying your "Breathing Energy". This measures how you are breathing with higher energy corresponding to peaks in your breathing cycle and lower energy corresponding to troughs. If you tried the examples with the GUI before this, the breathing energy is what is used to make the graph in the breathing example.
Note
Before you leave this with someone, please make sure to test it. Drive around and have the person lie on a couch or something and breathe normally. BACH should be giving you a nice cycle of high and low values. Now tell them to hold their breath. BACH should only give you low values.
Step 5: Other
Feel free to build your own version of this robot and modify the components. The goal of this was to provide an inexpensive platform to take care of family members and be there for them even when we are far away.
If you need any help, go to the Discord channel or check out my stream of this robot here:
https://letsrobot.tv/robocaster/Mitomon/robot/5689...
Good luck!
Credits
Related products


Leave your feedback...