
Bionic Arm Moved Vith Voice

Made by electrouser530 / 3D Printing / Automotive / Health / Robotics / Voice
About the project
I wanted to prove if an arm moved trough voice would be useful in daily life; with this idea in mind I learned to design and print in 3D, Arduino code, and some mechanics a complete project for those who want to learn!
Items used in this project
Hardware components


Story
INTRODUCTION:
I raised a hypothesis it consisted in demonstrate if was possible to build a forearm prosthesis printed in 3D and controlled through a voice recognition module. The idea was doing with the less budget possible. The original prosthesis was a prototype that I took from internet and the pieces were download form an humanoid robot called Inmoov. In spite of that I needed to design some 3D pieces to adapt to reality.
To do this project I wanted to use some innovative tools. The 3D printing is a recent concept. Reading about this technology I discovered that can be implemented in the health area, for the regeneration of organs and prosthesis. I decided to focus in this last scope because I thought that was so impressive. I decided to focus on forearm because our hands are something that we use constantly, to subject, to take objects, to gesticulate.
I did some research about their presence in the third world, there are some NGO that work there and I would like to discover their projects; there due the war and the bad work conditions, is known the elevate number of amputations; in those cases is so difficult to return to their normal life attend to the trouble to access to a prosthesis; caused by the high economic cost or the absence of medical centers.
I did this project for high-school, I wanted to apply the technology into an area where can be useful, I mean that using it we can be able to improve on some aspect of our life. Our society is based on the mobility and the desire of freedom, so a person with limited mobility has fewer possibilities to access to this kind of life. When I was little I had the conception that a prosthesis was a fixed element that was only aesthetic, but in fact is more than that. Actually are functional elements, is able to act like a natural member, with the movement and the aspect. So this is the idea that I would talk about.
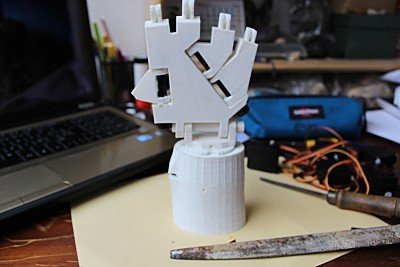
1.Building process
Video :Building proces
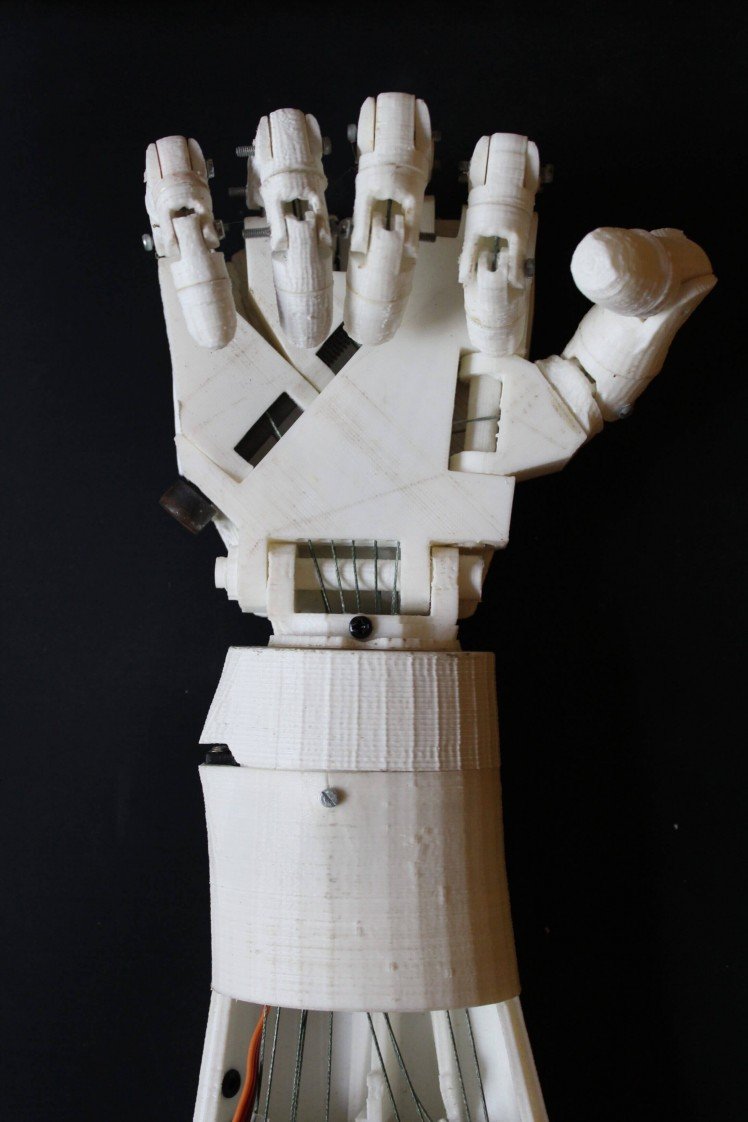
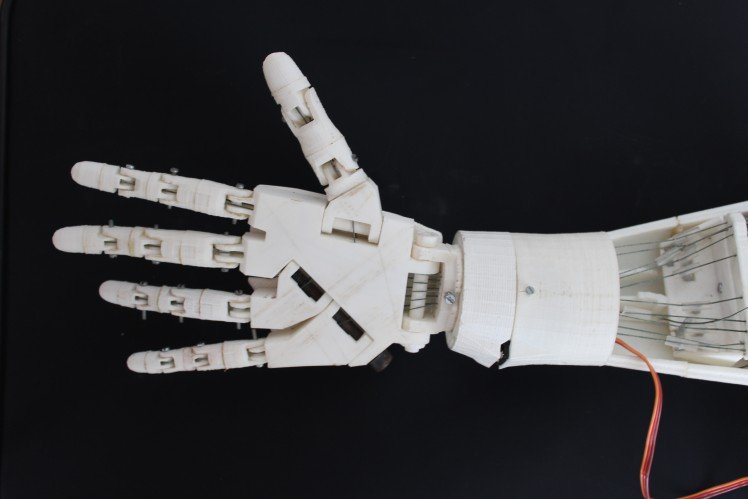
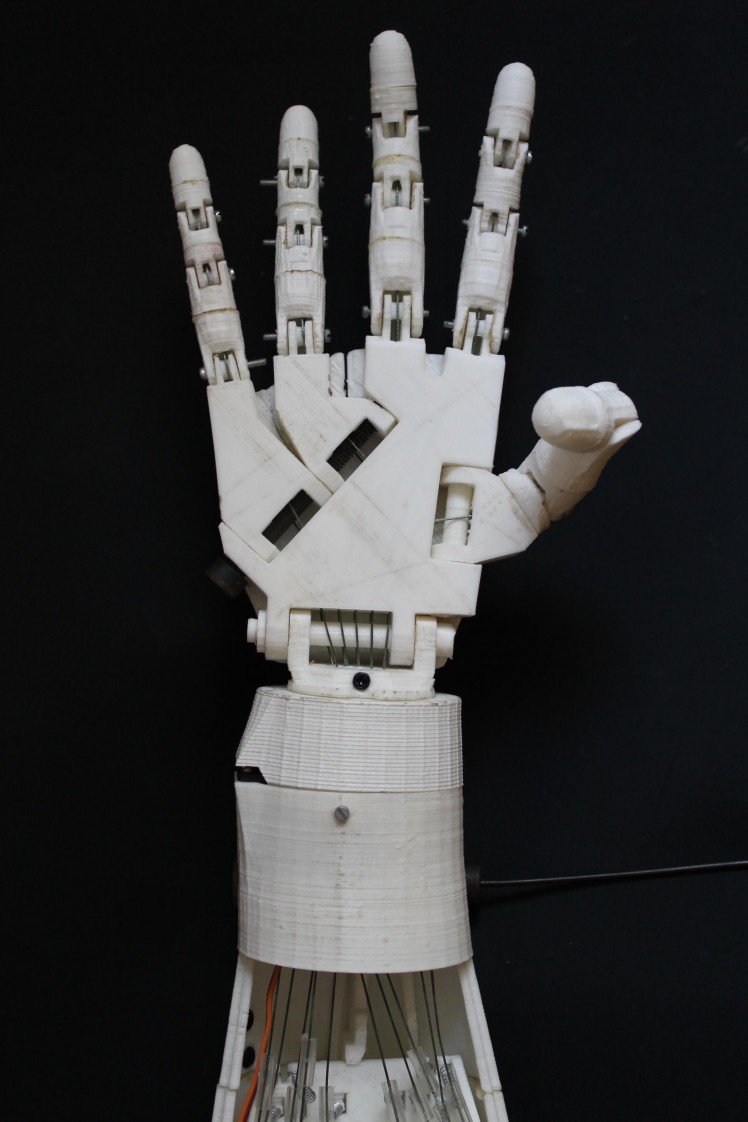
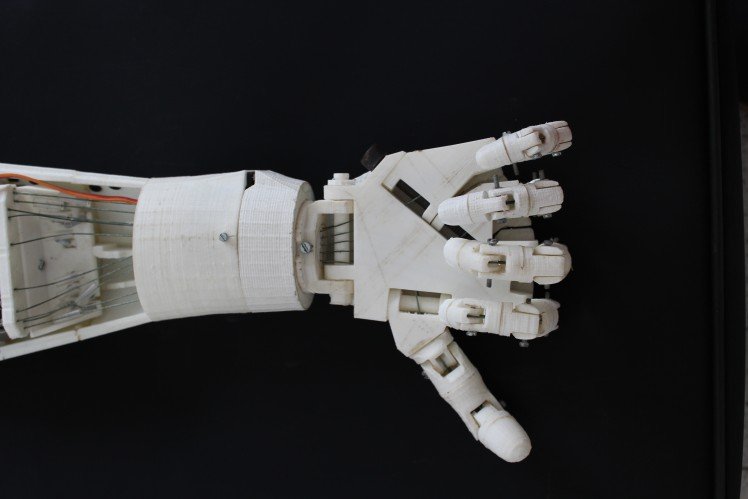
- First, I started with the palm it is made up by the pieces WristlargeV4 and WristsmallV4. To join together, I used Allen bolts. You must pay attention to the fact that those pieces have movement and you need to file a lot.

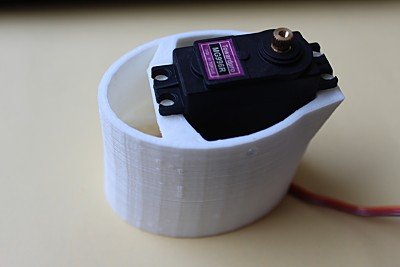
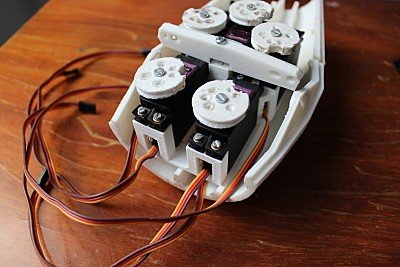
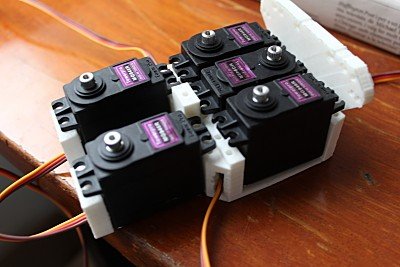
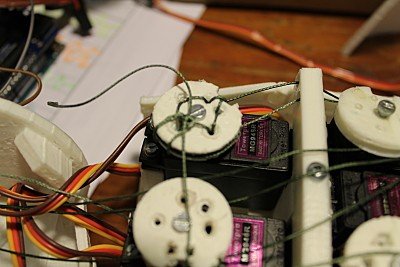
- In second place we assemble the pieces from the wrist. The base is formed by rotawrist2 and rotawrist1. Inside them is placed the servo motor MG996R and the gears WristGearsv4 and CableHolderWristv5. This last one allows the crossing of the fishing line. The servo motor is connected to pin 9 in the Sensor Shield.

- The fingers move is possible due to the five servo motors MG946R those are connected to the pins 4,5,6,7,8 in the Sensor Shield. They are placed on the bottom of the forearm and placed in the RobServoBedV5, in front of it we place the RobCableFrontV3. This piece with TensionerRightV1 allow the alignment of the fishing line. On the top of the servo motors we place a pulley that allows for subjecting the fishing lines to transmit the movement. We put the RobServoBedV5 on RobPart5V3, to be sure that is fixed we adjust with a bolt. On top we set RobPart4V3.
- On the outward we place RobPart3V3 and RobPart2V2 they are part of the structure. To cover this part we put RobCap3V1.
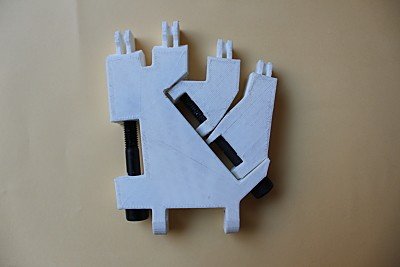
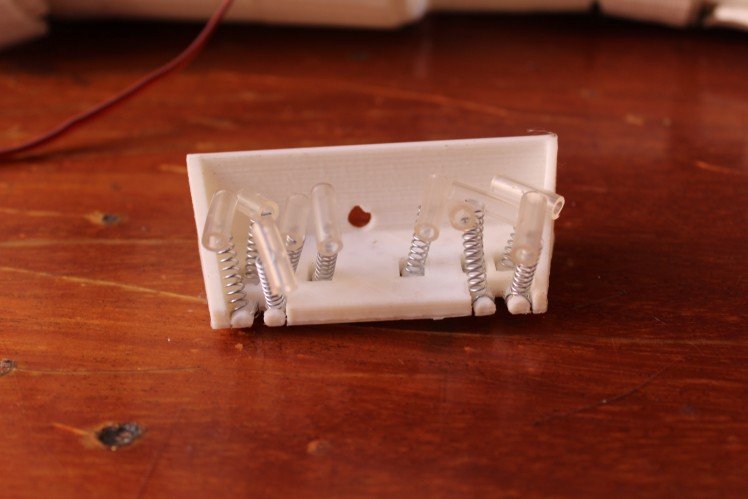
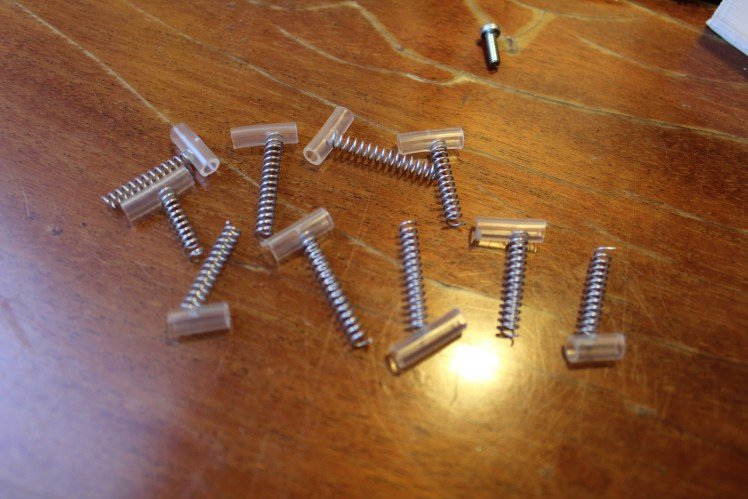
- Tensioner is placed opposite the RobServoBedV5. This element allows us to maintain the fishing line tighten and avoid sudden movements. The system is based on a small plastic tube and springs
- Is so simple to assemble the fingers, the order is from bigger to smaller.
- To finish, we must proceed the fishing line inside the arm, each finger have two lines. To end, we hooked with glue the bottom cover of the fingers.

- To attach the prosthesis to the real arm we have to put ropcapAddition3V1 and robcap3V1.
2. Budget
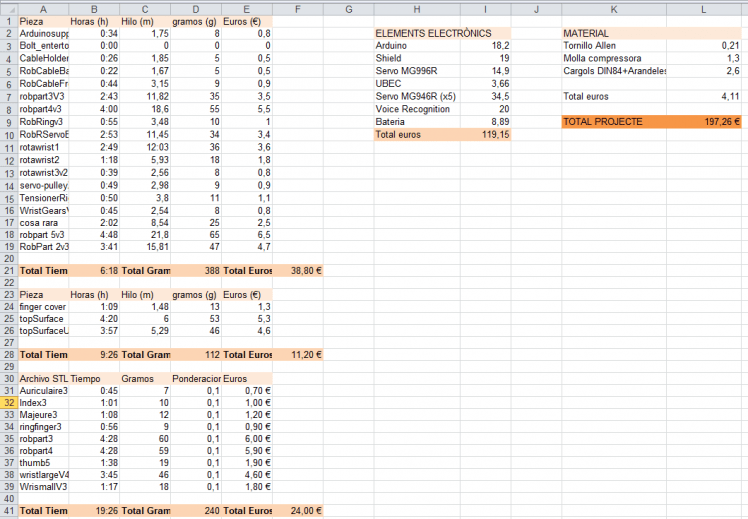
I achieved some discount from the 3D printers, but I thought that in real life this price can reach thanks to donations.
The price in this project was one of the most important. As I said before the idea was be able to achieve an affordable price for everyone.
The prothesis that are sold in the orthopedics are between the 3000 and 6000 euros, depending the characteristics; I tought that if, for example, you change some expensive material for 3D printing can be as useful as before and cheaper.
3. 3D Desgin
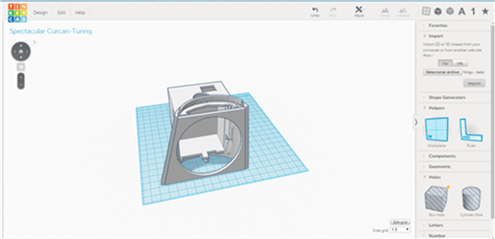
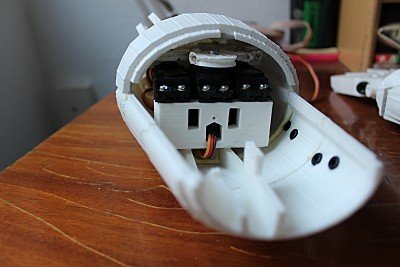
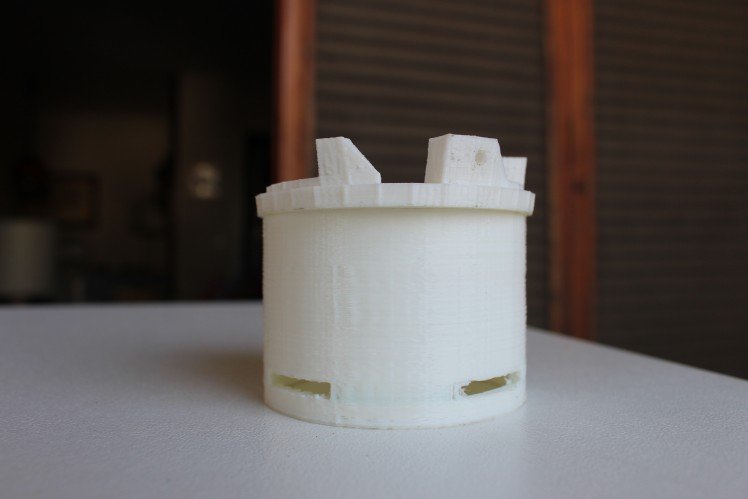
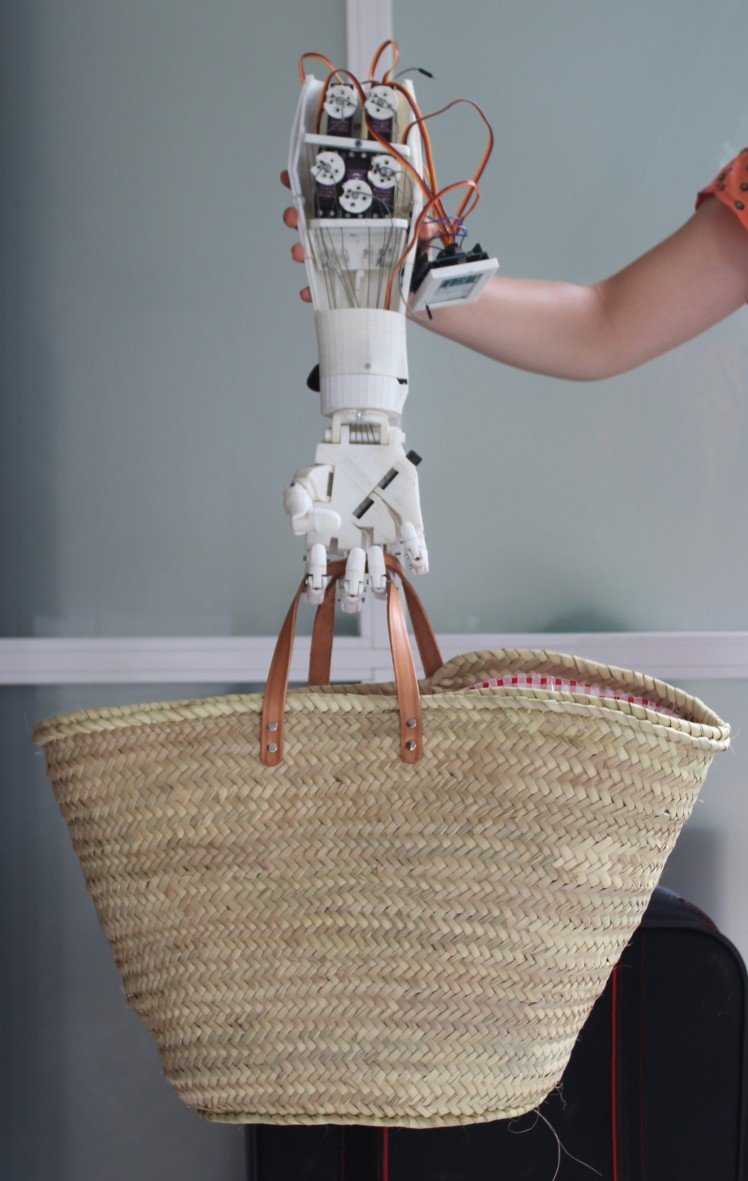
I modified the initial piece "robpart3V3" adding a cube; inside it, I placed the electronic components. The size is the same as the Arduino and it is supported using bolts. I also made a hole through it is placed the microphone; also there is a rectangular hole used for the USB port; this offers us the possibility to access to the program and improve it without the necessity of disassemble everything.
4. Movements
I did 13 movements trying to adapt the prosthesis to the normal life. The program is divided into two groups. The first one is used to take objects and the second one to gesticulate. To change the group is as simple as saying "cambio" change.The initial position is with the servo motors at 90 degrees
4.1 First group
Greet: In this function when the person says "hola" the wrist moves 45º and the hole fingers are open
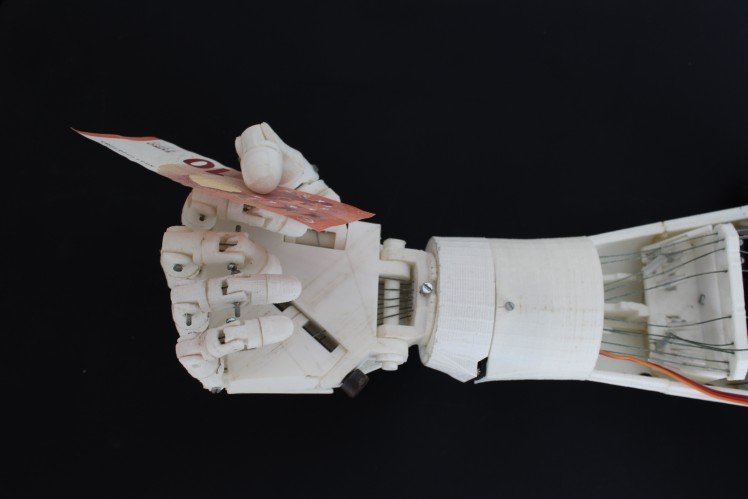
Pliers:
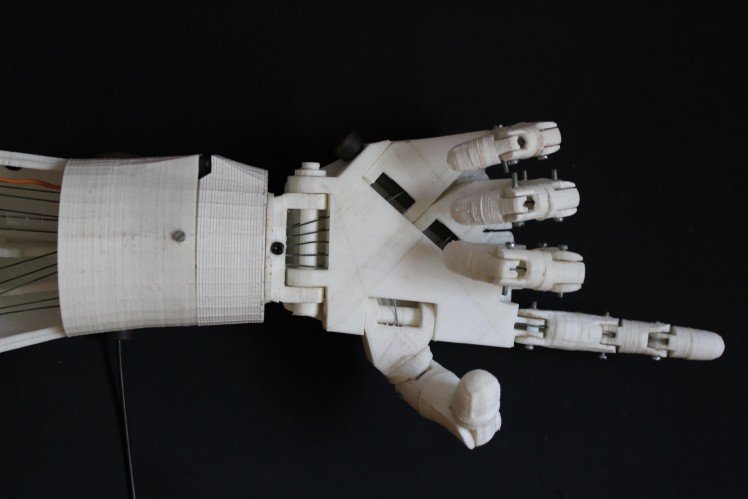
Order : "Pinza"
Is used to catch an object; for example a bill; the object is grab with the index and the thumb
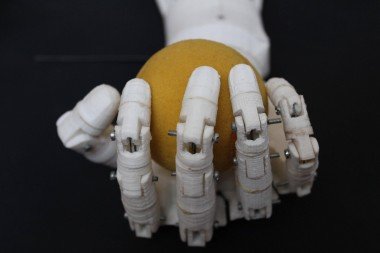
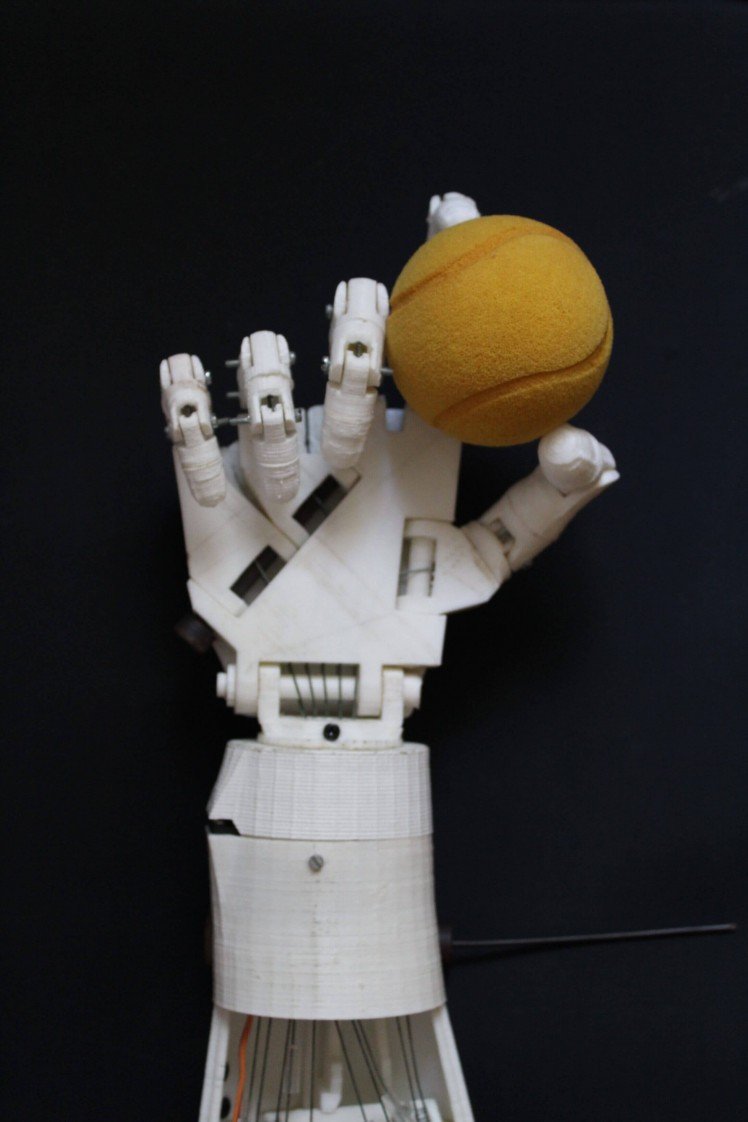
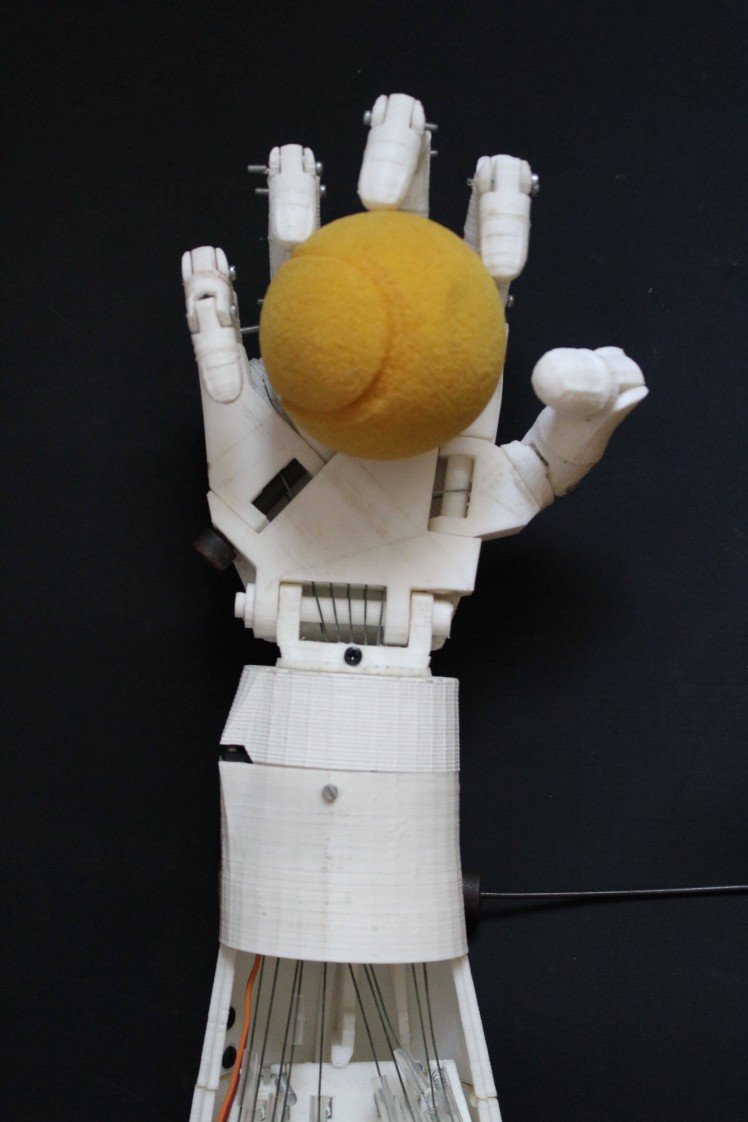
Ball:
Order: "pelota"
Is the same idea as the pliers but, in this case you can grab bigger objects
Grab:
Order: "coger"
The idea is to take bigger objects in this case we don't increase the diameter but larger

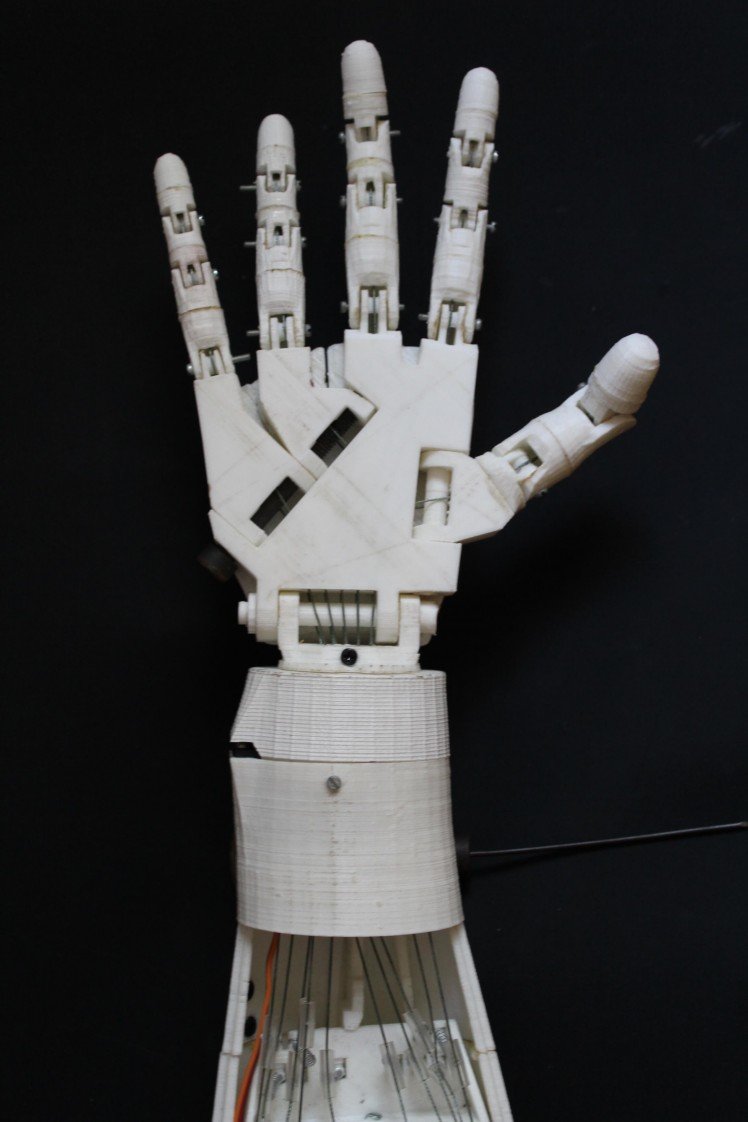
Order: "abrir"
The idea of this movement is to have a neutral position
Order : "agarrar"
Is used to catch things with all the fingers; like a ball
4.2 Second group
In this group we just find the numbers

I add another three movements that can be useful:
Order : "De acuerdo"
In this movement the thumb is raised while the other fingers are closed
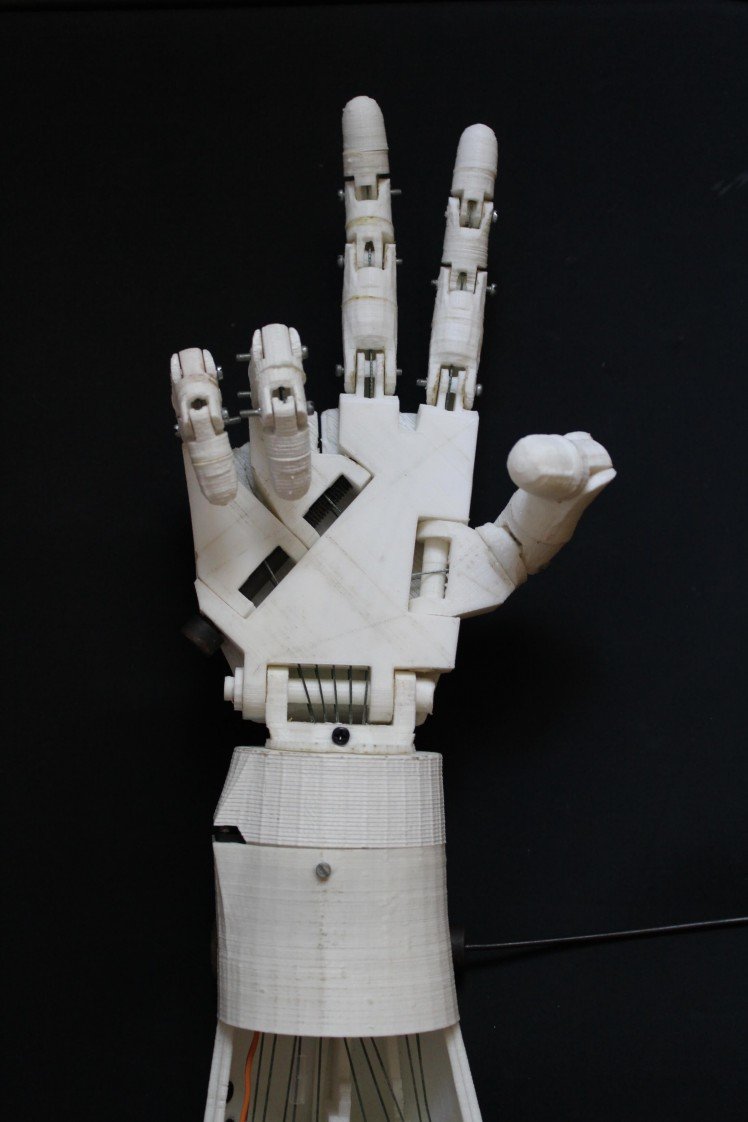
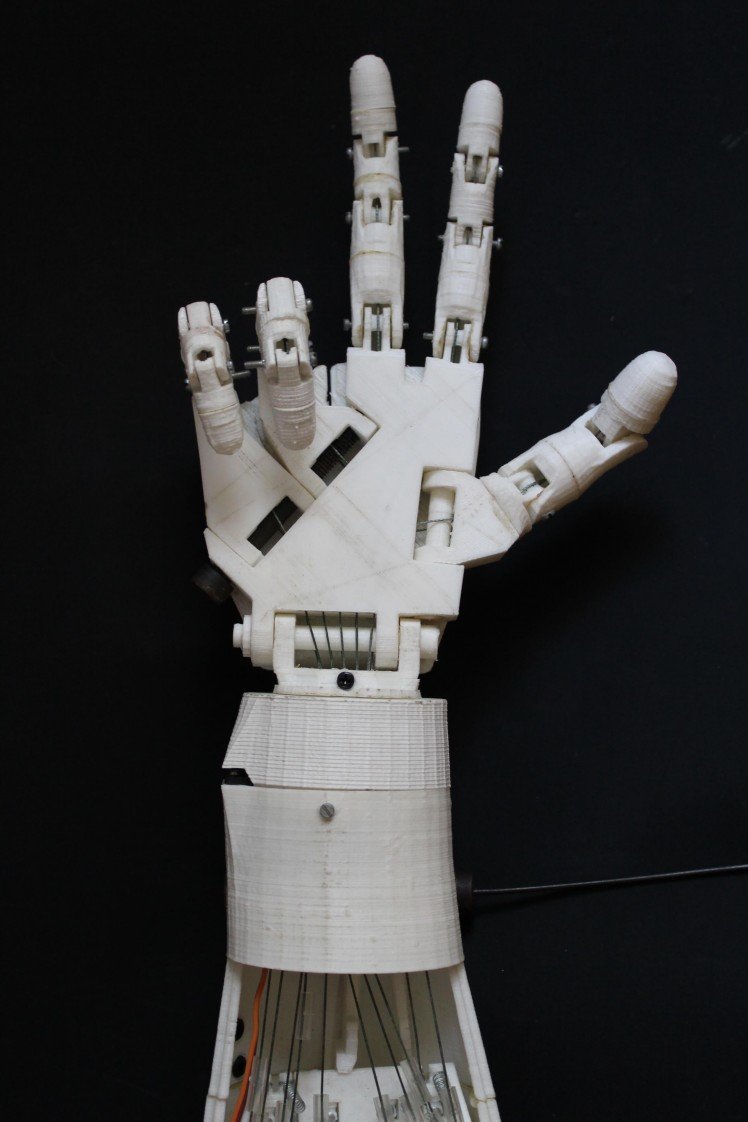
 ( this picture must go 180º turn but the editor don't let me change)
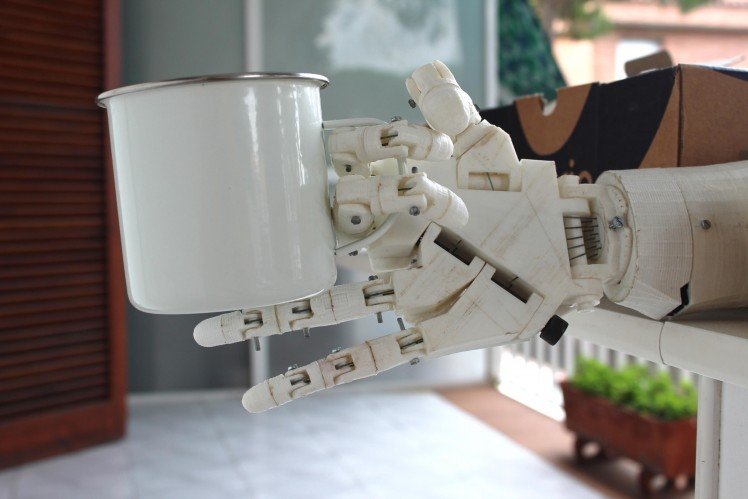
In this group I also added two more movements. The first one is activated with the order "taza" it consists in taking a cup; the second one is used to grab a bag and the order is "maletín".
Even the fact that the prosthesis does six correct grades of movement there are some actions that is not able to do, cause their simplicity compared with a human arm that has the triple of movements.
5.Conlusion
Doing this project I achieve some of my initial objectives, but also I discovered some handicaps.First of all the advantages; I have been able to build a prosthesis made with 3D printing and it works properly; even this fact, this project is not definitive due to the weight; the size and the appearance.In second place I had some problems:
-The hardware; the electronic components; is standard and have limited characteristics, so this means that aren't useful enough and due their size and weight the general prosthesis is bigger; for example instead of using servomotors change them for micro servomotors. This was the reason for example, of the necessity of creating a 3D piece.
Postscript: This project had been done in Spanish; here I only wrote the most important and relevant; it contains interviews, information about third world and NGO, also the history of prosthetics. If someone is interested in it send me a message; I would upload here but the program does not let me upload due to the size (KB) of the document. I would like to write and translate everything but I did not have enough time due to the university exams. If people are interested in it I would translate everything.
Thank you for reading and hope to know if someone will work for a better prototype!
Schematics, diagrams and documents
CAD, enclosures and custom parts
Code
Credits
Related products


Leave your feedback...