
Arduino: Neopixels (ws2812) Made Easy - Indexed Pixels

About the project
Nothing can uplift the Holiday spirit like colorful flashing LEDs. Arduino with some NeoPixels from Adafruit or similar type of WS2812.
Project info
Difficulty: Easy
Platforms: Adafruit, Arduino, Visuino
Estimated time: 1 hour
License: GNU General Public License, version 3 or later (GPL3+)
Items used in this project

Story
Nothing can uplift the Holiday spirit like colorful flashing LEDs.
Arduino with some NeoPixels from Adafruit or similar type of WS2812 based smart pixels are perfect for this, and with the help of Visuino an easy to use and powerful graphical development environment for Arduino, it has never been easier to program.
Step 1: Components
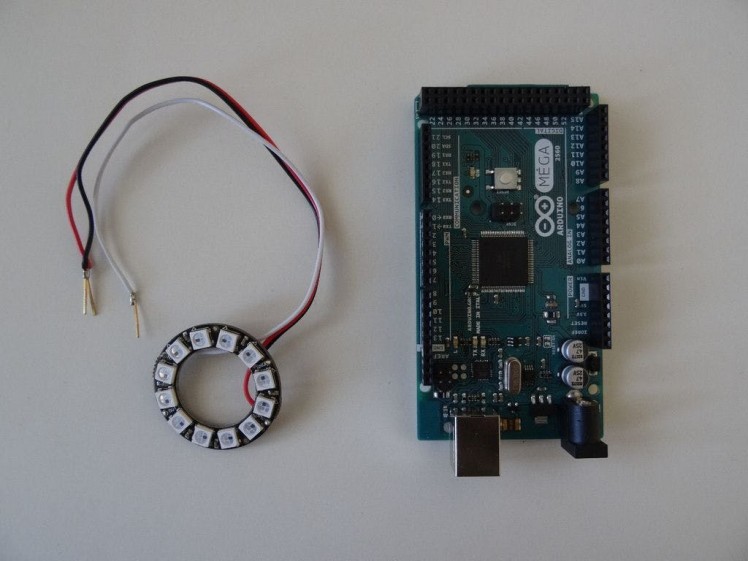
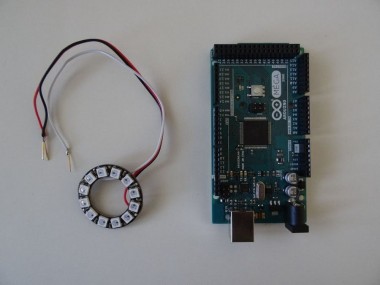
- One Arduino board (I used Mega because I had one available, but ONO, Mini or Nano will be perfectly fine)
- Some NeoPixels from Adafruit or similar WS2812 based (I used 12 pixels ring from Adafruit)
1 / 3 • Picture 1

Picture 1

Picture 2

Picture 3
- If you have not yet done so, soldier wires to the Power (Red wire), Ground (Black wire), and "Data Input" (White wire) connection points on the NeoPixels ring (Picture 1)
- Connect the other end of the Power wire (Red wire) to the 5V Power pin of the Arduino board. Connect the other end of the Ground wire (Black wire) to one of the the Ground pins of the Arduino board (Picture 2)
- Connect the Data wire (White wire) to Digital Pin 2 of the Arduino board (Picture 3)
1 / 3 • Picture 1

Picture 1

Picture 2

Picture 3
To start programming the Arduino, you will need to have the Arduino IDE installed from here: http://www.arduino.cc/.
Please be aware that there are some critical bugs in Arduino IDE 1.6.6. Make sure that you install 1.6.7 or higher, otherwise this Instructable will not work!
The Visuino: https://www.visuino.com also needs to be installed.
- Start Visuino
- Type "neo" in the Filter box of the Component Toolbox then select the "NeoPixels" component (Picture 1), and drop it in the design area
- Connect the "Out" pin of the component to the "Digital" input pin of the Digital[ 2 ] channel of the Arduino Component as shown in Picture 2
- Set the value of the Brightness property of the component to 0.07 so the pixels will not be too bright (Picture 3)
1 / 4 • Picture 1

Picture 1

Picture 2

Picture 3

Picture 4
We need to add a "Color Pixel" element and specify how many pixels the element will control. The color pixel has index and color pins, and we can use them to assign colors to a pixel by index.
- Click on the "Tools" icon in the NeoPixels component or Double Click on the component to open the Elements Editor (Picture 1)
- Double click on the "Color Pixel" item (Picture 2) to add one of them (Picture 3)
- Set the value of CountPixels property of the "Color Pixel1" element to 12, since we have a ring of 12 pixels that we want to control. If you use different number of NeoPixels, enter the number in this property (Picture 4)
1 / 3 • Picture 1

Picture 1

Picture 2

Picture 3
We will use an Unsigned Sine generator to select a pixel to assign color to.
- Type "sine" in the Filter box of the Component Toolbox then select the "Sine Unsigned Generator" component (Picture 1), and drop it in the design area
- Connect the "Out" pin of the SineUnsignedGenerator1 component to the "Index" input pin of the "Color Pixel1" of the NeoPixel1 component as shown in Picture 2
- Set the values of the Amplitude and Offset properties of the component to 6, which is half of the number of pixels that we want to control - 12. If you use different number of pixels, divide the number by 2 and enter it here
- Set the value of the Frequency property of the component to 0.8 (Picture 3)
1 / 5 • Picture 1

Picture 1

Picture 2

Picture 3

Picture 4

Picture 5
We will generate partially random color from Red Green and Blue components to set the selected pixel.
- Type "to co" in the Filter box of the Component Toolbox then select the "Analog To Color" component (Picture 1), and drop it in the design area
- Connect the "Out" pin of the AnalogToColor1 component to the "Color" input pin of the "Color Pixel1" of the NeoPixel1 component as shown in Picture 2
- Type "rando" in the Filter box of the Component Toolbox then select the "Random Analog Generator" component (Picture 3), and drop two of them in the design area
- Type "sine" in the Filter box of the Component Toolbox then select the "Sine Analog Generator" component (Picture 4), and drop it in the design area
- Connect the components as shown in Picture 5
1 / 2 • Picture 1

Picture 1

Picture 2
- In Visuino, Press F9 or click on the button shown on Picture 1 to generate the Arduino code, and open the Arduino IDE
- In the Arduino IDE, click on the Upload button, to compile and upload the code (Picture 2)
1 / 4 • Picture 1

Picture 1

Picture 2

Picture 3

Picture 4
Congratulations!
The project is completed. You should see the NeoPixels changing colors.
On Picture 1 you can see the complete Visuino diagram.
Enjoy the colorful lights.
Also attached is the Visuino project, that I created for this Tutorial. You can download and open it in Visuino: https://www.visuino.com
Credits
Related products


Leave your feedback...