
All In One Led Light

Made by mahmood_ul_hassan / Home Automation / Lights / Sensors / IoT
About the project
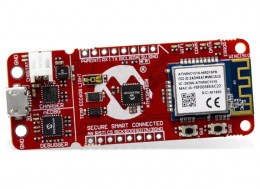
Built Smart LED light with auto ON/OFF, brightness control and night mode using Microchip AVR iot WG development Board with Open Weather Maps and local time
Project info
Difficulty: Moderate
Platforms: Atmel, Google, Microchip
Estimated time: 1 day
License: MIT license (MIT)
Items used in this project
Hardware components


View all
Story
Built Smart LED light with auto ON/OFF, brightness control and night mode using Microchip AVR iot WG development Board with Open Weather Maps and Local Time based control.
With brightness control feature we can easily turn the same light into night light. Open weather maps is used to get local weather information along with sunrise and sunset time to enable the auto ON/OFF the light. INA219 is used to monitor the current comsumption at any time.
In this projecy AC-DC constant current LED driver is used to provide brightness control through out the 8 bit PWM range.
The onboard light sensor is used to continously monitor the room light and accordingly LED light intensity is varied instead of simply turning ON the LED the light and maintain the constant light level in the room.
Sunset time help indeciding when to stop adjusting the LED brightness and simply turn it on at FULL or user adjustable brightness level.

Create new sensor project using your own Google cloud account and deploying a live UI to Firebase (Help: AVR-IoT User Guide or AVR-IoT Quick Start).
Initalize the TCA0 timer into 8-bit Split mode and set the PD4 pin as output. The TCA0 clock input should be atleast "TCA_SPLIT_CLKSEL_DIV2_gc"otherwise I was getting flickering when adjusting the LED brightness. If using easyPWM library then initlize PWM as shown below;
- easyPWM_init(SYSCLK_DIV_2);
WINC1500/1510 wifi module has builtin SNTP feature with time keeping and it is already implemented in this example and we use that feature to check if its sunrise or sunset time. SNTP time update details can be found in "static void wifiCallback(uint8_t msgType, void *pMsg)" function under "case M2M_WIFI_RESP_GET_SYS_TIME" in "cloudwifi_service.c" file.
- case M2M_WIFI_RESP_GET_SYS_TIME: {
- tstrSystemTime *WINCTime = (tstrSystemTime *)pMsg;
- struct tm theTime;
- // Convert to UNIX_EPOCH, this mktime uses years since 1900 and months are 0 based so we
- // are doing a couple of adjustments here.
- if (WINCTime->u16Year > 0) {
- theTime.tm_hour = WINCTime->u8Hour;
- theTime.tm_min = WINCTime->u8Minute;
- theTime.tm_sec = WINCTime->u8Second;
- theTime.tm_year = WINCTime->u16Year - 1900;
- theTime.tm_mon = WINCTime->u8Month - 1;
- theTime.tm_mday = WINCTime->u8Day;
- theTime.tm_isdst = 0;
- set_system_time(mktime(&theTime));
- }
- break;
- }
Now modify the "SENSORS_getLightValue(void)" function in "sensors_handling.c" to get as smooth as possible sensor readings. Without these modification TEMT6000 reading varies alot and it can cause LED flickering.
Replace this:
- uint16_t SENSORS_getLightValue(void)
- {
- return ADC_0_get_conversion(LIGHT_SENSOR_ADC_CHANNEL);
- }
with this:
- uint32_t ADC_0_measurement=0;
- uint8_t ADC_0_samples=10;
- uint8_t ADC_SAMPNUM=64;
- uint16_t SENSORS_getLightValue(void)
- {
- ADC_0_measurement = 0;
- for(int i=0; i<ADC_0_samples; i++){
- ADC_0_measurement += ADC_0_get_conversion(LIGHT_SENSOR_ADC_CHANNEL);
- }
- float result = ADC_0_measurement;
- result /= (ADC_0_samples * ADC_SAMPNUM);
- return (uint8_t)result; // easily usable value for PWM duty cycle control
- }
Also modify these line in "ADC_0_init()" function in "adc_basic.c" as shown below:
- ADC0.CTRLB = ADC_SAMPNUM_ACC64_gc; /* 64 ADC sample */
- ADC0.SAMPCTRL = 0x8 << ADC_SAMPLEN_gp; /* Sample length: 0x8 */
- ADC0.CTRLD = 1 << ADC_ASDV_bp /* Automatic Sampling Delay Variation: enabled */
- | 0x0 << ADC_SAMPDLY_gp /* Sampling Delay Selection: 0x0 */
- | ADC_INITDLY_DLY16_gc; /* Delay 16 CLK_ADC cycles */
Create new open weather map account and get API to get weather data along with sunrise, sunset time for automatic turn on the Low power mode by turning ON the LED at full power.
- http://api.openweathermap.org/data/2.5/weather?q=City,XX&appid=XXXXXX API KEY XXXXXXXX
Here replace "city,XX" with your own city name and XX country code. Also replace the "XXXXXX API KEY XXXXXXXX" with default or generated api key.
Newly created account and API key will take some (few hours) setup time. You can test the above link in your browser to find out if your account and api key is setup or not. If API key is not setup yet then you will see error like shown below.
When API key is setup and then you will see this by visiting the above mentioned link.
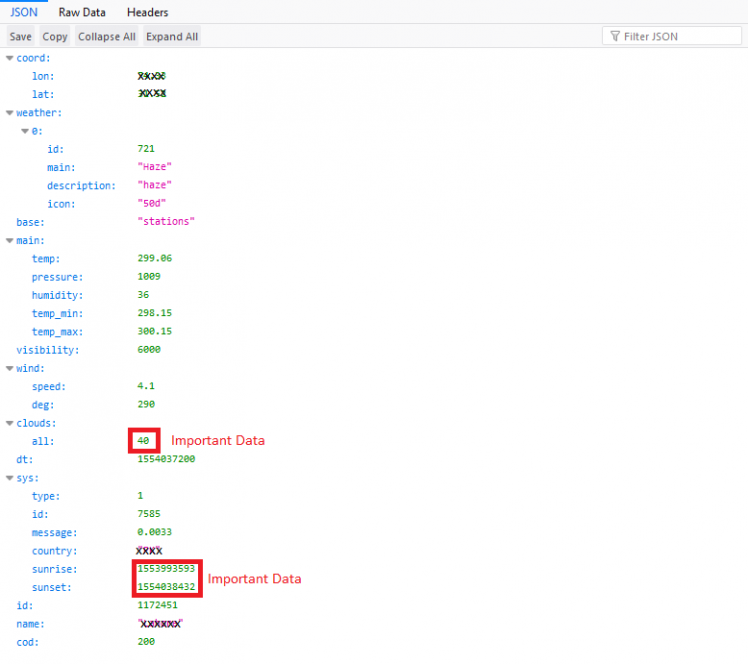
Now we can add the details of open weather map account into our account to get the local sunrise, sunset and latest clouds information. (other data can be useful i.e: out door and indoor temperature and humidity comparison OR built a weather display etc).
- char *server = "api.openweathermap.org";
- char *apiKey = "XXXXXXXXX API key XXXXXXXXX";
- char *cityNames[] = {"CITY,XX"};
- char *currentWeather = "GET /data/2.5/weather?";
We can use the above data to send a TCP/IP GET request and pass on the received data to "parse_OWMdata" for further data processing.
Parse OWM data to assign sunrise and sunset time to these global variables using function given below
- uint32 t_sunrise;
- uint32 t_sunset;
- void parse_OWMdata (uint8_t *payload) {
- // char payload[]="{"coord":{"lon":XX.XX,"lat":XX.XX},"weather":[{"id":721,"main":"Haze","description":"haze","icon":"50n"}],"base":"stations","main":{"temp":295.51,"pressure":1010,"humidity":47,"temp_min":294.15,"temp_max":297.15},"visibility":5000,"wind":{"speed":2.6,"deg":260},"clouds":{"all":40},"dt":1554046200,"sys":{"type":1,"id":7585,"message":0.0048,"country":"XX","sunrise":1553993593,"sunset":1554038432},"id":1172451,"name":"City","cod":200}";
- char *sunrise = ""sunrise":";
- char *sunset = ""sunset":";
- char *subString;
- char *resString;
- if ((subString = strstr((char *)payload, sunrise))) {
- int i = strlen(sunrise);
- int j=0;
- while (subString[i]!= ','){
- resString[j] = subString[i];
- j++;
- i++;
- }
- resString[j]='�';
- t_sunrise = atoi(resString); //global variable
- }
- if ((subString = strstr((char *)payload, sunset))) {
- int i = strlen(sunset);
- int j=0;
- while (subString[i]!= ','){
- resString[j] = subString[i];
- j++;
- i++;
- }
- resString[j]='�';
- t_sunset = atoi(resString); //global variable
- }
- }
Replace following line in "receivedFromCloud()" function in "main.c" to turn ON or OFF the light using cloud, as shown below;
- /* Replace this Line */
- // LED_holdYellowOn(subString[strlen(toggleToken)] == '1');
- /* with this Line */
- led_status=(subString[strlen(toggleToken)] == '1')? 1:0;
Modify the "sendToCloud()" function in "main.c" to store led current power consumption and outdoor weather (cloud) data as shown below;
- void sendToCloud(void)
- {
- static char json[70];
- // This part runs every CFG_SEND_INTERVAL seconds
- int rawTemperature = SENSORS_getTempValue();
- int light = SENSORS_getLightValue();
- /* measuring only LED current with digital and power ground isolation */
- int led_power = INA219_getPowerValue();
- /* clouds data to estimate outdoor natural light availability */
- int OWM_clouds = OWM_getCloudValue();
- int len = sprintf(json, "{"Light":%d,"Power":%d,"Clouds":%d,"Temp":"%d.%02d"}", light, led_power, OWM_clouds, rawTemperature / 100, abs(rawTemperature) % 100);
- if (len > 0) {
- CLOUD_publishData((uint8_t *)json, len);
- LED_flashYellow();
- }
- }
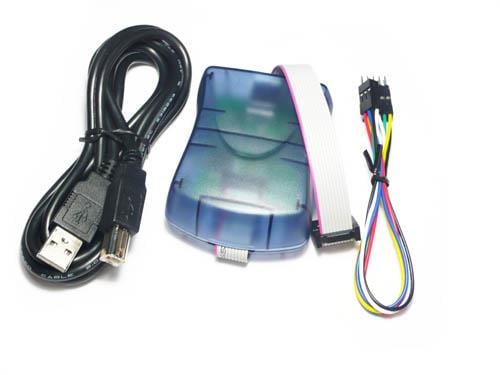
Final Assembly:

s

Additional Help Sources:
OpenWeatherMap: Basic Guide, API Reference.
WINC 1510 SNTP: ASF WINC components documentation and Tutorial How to read display and set ATWINC1500 system time and WINC1500 Software Design Guide. (Already implemented in Sensor Node example)
IRF520: Datasheet.
MT3608: Datasheet.
Schematics, diagrams and documents
Credits
mahmood_ul_hassan
Electronics Engineer with specialization in Robotics Engineering, seven years of experience in electronics research and development. I worked mostly on designing custom labview based automatic test and measurement equipment. Hobbyist, ARM enthusiast, DIY maker
Related products


Leave your feedback...