
Webhook From Particle Photon To Thigspeak

Made by anas / Communication / IoT
About the project
Here explains how to create a webhook to read data in Particle event and visualize it graphically in thingspeak.com.
Project info
Difficulty: Moderate
Platforms: MATLAB, Particle, ThingSpeak
Estimated time: 5 hours
License: GNU General Public License, version 3 or later (GPL3+)
Items used in this project

Story
In one of my old blog post we already had a introduction about the Particle IoT platform. As we discussed there particle events have many application and can be integrated to many other IoT services like webhooks, Thingspeak, IFTTT, Ubidots, etc. In this post I am going to share that how to create a webhook to thingspeak from Particle. It is very simple, actually we are just using the Particle event (particle.publish) here. No tactical coding is needed to send data to thingspeak from particle using webhook. For demo purpose i am just showing how to visualize varying analog voltage graphically in Thingspeak. Here I am using a potentiometer to change the analog voltage. You can change it to any other sensor and visualize data graphically. Even you can embed this graph into your personal site.
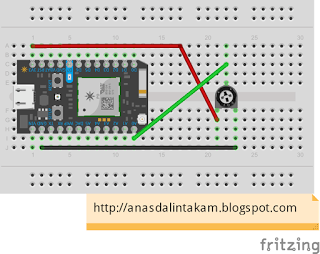
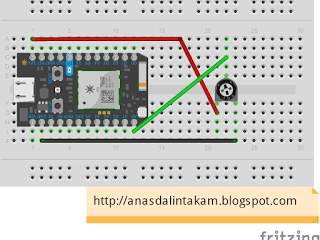
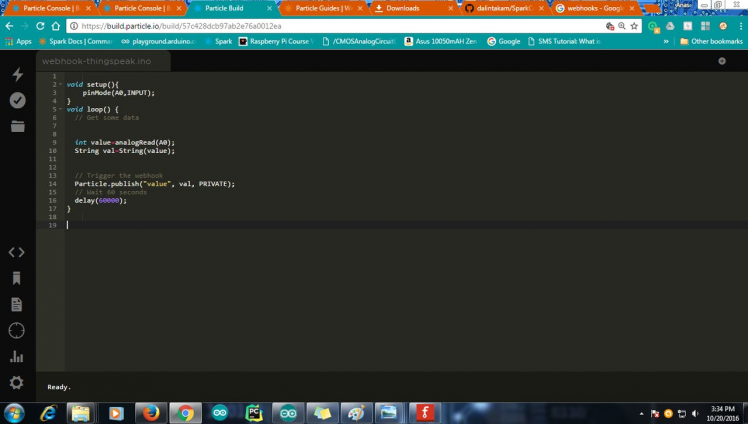
Wire up your Particle Photon as shown in the above circuit. Then open Particle Web IDE and upload the below code to your Photon. The code is simple it is just publish an event which is publishing the analog voltage on pin A0 in every 1 minute.
 void setup(){
pinMode(A0,INPUT); }
void loop() {
 // Get some data
int value=analogRead(A0);
 String val=String(value);
// Trigger the webhook
 Particle.publish("value", val, PRIVATE);
 // Wait 60 seconds
 delay(60000);
 }
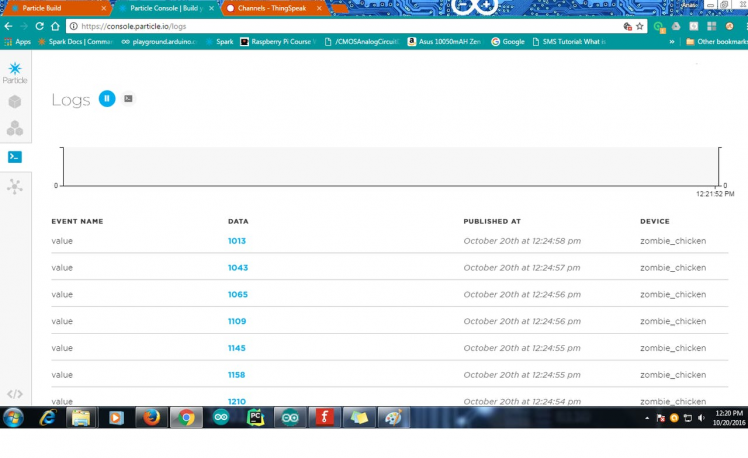
Now we have published an event named "value". We can see the updates of this event in particle console.
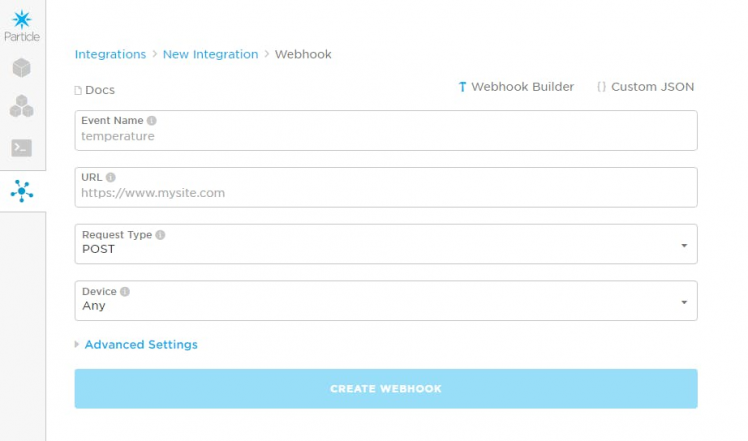
Now we can create new integration. For that select new integration in console and select webhook:
You can see the above screen. Now we have to create a channel in thingspeak and fill the data to above form. Now open thingspeak and create a new account if you are new to thingspeak. Then create a new channel and note the channel API:

Now we can fill the webhook form in particle console. Fill the boxes like below:
- Event Name=value
- Request type = POST
- Device = Your device name
Now press advance setting tab and fill the boxes
api_key: YOUR_API_KEY
field1: {{PARTICLE_EVENT_VALUE}}
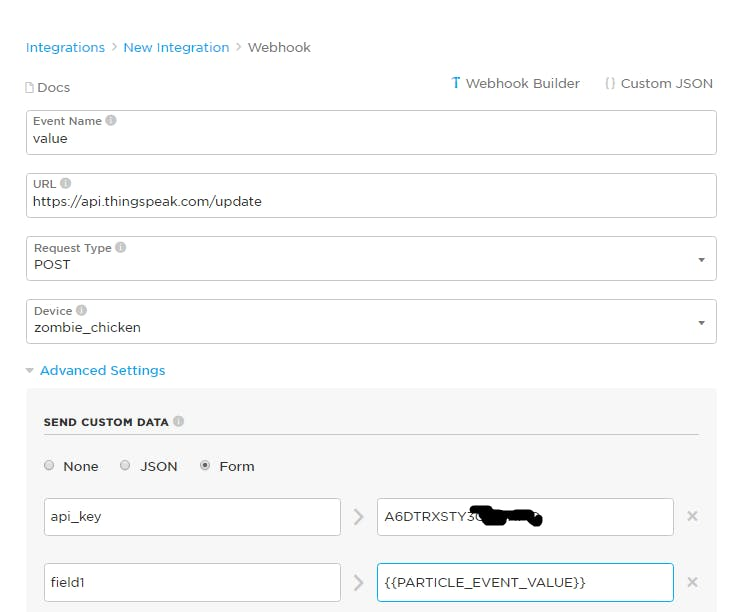
Now the webhook to thingspeak is created. Now you can see graphical representation of your sensor values in thingspeak.
1 / 2

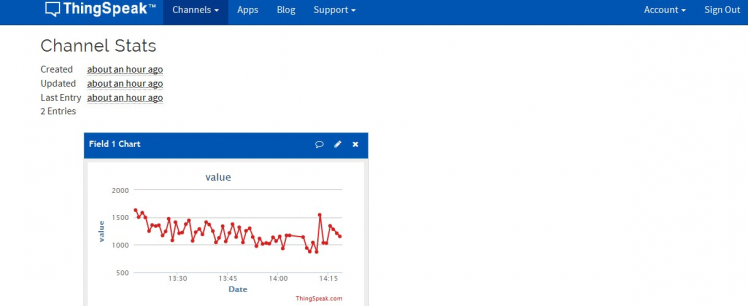
You can also embed the graph in your site also. You can find more info from my blog wiring it my way.
Schematics, diagrams and documents
Credits


Leave your feedback...