
Use Arduino To Control Max 8: Receive Data From 16+ Sensors

About the project
Max is a visual programming language that is a little easier to get your head around for prototyping projects. Being able to use an Arduino to control it unlocks all sorts of new project possibilities!
Project info
Difficulty: Moderate
Platforms: Arduino
Estimated time: 1 hour
License: GNU General Public License, version 3 or later (GPL3+)
Items used in this project
Hardware components

Software apps and online services
Story
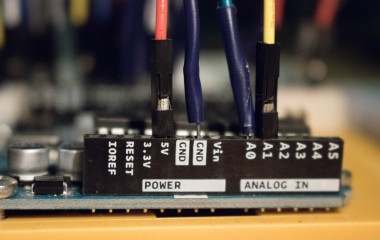
Over the past few posts, I’ve designed an analogue user interface with 16 potentiometers outputting a number between 0 and 1023 to the Arduino through two multiplexers. Now what I want to do is take this data and use it for something purposeful, eventually the ‘Markov Sequencer’!
The first step is to decide which program I want to use. I’m still relatively fresh to coding, so I thought it was sensible to do the more complex elements of this project in Max. The equivalent coding in Arduino would be significantly more time consuming to write and learn from scratch. Using Max also means that I can turn this device into a patch for Ableton using Max for Live.
One negative of this choice is that the Arduino will always have to be plugged into a computer running this Max patch, taking away from the standalone nature of the device I was envisioning. In the future, if I particularly like this design and am more comfortable with programming, I could try to recode it using Arduino.

The Arduino Code
The Arduino code, detailed in my last post and video, sends each potentiometer output to the serial monitor with a space between them. Once all 16 have been read, a carriage return (enter) indicates to the computer that it has reached the end.
Opening the serial monitor in Arduino before/while using Max will mean Max won’t read the data, as only one program can use the COM port at a time (Watson, 2019). This was a big point of confusion for me as I instinctually wanted to open the Arduino serial monitor every time there was an issue to check whether the information was coming in.
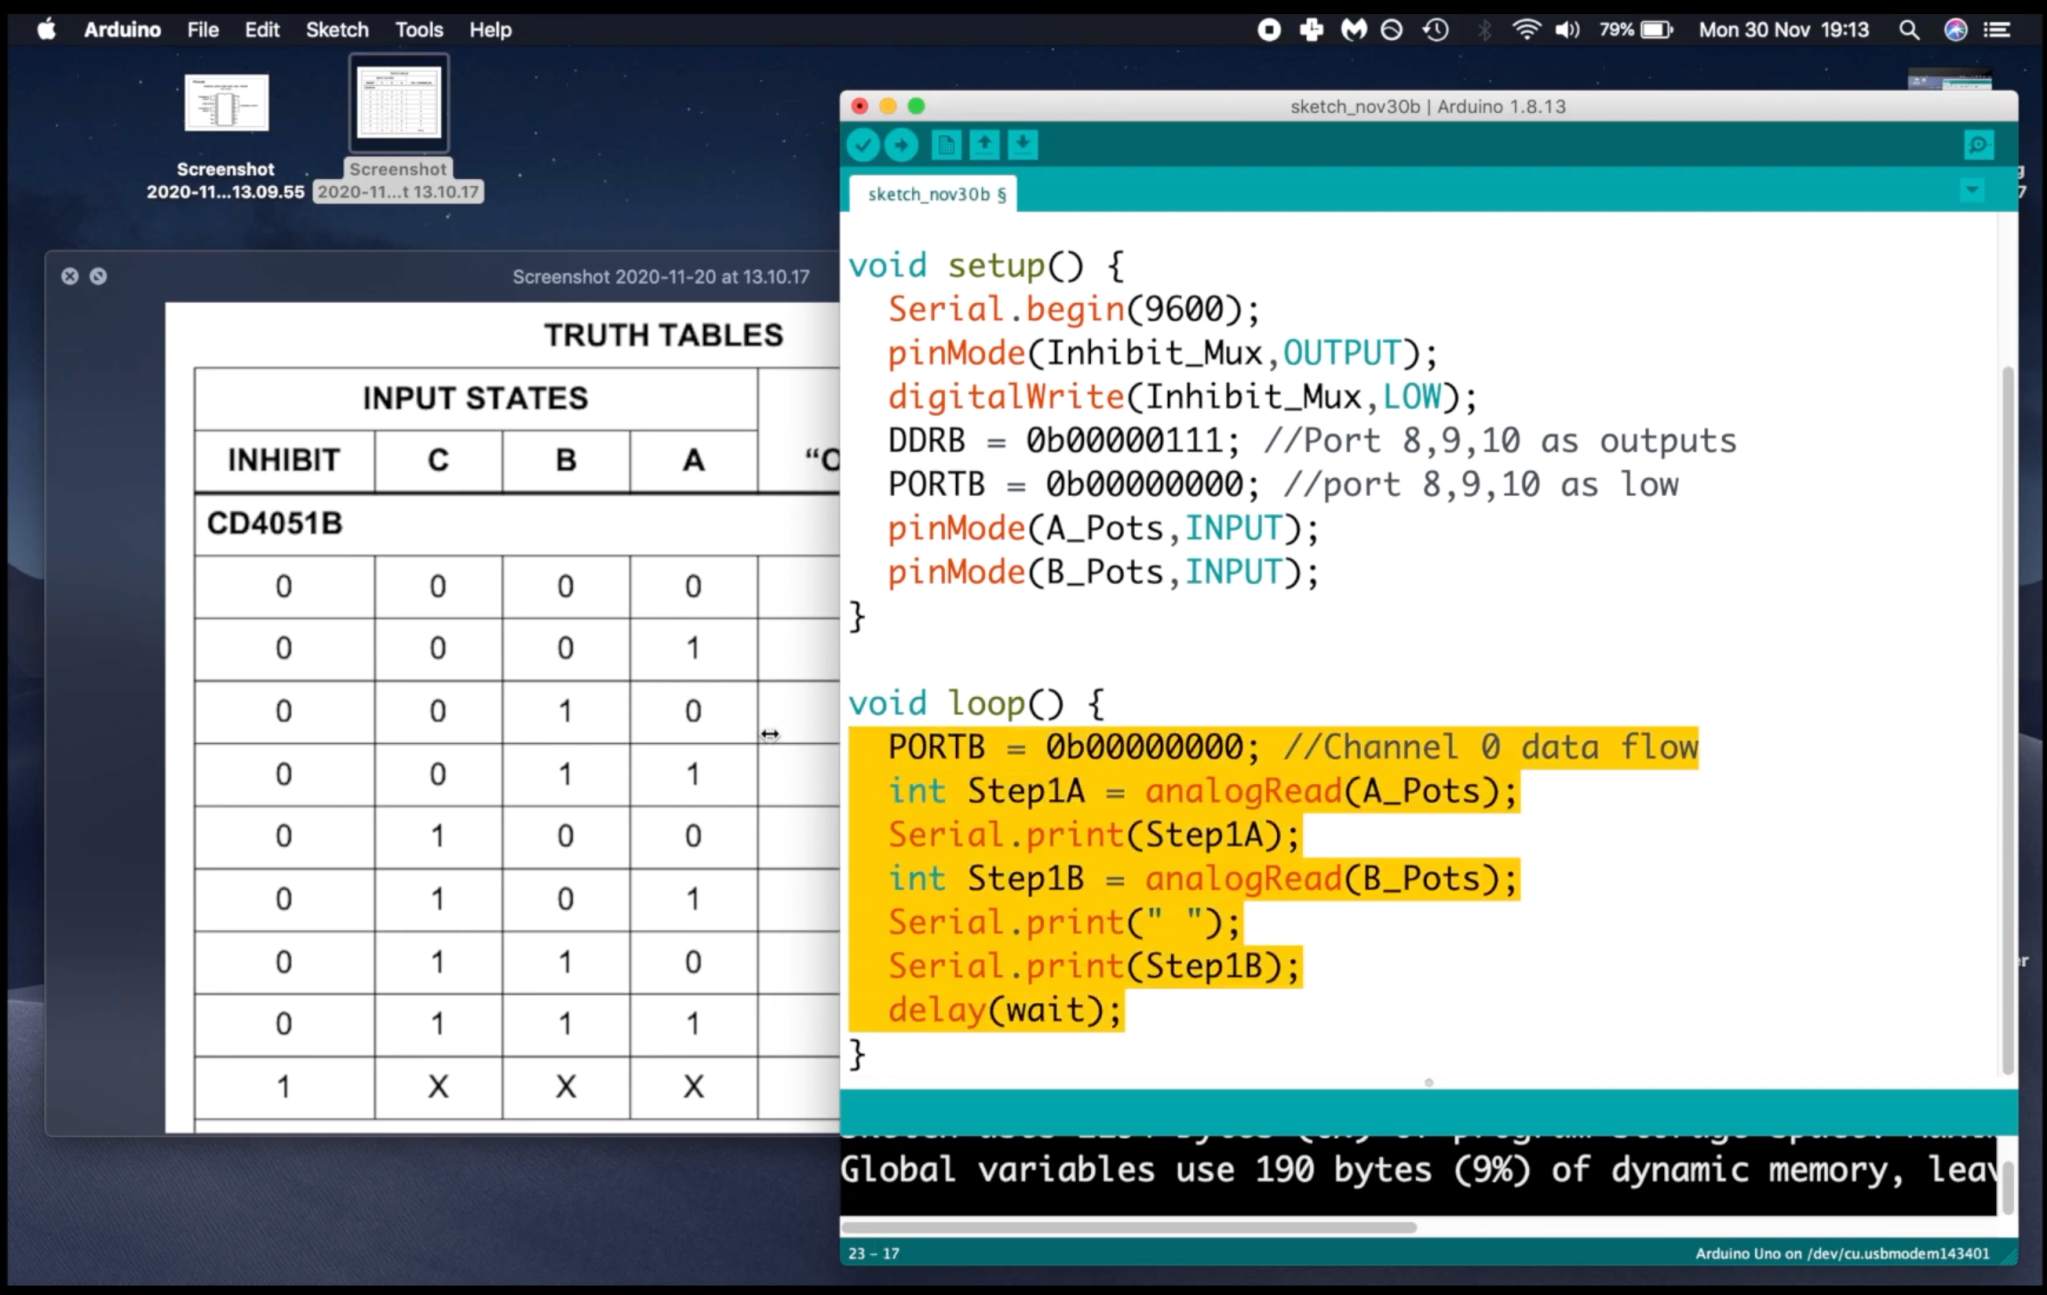
Part of the Arduino code i’m using to feed the Max patch
The Max Patch
This patch is heavily based on one shown in Programming for Peoples tutorial (Mckellar, 2016), but I have adapted it to work for 16 multiplexed inputs coming in as a list. I’ve also made a comprehensive video tutorial explaining the information in this article if you’d rather listen than read.
Serial Object
The first step is to find which port the Arduinos serial data is on. There is an aptly named ‘serial’ object which does that.
Connecting a print message to the ‘serial’ object’s hot input shows a list of available ports in the max console – my Arduino shows on port C, but this changes depending on your set up.
To link Max to a serial port, type the correct port number and baud value into the serial object.

ASCII
Arduino sends out data in ASCII format – a system where each character is converted into a string of at least seven binary numbers (Scott, 2013); upper and lower case, punctuation, and in this case numbers. The Arduino uses UTF-8 ASCII format – which is 8 bit, not 7 bit – but this still isn’t the format that Max expects to work with.
Metro Object
A ‘print raw’ object and a button connected into the ‘serial’ object prints directly to the Max console – meaning you can see the ASCII information coming in. There are, for example, a lot of 32s in this list representing spaces.

To avoid having to click a button every time, a ‘metro’ (metronome) object and a toggle can be used to send bang messages through the serial object repeatedly. This means a steady stream of values will print into the Max Console until the ‘print raw’ object is deleted (as the numbers speeding past get pretty annoying!).
Sel Object
One important ASCII string is 13 10, which represents a carriage return. The code asks Arduino to output carriage returns after all 16 inputs have been read.
Using a ‘sel’ object with the arguments 13 10 will separate the data into lists of 16 values. When the ‘sel’ object reads 13 10, or a carriage return, it outputs a bang from its left output and outputs the rest of the data from it’s right (sel Object Reference – Max 7 Documentation, n.d.). Combining these into a group creates a list of the ASCII characters between carriage returns, a little closer to my required output.
Zl Group Object
Connecting the left and right outputs of the sel object into the hot input of a ‘zl group’ object creates this group. But it can’t do anything about the fact that the numbers are in ASCII.

The ‘zl group’ object also needs a number argument specifying how long the group will be, and using the improbably high number of 1000 means that the list will always be read in full (Mckellar, 2016).
Itoa Object
There is an object called ‘itoa’ in Max. It stands for integer to ASCII – exactly what we need here!
According to the documentation, the ‘itoa’ object ‘converts a stream or list of up to 256 integers into a symbol’ (itoa Object Reference – Max 7 Documentation, n.d.). It recognises integers into its left input as in UTF-8 ASCII Unicode format, translates them into the correct characters, and outputs them as a symbol.
The values which it outputs are between quotes, signifying that they are in symbol format, so there is still one more object to use.
Fromsymbol Object
The object which converts from symbol has a pretty handy name, it’s just ‘fromsymbol’. ‘fromsymbol’ reads the input and converts it into integers, by default using the space as the separator. This is why I have used a space between each number in the Arduino code.

Unjoin Object
The final bit of coding here is to ‘unjoin’ this list into separate integer variables. Neatly enough, there is an ‘unjoin’ object I can use, giving an argument of 16 because there are 16 pieces of data to split. If I then connect a number box to each output, it creates a visual representation of the potentiometer rows on the breadboard.

In the above image, I have also included one inlet and 16 outlets so that it can be used as a patcher object within any Max project. If you copy and paste the code included into Max you can mess around with this yourself!References:
McKellar, M., 2016. MAX Msp 7: Sending Data From Arduino Into Max. Available at: https://www.youtube.com/watch?v=6bT3G4Mep7E [Accessed 26 November 2020].
Watson, R., 2019. How To Send And Receive Data Between An Arduino And Max/MSP. [online] Maker Pro. Available at: https://maker.pro/arduino/tutorial/how-to-send-and-receive-data-between-an-arduino-and-maxmsp [Accessed 26 November 2020].
Docs.cycling74.com. n.d. Sel Object Reference – Max 7 Documentation. [online] Available at: https://docs.cycling74.com/max7/refpages/sel [Accessed 30 November 2020].
Docs.cycling74.com. n.d. Zl.Group Object Reference – Max 7 Documentation. [online] Available at: https://docs.cycling74.com/max7/refpages/zl.group [Accessed 30 November 2020].
Docs.cycling74.com. n.d. Itoa Object Reference – Max 7 Documentation. [online] Available at: https://docs.cycling74.com/max7/refpages/itoa?q= [Accessed 30 November 2020].
Docs.cycling74.com. n.d. Fromsymbol Object Reference – Max 7 Documentation. [online] Available at: https://docs.cycling74.com/max7/refpages/fromsymbol?q= [Accessed 30 November 2020].
Scott, T., 2013. Characters, Symbols And The Unicode Miracle – Computerphile. [online] Available at: https://www.youtube.com/watch?v=MijmeoH9LT4 [Accessed 3 December 2020].
Code
Credits
Related products


Leave your feedback...