
The Makersign

Made by nwalker4483 / Art / Lights
About the project
Play any animation or game on a custom shaped LED sign
Project info
Difficulty: Moderate
Estimated time: 1 day
License: GNU General Public License, version 3 or later (GPL3+)
Items used in this project
Hardware components


Story
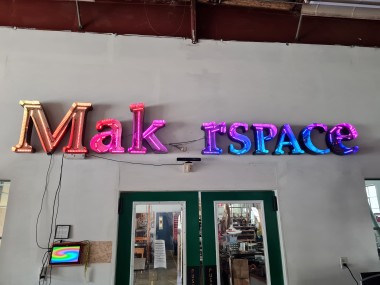
The Maker sign is an old part of my maker space. The letters were scavenged from an old warehouse that one of the members had access to and we repurposed it into our own. Initially it just sat stagnant as a normal sign but when another Maker, Ben started to put lights in the sign I got the idea for playing animations on it. And it was at a time where I was super stressed about another project so I figured it would be nice to take a week of and figure this out instead.
I'm definitely not the creative type so I figured it would be easier to make a platform that could play any animation than figuring out an animation that would look good and just making it once. The concept for this was pretty simple but implementation and making it user-friendly was a little bit eeh.
We start by defining the start and stop vector for every LED strip within the sign and then just sample at the appropriate in between points for an LED color and send that to the strip. To manage all these positions I have a game that saves the positions to a file that you can modify there or drag and drop them within the UI. The purpose behind using pygame was I figured it would be the easiest way to allow people to create new interactive experiences since I already had the Kinect there.
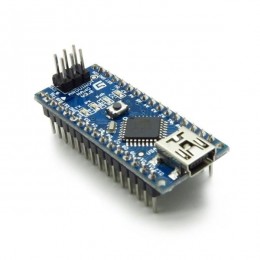
For actually controlling the LEDs each symbol within the sign contains in Arduino Nano which is Daisy Chained to the next symbol in the sign. Whenever in Arduino receives a command it'll check the second byte of the command and if it's zero it'll execute it and if it's not it'll decrement the byte and pass it down the chain. By just running this at really high speeds allows it to reach some really smooth frame rates (60 +). There are some other trick to actually getting it to update smoothly but I won't go onto those here as there addressed in the "documentation". Once the Arduino's are flashed and the python dependencies are installed you'll have a fully functional addressable LED sign.
So now came the issue of actually playing stuff on the LEDs. I had an internship in NY a few years ago and one of the art pieces that they had there was this huge black and white board and whenever you got close to it different tiles would flip to make a mirror effect so I figured I could do the same thing on the sign. The Xbox Kinect will take in a depth frame and feed that into a background subtraction model that slowly figures out which things are new in the frame. I can then draw that frame onto a Surface which the LedSign object will then sample from.
The code is in desperate need of optimization but I ended up with a really fun interactive LED sign that you can play games on or play video files to. And hopefully somebody else can take it further.
Schematics, diagrams and documents
Code
Credits
Related products


Leave your feedback...