
The Ai Mood Stabilizer

Made by 8BitsAndAByte / 3D Printing / Artificial intelligence / Health / Voice
About the project
We accepted the challenge to create a Google AIY vision and voice enabled device to detect a person's mood and enhance it. We’ll be toying with your emotions, what could possibly go wrong?
Project info
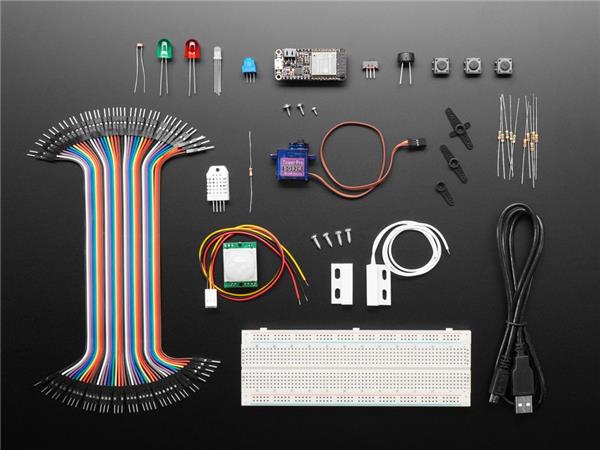
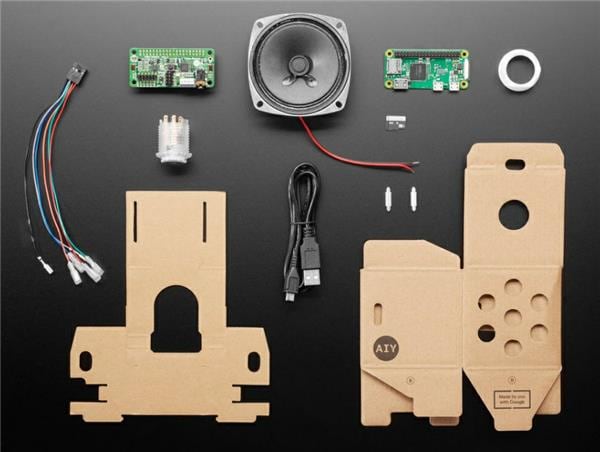
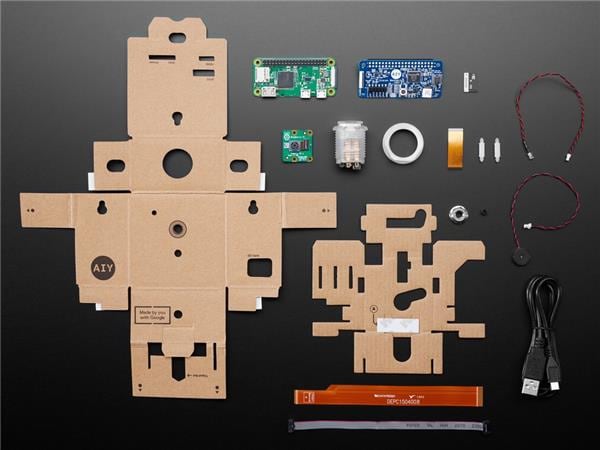
Items used in this project
Hardware components

View all
Hand tools and fabrication machines
Story
Introduction
Our project is all about stabilizing your mood. The idea is to detect your current emotional state using a camera. To get your mood back to neutral we will use a speaker to tell you facts, either fun or depressing ones. For example, if you're not feeling well, you might hear a fun fact like “cows have best friends”. If you're in an excellent mood, you might hear something along the lines of “everything you love will die”.
More information about The AIY Vision Kit Challenge Contest can be found here on the Electromaker website.
Project Video
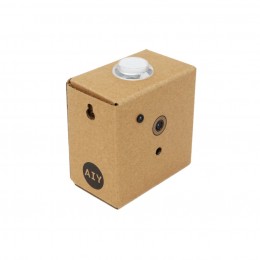
Google AIY Voice & Vision Kits
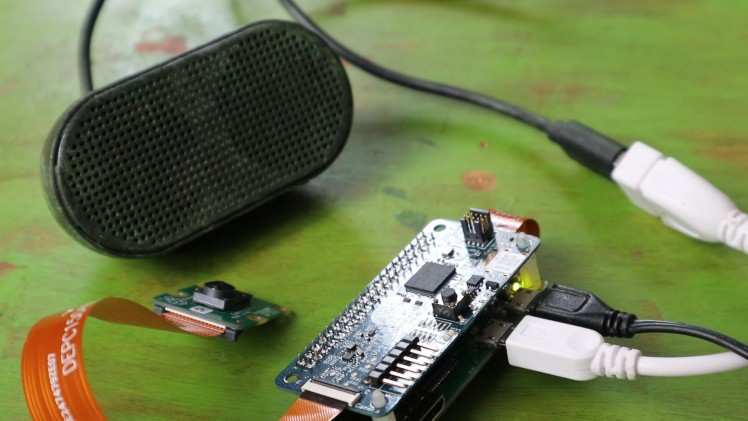
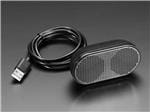
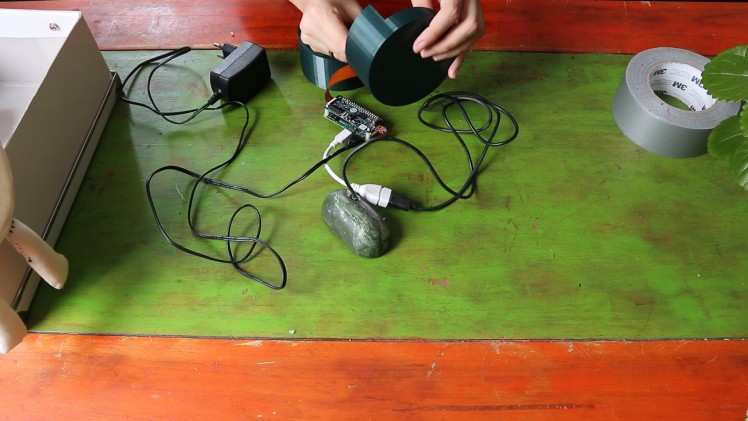
So, first things first, we’ll need to assemble our hardware. We initially set up the Voice Kit and added the camera that was part of the Vision Kit, but this setup didn’t work for our project idea. We ended up using the Google AIY Vision Kit and adding a separate USB speaker. To add a USB speaker to the Raspberry Pi Zero you’ll need a micro USB to USB adapter.
To set up the Google AIY Vision Kit, you can follow this excellent tutorial provided with the kit.
Face and Mood Detector

On to the next step: detecting a person’s mood. This might seem like an enormously impossible task, but the AIY Vision Kit comes with a demo that detects faces and provides a “joy score” for each face. Pretty neat, right?
Follow the steps in this tutorial to run the face detector demo.
Mood Stabilizer
Now we can detect someone’s mood, it’s time to stabilize it. We’ll use the demo code from the face detector mentioned above as our starting point and tweak it to make it fit our needs.
In short, the code will do the following:
Import files containing happy and sad facts (see the next step for creating these files).
Check each frame of the camera input for faces.
If a face is found, it will be given a joy score.
If the score is high, it means the person is happy and the device will say “happy”. Next, it will pick a random sad fact and say this using the USB speaker.
If the score is low, it means the person is sad and the device will say “sad”. Next, it will pick a random happy fact and say this using the USB speaker.
The code for the mood stabilizer is added to this article.
Happy and Sad Facts
To add some happy and sad facts to our project, we’ll make two JSON files. One will be filled with joyous facts, and the other one with miserable ones.
If you haven’t worked with JSON before, W3Schools has a pretty good introduction.
You can use the two files added as a template.
WARNING! Please be wary when searching for sad facts on the internet, as some of them are really, really sad. We recommend first searching for some sad ones and then cheering yourself up by reading a lot of happy facts.
Once your files are complete, copy them onto the Raspberry Pi. You’ll need to refer to the name and the location of these files in the code mentioned in the previous step, so it will load the correct files. To do this, adjust the path in the data setup part to go to your newly created files. It might look something like this: '/home/pi/Desktop/happyFacts.json'.
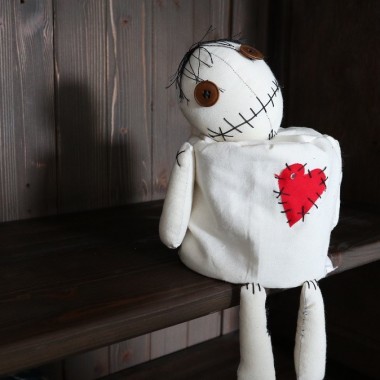
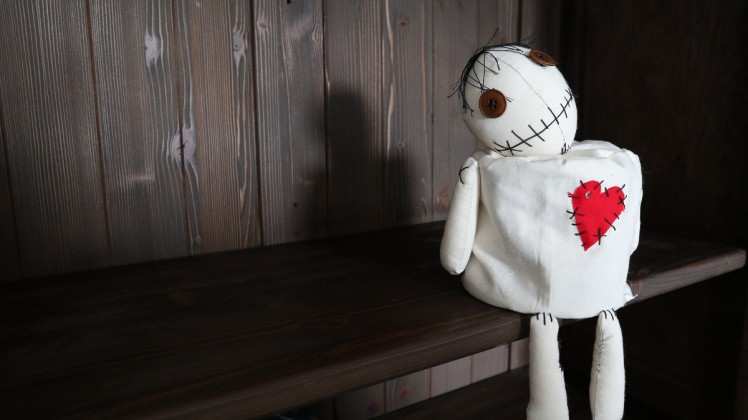
Voodoo Doll
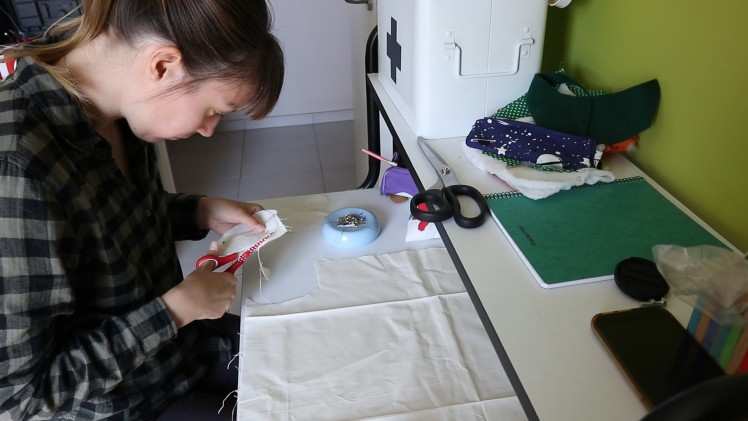
The electronic parts of the project seem to be working, but it doesn’t look the part just yet. Because we’re toying with your emotions, a voodoo doll seems fitting.
We don’t have too much experience with voodoo, so we’ll still need to make one. We found this briljant voodoo doll sewing pattern by MyLovelyHomeStudio on Etsy.
There are of course many ways to make a voodoo doll, so let your creativity roam free!
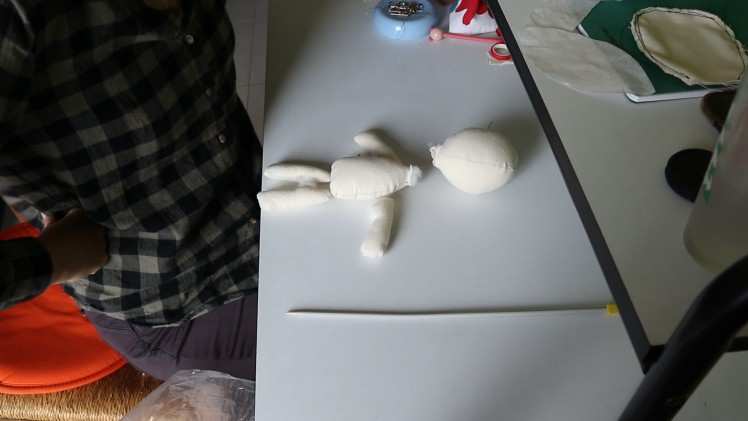
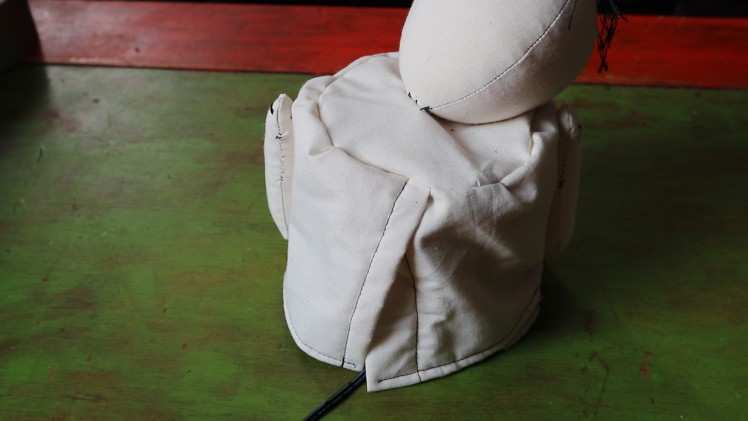
Voodoo Doll Body
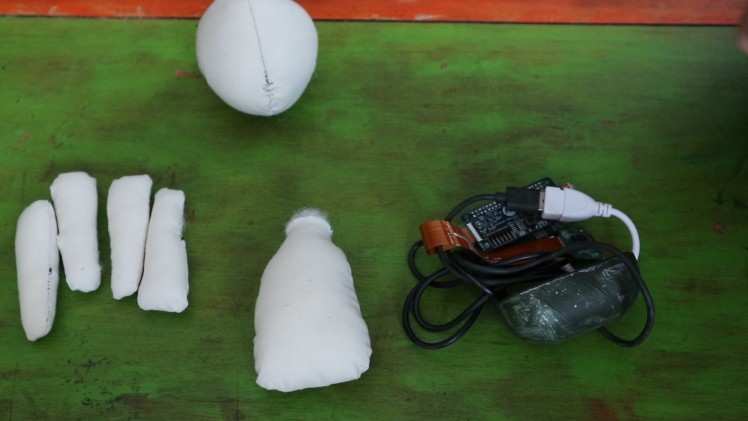
When sewing the voodoo doll pattern we realised a sad fact: the Google AIY Vision kit and the speaker don’t fit inside.
Happy fact: it’s a problem we can solve.
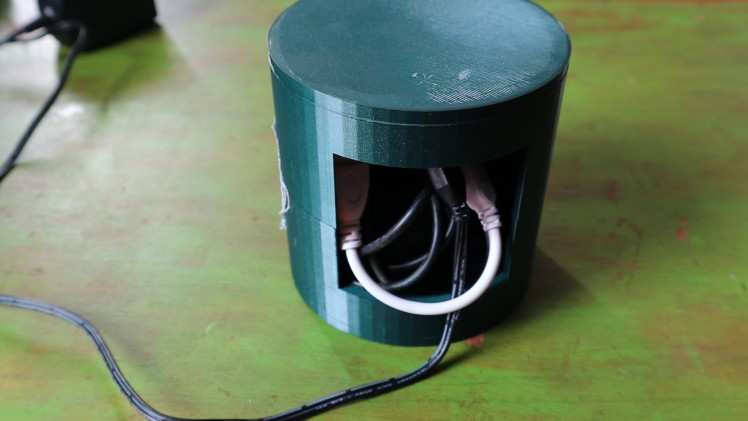
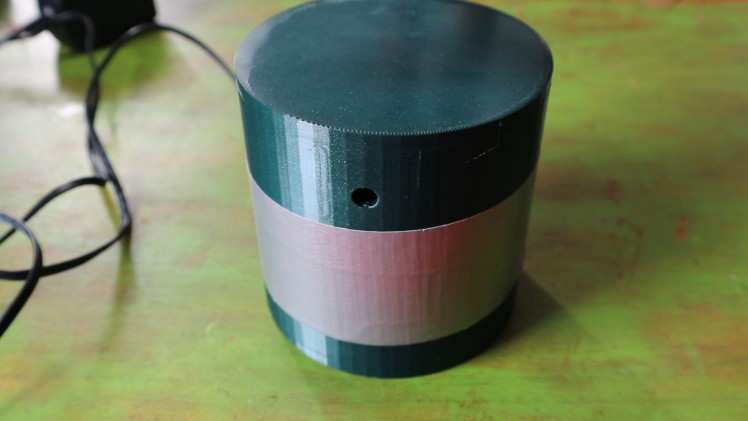
To fix the issue, we design and 3D print a cylinder shape that’s big enough for the components, with a special notch to hold the Pi Camera in place. Once done, we sew a cylinder shaped cover for it and attach the other voodoo doll elements.

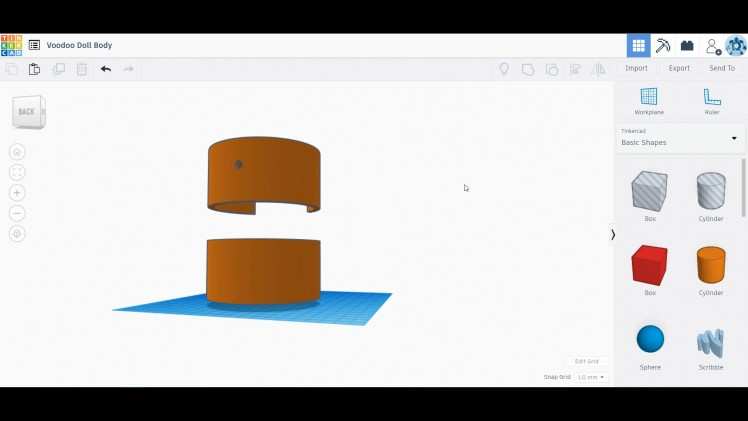
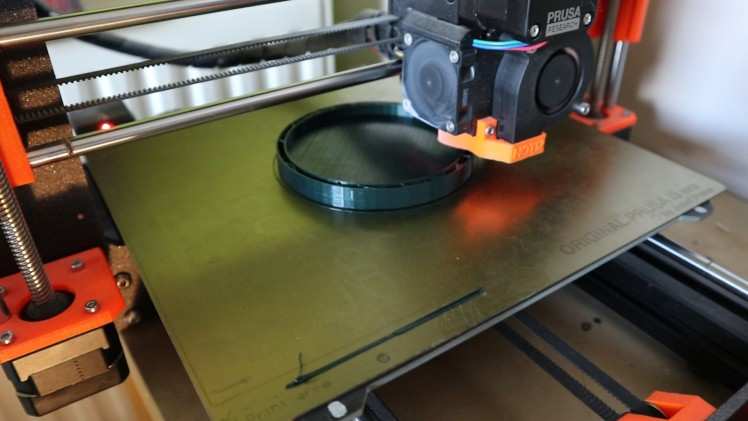
Tinkercad is a great free online 3D design tool you can use to design your container. You can use this Raspberry Pi Camera Stand by atleberg we found on Thingiverse to create the notch to hold the Pi Camera.
All the 3D models are added to this article, although you might need to adjust them depending on the size of your components.
To sew the cover, measure your 3D printed cylinder and roughly follow these directions on how to sew a round bolster pillow case. We chose to leave the seam in the back of the tube open, as well as half of the bottom circle, so the 3D printed case can easily fit inside. For the cover, we used the same fabric as the rest of the voodoo doll with an added layer of batting to make it softer. Feel free to give it your own twist!
Following the directions of the voodoo doll pattern, we can now add the arms, legs, head and heart to our creation.
Assembly
The time has come to assemble the final manipulation device. Put all the parts together and if things let go when they shouldn’t, add a bit of duct tape.
The very last issue to tackle is the placement of the camera. If you’ve opted for a fabric object to hold your hardware, you can use a hole punching tool to create a small hole in the desired spot. We punched a hole in the heart of the voodoo doll to obscure it a little bit.
You can use a soft object like a plastic straw (sorry turtles!), to go through the hole in the fabric and align it with the camera. If all goes well, your contraption can get a good look at the person in front of it. This can be rather fiddly and might take up a big chunk of your time. There must be a better way, but we haven’t thought of it just yet.
AI Mood Stabilizer
All that’s left to do is activate our voodoo creation and enjoy the ensuing chaos!

CAD, enclosures and custom parts
Code
Credits
8BitsAndAByte
We’re Dane & Nicole, two makers that create tremendously terrible tech, which we happily share with you on our channel! https://www.youtube.com/c/8bitsandabyte
Related products

Leave your feedback...