
Particle Home Mesh

Made by gusgonnet / Home Automation / IoT
About the project
Build thermostats, monitor sump pumps, water leaks, temperature, and pools. Let's see what we can do with Particle Mesh at home.
Project info
Difficulty: Difficult
Platforms: Adafruit, Blynk, ControlEverything.com, Particle
Estimated time: 2 weeks
Items used in this project
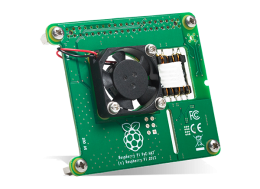
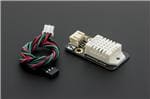
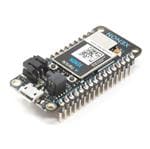
Hardware components


View all
Story
WHAT IS THE PLAN? The plan is to build a mesh connected home project.
Meet my Home Mesh project Meet my Home Mesh project The picture is coming from this Particle 101 video. I'll start with a Particle Ultimate Mesh Bundle and add as many nodes as needed:
What a useful bundle! What a useful bundle!

Particle has discontinued the MESH protocol on all its Generation 3 devices on January 2020. You can read more about the (sad) announcement here.
INTRODUCTION TO PARTICLE MESH DEVICES If you do not know already what Particle Mesh, Particle's 3rd generation of their development kits is, you are missing out. Read more on their site right away! David Scheltema describes it very well in his post here. Also, let me 'copy-pasta' some words from Jeffrey Lee's post here (thank you Julien for introducing me to that term, can't stop using it): A wireless mesh network is an infrastructure of nodes (a mesh topology) that are wirelessly connected to each other. These nodes piggyback off each other to extend a radio signal (like a Wi-Fi or cellular connection) to route, relay, and proxy traffic to/from clients. Each node spreads the radio signal a little further than the last, minimising the possibility of dead zones. It should be noted that not all wireless mesh solutions provide these benefits, but this is the complete list that is unique to Thread and Particle Mesh. Thank you Jeffrey and David for all the explanations! With Particle, you can have WIFI (with the Argon development kit) or cellular (Boron dev kit) connected mesh networks:
WIFI or cellular mesh networks WIFI or cellular mesh networks Boron, Xenons, Argons all can have different roles:
Mesh roles Mesh roles Here are all the devices I will be playing with:
My fleet of devices My fleet of devices And this is what I'm planning to build for my Mesh Home project: You need to start by having all your devices ALREADY CLAIMED to your Particle account. If you have not done so, go ahead and do it. The whole process will take you few hours and is described here. For the record, I updated all my devices to Device OS 1.3.0-rc.1. This a new spin on my Minimalist Thermostat here. It's hard to believe that my original project has been working at home non-stop for the last three and a half years, 24/7/365, with minimal interruptions (maybe I had to reset it twice?). The original project was based on a Particle Photon (a WIFI development kit) and a cheap four relay board. This time I'll be using an Argon (a mesh enabled WIFI development kit) and an NCD 4 relay board. I'll be using a DHT22 for sensing the temperature and humidity. Thermostat: wiring the relays Same as in the original project, wire relay1 (R1 in the drawing below), relay2 and relay3 to your HVAC wires. My HVAC uses 24 volts which is ok to handle. PLEASE CHECK IF YOURS USES A HIGHER VOLTAGE. IF THATIS THE CASE YOU NEED TO USE EXTREME CARE WHILE WIRING Everything over 40 volts can pose a danger to your health so: BE CAREFUL
HVAC wiring HVAC wiring Thermostat: wiring the temperature sensor The sensor I'm using is the popular DHT22. The DHT22 is a basic, low-cost digital temperature and humidity sensor. It uses a capacitive humidity sensor and a thermistor to measure the surrounding air, and spits out a digital signal on the data pin (no analog input pins needed). It's fairly simple to use, but requires careful timing to grab data. The only real downside of this sensor is you can only get new data from it once every 2 seconds. The connections are as follows: DHT22 pin 1 is Vcc <==> 3v3 on the Argon DHT pin2 is data <==> D5 on the Argon DHT pin 3 <==> leave disconnected DHT pin 4 <==> connect to GND on the Argon DO NOT FORGET to add a 4.7K - 10K resistor pullup on the data pin to Vcc. Note: I am using the rather old PietteTech library for it, since I had issues with the latest library. Thermostat: placing the temperature sensor I placed mine right on top of the not so smart previous thermostat:
Playing hide and seek with a DHT22 Playing hide and seek with a DHT22 Thermostat: firmware I'm a huge fan of finite state machines (FSM from now on) and I use them in almost all my projects now. The times I do not use one, I regret later! Check out my write-up on them if you are not familiar with state machines and how we can use them in our IoT projects. Now for the firmware, please open the folder minimalistThermostat with the Particle WorkBench. I used the library I ported from Arduino for the FSM, and the states for heating look like this:
thermostat states for heating thermostat states for heating The cooling states are identical to these. Here's the full picture, pardon the quality:
all the states of the thermostat all the states of the thermostat You can decide what units to use for the temperature with this boolean variable: Thermostat: mesh connection The thermostat will take the role of a GATEWAY in my home mesh network. See the Argon in the picture below? That's exactly the role.
My Home mesh network setup My Home mesh network setup This means the other devices (the Xenons) will connect to the Argon via the mesh protocol. They then will connect to the Particle Cloud via the Argon. So the Argon here acts as the Gateway for the mesh network, as well as being the brains of the Minimalist Thermostat. Thermostat: the mobile app For controlling my thermostat from my mobile I will be using Blynk. Blynk is a hardware-agnostic IoT platform with white-label mobile apps, private clouds, device management, data analytics, and machine learning. Sounds powerful enough? It is! It's also my favourite way of adding a mobile app to my personal projects, this one included. With Blynk you can design Drag-n-drop beautiful IoT apps in minutes. You can choose from a variety of pre-designed widgets to build native iOS and Android apps that control electronics, monitor sensor data, get notifications, and much more.
Blynk widgets are amazing Blynk widgets are amazing Control your hardware from anywhere in the world. Can't get better than that! Here's my mobile app:
The Blynk mobile app The Blynk mobile app With Blynk is easy to share the mobile app, just scan this code from inside Blynk after you install it on your device:
Scan with the Blynk app Scan with the Blynk app The mesh remote temperature sensor for the Minimalist Thermostat will be based on a Particle Xenon and a DS18B20. Temperature sensor: wiring Wiring a sensor like the DS18B20 couldn't be simpler. Here's the datasheet in case you need it. Connect it like this DS18B20 GND pin 1 is GND <==> 3v3 on the Argon DS18B20 GND pin 2 is DQ <==> D9 on the Argon DS18B20 GND pin 3 is Vdd <==> 3v3 on the Argon
The DS18B20 temperature sensor The DS18B20 temperature sensor Temperature sensor: firmware Please find the firmware under the tempSensor folder on the github repository. I am using the same firmware for two components of this mesh home project: for this remote sensor and for the pool sensor. Please open the folder with the Particle WorkBench. Hence, before building the firmware you need to make these lines look like this: You can also decide what units to use for the temperature with this boolean variable (default is degrees Celsius): After saving your changes, building and flashing, you can start playing with it. Temperature sensor: mesh connection Now that the Xenon is reading the temperature, what do we do with it? We send it to the Thermostat, which is also acting as the GATEWAY. Please note: the information can go through the gateway all the way to the Particle Cloud without us doing anything. In this case, we want to act on it, or show it on the mobile app, hence we send it via the mesh protocol to this mesh node, the Argon. The code on the Xenon is this simple line using a Mesh.publish: Now on the receiving end, we need to use a Mesh.subscribe. We setup the subscription on the setup() function (that runs every time the device boots up): We just setup a handler function, called meshTempSensorHandler(), so the code for that function looks like this: That's it! Mesh-gically, the temperature reading of the remote mesh sensor becomes available on another node (in this case the gateway node, but any node can subscribe to that information or topic). Now the variable meshTempSensorCurrentTemp contains the temperature, and I added a meshTempSensorLastHeardOf, a timestamp for every time we receive information from this node. This can help us tell if the node is alive, or even if the reading is recent. Temperature sensor: mobile app To show the information of the sensor on the mobile app, I added a couple of calls to the virtualWrite() function on the Blynk library. This is the Blynk way to send information to the app. Here are the lines that do just that: Here's the information on the Thermostat tab of the app:
The red block shows the mesh temperature readings on the Blynk mobile app The red block shows the mesh temperature readings on the Blynk mobile app Temperature sensor: extranodes Have in mind that once you have one node like this remote sensor, is trivial to have as many more and you need or like. One would need to change the mesh event name for a second remote sensor. This is the key: In our case, MESH_EVENT_DS18B20_SENSOR_X is the event node. You set up the extra nodes with X, Y, Z, etc event names and modify the subscribe handler on the gateway node. A little bit of work on the Blynk mobile app for presenting this new information and that's it! This will be a remake of my pool temperature monitor here. Still, the million dollar question is: what is the temperature of the water? That can be solved with a Xenon, a resistor and a thermistor. You have plenty of choices and here are two:
1 / 2 • The simple thermistor
The simple thermistor The more robust thermistor The simple thermistor is this one.The more robust one is this one. Please note that since the simple thermistor (the 10K Precision Epoxy Thermistor - 3950 NTC) is NOT manufactured to be used in contact with water directly, the lifespan of the sensor is around two summers. After that, the sensor will stop working and the readings will not make sense anymore. The more robust one will last you the whole life of your pool. Pool temperature sensor: wiring Connections are like this: the 10k resistor goes between 3v3 and A0 on the Argon the thermistor goes between A0 and GND on the Argon
pool thermistor connection pool thermistor connection Pool temperature sensor: firmware Please find the firmware under the tempSensor folder on the github repository. I am using the same firmware for two components of this mesh home project: the remote sensor and the pool sensor. You can open the folder with the Particle WorkBench. Hence, before building the firmware you need to make these lines look like this: You can also decide what units to use for the temperature with this boolean variable (default is degrees Celsius): Save your changes, build and flash, and you are ready to go. Pool temperature sensor: mesh connection Same as with the previous sensor, the code on the Xenon uses the Mesh.publish: Now on the receiving end, we need to use a Mesh.subscribe. We setup the subscription on the setup() function (that runs every time the device boots up): On the receiving end, things look almost the same as with the previous sensor, just that the handler is called meshTempSensorPoolHandler(). Pool temperature sensor: mobile app I added a tab on the Blynk mobile app:
Today is a hot day! Today is a hot day! Pool temperature sensor: extranodes Do you have a spa to monitor as well? Follow the same line of thought as in the extra nodes of the remote temperature sensor in the previous section. This is a complete rewrite of my Garage Commander. In this version I am using an FSM to keep track of the status of the garage. Here is a description of the states of the FSM:
the garage FSM the garage FSM Garage opener: wiring You will need two magnetic reed switches like this one here. Here is a picture of mine:
The magnetic reed switches The magnetic reed switches Once strategically located, these reed switches will tell the Xenon if the garage is open or closed. I placed the one that senses the closed position on top of my garage door, you can see it there:
Place the close reed sensor switch on top of your garage door Place the close reed sensor switch on top of your garage door I placed the one that senses the open position under the rail of the garage opener:
Open switch can go under the rail Open switch can go under the rail You can choose the most convenient locations for you and your garage door. Once installed, you wire the close sensor reed switch to D2 and GND and the open sensor to D1 and GND on the Argon. That's it for the sensors. Now for the Xenon to move the door, you need to find the place where the button pad is connected to the main unit. It will look something like this:
top right is the connection for our relay to more the garage door (on my garage unit!) top right is the connection for our relay to more the garage door (on my garage unit!) Wire that one to the featherWing power relay we'll be using in this part of the project. TIP: the garage door will move if you short circuit these connectors. BE CAREFUL! I used a FeatherWing tripler because I had one handy but you can use a doubler if you want:
the FeatherWing format is very practical! the FeatherWing format is very practical! Garage opener: firmware Time to flash the firmware! You can find it under the meshGarage folder. Please open the folder with the Particle WorkBench. Garage opener: mesh connection For the garage opener we have a different situation. The previous remote sensors were sending info to the gateway for displaying the temperature on the mobile app. Now, in order to control the garage from the mobile app, we need to set up a similar publish-subscribe mesh mechanism, but the other way around. Garage opener: mobile app
the Blynk tab for the garage opener the Blynk tab for the garage opener Garage opener: extra nodes Do you have a double garage, or maybe triple garage? Add an extra mesh node by following the same instructions for the remote temperature sensor above! This is a remake of my water leak sensor. However, unlike the original project, with Particle Mesh is very easy to add as many nodes as we need. Just duplicate the sensor, modify a bit the event name and voila! In no time you have your basement, kitchen cabinets, bathrooms and water heater all protected from leaks. This is the water leak sensor that I'm using on this version:
The water leak sensor The water leak sensor Waterleak sensor: wiring The circuit is strongly inspired on this sump pump monitor project here and this circuit here. The schematic looks like this:
Water leak sensor schematic Water leak sensor schematic The transistor is an MPSA13 transistor (Darlington pair).
1 / 2 • Scroll to the side for a close up picture
Scroll to the side for a close up picture The breadboard implementation Waterleak sensor: firmware Find the firmware for this node of the project under the meshWaterLeakSensor folder. Waterleak sensor: mesh connection Same deal as with other nodes. The event on the mesh node is: Then that information is received on the gateway node (the thermostat) by the event handler: And taken care by the handler function itself: Waterleak sensor: mobile app I just needed to add a tab on the wonderful Blynk mobile app:
Water leak sensor tab on the Blynk mobile app Water leak sensor tab on the Blynk mobile app When the sensor detects water it goes into a transition state of 30 seconds and then goes into alarm (if the condition is still there):
The UNWANTED situation! The UNWANTED situation! Waterleak sensor: extranodes Do you have a more places to monitor for water leaks as well? Repeat the steps here, change the event name, modify the Blynk app and that's it! I developed a sump pump monitor project for a friend some time ago, and decided to add the mesh capable node with this feature or functionality to my mesh home project. The sump pump monitor consists of two water sensors to read if the level of the water goes too high. The first level sets the state of the system in a high water level alarm state (basically, you are in trouble), then if the water reaches the second sensor, the system goes into a very high water level alarm state (this time you are in DEEP trouble). Here's a schematic:
Clearer now? Clearer now? Note that we planned for three sensors but we ended up using two. These are the sensors used:
We can use the same for the water leak sensors We can use the same for the water leak sensors Sump pump monitor sensor: wiring The circuit is the same as for the water leak sensor, just two times:
Double this! Double this! Connect the high water level sensor to D1 and the very high water level sensor to D2 on the Xenon. The transistor is an MPSA13 transistor (Darlington pair). Sump pump monitor sensor: firmware Open the meshSumpPump folder with Particle Workbench, flash and enjoy! Sump pump monitor sensor: mesh connection The event published by the sump pump node is this: And the code on the gateway: Sump pump monitor sensor: mobile app Another tab to the mobile app!!!
Sump pump is ok Sump pump is ok Now if the water goes up, the system goes into a transition state for 30 seconds:
Something seems off Something seems off If the water does not go down:
TROUBLE: get there soon! TROUBLE: get there soon! And if the water continues to go up:
You are too late! You are too late! So what to do with the boron that comes with the bundle? Well, let's use it for a remote temperature sensor! Wiring is the same as with the DHT22 on the thermostat above. Open the tempSensor code using Particle Workbench. But before flashing, please adapt these lines in the firmware: That way the firmware will compile for a DHT22 sensor. Now you are ready to flash and install this cellular connected temperature sensor wherever you want! I will install it in my car:
Cellular connected temperature and humidity sensor with the DHT22 Cellular connected temperature and humidity sensor with the DHT22 One thing I discovered by building this ambitious project is that with mesh nodes you can duplicate with little effort and cost the components of your mesh connected home devices. If your project is stuck in state init, please check the Blynk configuration. I've found the hard way that if I do not configure Blynk properly (example: the auth token is not valid) the whole project does not even start to run! If you are not planning on using Blynk, then deactivate it by changing this line: so it ends up looking like this: If you require professional help with your projects, don't hesitate to write me a line at gusgonnet@gmail.com. Thank you!


PREREQUISITES
THE 3rd GENERATION MINIMALIST THERMOSTAT———————————————————————————————————————————————————————————————————————


bool useFahrenheit = false;


THE 3rd GENERATION MESH TEMPERATURE SENSOR———————————————————————————————————————————————————————————————————————
// #define SENSOR_POOL // thermistor #define SENSOR_DS18B20bool useFahrenheit = false;Mesh.publish(MESH_EVENT_DS18B20, the_temperature_reading);void setup() { Mesh.subscribe(MESH_EVENT_DS18B20, meshTempSensorHandler); }double meshTempSensorCurrentTemp = -999; String meshTempSensorLastHeardOf = "Never"; // enable the remote temperature sensor if on an argon #if PLATFORM_ID == PLATFORM_ARGON void meshTempSensorHandler(const char *event, const char *data) { char tempChar[BUFFER] = ""; snprintf(tempChar, BUFFER, "event=%s data=%s", event, data ? data : "NULL"); Log.info(tempChar); snprintf(tempChar, BUFFER, "%s", data ? data : "-999"); meshTempSensorCurrentTemp = atof(tempChar); meshTempSensorLastHeardOf = Time.timeStr(); #ifdef USE_BLYNK Blynk.virtualWrite(BLYNK_DISPLAY_CURRENT_TEMP_REMOTE, meshTempSensorCurrentTemp); Blynk.virtualWrite(BLYNK_DISPLAY_CURRENT_TEMP_REMOTE_LAST_HEARD_OF, meshTempSensorLastHeardOf); #endif } #endif#ifdef USE_BLYNK Blynk.virtualWrite(BLYNK_DISPLAY_CURRENT_TEMP_REMOTE, meshTempSensorCurrentTemp); Blynk.virtualWrite(BLYNK_DISPLAY_CURRENT_TEMP_REMOTE_LAST_HEARD_OF, meshTempSensorLastHeardOf); #endif
Mesh.publish(MESH_EVENT_DS18B20_SENSOR_X, the_temperature_reading);
THE 3rd GENERATION MESH POOL TEMPERATURE SENSOR———————————————————————————————————————————————————————————————————————


#define SENSOR_POOL // thermistor // #define SENSOR_DS18B20bool useFahrenheit = false;Mesh.publish(MESH_EVENT_POOL, the_temperature_of_the_pool);void setup() { Mesh.subscribe(MESH_EVENT_POOL, meshTempSensorPoolHandler); }
THE 3rd GENERATION GARAGE OPENER———————————————————————————————————————————————————————————————————————


")


THE 3rd GENERATION WATER LEAK SENSOR———————————————————————————————————————————————————————————————————————


Mesh.publish(MESH_EVENT_WATER_LEAK_SENSOR, waterLeakState);Mesh.subscribe(MESH_EVENT_WATER_LEAK_SENSOR, meshWaterLeakSensorHandler);String meshWaterLeakSensorState = "Unknown"; String meshWaterLeakSensorLastHeardOf = "Never"; // enable the remote temperature sensor for the pool if on an argon #if PLATFORM_ID == PLATFORM_ARGON void meshWaterLeakSensorHandler(const char *event, const char *data){ char tempChar[BUFFER] = ""; snprintf(tempChar, BUFFER, "event=%s data=%s", event, data ? data : "NULL"); Log.info(tempChar); snprintf(tempChar, BUFFER, "%s", data ? data : "Unknown"); meshWaterLeakSensorState = tempChar; meshWaterLeakSensorLastHeardOf = Time.timeStr(); #ifdef USE_BLYNK Blynk.virtualWrite(BLYNK_DISPLAY_WATER_LEAK_SENSOR, meshWaterLeakSensorState); Blynk.virtualWrite(BLYNK_DISPLAY_WATER_LEAK_SENSOR_LAST_HEARD_OF, meshWaterLeakSensorLastHeardOf); #endif } #endif

THE 3rd GENERATION SUMP PUMP MONITOR———————————————————————————————————————————————————————————————————————


#define MESH_EVENT_SUMP_PUMP "meshSumpPump"/************************************************************ sump pump sensors *************************************************************/ String meshSumpPumpState = "Unknown"; String meshSumpPumpLastHeardOf = "Never"; // enable the remote temperature sensor for the pool if on an argon #if PLATFORM_ID == PLATFORM_ARGON void meshSumpPumpHandler(const char *event, const char *data){ char tempChar[BUFFER] = ""; snprintf(tempChar, BUFFER, "event=%s data=%s", event, data ? data : "NULL"); Log.info(tempChar); snprintf(tempChar, BUFFER, "%s", data ? data : "Unknown"); meshSumpPumpState = tempChar; meshSumpPumpLastHeardOf = Time.timeStr(); #ifdef USE_BLYNK Blynk.virtualWrite(BLYNK_DISPLAY_SUMP_PUMP, meshSumpPumpState); Blynk.virtualWrite(BLYNK_DISPLAY_SUMP_PUMP_LAST_HEARD_OF, meshSumpPumpLastHeardOf); #endif } #endif


THE 3rd GENERATION CELLULAR CONNECTED TEMPERATURE AND HUMIDITY SENSOR———————————————————————————————————————————————————————————————————————// #define SENSOR_POOL // thermistor // #define SENSOR_DS18B20 #define SENSOR_DHT22
Conclusion———————————————————————————————————————————————————————————————————————#define USE_BLYNK
Need help?// #define USE_BLYNK
Schematics, diagrams and documents
Code
Credits
Related products


Leave your feedback...