
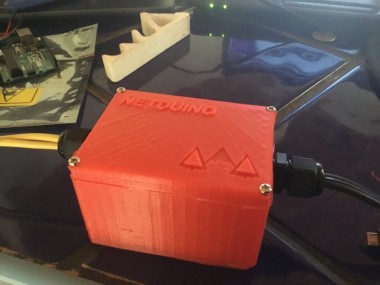
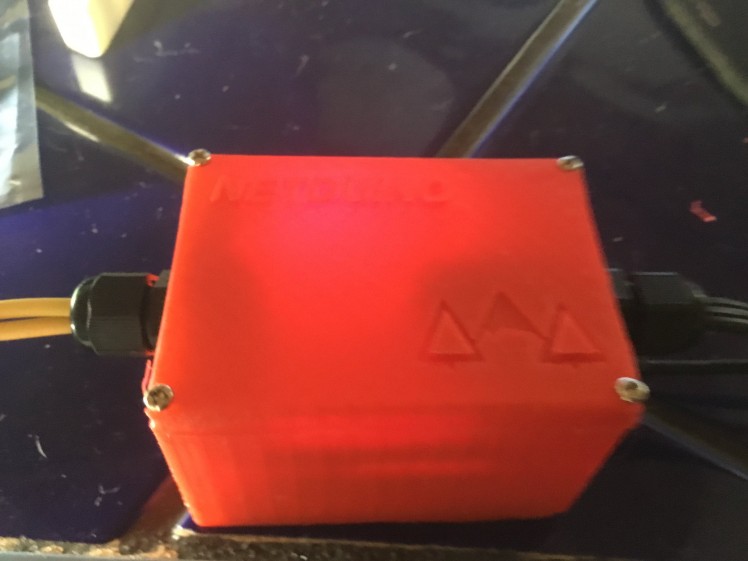
Netduino Connected Appliance Shield

Made by Jade7272 / Home Automation
About the project
Same code as example but with a scaled down single shield with 120 VAC in powering the Netduino and a relay to turn your appliance on/off.
Items used in this project

Hand tools and fabrication machines

Story
When I saw the Connected Coffee Maker example I figured it would be great if it could be scaled down into a smaller package so it could sit quietly beside an appliance and control it.. so here is my idea it may not be perfect but as always inovation comes from invention and trail and error.. I am still figuring out the power supply side of things but the relay and the Netduino work together flawlessly.
I used the examples explained in Parts 2 and 3 of http://blog.wildernesslabs.co/connectedcoffeemaker_part2/3 to make the code for the connected appliance board...
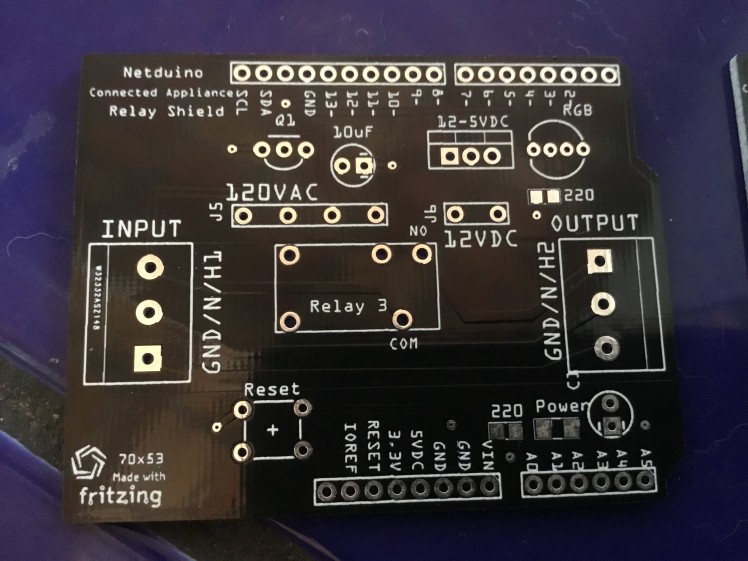
 5 Amp Model
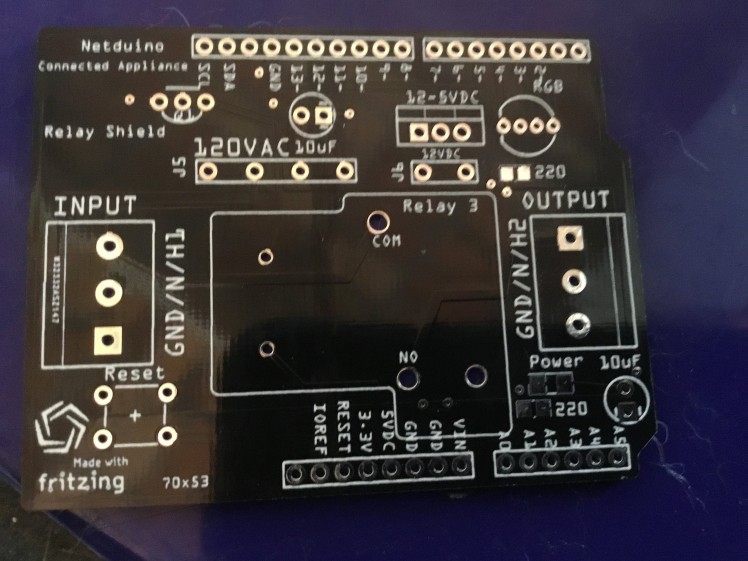
 Produced Board from PCBway.com
 20 Amp Model
 20 Amp Model From PCBway.com
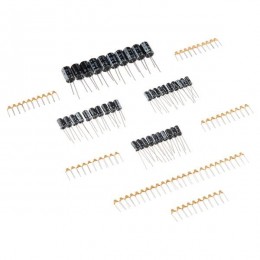
Bill of Materials for the 5 Amp Model
https://www.mouser.com/ProjectManager/ProjectDetail.aspx?AccessID=9ffcb4c755
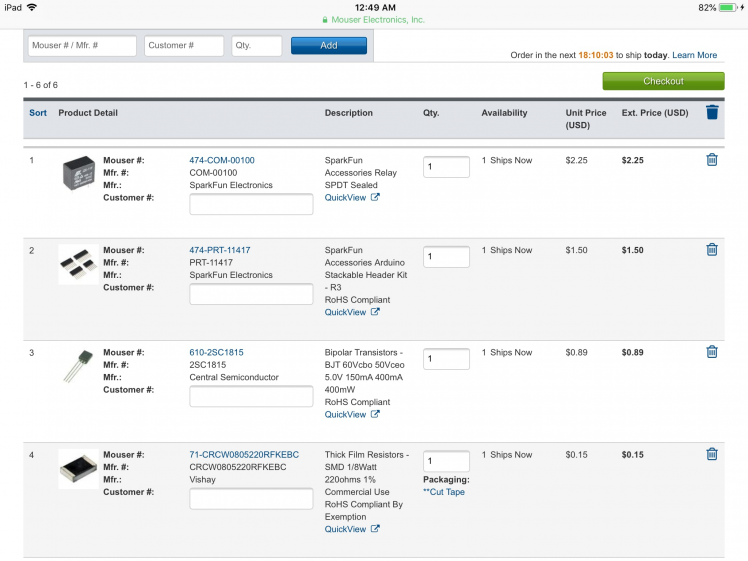 1 / 2 • This is the bare minimum to get you going about $35 USD to control an appliance
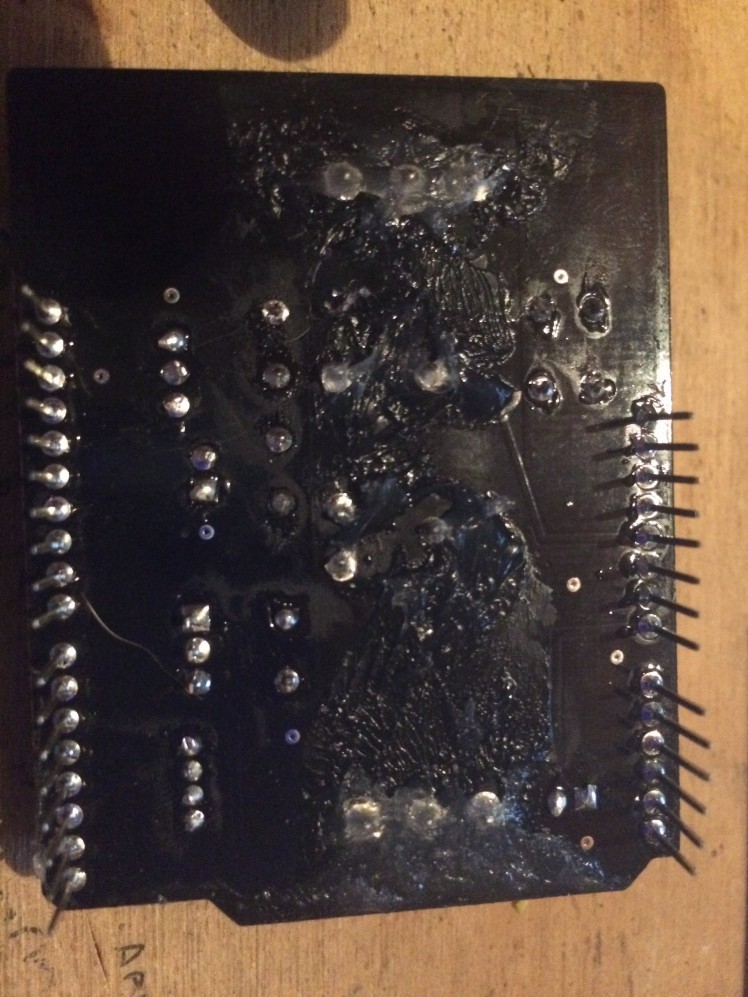
Soldering the Shield
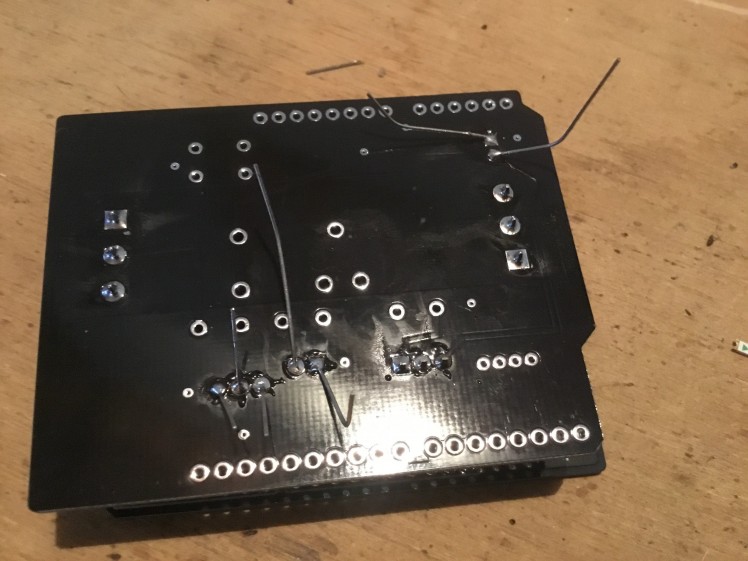 Solder from Inside to Outside
 Use another shield to keep pins square for soldering
optional : add a layer of silicone to the underside where the 120 volt pins are to prevent shocks fire and death.
 Silicone 120 Volt Pins liberally
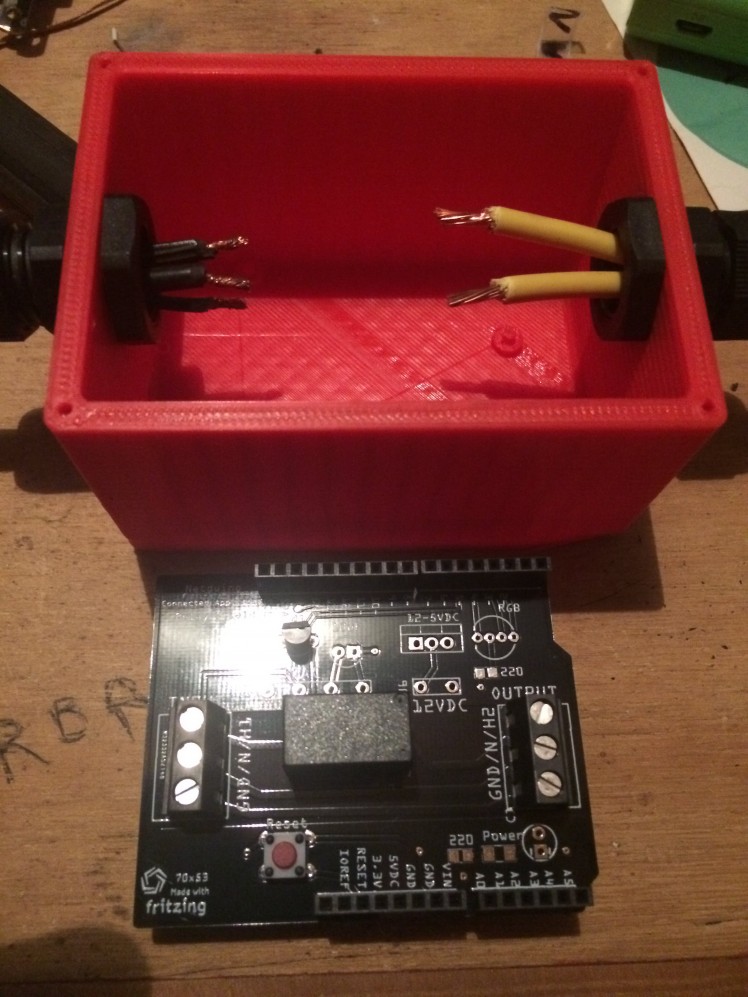 Preparation for install
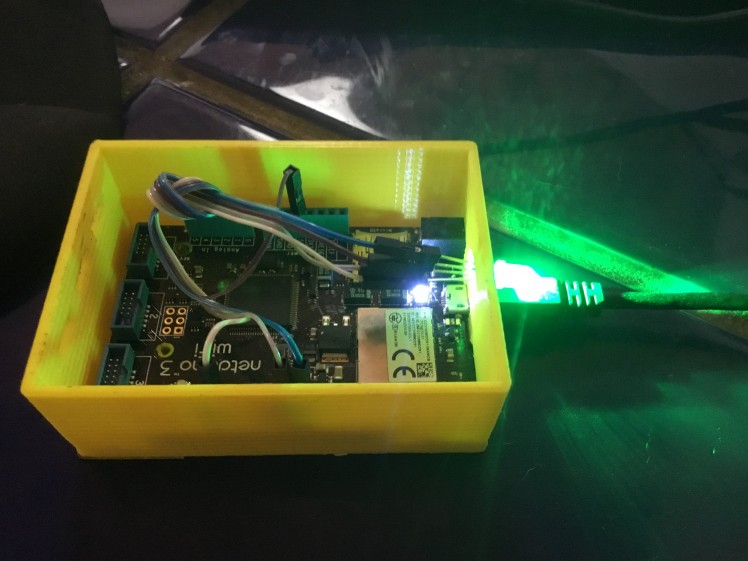
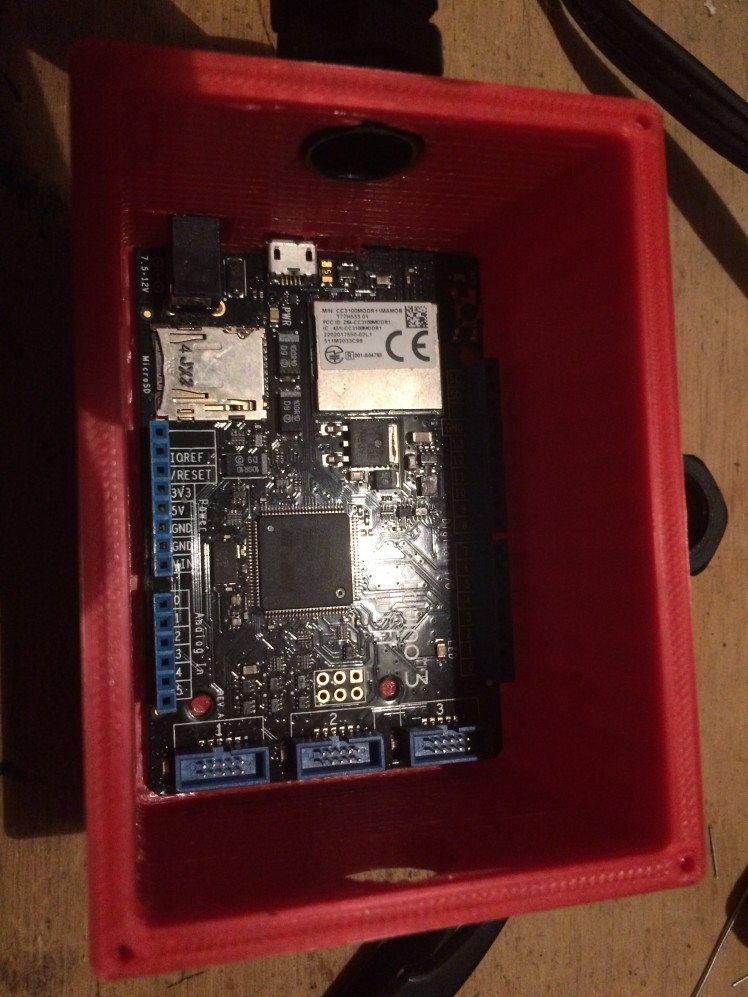 Nice tight fit
Note you need to install the relay shield and optional Sensor shield before putting it in the box.. It is possible as that’s how I built it for the demo.
Tin the 120 volt leads with solder to prevent fraying
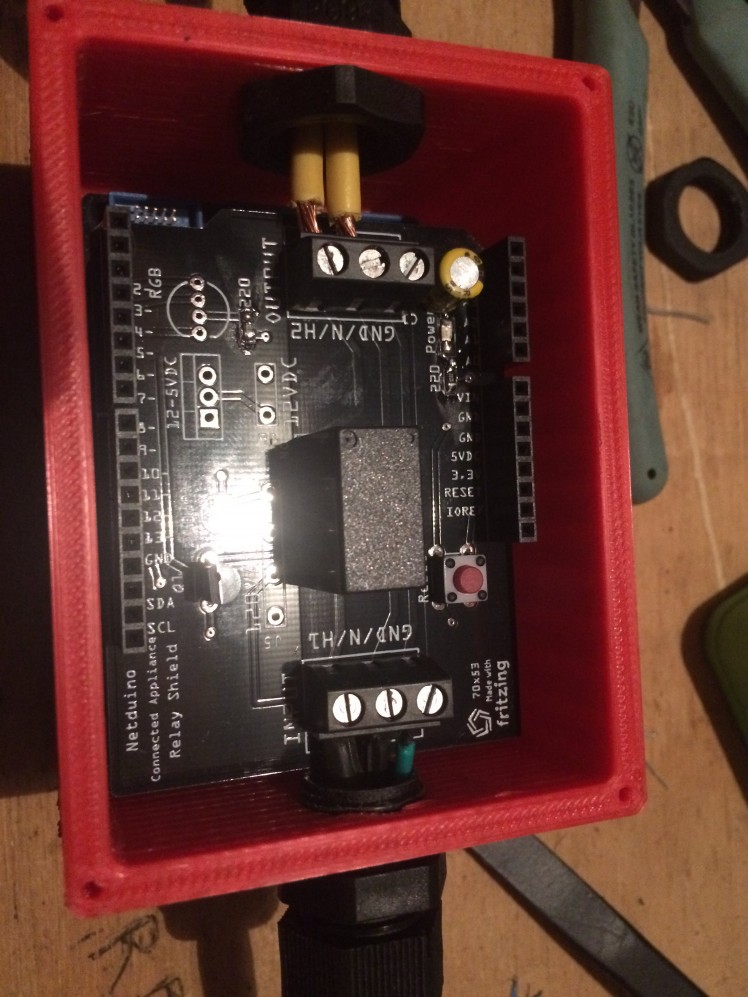 Wired up and ready for testing
Electrical Installation Notes
1. Test the relay before installing electrical wiring.
2. Do not work on this project with live wires... You can be hurt or killed.
3. Use a multimeter before plugging in the cord to ensure you don’t have any short circuits or worse a path to the Netduino. Meter from the hot screw on the input and go to ground with a continuity test and then neutral and then any exposed control wiring to make sure there are no mistakes..
4. Optional: Cover the exposed 120V through hole pins and relay pins with a thick coating of silicone to prevent accidents.
5. Have your project installed into the box before powering up. I designed it to protect the user and the electronics from accidentally coming into contact with yourself with any exposed wires. The lid can be screwed on afterwards when you are satisfied with deployment..
 1 / 2
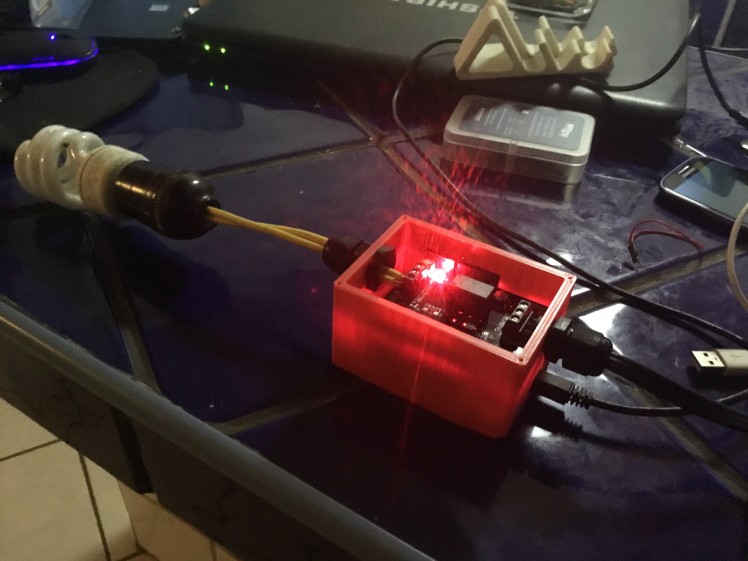
In Action
1 / 2
In Action
At the time of publishing I was still fighting with the Xameran application so I am just using the simple relay action app to show the Relay and shield really does work.
Programming
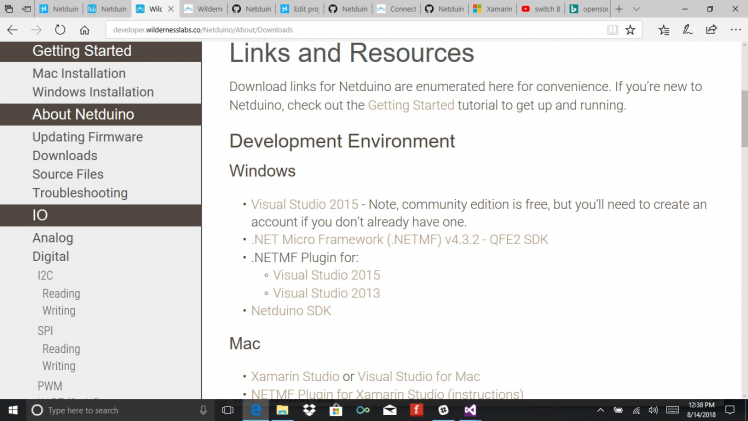
http://developer.wildernesslabs.co/Netduino/About/Downloads/
Download and install dependencies needed for the project.
First, open Visual Studio 2015 and open the files
 Screen Shot of file opening Link
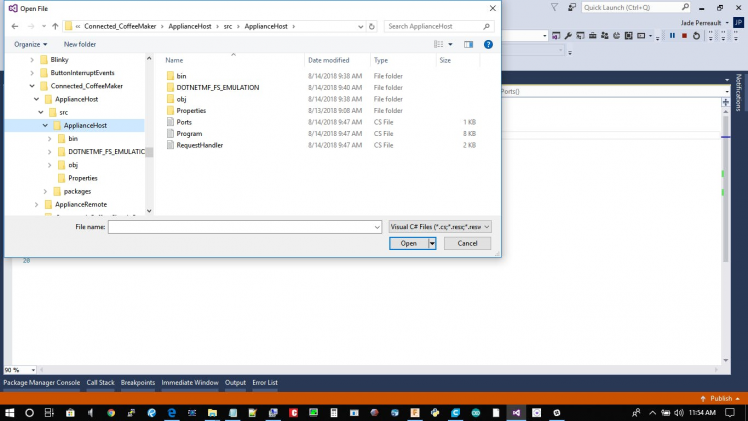 Files to open
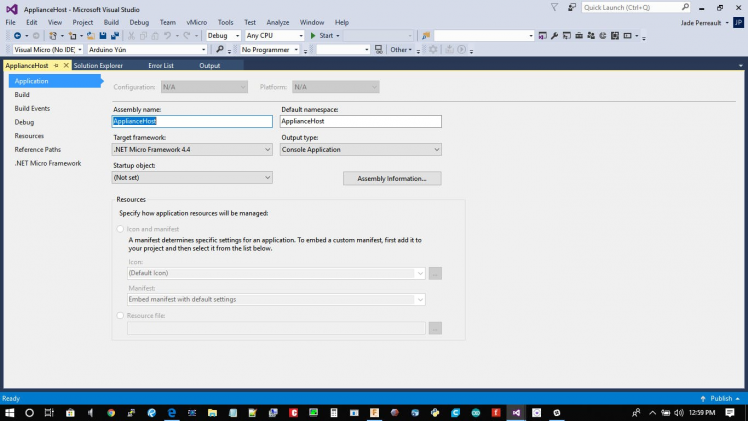
One project is open and uploaded you have a couple of steps in the properties files.
 Step 2 Project properties
Check this. Don't change if OK.
 Micro Framework 3
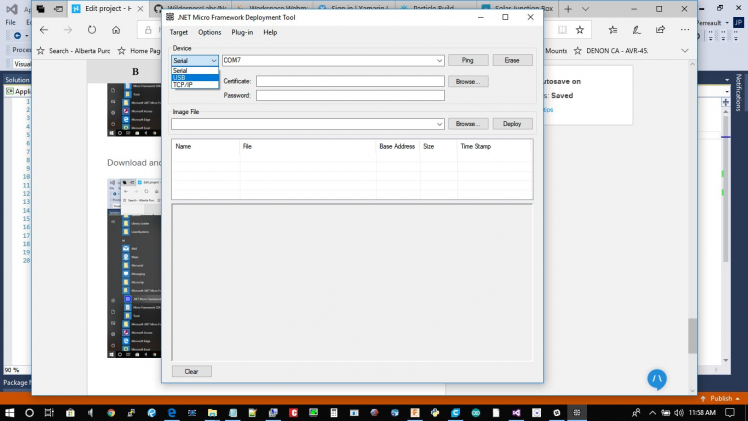
Pick USB. The Netduino will show up if connected.
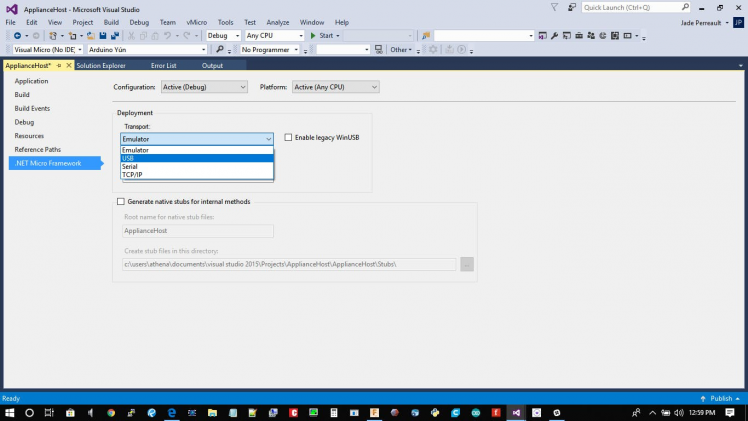 Pick USB
Change the pins here to Pins.GPIO_PIN_D5, in Ports.cs.
using System;
using Microsoft.SPOT;
using Microsoft.SPOT.Hardware;
using SecretLabs.NETMF.Hardware.Netduino;
namespace ApplianceHost
{
   static class Ports
   {
       static Ports()
       {
           ONBOARD_LED = new OutputPort(Pins.ONBOARD_LED, false);
           GPIO_PIN_D5 = new OutputPort(Pins.GPIO_PIN_D5, false);//Change the pins to use here to activate the relay
       }
       public static OutputPort ONBOARD_LED;
       public static OutputPort GPIO_PIN_D5;
   }
}
You also have to change the pins here in Requesthandler.cs.
using System;
using Microsoft.SPOT;
using Maple;
using System.Net;
using System.Collections;
namespace ApplianceHost
{
   public class RequestHandler : RequestHandlerBase
   {
       private static bool _isPowerOn;
       public RequestHandler(HttpListenerContext context) : base(context)
       {
       }
       public void getStatus()
       {
           StatusResponse();
       }
       public void postTurnOn()
       {
           TogglePower(true);
           StatusResponse();
       }
       public void postTurnOff()
       {
           TogglePower(false);
           StatusResponse();
       }
       private void TogglePower(bool val)
       {
           _isPowerOn = val;
           Ports.ONBOARD_LED.Write(val);
           Ports.GPIO_PIN_D5.Write(val);
       }
       private void StatusResponse()
       {
           this.Context.Response.ContentType = "application/json";
           this.Context.Response.StatusCode = 200;
           Hashtable result = new Hashtable { { "isPowerOn", _isPowerOn.ToString().ToLower() } };
           this.Send(result);
       }
   }
}
Also in Program.cs.
using System.Threading;
using System.Net;
using System.IO;
using Microsoft.SPOT;
using Microsoft.SPOT.Net.NetworkInformation;
using System.Collections;
using System;
using Maple;
namespace ApplianceHost
{
   public class Program
   {
       public static void Main()
       {
           // initialize our network
           App app = new App();
           app.Run();
           while (app.IsRunning)
           {
               Thread.Sleep(1000);
               Debug.Print("still alive. " + DateTime.Now.Millisecond.ToString());
           }
       }
   }
   public class App
   {
       NetworkInterface[] _interfaces;
       public bool IsRunning { get; set; }
       public void Run()
       {
           this.IsRunning = true;
           bool goodToGo = false;
           try {
               goodToGo = InitializeNetwork();
           } catch (Exception e) {
               Debug.Print(e.Message);
           }
           if (goodToGo)
           {
               MakeWebRequest("http://google.com");
               //
               Debug.Print("Network done.");
               // set initial state
               Ports.ONBOARD_LED.Write(false);
               Ports.GPIO_PIN_D5.Write(false);
               // start web server
               MapleServer server = new MapleServer();
               server.Start();
           }
           //this.IsRunning = false;
       }
       protected bool InitializeNetwork()
       {
           if (Microsoft.SPOT.Hardware.SystemInfo.SystemID.SKU == 3)
           {
               Debug.Print("Wireless tests run only on Device");
               return false;
           }
           Debug.Print("Getting all the network interfaces.");
           _interfaces = NetworkInterface.GetAllNetworkInterfaces();
           // debug output
           ListNetworkInterfaces();
           // loop through each network interface
           foreach (var net in _interfaces)
           {
               // debug out
               ListNetworkInfo(net);
               switch (net.NetworkInterfaceType)
               {
                   case (NetworkInterfaceType.Ethernet):
                       Debug.Print("Found Ethernet Interface");
                       break;
                   case (NetworkInterfaceType.Wireless80211):
                       Debug.Print("Found 802.11 WiFi Interface");
                       break;
                   case (NetworkInterfaceType.Unknown):
                       Debug.Print("Found Unknown Interface");
                       break;
               }
               // check for an IP address, try to get one if it's empty
               return CheckIPAddress(net);
           }
           // if we got here, should be false.
           return false;
       }
       protected void MakeWebRequest(string url)
       {
           var httpWebRequest = (HttpWebRequest)WebRequest.Create(url);
           httpWebRequest.Method = "GET";
           var httpResponse = (HttpWebResponse)httpWebRequest.GetResponse();
           using (var streamReader = new StreamReader(httpResponse.GetResponseStream()))
           {
               var result = streamReader.ReadToEnd();
               Debug.Print("this is what we got from " + url + ": " + result);
           }
       }
       protected bool CheckIPAddress(NetworkInterface net)
       {
           int timeout = 10000; // timeout, in milliseconds to wait for an IP. 10,000 = 10 seconds
           // check to see if the IP address is empty (0.0.0.0). IPAddress.Any is 0.0.0.0.
           if (net.IPAddress == IPAddress.Any.ToString())
           {
               Debug.Print("No IP Address");
               if (net.IsDhcpEnabled)
               {
                   Debug.Print("DHCP is enabled, attempting to get an IP Address");
                   // ask for an IP address from DHCP [note this is a static, not sure which network interface it would act on]
                   int sleepInterval = 10;
                   int maxIntervalCount = timeout / sleepInterval;
                   int count = 0;
                   while (IPAddress.GetDefaultLocalAddress() == IPAddress.Any && count < maxIntervalCount)
                   {
                       Debug.Print("Sleep while obtaining an IP");
                       Thread.Sleep(10);
                       count++;
                   };
                   // if we got here, we either timed out or got an address, so let's find out.
                   if (net.IPAddress == IPAddress.Any.ToString())
                   {
                       Debug.Print("Failed to get an IP Address in the alotted time.");
                       return false;
                   }
                   Debug.Print("Got IP Address: " + net.IPAddress.ToString());
                   return true;
                   //NOTE: this does not work, even though it's on the actual network device. [shrug]
                   // try to renew the DHCP lease and get a new IP Address
                   //net.RenewDhcpLease ();
                   //while (net.IPAddress == "0.0.0.0") {
                   //    Thread.Sleep (10);
                   //}
               }
               else
               {
                   Debug.Print("DHCP is not enabled, and no IP address is configured, bailing out.");
                   return false;
               }
           }
           else
           {
               Debug.Print("Already had IP Address: " + net.IPAddress.ToString());
               return true;
           }
       }
       protected void ListNetworkInterfaces()
       {
           foreach (var net in _interfaces)
           {
               switch (net.NetworkInterfaceType)
               {
                   case (NetworkInterfaceType.Ethernet):
                       Debug.Print("Found Ethernet Interface");
                       break;
                   case (NetworkInterfaceType.Wireless80211):
                       Debug.Print("Found 802.11 WiFi Interface");
                       break;
                   case (NetworkInterfaceType.Unknown):
                       Debug.Print("Found Unknown Interface");
                       break;
               }
           }
       }
       protected void ListNetworkInfo(NetworkInterface net)
       {
           try
           {
               Debug.Print("MAC Address: " + BytesToHexString(net.PhysicalAddress));
               Debug.Print("DHCP enabled: " + net.IsDhcpEnabled.ToString());
               Debug.Print("Dynamic DNS enabled: " + net.IsDynamicDnsEnabled.ToString());
               Debug.Print("IP Address: " + net.IPAddress.ToString());
               Debug.Print("Subnet Mask: " + net.SubnetMask.ToString());
               Debug.Print("Gateway: " + net.GatewayAddress.ToString());
               if (net is Wireless80211)
               {
                   var wifi = net as Wireless80211;
                   Debug.Print("SSID:" + wifi.Ssid.ToString());
               }
           } catch (Exception e) {
               Debug.Print("ListNetworkInfo exception:  " + e.Message);
           }
       }
       private static string BytesToHexString(byte[] bytes)
       {
           string hexString = string.Empty;
           // Create a character array for hexadecimal conversion.
           const string hexChars = "0123456789ABCDEF";
           // Loop through the bytes.
           for (byte b = 0; b < bytes.Length; b++)
           {
               if (b > 0)
                   hexString += "-";
               // Grab the top 4 bits and append the hex equivalent to the return string.
               hexString += hexChars[bytes[b] >> 4];
               // Mask off the upper 4 bits to get the rest of it.
               hexString += hexChars[bytes[b] & 0x0F];
           }
           return hexString;
       }
   }
}
namespace System.Diagnostics
{
   public enum DebuggerBrowsableState
   {
       Never = 0,
       Collapsed = 2,
       RootHidden = 3
   }
}

Download and install Micro Framework
http://developer.wildernesslabs.co/Netduino/About/Downloads

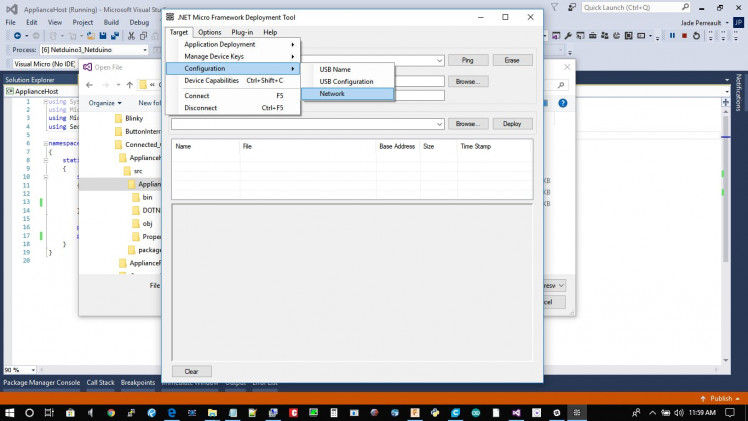 Setup your Network
Upload and run by pressing the RUN button on the top tool menu.
Let it compile and upload to the Netduino and this part is finished.
Here is a picture of Pin 5 activated before shield goes on.
 Pin 5 High .
For the Xamerin Forms, I followed the tutorials here:
Next is the Xamerin program close out the program and start a new one as its a separate entity to connect to the Netduino.
Open the examples folder and open the appliance remote folder.
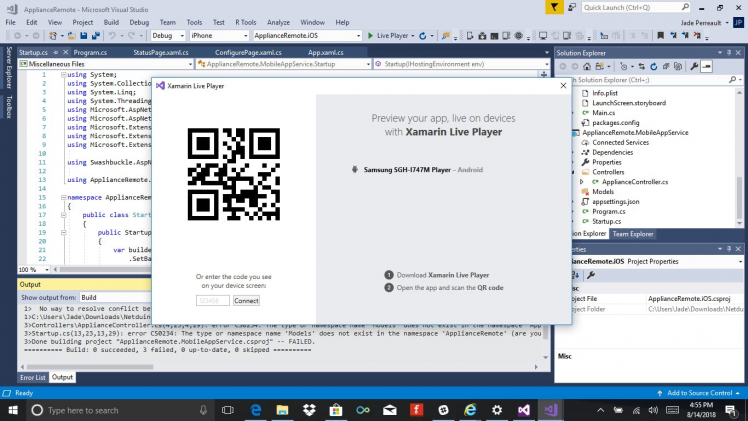
Open the examples folder and open the appliance remote folder.

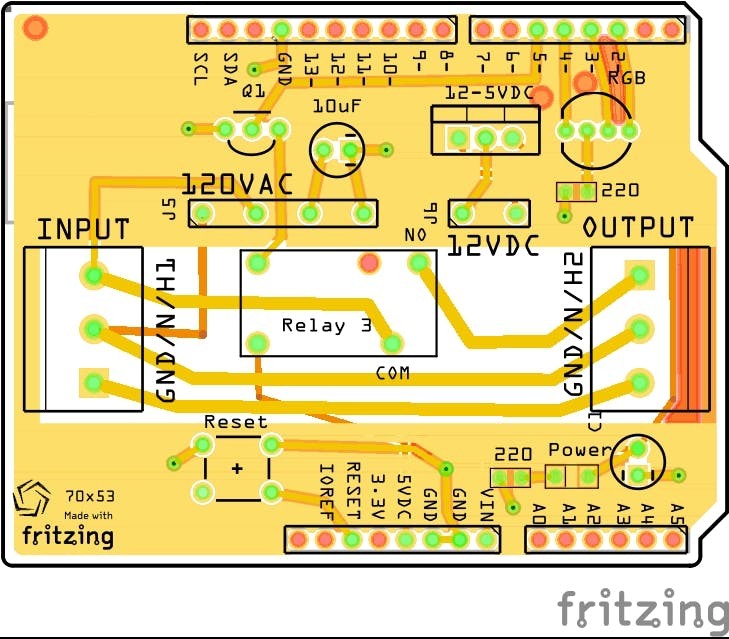
Schematics, diagrams and documents
CAD, enclosures and custom parts
Code
Credits
Leave your feedback...