
Mqtt Tutorial For Azure Sphere Mt3620

Made by anas / Communication / IoT
About the project
A tutorial for Azure sphere MT3620 MQTT implementation
Project info
Difficulty: Moderate
Platforms: Avnet, Microsoft, MQTT
Estimated time: 7 hours
License: GNU General Public License, version 3 or later (GPL3+)
Items used in this project

Story
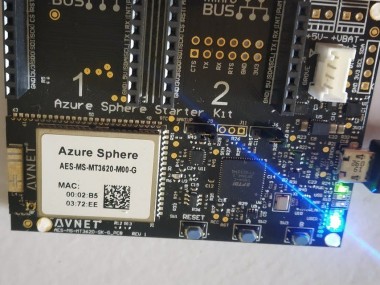
Azure Sphere MT3620 is very powerfull ARM based dev kit with wifi connectivity.As I explained all the basic installation steps and flashing first blink an led highlevelapp in my previous project I am directly jumping to MQTT implementation.
Or if you are still struggling with setup SDK and build first app then follow Microsoft documentation
If you are new to mqtt and dont have mqtt broker in your pc/server/rpi then please follow my project to setup mqtt broker
for starting this tutorial you should
- installed azure sphere sdk in your pc
- CMake and ninja tools for building and flashing
- MQTT broker installed in pc or access to any mqtt broker to publish and subscribe data
- already flashed succefully a code in AZURE sphere mt3620
As I said above make sure you already succesfully done blink an led code before going for mqtt kind of tasks
HOW I MADE MQTT PUBLISH using AZURE Sphere MT3620I made this possible by simply editing codes done by a member developer community.I referred this project
STEP 1
dowload zip from this git
STEP 2
extract that to your project directory
STEP 3
you will find Sphere_HighLevelApp folder make sure you are able to compile and build that app
STEP 4:files editing
open CMakeSettings.json file and replace that with below data.in this I edited AZURE_SPHERE_TARGET_API_SET value due to some error popup. if 7 is working for you then no need to edit it 5. here I am using 5.
{ "environments": [ { "environment": "AzureSphere" } ], "configurations": [ { "name": "ARM-Debug", "generator": "Ninja", "configurationType": "Debug", "inheritEnvironments": [ "AzureSphere" ], "buildRoot": "${projectDir}\out\${name}", "installRoot": "${projectDir}\install\${name}", "cmakeToolchain": "${env.AzureSphereDefaultSDKDir}CMakeFiles\AzureSphereToolchain.cmake", "buildCommandArgs": "-v", "ctestCommandArgs": "", "variables": [ { "name": "AZURE_SPHERE_TARGET_API_SET", "value": "latest-lts" } ] }, { "name": "ARM-Release", "generator": "Ninja", "configurationType": "Release", "inheritEnvironments": [ "AzureSphere" ], "buildRoot": "${projectDir}\out\${name}", "installRoot": "${projectDir}\install\${name}", "cmakeToolchain": "${env.AzureSphereDefaultSDKDir}CMakeFiles\AzureSphereToolchain.cmake", "buildCommandArgs": "-v", "ctestCommandArgs": "", "variables": [ { "name": "AZURE_SPHERE_TARGET_API_SET", "value": "5" } ] } ]}Then open CMakeLists.txt file and replace as below. here also I edited target api value
# Copyright (c) Microsoft Corporation. All rights reserved.# Licensed under the MIT License.cmake_minimum_required(VERSION 3.10)project(OBD2_MQTT C)azsphere_configure_tools(TOOLS_REVISION "20.04")azsphere_configure_api(TARGET_API_SET "5")add_executable(${PROJECT_NAME} main.c eventloop_timer_utilities.c ./thirdparty/MQTT-C/src/mqtt.c ./thirdparty/MQTT-C/src/mqtt_pal.c "mqtt_utilities.c" # "parson.c" "common.c" ) # "uart_utilities.c")TARGET_INCLUDE_DIRECTORIES(${PROJECT_NAME} PUBLIC ./thirdparty/MQTT-C/include ./)target_link_libraries(${PROJECT_NAME} applibs pthread gcc_s c)azsphere_target_hardware_definition(${PROJECT_NAME} TARGET_DIRECTORY "Hardware/mt3620_rdb" TARGET_DEFINITION "sample_hardware.json")azsphere_target_add_image_package(${PROJECT_NAME})Then open app_manifest.json.here we have to set capabilities of app. here we are going to use one led and mqtt in this code.So in "AllowedConnections" variable set your MQTT broker IP.
{ "SchemaVersion": 1, "Name" : "UART_HighLevelApp", "ComponentId" : "4f2d9823-dbbd-4740-a7dd-198c32ba34fe", "EntryPoint": "/bin/app", "CmdArgs": [], "Capabilities": { "AllowedConnections": [ "192.168.43.59"], "Gpio": [ "$SAMPLE_LED" ], }, "ApplicationType": "Default"}Now we can open main.c file to edit. here also we have to set ip address of broker and mqtt topic name.iam using topic name "AZURE".please don't bother about commented section in code(i have commented out lines which are not required for this basic app.Initial code was developed for reading UART data and send it to mqtt).j
ust set static char* mqttConf_topic = "AZURE";//topic name
static char* mqttConf_brokerIp = "192.168.43.59";//fill your mqtt broker ip here
/* Copyright (c) Microsoft Corporation. All rights reserved.Licensed under the MIT License. */// This sample C application for Azure Sphere demonstrates how to use a UART (serial port).// The sample opens a UART with a baud rate of 115200. Pressing a button causes characters// to be sent from the device over the UART; data received by the device from the UART is echoed to// the Visual Studio Output Window.//// It uses the API for the following Azure Sphere application libraries:// - UART (serial port)// - GPIO (digital input for button)// - log (messages shown in Visual Studio's Device Output window during debugging)// - eventloop (system invokes handlers for timer events)#include <errno.h>#include <stdbool.h>#include <stdlib.h>#include <stdio.h>#include <string.h>#include <time.h>#include <unistd.h>// applibs_versions.h defines the API struct versions to use for applibs APIs.#include "applibs_versions.h"//#include <applibs/uart.h>#include <applibs/gpio.h>#include <applibs/log.h>//#include <applibs/eventloop.h>#include "mqtt_utilities.h"#include "common.h"// By default, this sample targets hardware that follows the MT3620 Reference// Development Board (RDB) specification, such as the MT3620 Dev Kit from// Seeed Studio.//// To target different hardware, you'll need to update CMakeLists.txt. See// https://github.com/Azure/azure-sphere-samples/tree/master/Hardware for more details.//// This #include imports the sample_hardware abstraction from that hardware definition.#include <hw/sample_hardware.h>//#include "eventloop_timer_utilities.h"//MQTT Variable#define MQTT_PUBLISH_PERIOD 500000000//static EventLoopTimer* publishMQTTMsgTimer = NULL;static char* mqttConf_topic = "AZURE";static char* mqttConf_brokerIp = "192.168.43.59";//MQTT Variable//#define UART_SEND_PERIOD 5//static EventLoopTimer* sendUartTimer = NULL;//const size_t receiveBufferSize = 20;// File descriptors - initialized to invalid value//static int gpioButtonFd = -1;//static int uartFd = -1;//EventLoop *eventLoop = NULL;//EventRegistration* uartEventReg = NULL;//EventLoopTimer *buttonPollTimer = NULL;// State variables//static GPIO_Value_Type buttonState = GPIO_Value_High;//const char* engineRPMCmd = "010Cr";//const char* engineTempCmd = "0105r";//const char* engineFuelCmd = "012Fr";//static int engineRPM;//static int engineTemp;//static int engineFuel;//static char rxData[33];//static char rxIndex = 0;//static char Data[20];//static void TerminationHandler(int signalNumber);//static void SendUartMessage(int uartFd, const char *dataToSend);//static void ButtonTimerEventHandler(EventLoopTimer *timer);//static ExitCode InitPeripheralsAndHandlers(void);//static void CloseFdAndPrintError(int fd, const char *fdName);//static void ClosePeripheralsAndHandlers(void);//mqtt test codeint test_mqtt(){Log_Debug("Im inn");int res = MQTTInit(mqttConf_brokerIp, "1883", mqttConf_topic);Log_Debug(res);Log_Debug("done initn");//MQTTPublish(mqttConf_topic, "{"engineTemp":"67.0","engineRpm":"32.0","fuel":"51.0"}");MQTTPublish(mqttConf_topic, "Wiring It my way");// while (1)// {// }//Log_Debug("done publishn");}/// <summary>/// Main entry point for this application./// </summary>int main(void)//int main(int argc, char *argv[]){//test_mqtt();/* Log_Debug("UART application starting.n");// test_mqtt();exitCode = InitPeripheralsAndHandlers();// Use event loop to wait for events and trigger handlers, until an error or SIGTERM happenswhile (exitCode == ExitCode_Success) {EventLoop_Run_Result result = EventLoop_Run(eventLoop, -1, true);// Continue if interrupted by signal, e.g. due to breakpoint being set.if (result == EventLoop_Run_Failed && errno != EINTR) {exitCode = ExitCode_Main_EventLoopFail;}}ClosePeripheralsAndHandlers();Log_Debug("Application exiting.n");// return exitCode;*/int fd = GPIO_OpenAsOutput(SAMPLE_LED, GPIO_OutputMode_PushPull, GPIO_Value_High);if (fd < 0) {Log_Debug("Error opening GPIO: %s (%d). Check that app_manifest.json includes the GPIO used.n",strerror(errno), errno);// return ExitCode_Main_Led;}const struct timespec sleepTime = {.tv_sec = 1, .tv_nsec = 0};while (true) {test_mqtt();GPIO_SetValue(fd, GPIO_Value_Low);nanosleep(&sleepTime, NULL);GPIO_SetValue(fd, GPIO_Value_High);nanosleep(&sleepTime, NULL);}}STEP 5 make and build
Now we can make app by running
cmake -G "Ninja" -DCMAKE_TOOLCHAIN_FILE="/opt/azurespheresdk/CMakeFiles/AzureSphereToolchain.cmake" -DAZURE_SPHERE_TARGET_API_SET="5" -DCMAKE_BUILD_TYPE="Debug" ./Sphere_HighLevelApprun the above command in correct directory.It will respond in terminal below
-- The C compiler identification is GNU 8.2.0-- Check for working C compiler: /opt/azurespheresdk/Sysroots/5/tools/sysroots/x86_64-pokysdk-linux/usr/bin/arm-poky-linux-musleabi/arm-poky-linux-musleabi-gcc-- Check for working C compiler: /opt/azurespheresdk/Sysroots/5/tools/sysroots/x86_64-pokysdk-linux/usr/bin/arm-poky-linux-musleabi/arm-poky-linux-musleabi-gcc -- works-- Detecting C compiler ABI info-- Detecting C compiler ABI info - done-- Detecting C compile features-- Detecting C compile features - done-- Configuring done-- Generating done-- Build files have been written to: /home/bagmo/AZUREif make is ok we cab build using command
ninjathat will show responds similar to
[1/1] Generating OBD2_MQTT.imagepackageAzure Sphere Utility version 20.11.0.58388Copyright (C) Microsoft Corporation. All rights reserved.Start time (UTC): Wednesday, 06 January 2021 14:42:42verbose: Creating image package.verbose: Azure Sphere application image package written.verbose: Appending metadata.verbose: Wrote metadata: Section: Identity Image Type: Application Component ID: 4f2d9823-dbbd-4740-a7dd-198c32ba34fe Image ID: 348406ca-a96d-46b7-af5e-24c4d3c548ac Section: Signature Signing Type: ECDsa256 Cert: a8d5cc6958f48710140d7a26160fc1cfc31f5df0 Section: Debug Image Name: UART_HighLevelApp Built On (UTC): 06/01/21 2:42:43 pm Built On (Local): 06/01/21 8:12:43 pm Section: Temporary Image Remove image at boot: False Under development: True Section: ABI Depends Depends on: ApplicationRuntime, version 5verbose: Packaging completed successfully.verbose: Output file is at: /home/bagmo/AZURE/OBD2_MQTT.imagepackageCommand completed in 00:00:04.5303249.now image file will be generated in that folder which need to flash to device for that device should be enable development
azsphere device enable-developmentif it is already enabled and some image is running then run
azsphere device sideload deletewhich will return delete any image running
now we can deploy our image to device
azsphere device sideload deploy --image-package OBD2_MQTT.imagepackagethe above command will deploy image to device and device will start blinking and publishing data to mqtt
Deploying '/home/bagmo/AZURE/OBD2_MQTT.imagepackage' to the attached device.Image package '/home/bagmo/AZURE/OBD2_MQTT.imagepackage' has been deployed to the attached device.Now we can subscribe to mqtt topic to see data
mosquitto_sub -h 192.168.43.59 -t AZUREreplace ip with your broker ip
it will continuously print data received(here I am sending text "wiring it my way" from device
Wiring It my wayWiring It my wayWiring It my wayWiring It my wayWiring It my wayso we successfully published data using azure sphere mt3260 to mqtt.
Guys please try it out and comment your opinions and doubts.i will try to figure out and answer. Lets Hack it
Code
Credits
Leave your feedback...