
Mosquitto Mqtt Broker On Raspberry Pi 3

Made by santronix / Communication / Home Automation / IoT
About the project
There are many blogs, articles and instructions on the Internet on how to get the Mosquitto MQTT or similar one installed on Raspberry Pi, but for few ones, these instructions do no work! We tried to find out the common mistakes and issues and create instructions for you to do in just few steps. So here it goes…
Project info
Difficulty: Moderate
Platforms: Raspberry Pi
Estimated time: 1 hour
License: Apache License 2.0 (Apache-2.0)
Items used in this project


Story
What do you need?
For MQTT broker for your home network you need following stuffs.
Raspberry Pi 3 (Recommended but can be used with older ones too) x 1
5V 2A Power adapter to power up the RPi3 x 1
Raspbian OS installed on RPi3 (Jesse)
Mosquitto broker and client
Putty (For Windows to remotely connect to Raspberry Pi)
and a local home network (Router which can provide local DHCP addresses)
With just few following steps your Raspberry Pi MQTT server will be ready in minutes!
Connecting the things
First you need to install Raspbian OS on your Raspberry Pi. We are not going to tell you how to do this but if you are unsure about how to do that then follow this link
https://www.raspberrypi.org/documentation/installation/installing-images/
You can install the Raspbian using a Raspbian ISO image or by flashing NOOBS and then downloading it online. Please use the latest version of Raspbian.
Once your Raspberry pi is alive with an OS, connect it to your home network using WiFi and note down the IP address of the Raspberry Pi. If you are not sure about the IP address of your Pi, then just go to your router's configuration web page and check the same in the DHCP client list as illustrated in the below picture
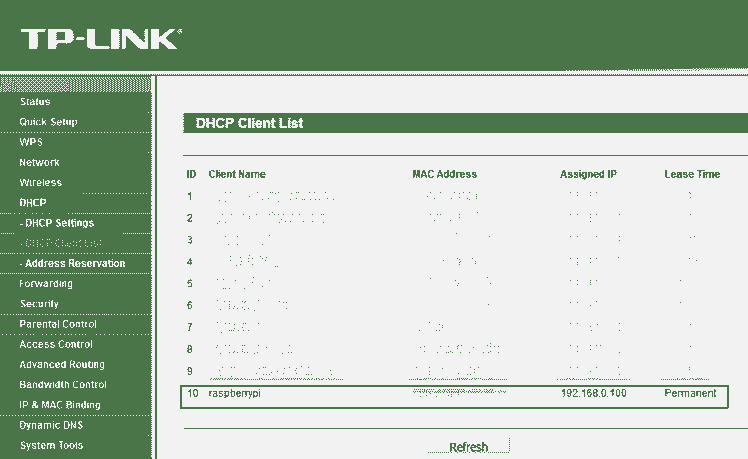
Pic 1 : find the IP address of your Raspberry Pi
We kept the IP address of our Pi Permanent to 192.168.0.100, the reason being, even if we restart the Pi we get the same IP address and be able to call the same. You can accomplish this in IP address reservation section in your routers configuration page.
So now as the Pi is connected to local network, we are ready to do some real stuff
Installing Mosquitto
Mosquitto is free and very popular MQTT broker. You can install it using apt-get commands.
so first open up a putty session from your windows desktop computer to your pi on the local network
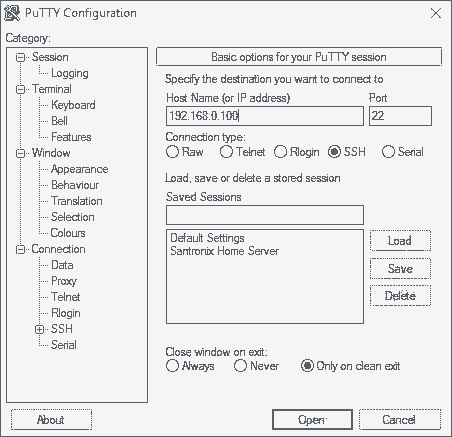
In your case, please use the correct IP address of your Pi, the port is always 22 (SFTP). If your Pi’s Ip address is correct it will ask you to enter the username and password to connect. The default username is pi and the password is the one which you have used when you installed Raspbian. (If you haven’t changed the password for your pi then it would default be raspberry)
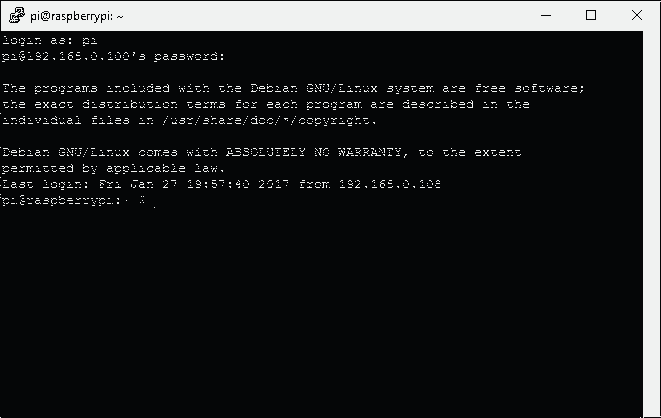
If you are successfully logged in then it will display a command prompt like cursor to type the next commands.
Unfortunately, the Raspberry Pi normal “apt-get” archives do not contain the latest version of the Mosquitto software. If you don’t install the latest version of the broker, you will get odd errors (because of version compatibility errors) and it will not work. So, the first thing is to open a terminal window (or log in using ssh) to your Raspberry Pi and do the following:
sudo wget http://repo.mosquitto.org/debian/mosquitto-repo.gpg.key
sudo apt–key add mosquitto–repo.gpg.key cd /etc/apt/sources.list.d/
sudo wget http://repo.mosquitto.org/debian/mosquitto-wheezy.list
Please enter one command at a time. Now its time to install Mosquitto.
There are 3 entities that we need to install
- mosquitto – the MQTT broker (or in other words, a server)
- mosquitto-clients – command line clients, very useful in debugging
- python-mosquitto – the Python language bindings
The client is required if you need to test the Mosquitto broker and the python bindings are required in order to enable mosquitto configuration in python scripts.
Type the following command to install them all
sudo apt–get install mosquitto mosquitto–clients python–mosquitto
As soon as the Mosquitto broker is installed it starts automatically. If you need to stop it you can use this command
sudo /etc/init.d/mosquitto stop
To enable and start mosquitto service again, type and enter
sudo /etc/init.d/mosquitto start
Now you need to enable mosquitto broker running in background. This is very important step as if you don’t do this, your broker will not be initiated.
sudo mosquitto -d
Now your mqtt broker is up and running
Test your MQTT Server
Testing your MQTT server is easy! If you had installed mosquitto client, this step would not be a problem for you
First open 2 new Putty sessions on your windows PC. Let’s call them Putty1 and Putty2 respectively. We will create and subscribe to a specific topic on Putty1 and we will subscribe and publish the message on Putty2. This should let us see this message on Putty1.
To create and subscribe the topic on Putty1 type and enter the following command
mosquitto_sub -t santronix_mqtt/topic
In this case santronix_mqtt/topic is the topic we have created but in your case you can use any. The same topic will be used to publish the message to broker.
If everything goes fine then there wouldn’t be any error message. Now go to Putty2 and try publishing the message to the same topic
mosquitto_pub -t santronix_mqtt/topic -m “Hello World!”
What it does is, it publishes the message “Hello World!” to topic santronix_mqtt/topic on our Pi’s broker. As soon as you type and press enter, you would see the same message appearing in Putty1.
As you know that, we have to start the MQTT broker in background manually, we can automatically do it once your pi is booted up by creating a launcher script and putting it in crontab.
First type the following command to create a launcher script
sudo nano launcher.sh
This will create a launcher.sh file and open it in nano editor. Now enter the following command in the empty launcher.sh file and press Ctrl+X and when asked to save the file type Y and press enter.
sudo mosquitto -d
Note that this is the same command that we used to manually start the broker in the background.
Now convert this script to an executable.
sudo chmod 755 launcher.sh
Now create a crontab and execute it
sudo crontab -e
Chose Option 2 to open the new crontab file in nano editor and enter the following lines at the end of the file.
@reboot sh /home/pi/launcher.sh
Now press Ctrl+X and when asked to save the file press Y and enter. This will save the crontab and immediately start the new crontab service.
Now even if you restart your Pi, you will see that your MQTT broker starts in background as soon as it boots up!
Hope this will be helpful guys! Enjoy!
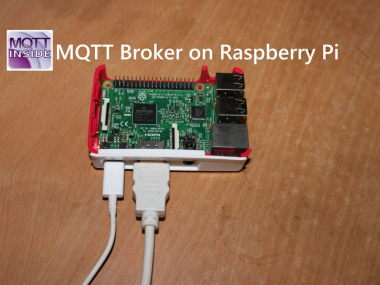
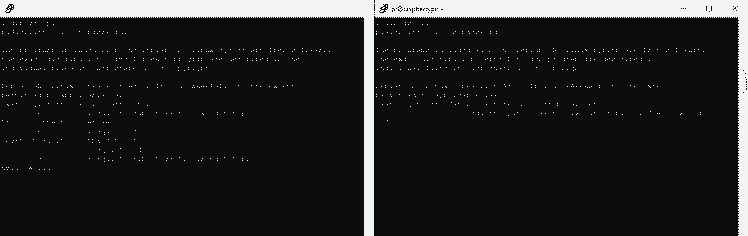
And finally, this is how our RPI3 mqtt server looks like!

-Santosh Ambekar
IT and IoT Expert

Author: santronix
Credits
Related products


Leave your feedback...